Tutorial Tuesday | Using Digital Cut Files

BlogHeader_0517_CutFiles

I love cut files.  I yearn to make lots of beautiful hybrid pages with little shapes and words cut out of colored paper and delicately adhered to my layouts, or tucked safely away in transparent pockets.  But, reality has a bad way of crashing down on me.  I don’t own a digital cutter.  And I lack the patience to hand cut more than one anything.  But I still love cut files, and I frequently used them as elements or stamps in my all-digital layouts.  I also use them to customize background papers for my all-digital layouts, and simple technique I’ll share with you today….no scissors required.

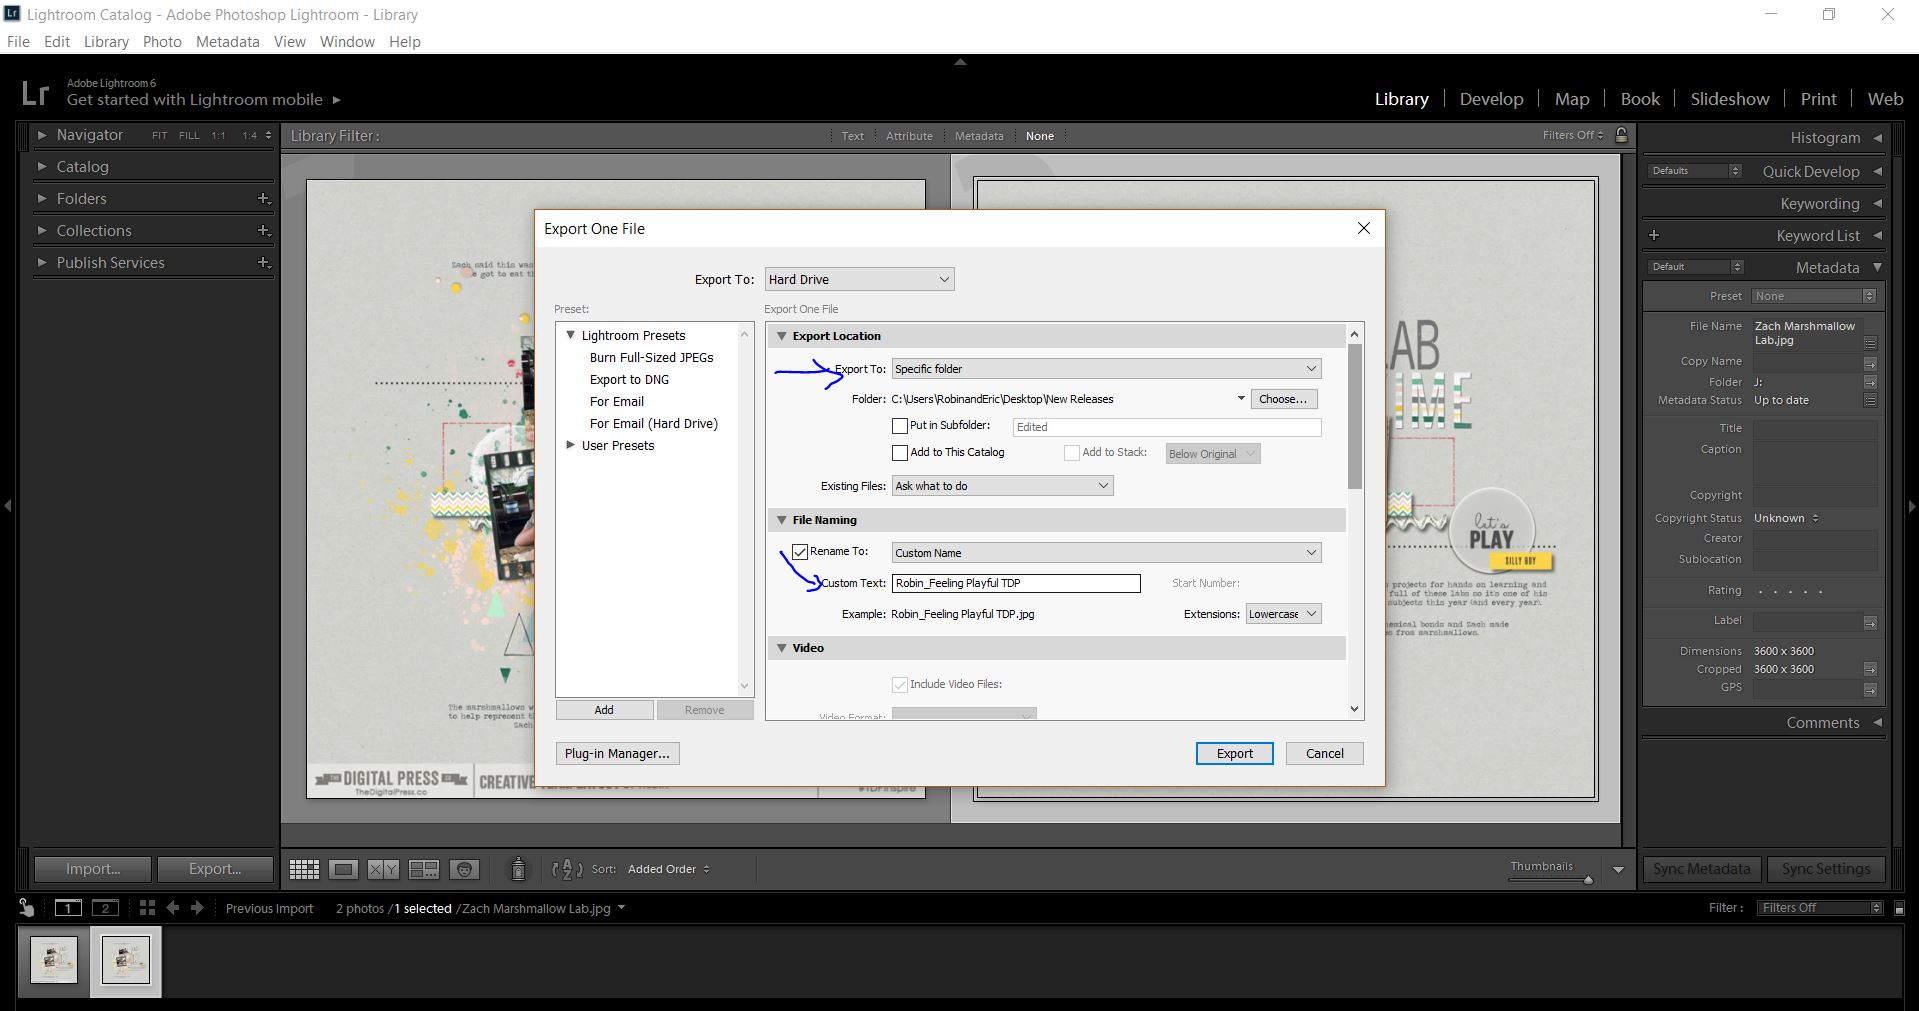
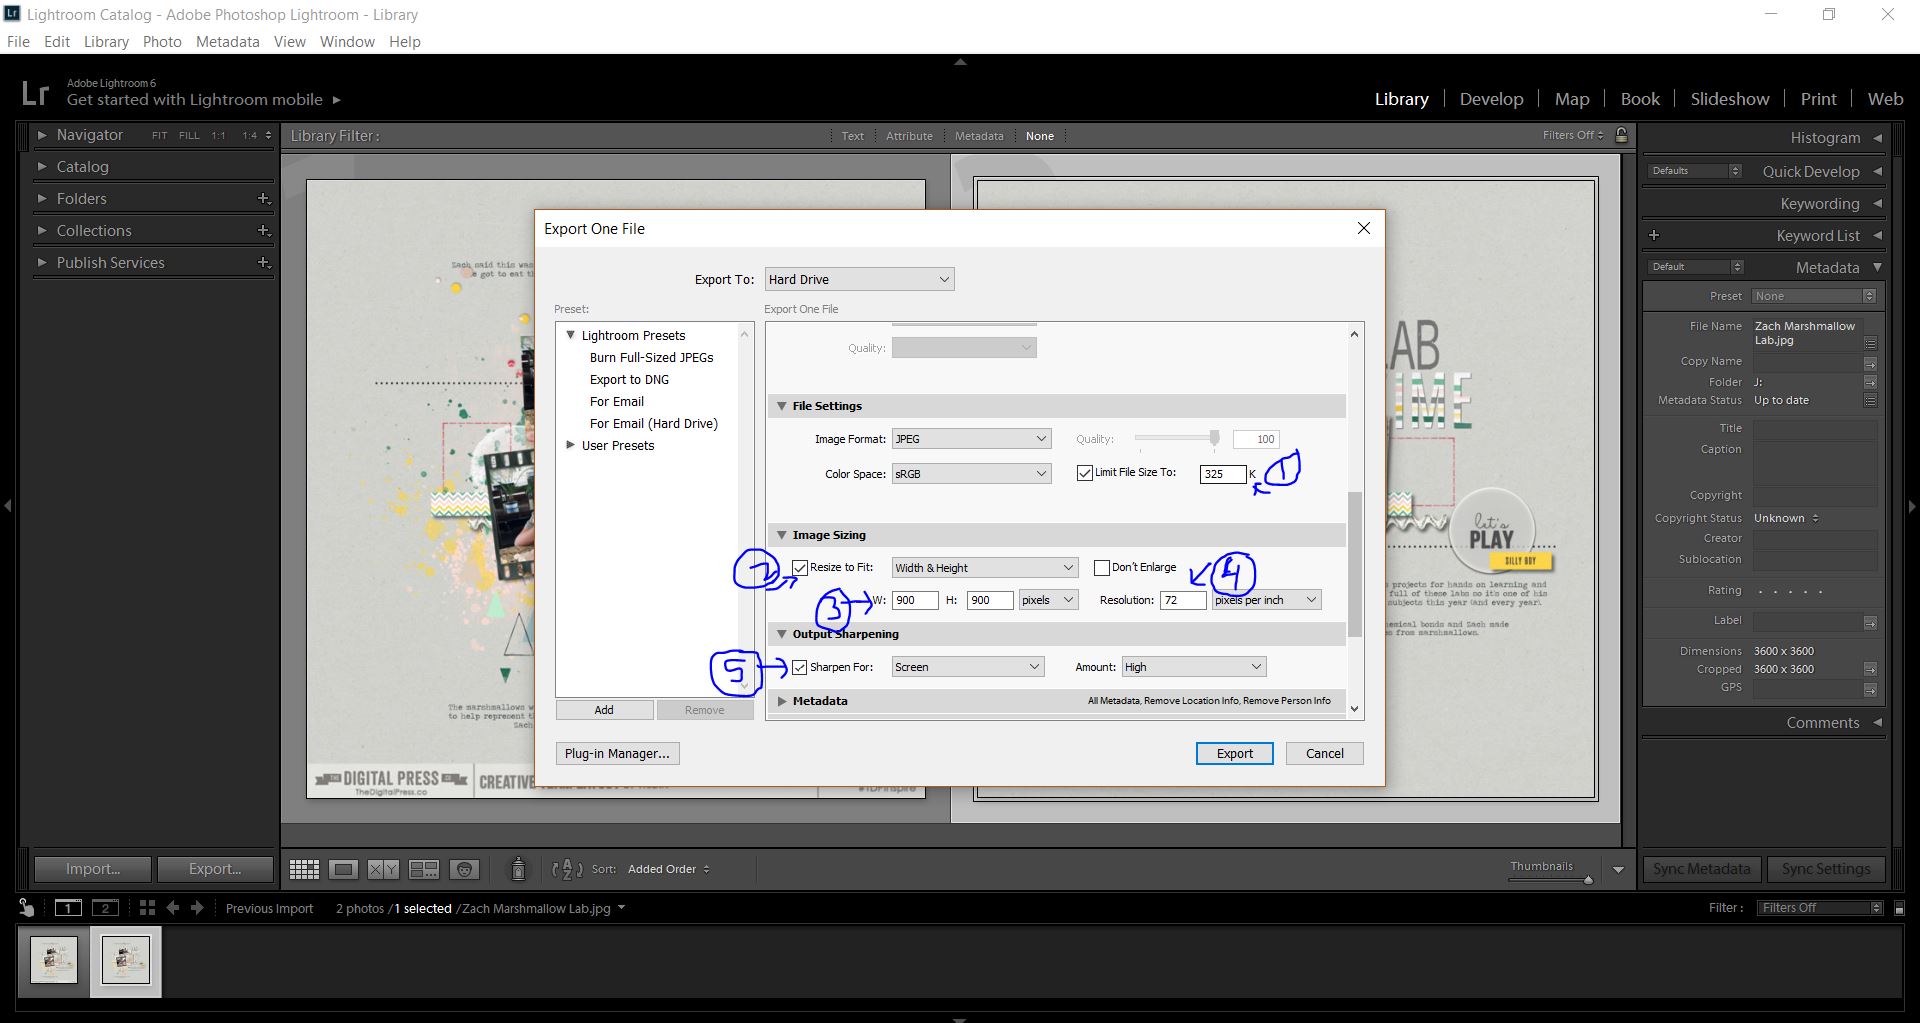
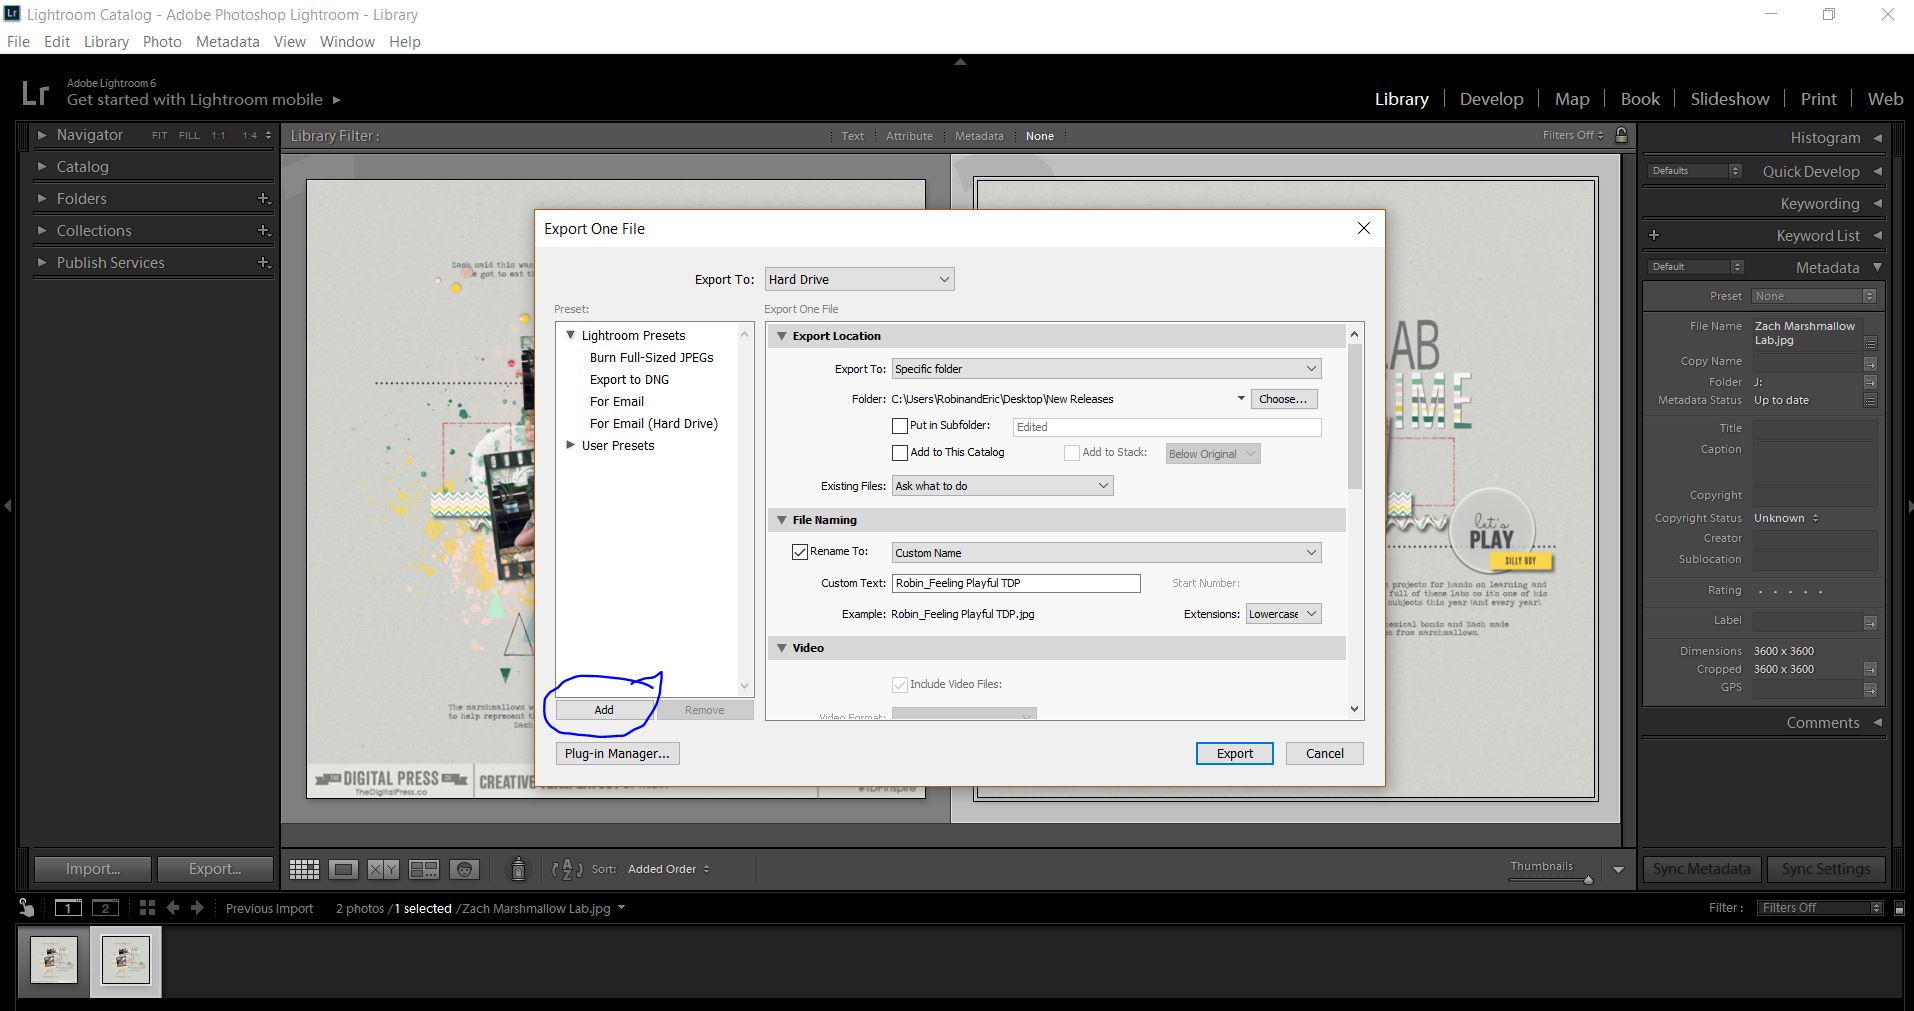
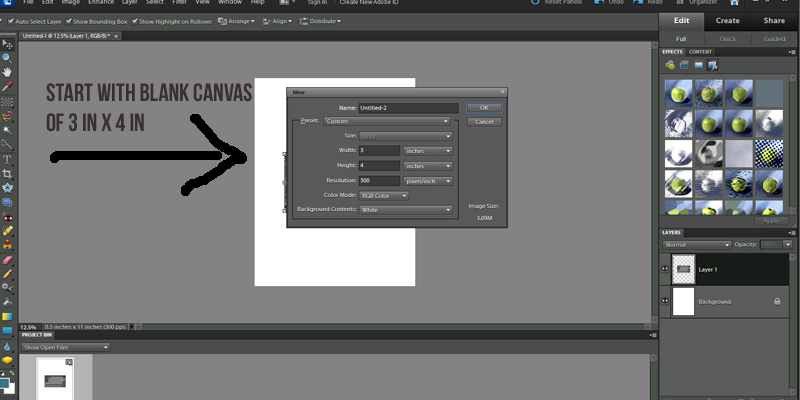
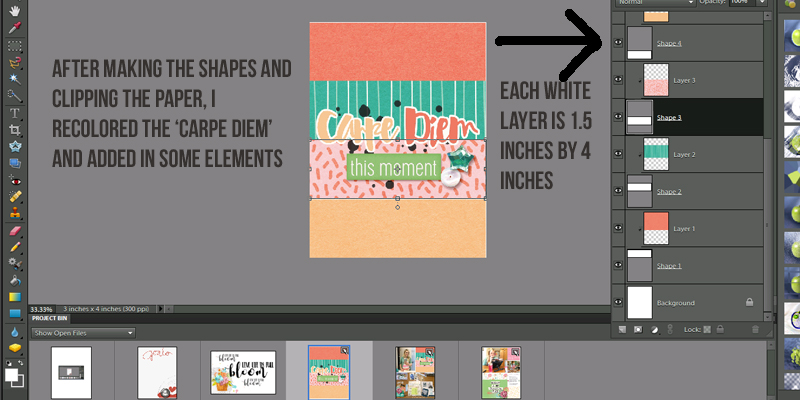
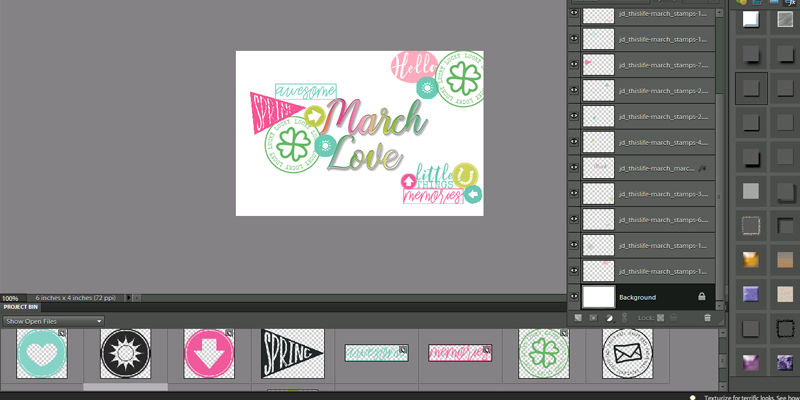
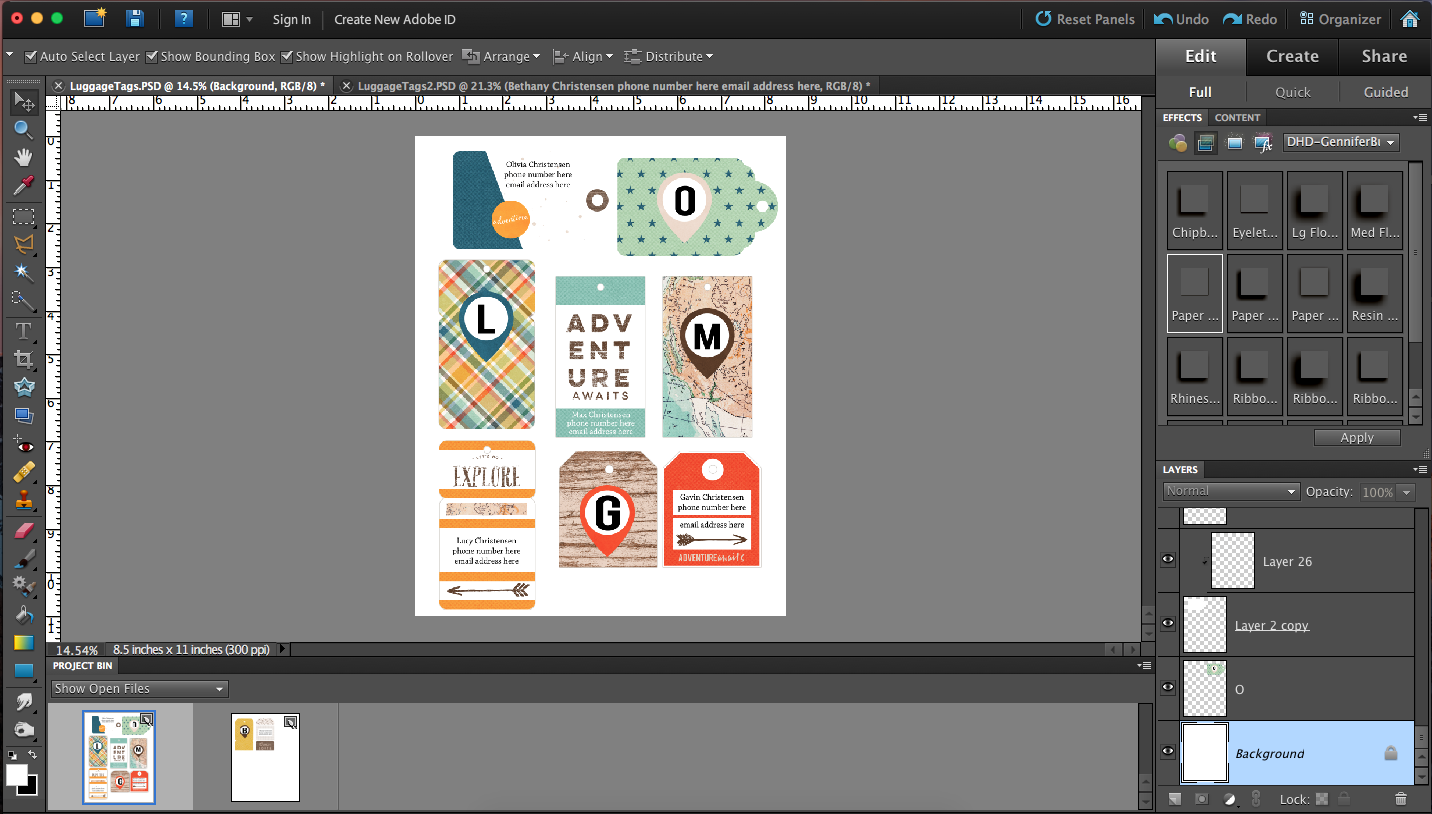
Cut files aren’t just for hybrid scrappers!  They can totally be used in an all-digital layout too.  The technique for using cut files to make a custom paper or background is fairly easy.  Open a new layout, and drag in a lightly textured solid background paper.  Select and open all the cut files you want to add.  I use the .pngs, and drag them to roughly where I think they should be when I first pull them into Photoshop.  The most time-consuming part of this process is moving around the cut files to fill the space.  Since I like a full, but not cluttered look, I overlap some, and duplicate others, being sure to keep some space between the duplicates so the paper doesn’t feel repetitive .  Sometimes I change the color of an element to give it better flow in in the background, or to make it coordinate with the rest of the cut files I’m using if I’ve got cut files from different sets.  To do that, I use the color picker to select the exact color I want, then create a new fill layer using the steps shown in the next image.

tdp_0517_tut1

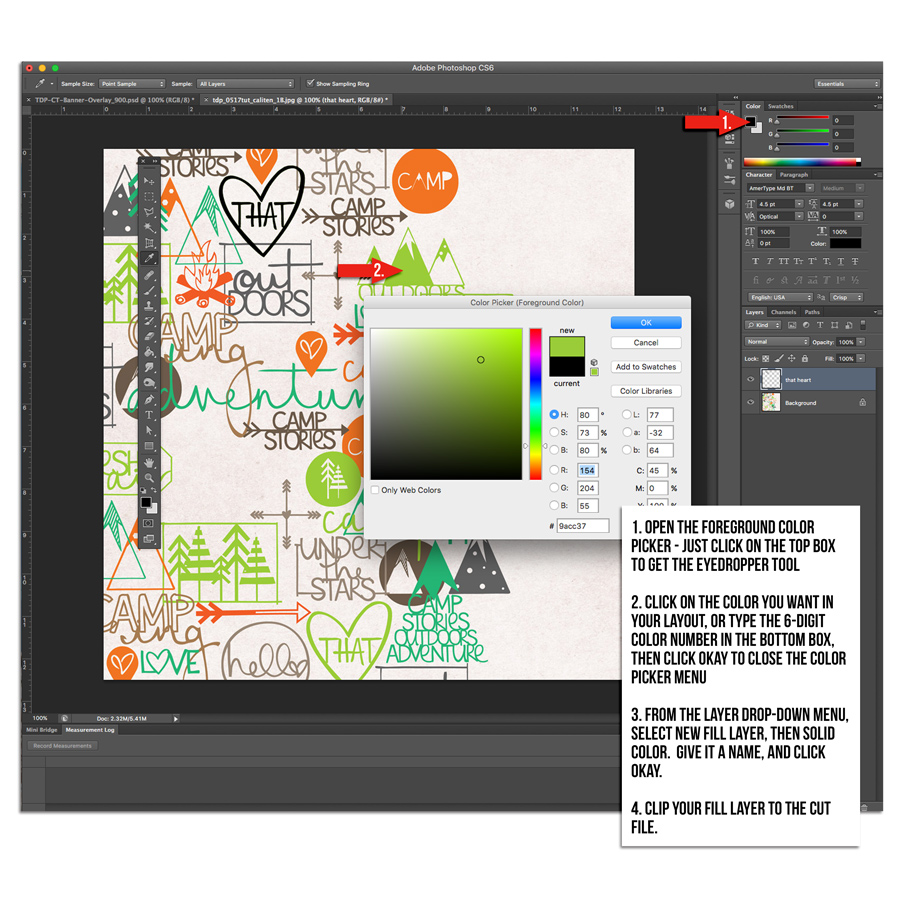
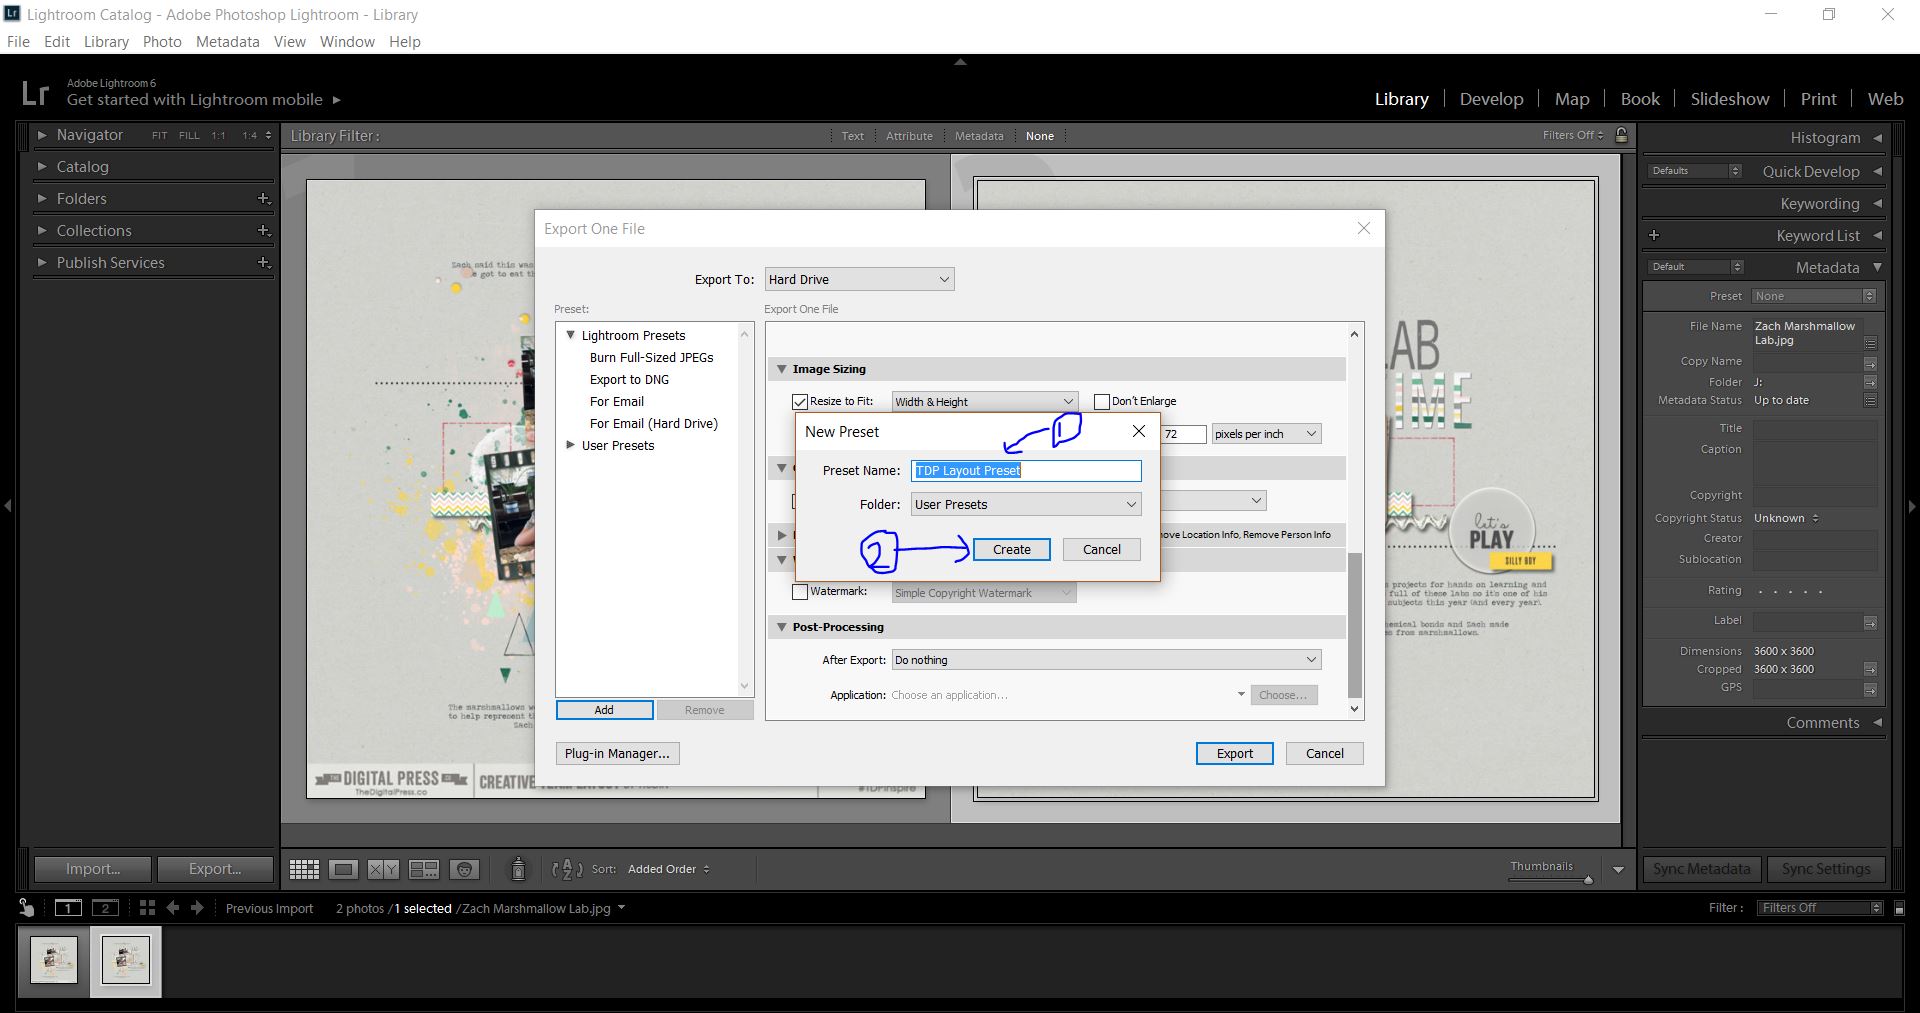
You could also use the paint bucket tool to change the color of the cut file, but you still have to follow steps 1 and 2 above to get the desired color in your bucket.  Once I have the cut files colored and arranged the way I want, I merge them into a single layer, then apply a distressing mask to give the paper a stamped look.  That’s it.  Easy custom background paper using cut files.

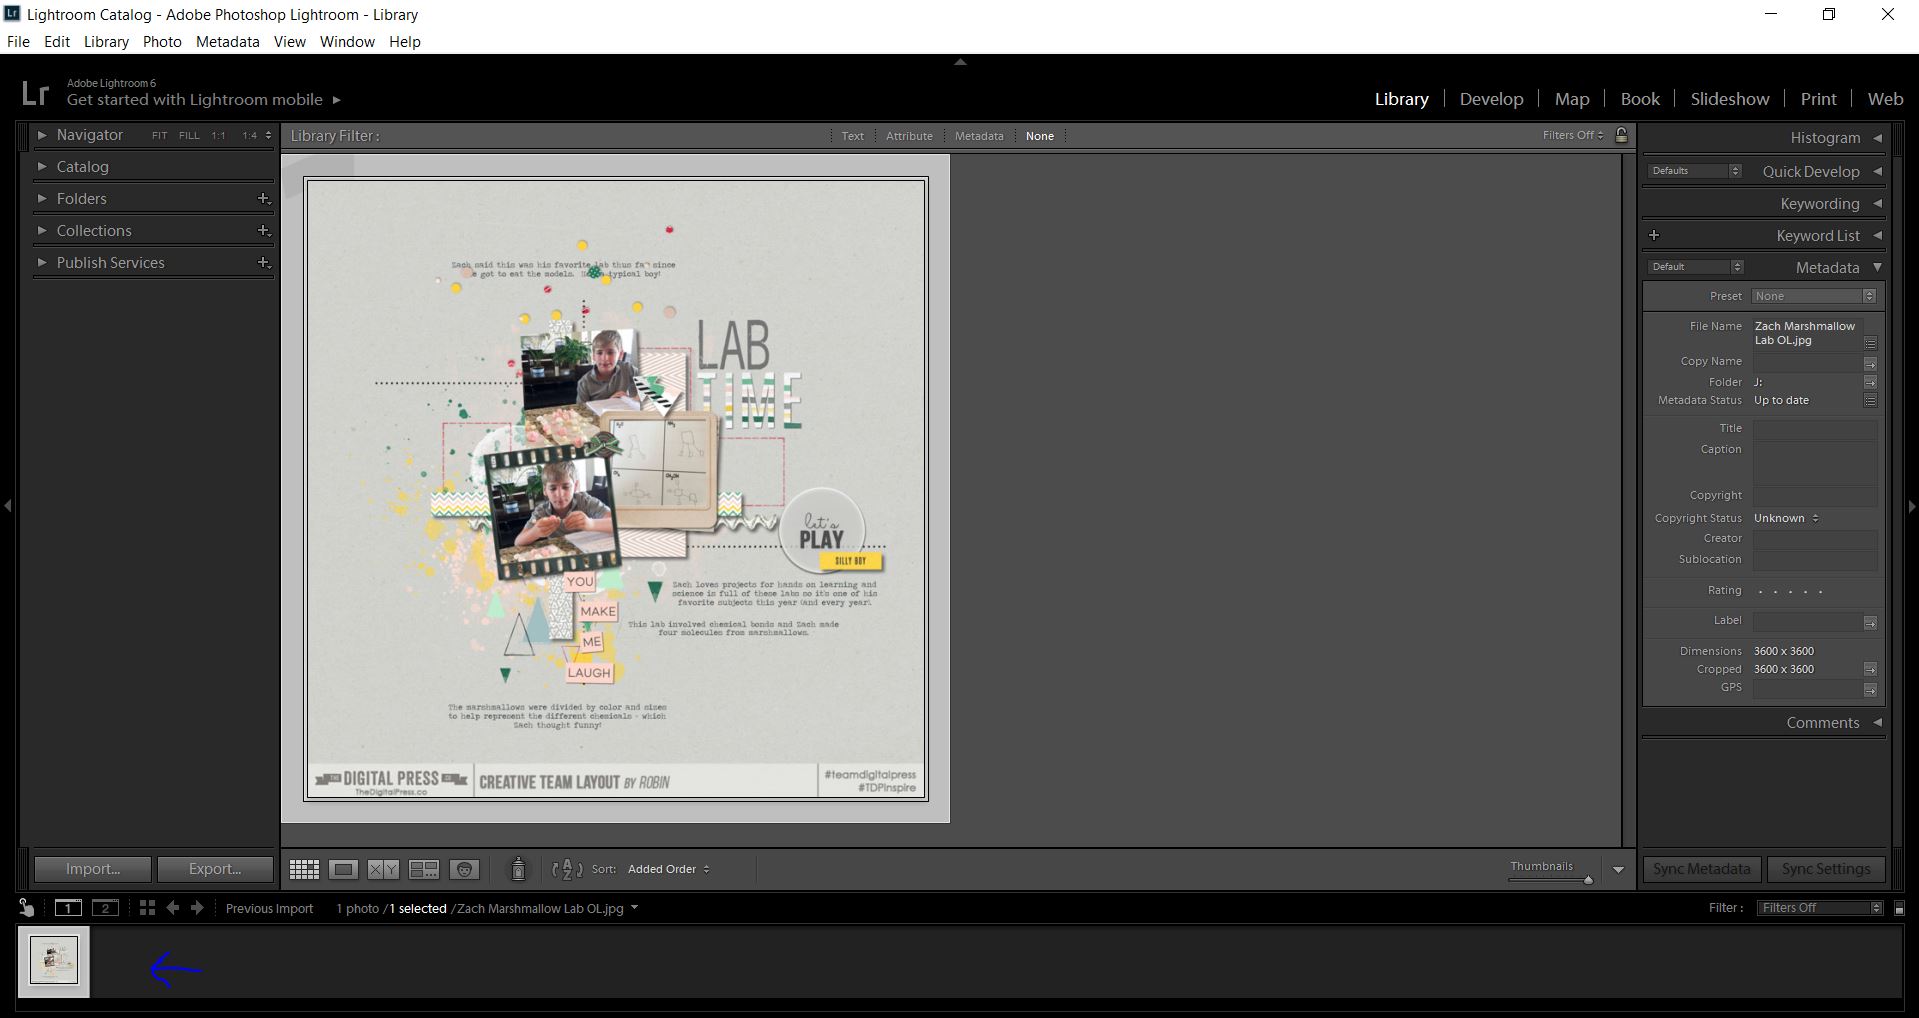
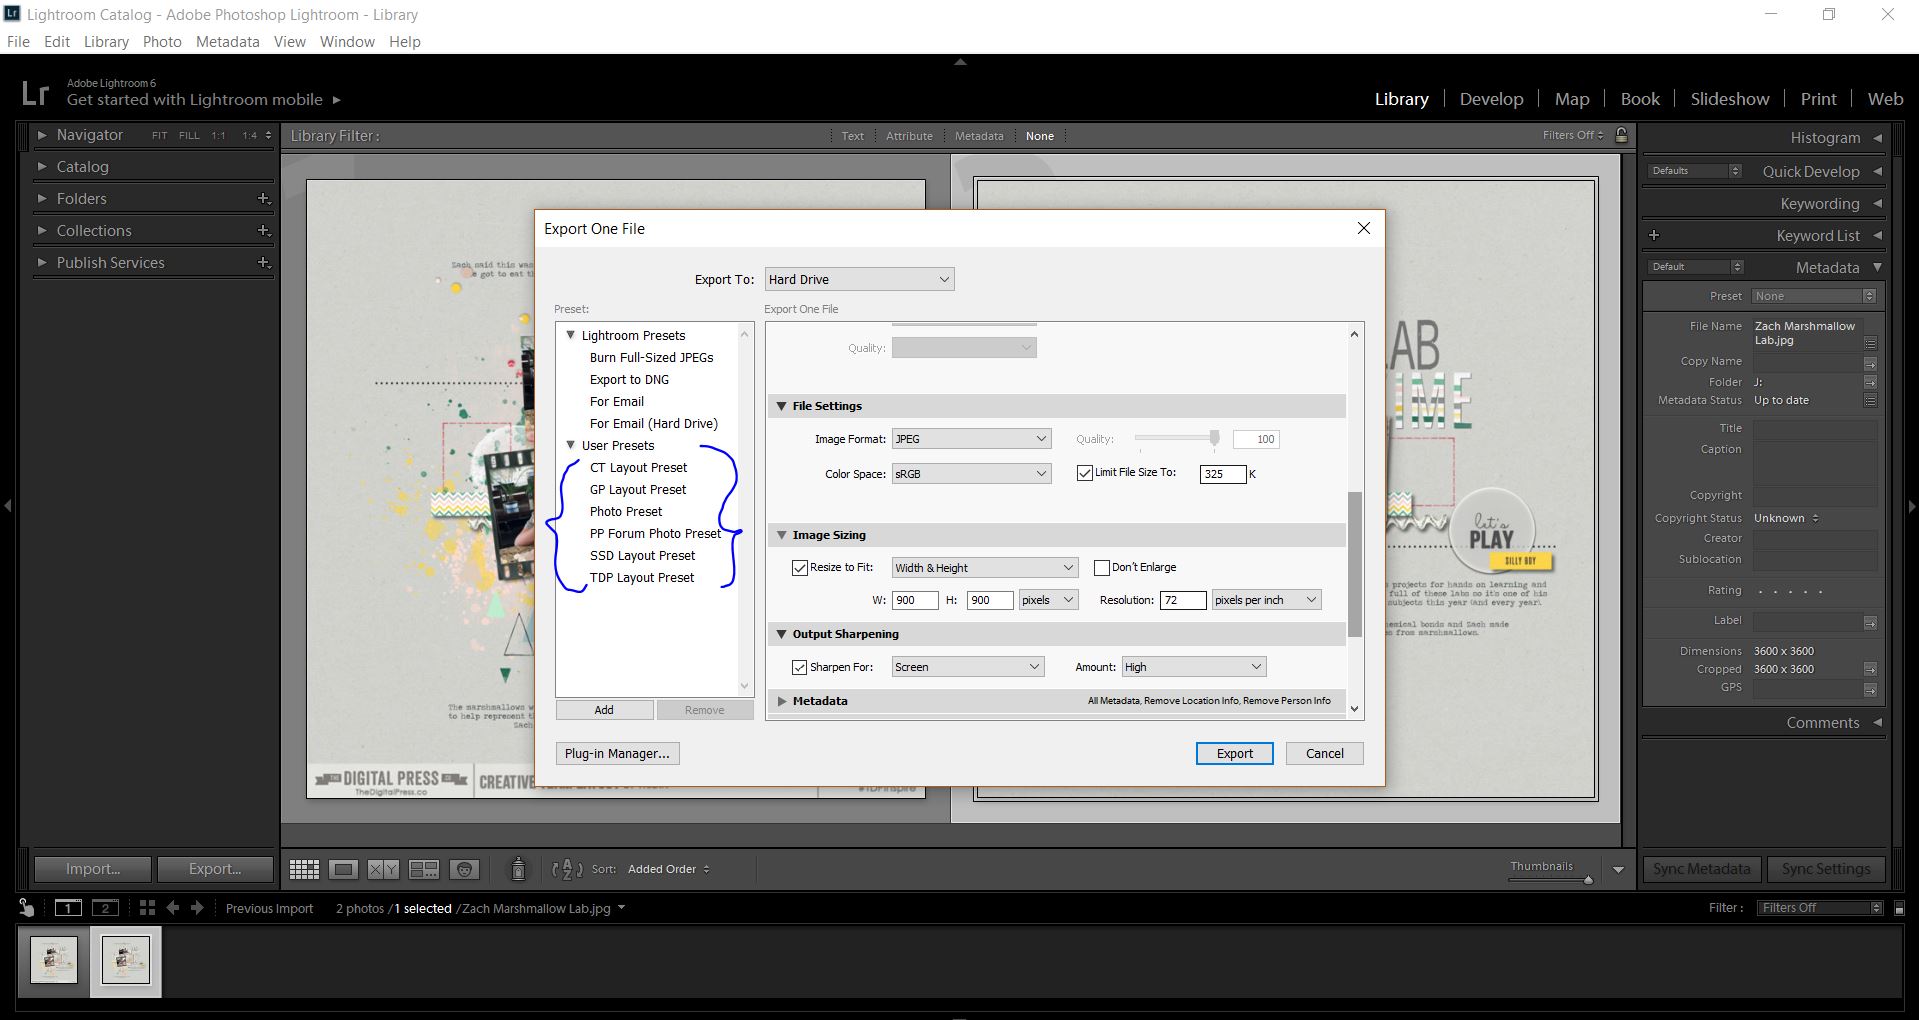
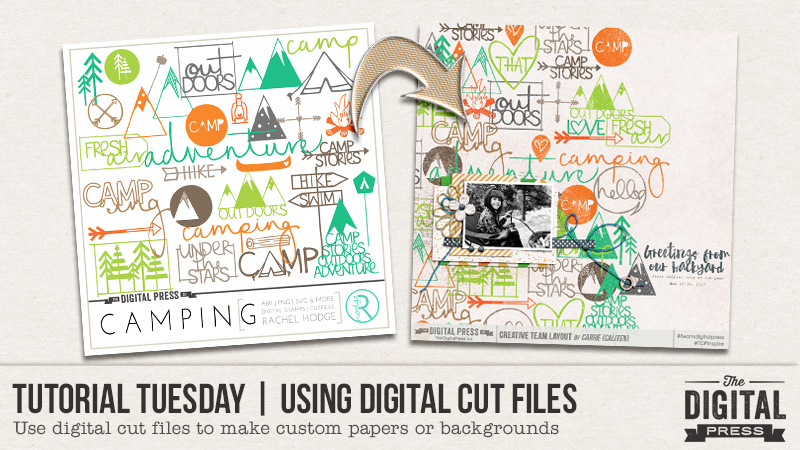
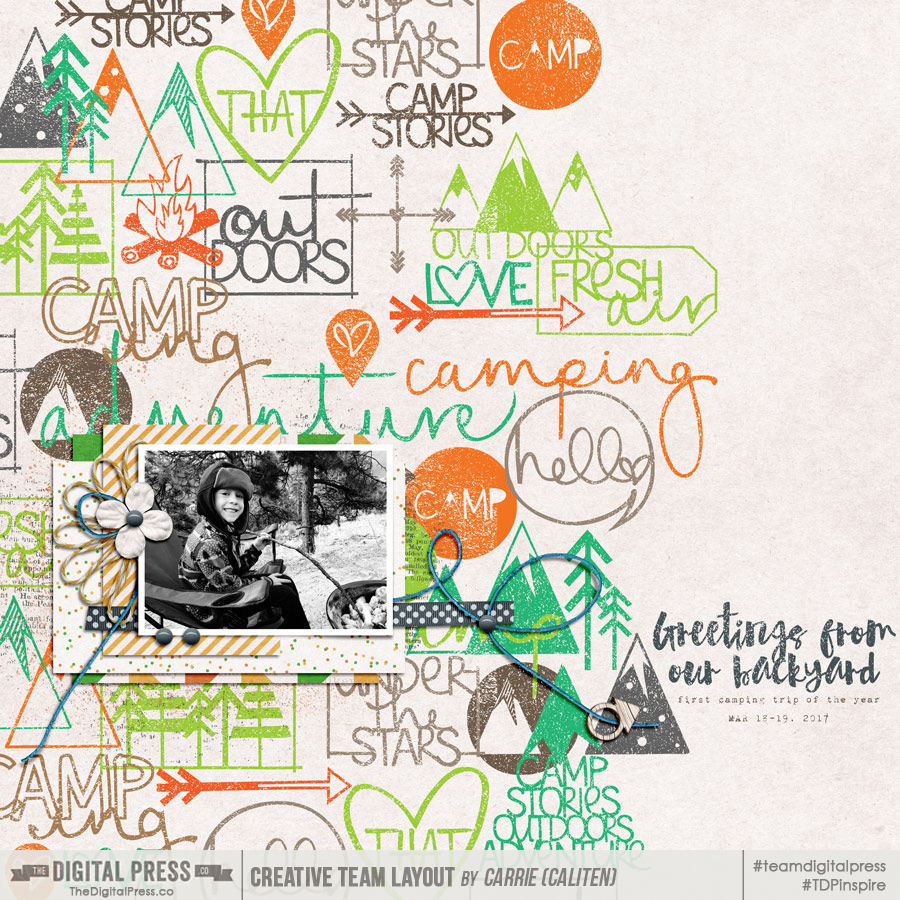
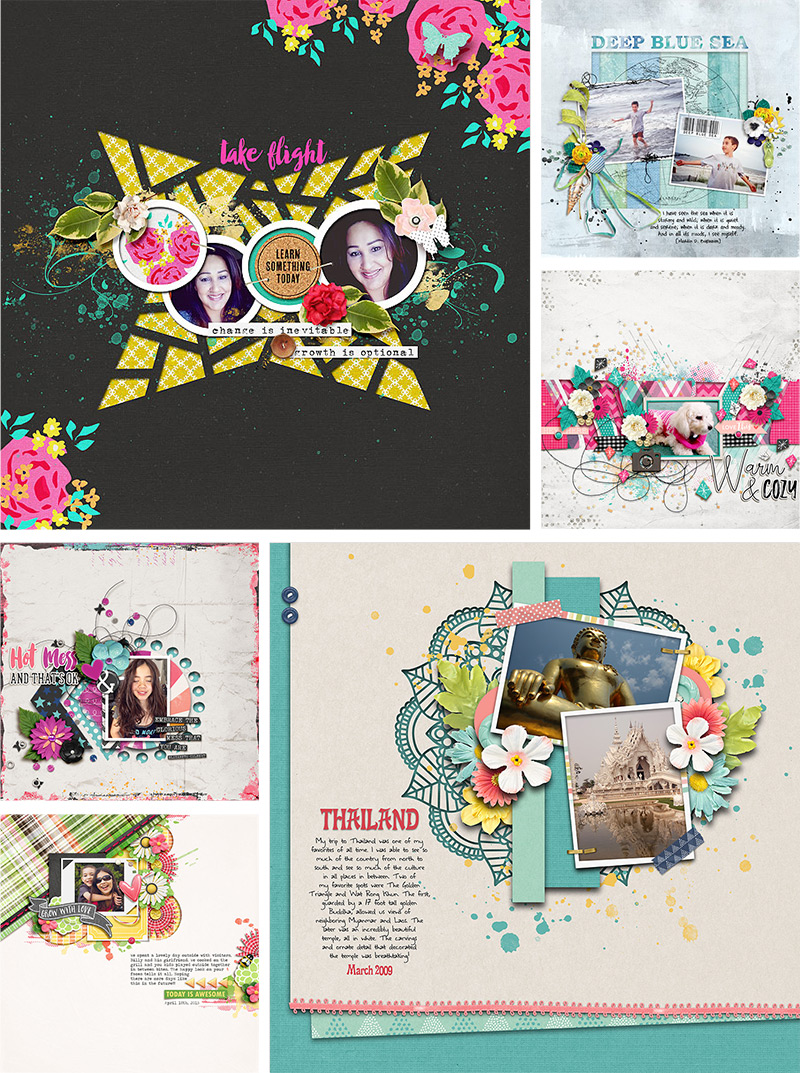
Here’s my finished layout.  I used cut files from the Camping Set and a freebie that coordinates with the Love This Set by Rachel Hodge.  The papers and elements are from Homecation by May guest designer ninigoesdigi.

tdp_0517tut_caliten_camping

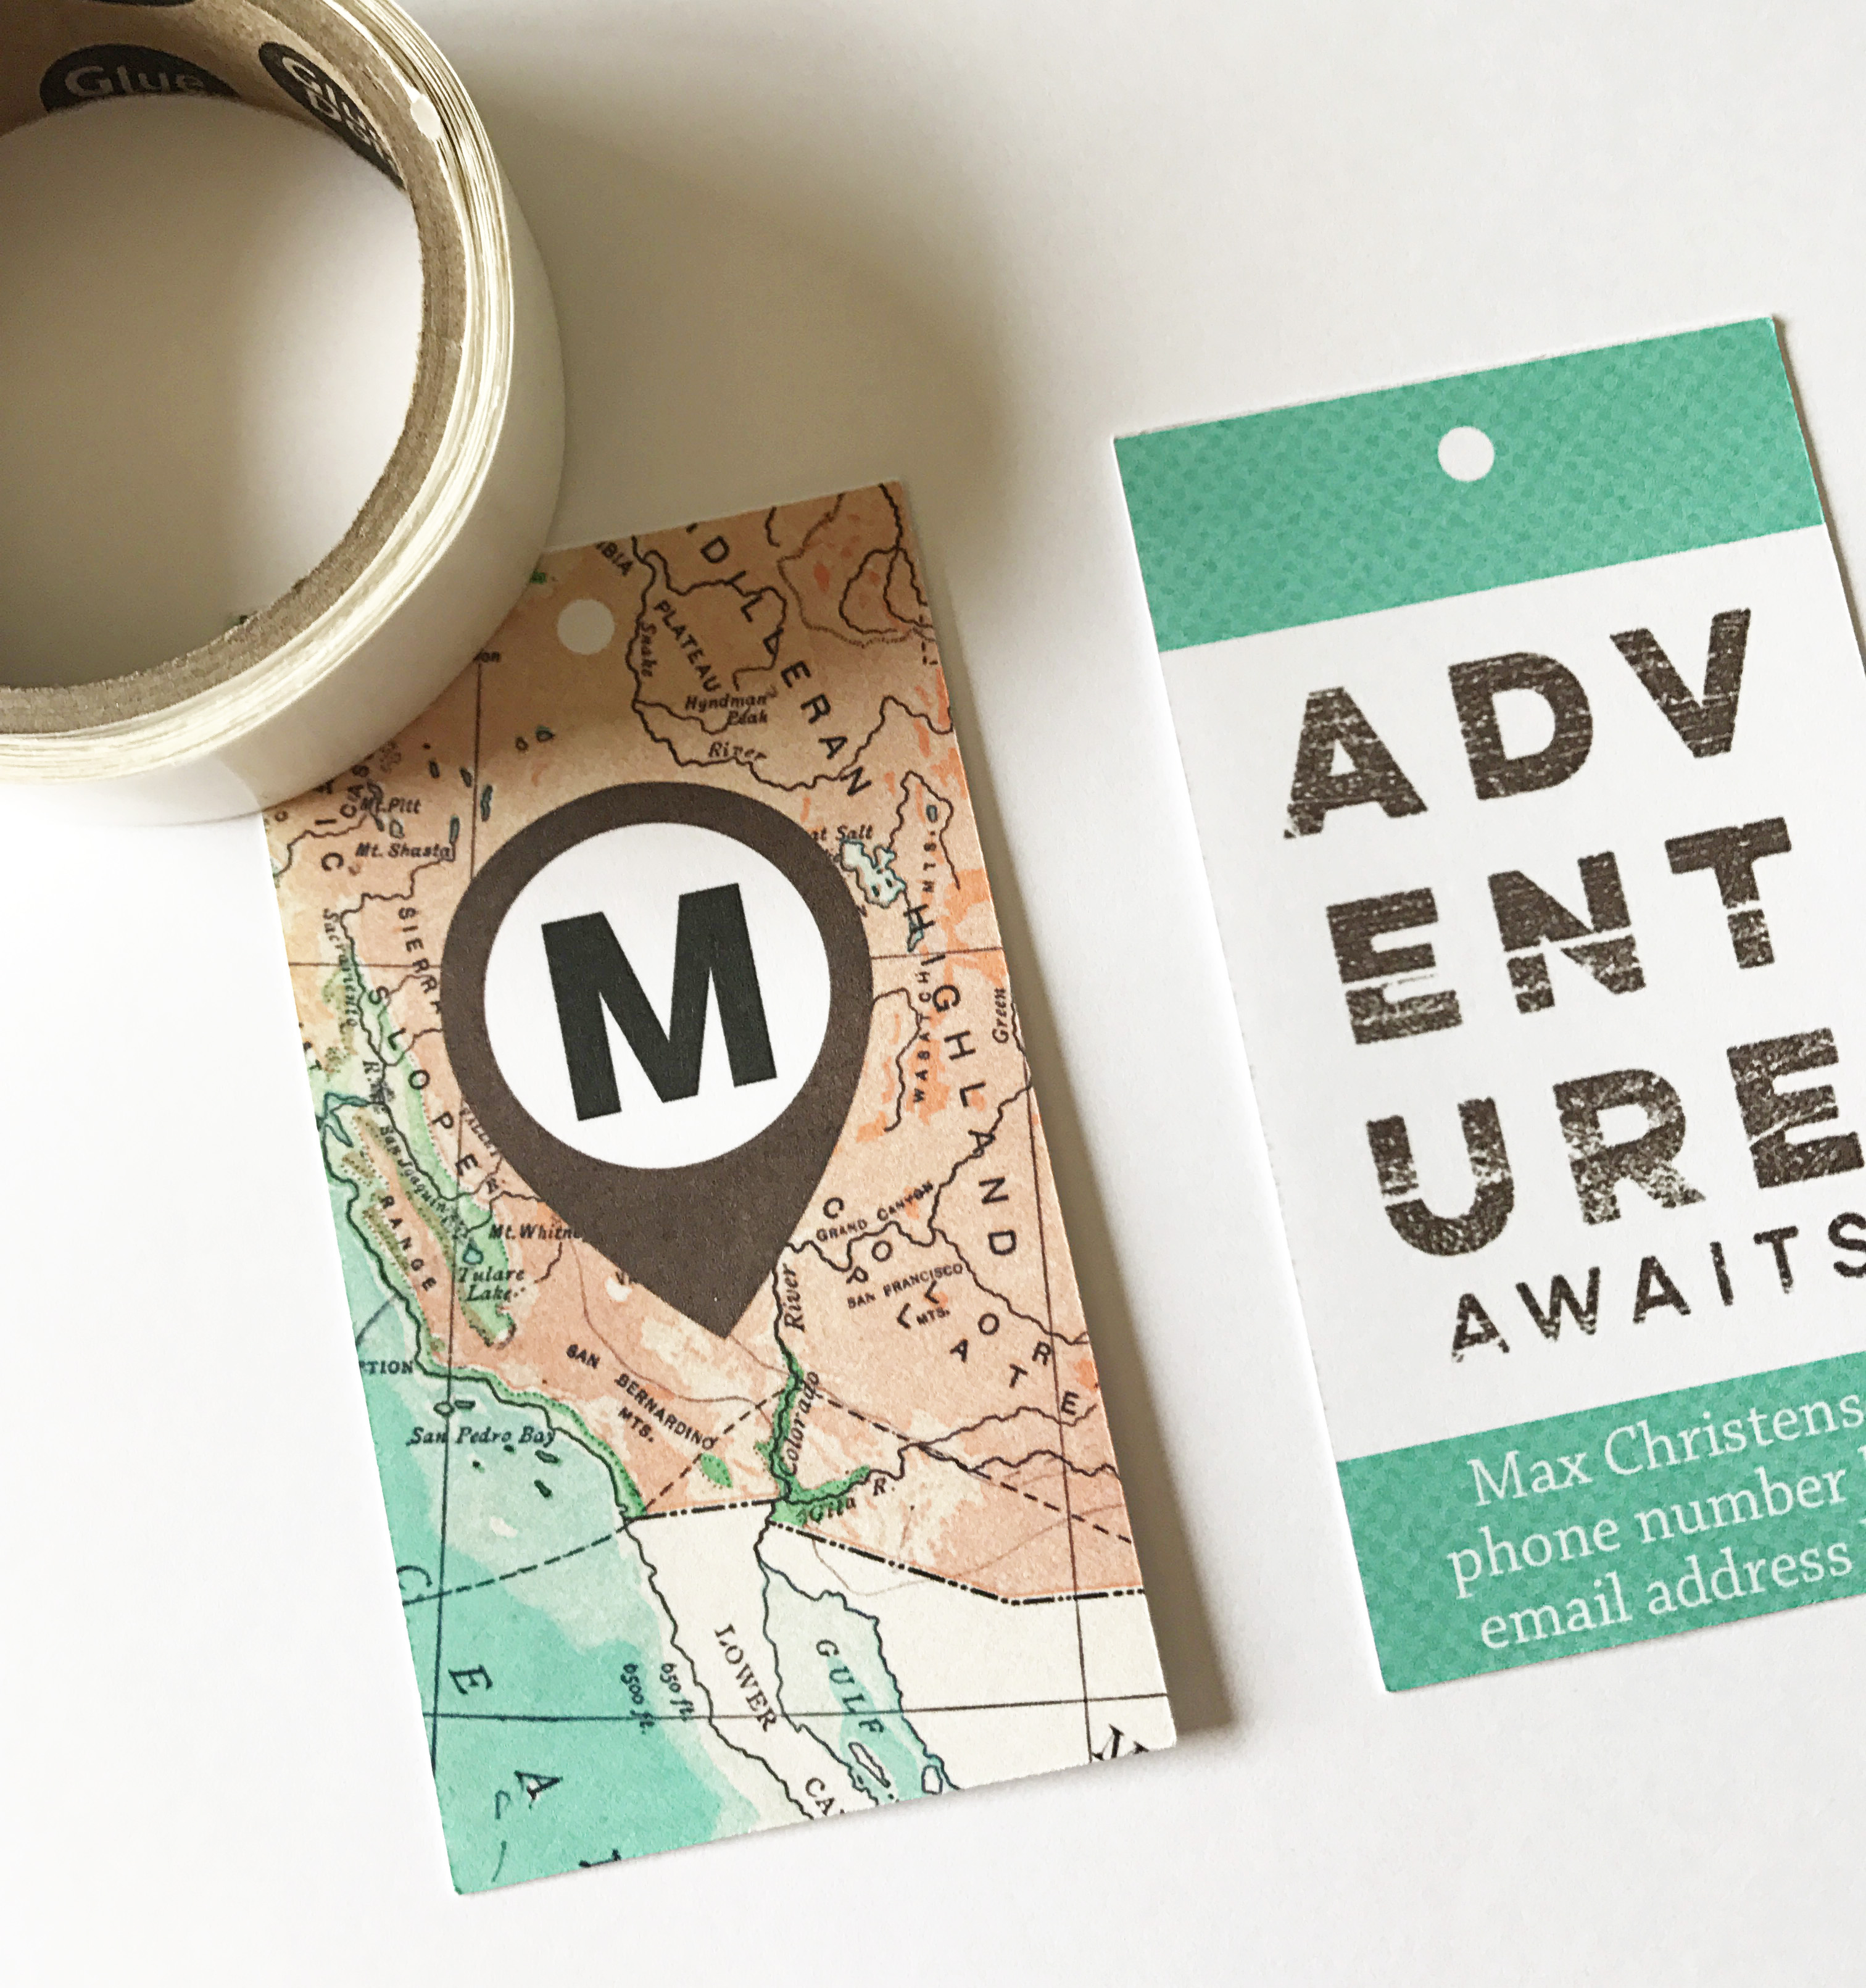
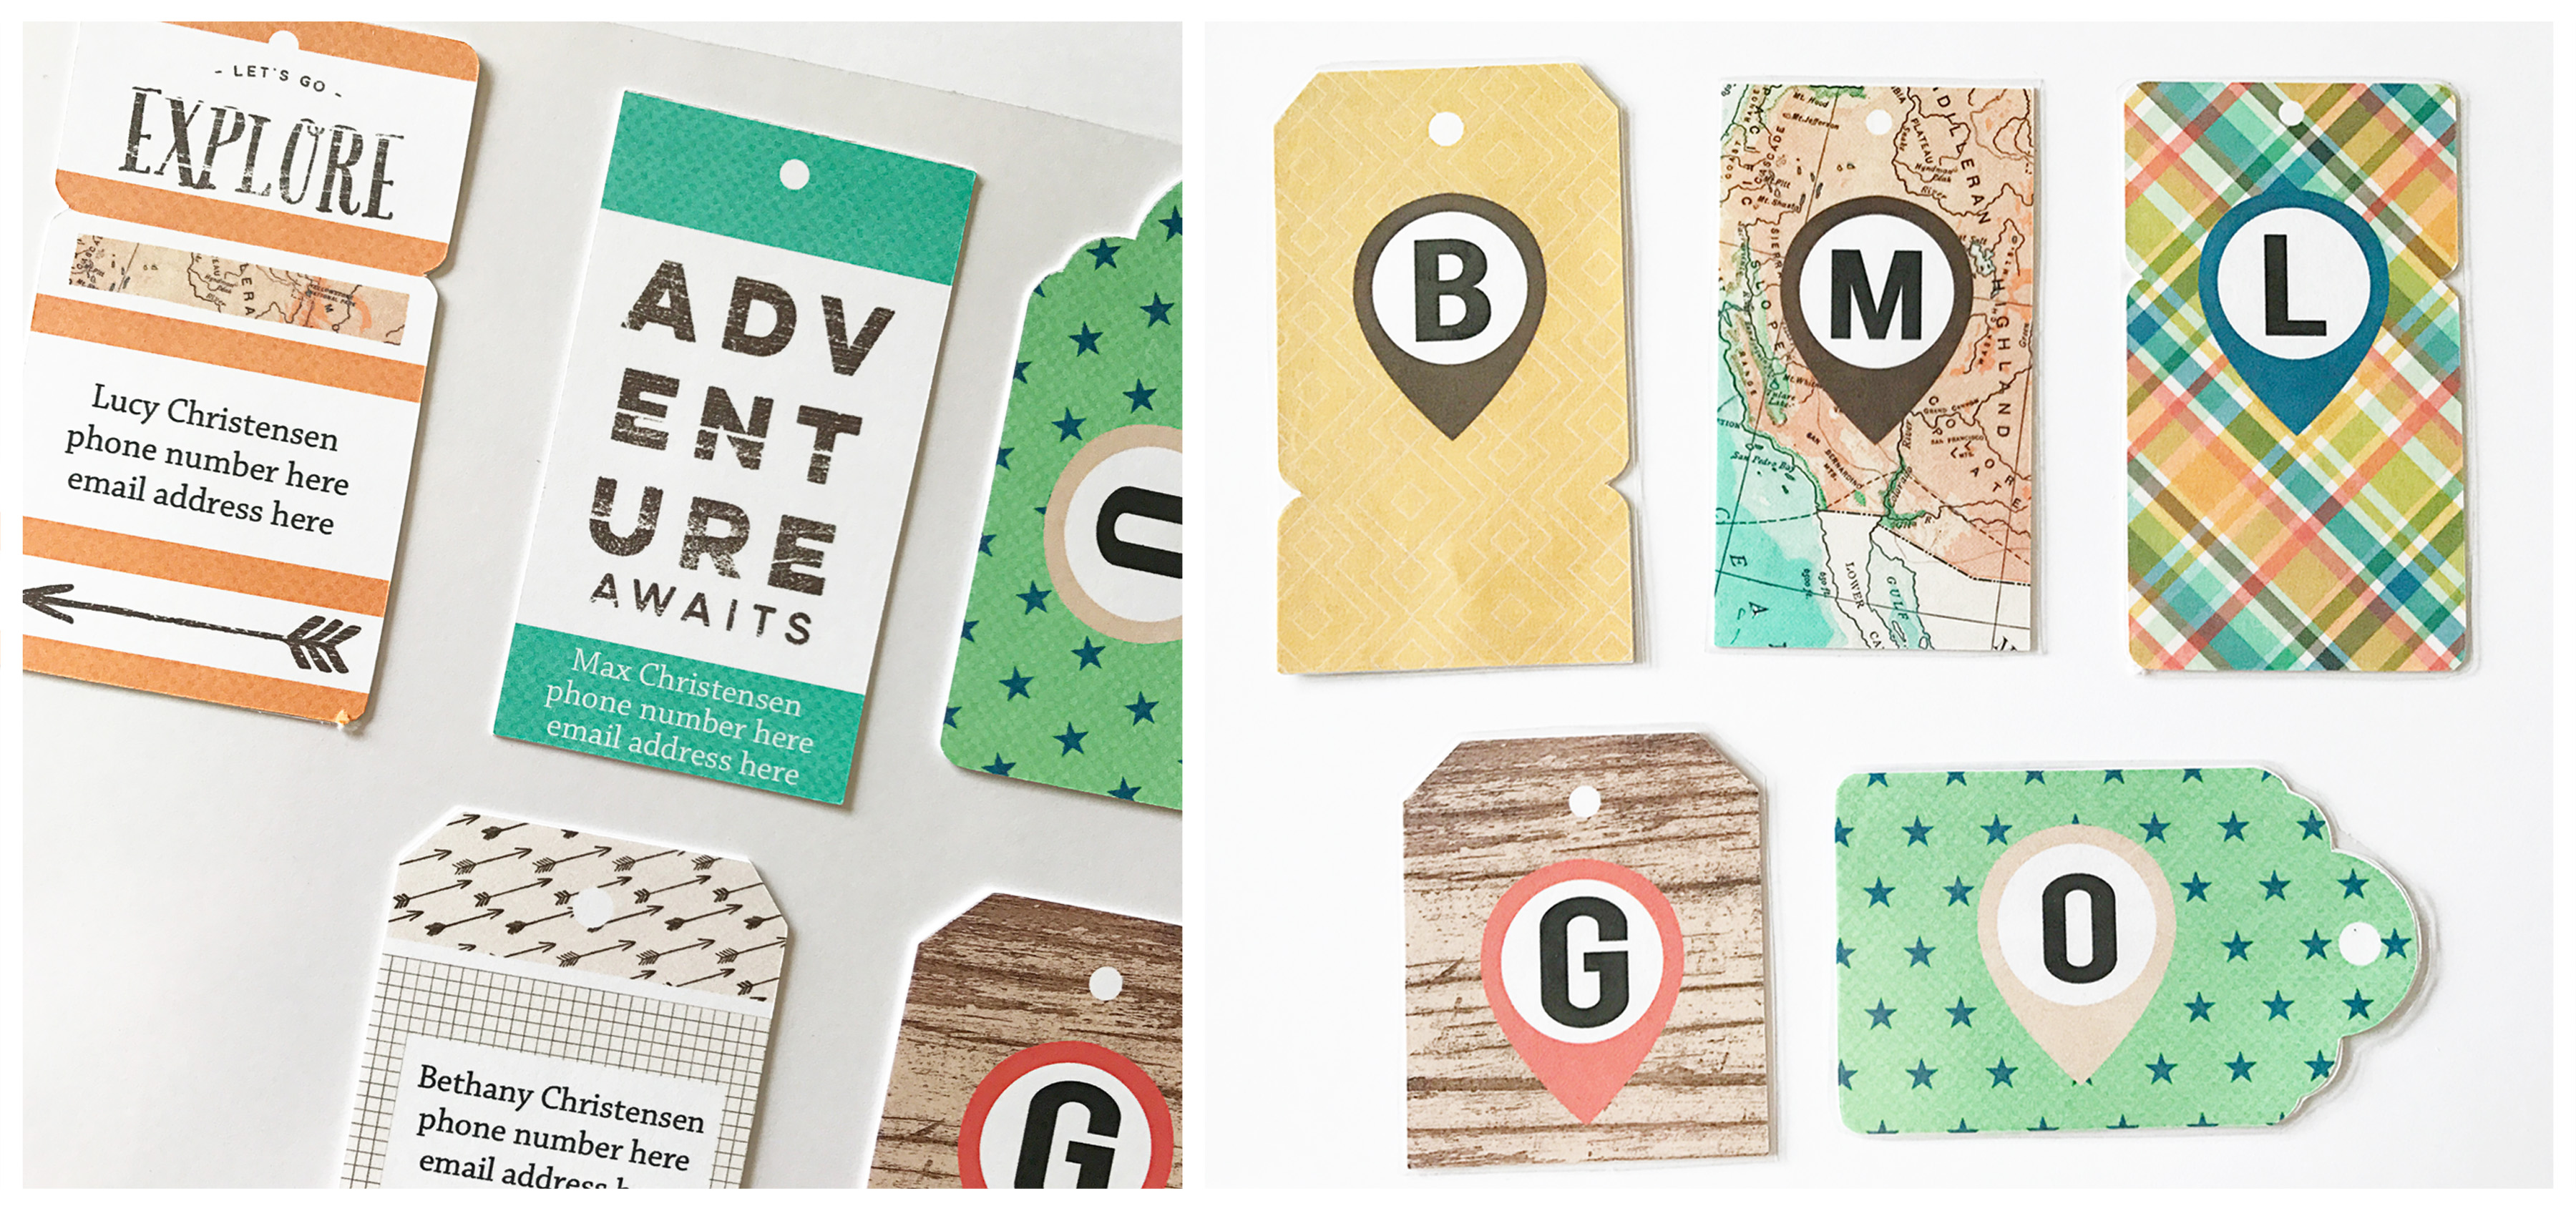
This technique is great for more than just background papers too.  It works well on a smaller scale too – say for a 3×4″ or 4×6″ pocket or filler card.  Cutting files are available in themed sets in the TDP store.  There are also usually a handful in the monthly TDP store collab kits, and the Monthly Chronicle collections, as well as the quarterly Digiscrap Parade.  This technique could also work well with the digital stamps that are included in many of the digital kits in the TDP store.  The opportunities abound, and I encourage you to try using digital cut files on your next all-digital layout!


About the Author  Carrie is a creative team member here at The Digital Press. She and her family enjoy spending time outdoors, year-round, near their home in Colorado. In addition to scrapbooking and the occasional hybrid home decor project, Carrie also reads voraciously, accumulates fabric, makes soap, brews beer, grows hops, and tries to keep indoor plants alive.caliten

Feature Friday | Jimbo Jambo Designs

It’s Friday, and time for another edition of our Feature Friday series here on The Digital Press blog! This week, I am excited to feature Aga of Jimbo Jambo Designs. This is Aga’s second feature here on the blog (you can find her first feature from October 2016 HERE)… and whereas last year we used our feature series to help you get to know some fun trivia about your favorite designers, this year we’re going to use our designer feature series to give you a little peek into our designers’ creative spaces, and more insight into their creative processes.

When I talked with Aga, I found out that she is a woman after my own heart — and does not have a regular workspace right now because she’s traveling the world! In November of 2016, she sold what she could of her worldly possessions and left her apartment in Spain to go travel throughout Africa and Asia. Her journey has already taken her through South Africa, Thailand, Myanmar, and Cambodia… and last I heard, she was leading to Laos next.

Her “normal” workspace, in her words, is “a bed, my laptop, nice music, and me.” How simple and wonderful! And luckily, that’s a workspace that she has been fortunate to to take with her on her amazing adventure… though, instead of a bed, she seems to have found some cozy little coffee shops and patios to work from, as shown here…

Then we asked her to share a Top 5 list with us that is representative of her at this point in her life… and she definitely had one ready, based on her travels! She shared with me her Top 5 Travel Tips

  1. Don’t be afraid to change your life! Just do what you want to do without fear, even if the rest of the people think you are crazy! The fear is your worst enemy!
  2. Everything can be solved. There is no situation that can not be solved if you think reasonably and stay calm.
  3. Try to look for not touristic places in touristic places. Look for locals or hostels managed by the orphan children. The great thing about them is that they are always more friendly and you can learn so much about their culture from them… and you help them by staying there.
  4. Less is more. Do not take as many things as you can. Big mistake! Everywhere in the world you will be able to buy what you need.
  5. Don’t try to see everything. Take your time to relax and enjoy your travels. Running from one place to another may be good as you will have many photos, but you’re not going to enjoy it as much.

I find such inspiration in what she’s said, and I definitely hope that others do, too. There’s a lot of wisdom there!

Even though she’s been constantly moving around the world, however, Aga has still found time to design her amazing templates. She’s got such a unique style, and says that she finds inspiration in some of the places she’s been visiting. Her template designs are so great and I’ve seen some really wonderful layouts that have been created with them. The shapes, cutouts, and arrangements are truly unique to her — so make sure to check out her shop at TDP, if you haven’t already.  She’s got so many creative templates, it was hard to pick favorites… but here are a few that I love…

Here are just a few of the fantastic pages I was able to find that use templates by Jimbo Jambo Designs…

jimbo-jambo-designs-layouts

Aga is such a humble person and finds so much joy out of creating templates, but even more joy and inspiration when she sees us using them. As we finished talking, she expressed true gratitude to her fans and wanted to send out thanks to everyone who has purchased her products.

And as a side note, if we’ve got any JJD fans in Asia, Aga said that she would LOVE to meet you over coffee, or just to get together and chat. As I fellow traveler, I know that it’s awesome to get recommendations for sights to see, restaurants, etc. from the locals… so if we’ve got a crew in Asia who follows her designs, let’s help her out! She did tell me she’s up for some scrapping sessions with her fans. Kinda makes me want to scoot over to Laos!

This coming week as we celebrate her Feature Week, you will find her entire shop at The Digital Press on sale 30% OFF (sale will run through 11:59pm ET on Thursday 6/1).

Additionally, Jimbo Jambo Designs has a special Free-with-Purchase offer for everyone this week! Don’t miss out on this opportunity to stock up on your favorite products from Jimbo Jambo Designs while they’re on sale… and you can snag her “Even Steven” template set for FREE with any $10+ purchase in her shop — this week only!


Shannon
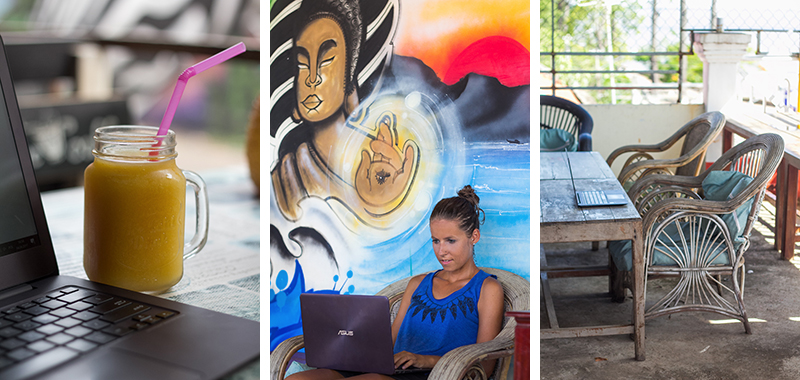
About the Author  Shannon has been completely addicted to digiscrapping since she began in early 2016 (though she’s been a scrapper since 2000). Her early morning ritual of a few quiet hours of scrapping while sipping a chai tea is her favorite part of each day. She is also the owner of a web design company, and when she’s not at the computer designing websites or digiscrap layouts, she’s probably hiking one of the local mountains in her hometown of Phoenix, Arizona. She is an avid reader and loves to travel to foreign countries.

Tutorial Tuesday | Custom-Made Journal Cards

Hello, and welcome to another edition of Tutorial Tuesday at The Digital Press! Today, I will be showing you some fun ways you can use your own digital kits to create custom journal cards.

You can really stretch your digital stash by making your own custom pocket cards with the various pieces included in the digital kits. Even if the kit comes with cards already, you can still create your own customized cards with photo editing software and digital papers, brushes, and elements. Getting creative with your supplies and making cards not only stretches your kit, but it adds a personal touch to your projects.

Let’s get started!

First, choose your canvas size. In Photoshop (PS) or Photoshop Elements (PSE), you will select File –> Open New File …and then a screen will pop up where you can enter your desired canvas size. Change pixels to inches, if necessary, and then select your size. I went with 3×4 for my canvas…

Now pick a kit, and start adding items to your blank canvas. Yes, it’s that easy! 🙂

EXAMPLE 1

For the following card, I picked the new May 2017 TDP Designer Collab collection, Day Planner, to make my card. I added in a sticker, brush, flair, and another heart sticker. It was so quick to make… and looks awesome. Here is a screenshot with my 3×4 canvas and all the different pieces in the project bin…

EXAMPLE 2

Another example of a card you can make would be a card with separate “striped” sections. This is also really easy!

You can do this by making some rectangle shapes on your canvas, and then clipping digital papers onto those shapes to create the separate pieces. I made each rectangle shape 1.5 inches high and 4 inches wide… and then I clipped some fun patterned papers and solid papers onto those shapes. To do this, you simply place the digital paper in the layer above the rectangle shape in your layers palette (see the right side of the following image)… and then use the “clipping mask” feature (Ctrl-G in PSE, or Ctrl-Alt-G in PS).

After I had my rectangle stripes, I added in a paint splatter, a few embellishments, a word sticker, and a title word art ‘carpe diem’. Also, for the ‘carpe diem’ I changed the color from black to the orange and pink using the eye dropper tool to get the exact colors from the other papers/elements in the kit.

This is how the card looked in PSE with the layers off the right; you can see them in the white boxes…

EXAMPLE 3

Lastly, I also created a fun 4×6 card using the digital brushes from This Life March, which can be found in Juno Designs’ shop at The Digital Press. I used a bunch of the stamps/brushes found in that collection to create a few clusters on my card…

As you can see, it’s so easy to create your own custom cards using photo editing software and the papers, elements, and brushes/stamps you find in your own digital stash! I hope these journal card examples, above, will inspire you to stretch your own kits and use them in new and creative ways!


Sabrina

About the Author  Sabrina is married to a hard-working man and has two rambunctious kids, nicknamed Captain and Sunshine. She spends every free minute creating at her crafty space. Digital layouts, hybrid layouts, project life and just anything memory keeping. She also loves to read, kickbox and go a bike ride.

Hybrid How-To | Luggage Tags

Hi everyone! It’s Kate here, with another edition of our Hybrid How-To series. Travel season is on the way, and I thought it would be fun today to show you how I made these cute hybrid luggage tags for my kids.

SUPPLIES

  • Digital scrapbooking kit of your choice (I used Happy Camper by Mari Koegelenberg)
  • Photo editing program like Photoshop (PS) or Photoshop Elements (PSE)
  • Cardstock
  • Self-seal laminating sheets
  • Scissors

INSTRUCTIONS

1. In PSE, I built my luggage tag templates (if you’d like to use mine, you can DOWNLOAD THEM HERE).

2. Add digital paper and elements to each of the tags, by using each PNG tag shape as a clipping mask (Ctrl-G in PSE or Ctrl-Alt-G in PS). Make sure you duplicate the templates so you can create a front and back for each tag. You can also add text to one side of each tag, if desired. Once you have them ready, send them to the printer and cut them out.

3. The next step is to adhere the front of the tag to the back of the tag. I used thin glue dots for this (don’t use anything too thick, or it shows up through the cardstock once you laminate).

4. Place your tags on a self-seal laminating sheet, and add another sheet to the top. Using your nail or a smoothing tool, smooth out the bubbles — especially along the edges of the tags. Cut them out, leaving a little bit of lamination for the edges.

5. At this point, you can just punch a hole and add some string or ribbon for attaching to the luggage. I chose to add a colorful eyelet to each.

And that’s all there is to it! Easy, right? 🙂

If you want to give this project a try, you can earn TDP challenge points if you post a photo of your finished project in the May 2017 Hybrid Challenge thread in The Digital Press forum.


Kate 
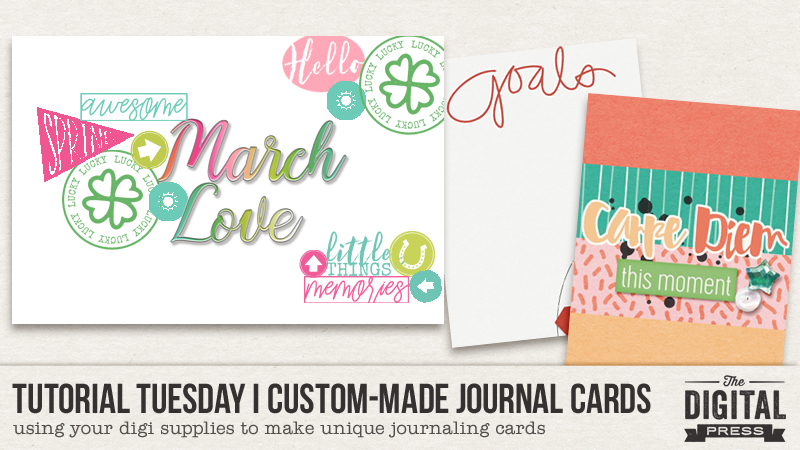
About the Author  Kate is on the hybrid team here at The Digital Press. She lives on the Utah/Colorado border with her husband, 5 kids, 10 chickens, and a dog named Gracie. She’s a city-born girl who found she’s really a country girl at heart. She can be found outside, barefoot, and probably in her garden.

Feature Friday | MEG Designs

It’s Friday, and time for another edition of our Feature Friday series here on The Digital Press blog! This week, I’m thrilled to feature the amazing Marie Eve of MEG Designs. This is her second feature article here on the blog (you can find her first feature from November 2016  HERE), and whereas last year we used our feature series to help you get to know some fun trivia about your favorite designers, this year we’ve been using our designer feature series to give you a little peek into our designers’ creative spaces and more insight into their creative processes.

With that in mind… here’s a peek at Marie Eve’s work space, where she creates her lovely designs…

Marie Eve’s workspace features lots of storage for all her little bits and pieces. I love the bowl with all that awesome washi tape and the colorful yarn lights. The drawers allow her to have a space for everything and keep things tidy so she can focus on her designs.

We also asked Marie Eve to share a Top 5 list with us that is representative of herself at this point in her life, and she shared her Top 5 Favorite Activities

  1. Sports — I really love doing sports 2 times a week. It is a real need for me. When you do sports, you don’t think about anything and that’s a pleasure. I practice kick power, which is boxing movements set to the rhythm of fitness music.
  2. Watching TV — I love watching American series like The Walking Dead, Game of Thrones, House, Revenge, Shameless, Bates Motel, The Affair, and much more.
  3. Playing with my kids — I enjoy planning board games with my family; sometimes we play for hours on Sunday afternoons!
  4. Cooking — I love making pastries. I am looking for a lot of recipes on the internet and I love trying them. The last one I tried was a lemon tiramisu with lemon curd; it was a real delight (if you love lemon, of course)!
  5. Genealogy — It became something obvious when my grandfather died 4 years ago. I had this need to look for my roots, to find where I came from. I can spend hours looking for information on the internet (fortunately the Mormons have scanned a lot of records). I also read many articles on the life of our ancestors, how they lived during the 1st and 2nd World War, and also during the French Revolution.

As for her designs, Marie Eve has a wonderful variety of products in her shop at TDP! I love her use of bright colors, her versatile templates, and her awesome pocket scrapbooking items. She truly has something for every scrapper! Here are a few of my favorite products from her shop…

Marie Eve’s products are so versatile that they can be used for all different kinds of layouts and scrapping styles. Here are a few of my favorite projects using her designs…

I loved getting to learn a bit more about Marie Eve of MEG Designs and getting a glimpse of her design space. To celebrate her feature week, her entire shop will be on sale 30% OFF all week long (sale will end at 11:59pm ET on 5/25). She has so many amazing products that it will be hard to choose; go check out her shop and see what catches your eye!

Additionally, she has a special Free-with-Purchase offer for everyone this week! Don’t miss out on this opportunity to stock up on your favorite products from MEG Designs while her shop is on sale 30% OFF… and you can also snag this for FREE with any $10+ purchase in her shop — this week only!


BLOG-AvatarAbout the Author  Katie is a member of the creative team here at The Digital Press. She lives in Central Florida with her husband and their four sweet but crazy boys. When she’s not dodging Nerf bullets or trying to dig out from under the never-ending pile of laundry, she enjoys photography, cooking, going to Disney World with her family, and, of course, digital scrapbooking.

Tutorial Tuesday | Creating Export Presets in Lightroom

Do you find yourself exporting your photos in Lightroom over and over with the same settings? If so, and you would like to save time by creating your very own custom presets… I’m here today to teach you how to do so!

Often, I find that I need to export a single layout in multiple different formats/sizes/etc. depending on which online gallery I’m going to be loading it into. For instance, here at The Digital Press, I size my layouts for the gallery at 900 x 900 pixels and up to 350kb in size. Because I do this with every layout I’m going to load at The Digital Press, I go through the same process over and over and over again. Thus, I have created an export preset to do just this with the touch of one button. Let me show you…

STEP 1

Import your layout (or photo) into Lightroom. If you don’t know how, don’t worry… we have another tutorial HERE that details the process of importing into Lightroom. Once you have imported your layout, you will want to select it for export (see blue arrow at lower left)…

STEP 2

Click on the export button on the bottom left side (again, see the blue arrow at lower left)…

STEP 3

Next, click on the drop-down arrow and select the folder into which you wish to save your adjusted photos. You will have a choice between “Select Folder,” “Choose Later,” or “Same Folder As Original.”  I have created a folder on my computer’s hard drive named “New Releases,” and each week when I save a new layout, it will always go to this specific folder. That way, it’s always easy to find when I start the process of posting my pages into various galleries.

*NOTE* When I want to save pictures that I have edited, however, I use “Same Folder As Original” so all my photos stay together. The good news is that you can customize these choices and do what’s best for you!

Once you have specified where Lightroom should save your file, you will select “Custom Text” and rename it (feel free to skip this step, if you’d like). I always add a few letters after each of my titles to let me know which gallery I’ve created this layout for …which is why you see the “TDP” on the end of my name (see image above). Again, you can skip this step if it’s not relevant to you.

STEP 4

This is where you get into the details that save you time! Here’s a detailed look at my own preset (see the image, below, for the numerical references in blue)…

(1) First, I tell Lightroom to limit the file size to 325-350 for The Digital Press. All online sites/galleries tend to have different limitations, so I might choose some other file size/number in this step if my layout will be loaded somewhere else.

(2) Then, I resize the layout to fit m needs.

(3) Again, for The Digital Press, I use 900 x 900 pixels; this is where I enter those numbers.

(4) Here, I can select the resolution. For web-sized images, 72 dpi is perfect.

(5) Lastly, I add your sharpening here (if I haven’t already done this when saving my layout after scrapping).

Of course, you can feel free to change any of the above details to fit your own needs! 🙂

STEP 5

After you’ve set everything up the way you like it, you’ll click the “Add” button…

STEP 6

Finally, you’ll name your preset. Here, I’ve chosen to call it “TDP Layout Preset.” Brilliantly unique, I know. 😉 After you’ve typed in your new preset name, click the “Create” button…

STEP 7

You should now be able to see your new preset under “User Presets” on the left side of your screen…

STEP 8

Now, whenever you need to use your preset… you’ll select it, rename your file (don’t worry, this won’t interfere with any of the other settings), and click the “Export” button…

That’s it! You’ve done it! You have successfully created a new preset in Lightroom, so that each and every time you want to save a photo or layout, it will be saved the same way without a lot of extra work.

As I mentioned earlier, I have created a preset for each of the galleries and blogs to which I post my layouts and photos… and it really makes my exporting workflow so much faster! Hopefully this tutorial is helpful in that way. If you have any questions, please don’t hesitate to reach out to me using the comments on this post, and ask away!


Robin

About the author  Robin is a member of the creative team here at The Digital Press. A wife of 25 years and a mom of 4 crazy children (2 in college and 2 still at home), she says that her life occurs mostly in the car as she transports said crazy kids to their many, many homeschool activities. When not driving, Robin loves to make her family cringe by pulling out her camera again (and again, and again…).