Welcome to Day Two of our annual 10 Holiday Tips & Tricks series here on The Digital Press blog! The holiday season is normally my favorite time of year, but especially for crafting & baking! But just like everyone else this time of year — extra time is short! These tips & tricks are great ways to utilize limited time to your advantage.
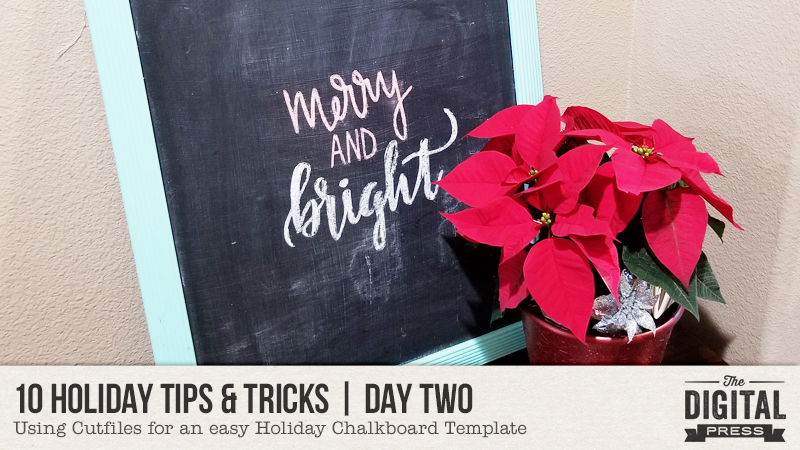
Today I’m here to share a fun chalkboard art tip for your holiday decor. I have a large chalkboard which is actually an old framed picture that I picked up at a garage sale (I jazzed up the frame with spare paint & the glass with chalkboard paint a few years back!) It’s a staple in all of my holiday decor, as it can easily be updated. I love all the fun chalkboard ideas on Pinterest… but man, I just do not like my handwriting, let alone in chalk! Therefore, I like to use the fun cut files or digital supplies that all our talented digital designers create to help me update my chalkboard!
Here’s how to do it…
Supplies:
- Paper or scrap vinyl
- Chalk
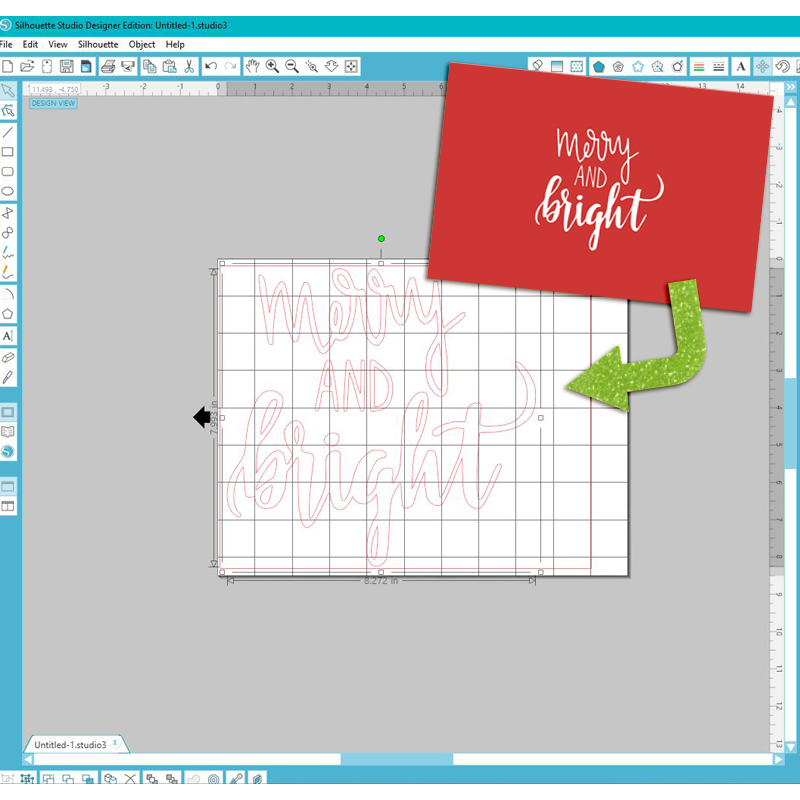
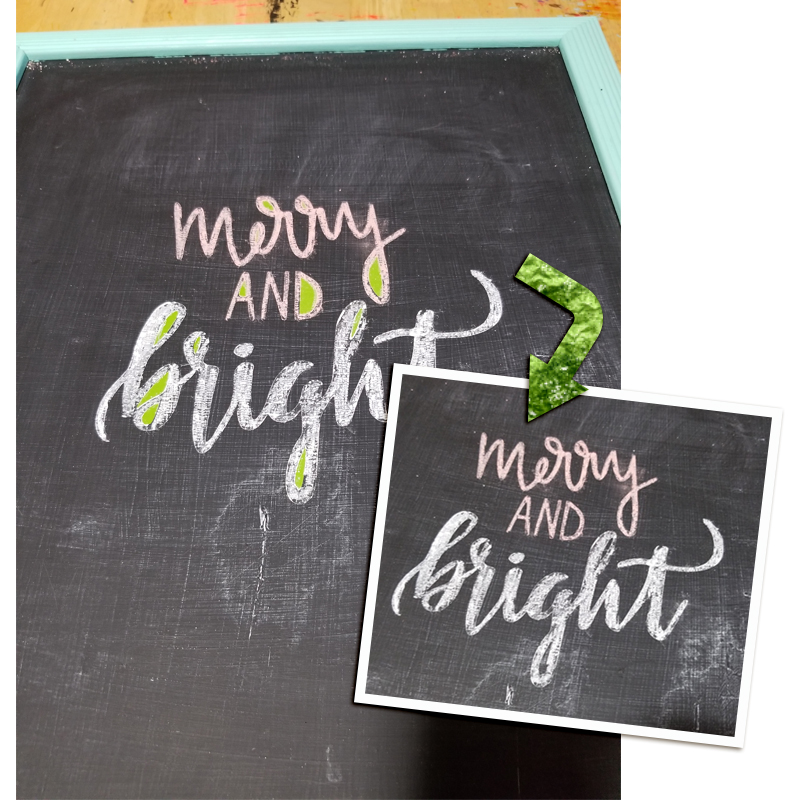
- Digital cut file or word art (I chose this cute ‘Merry & Bright’ card from Tis The Season by Rachel Etrog Designs)
I brought the card into my Silhouette program & traced the card to get cut lines. I typically use a piece of scrap vinyl, as the color doesn’t matter for my final project- it’s just a template! Alternatively, you could print the card on cardstock or some thicker material & then cut out the words.
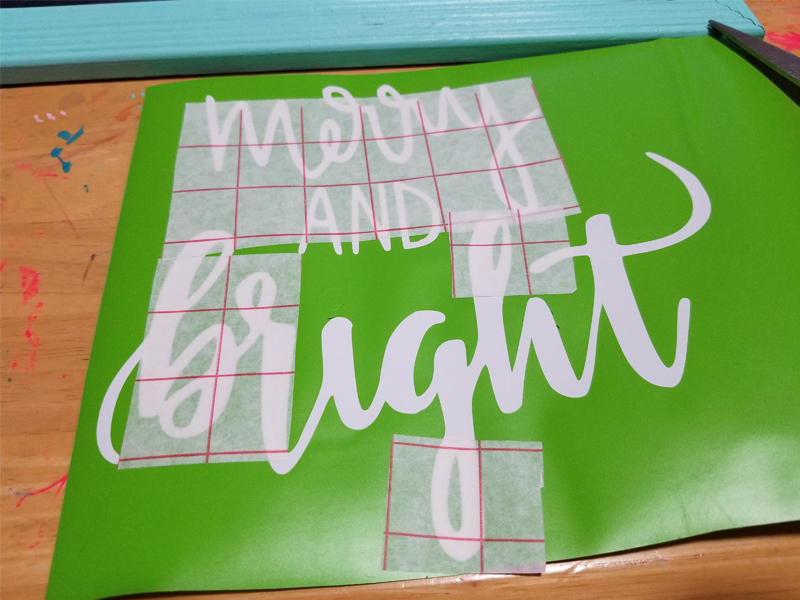
After my vinyl was cut, I weeded out the words — careful to leave the inside portions of the letters. I added some transfer material so that those inside portions would peel off with my vinyl.
I centered my vinyl on my chalkboard (eyeball it — I really don’t think it matters to be perfectly centered!). 😉
Then I simply filled in the words with red & white chalk…
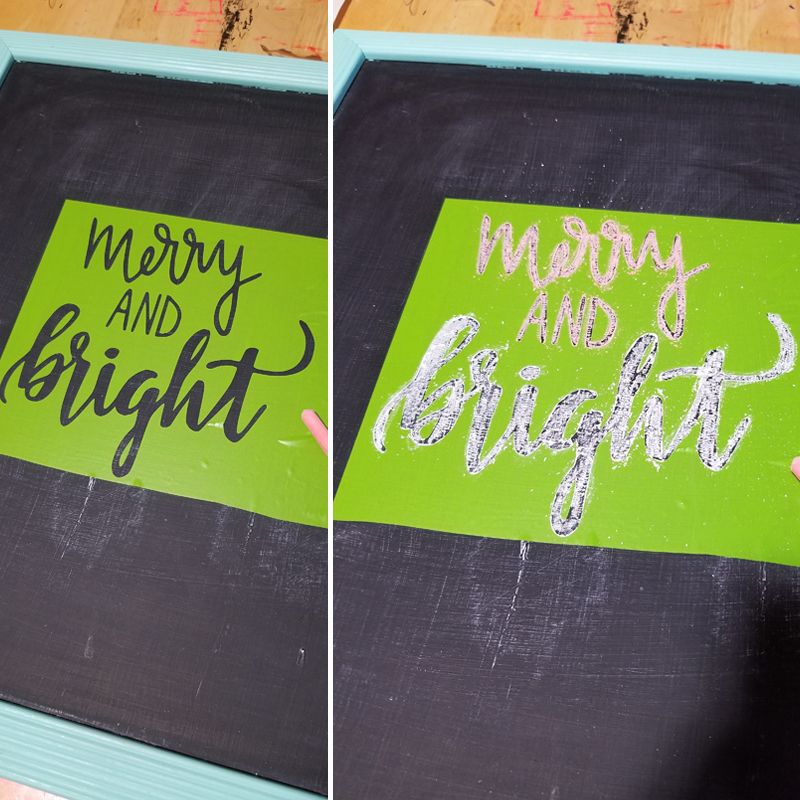
After carefully peeling up the vinyl, there will be some chalk dust — just blow it away. Then I finally weeded out the inside of the letters… & voila!
The usual spot for my chalkboard is on our entry bench! It goes perfectly with my $1 Poinsettia I picked up on Black Friday! This project took me less than 30 mins (and that time included pulling my Silhouette & supplies all out from the cupboard!).
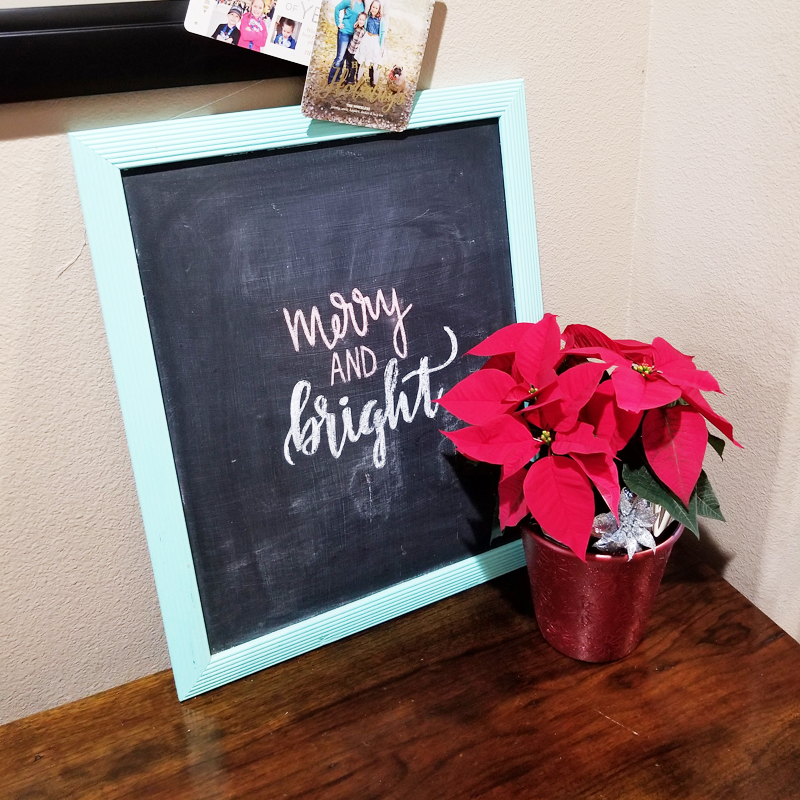
Cute, and easy!
If you’re thinking of giving this project a try… head over to The Digital Press’s challenge forum and get the details about how you can earn challenge points for December 2018 at TDP if you try any of our “Holiday Tips & Tricks” throughout the month as they appear here in this blog series! Also, we’d love to see any photos of your holiday projects using TDP goodies in the gallery this month, so link us up after you’re finished creating and uploading! 🙂
 About the Author Amie is a craft-loving dental hygienist who lives in Washington state. She loves her husband, her two crazy kids, and her English Bulldog… as well as coffee, baking cupcakes, daffodils, glitter & sprinkles, reading a good book, and lip gloss — not necessarily in that order.