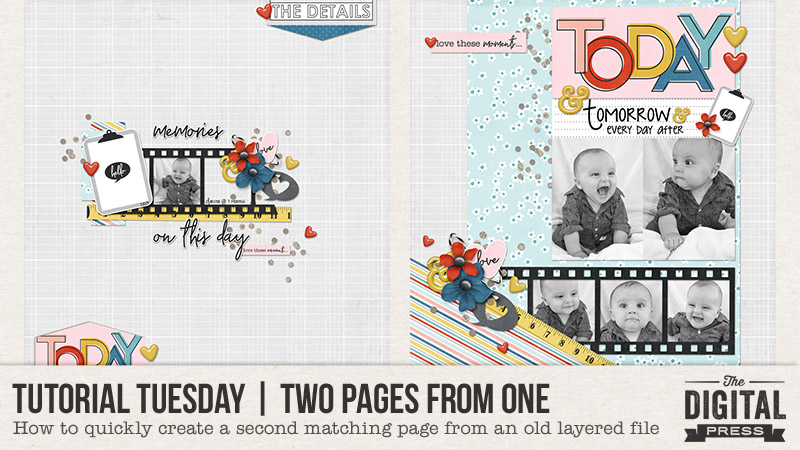
Hello, and welcome to another edition of our Tutorial Tuesday series here on The Digital Press blog! Today I am excited to share with you a method for quickly creating a 2-page spread by making a second complimentary page from a page you have previously created and saved as a layered file (such as a PSD file in Photoshop).
Often, we all scrapbook pages randomly… which leaves lots of holes in our chronological gathering of pages. When we decide to compile and print a book, however, these holes really become obvious and we are left with a collection of random pages that likely don’t look as pleasing when printed side by side in a book. When it comes time to print an album, we might wish to create a second page to go next to our first page (thus creating a 2-page spread), so that when a book is opened the two consecutive pages flow nicely together.
But… what if we don’t even remember what digital kit we used to create that first page? It could take hours to sift through our digital stash to locate the right kit. This is when my technique may come in handy. Read on and see….
Basically, when I open up the layered file of a scrapbook page I’ve already created in the past, it is almost like opening up a mini kit to scrapbook with (but in this case, the shadows are already applied and maybe even clusters are already created). All of the papers and elements I used the first time are available in that layered file. Let me walk you through the process of using them to create a second page.
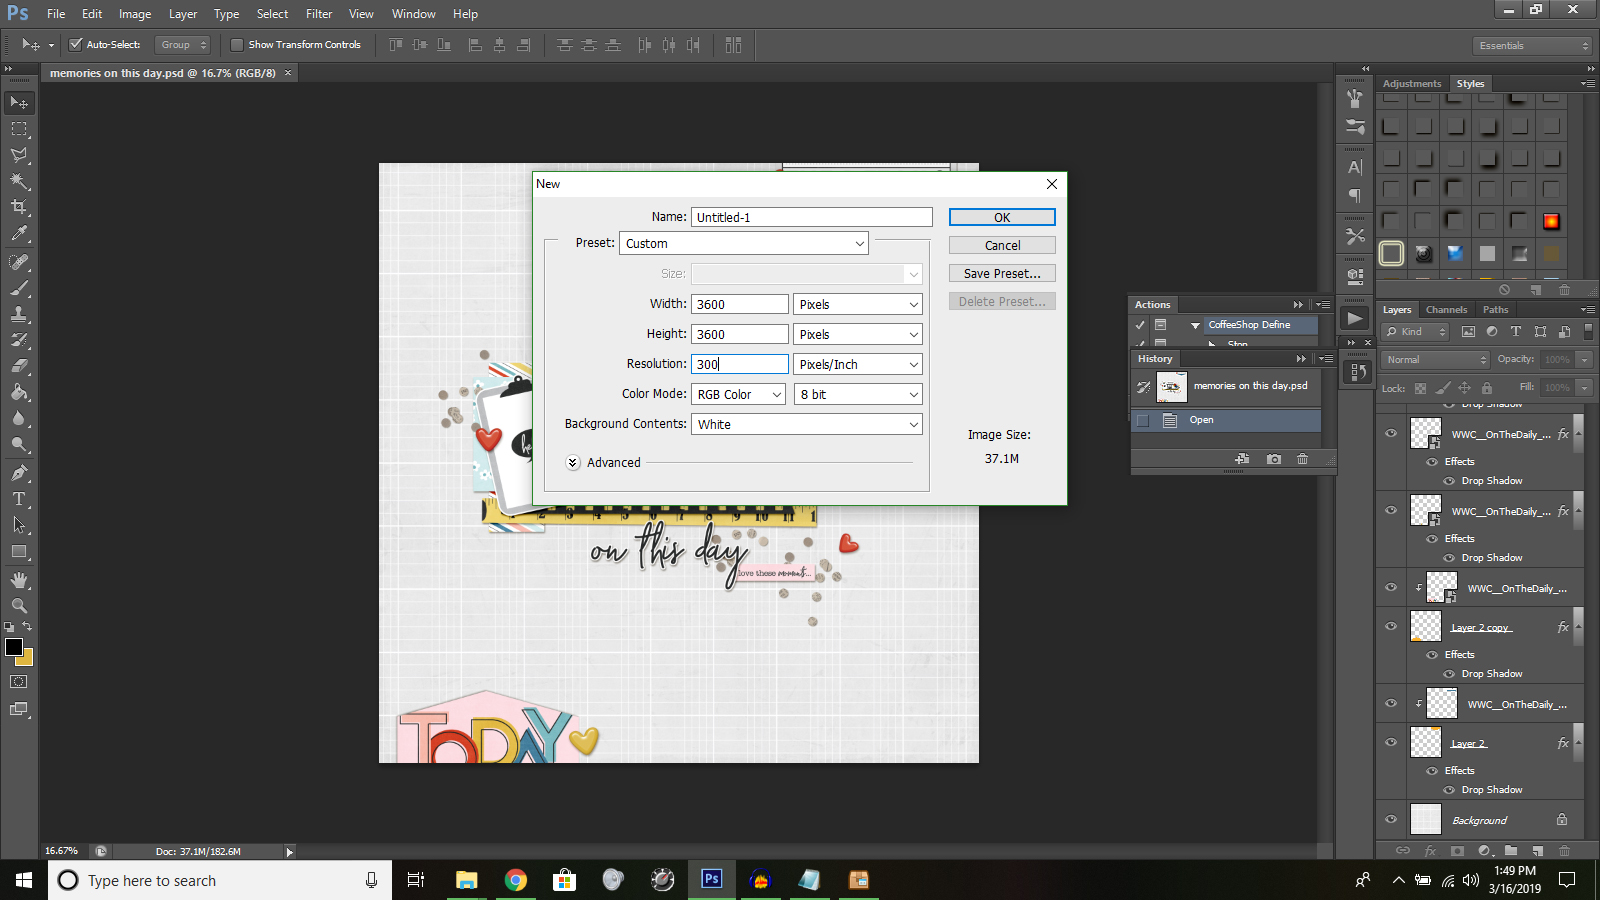
First, open the original layered file you want to use to create a second matching page (if working in Photoshop or a similar program, it will likely be a PSD or TIF file). For this tutorial I will be using a page I created using Laura Passage’s collection On The Daily, featuring my darling grandson…

Next, you’ll create a new project making sure your color mode is the same as the original (mine was created in RGB 8 bit color). You will also want to match the width, height, and resolution of the original page…
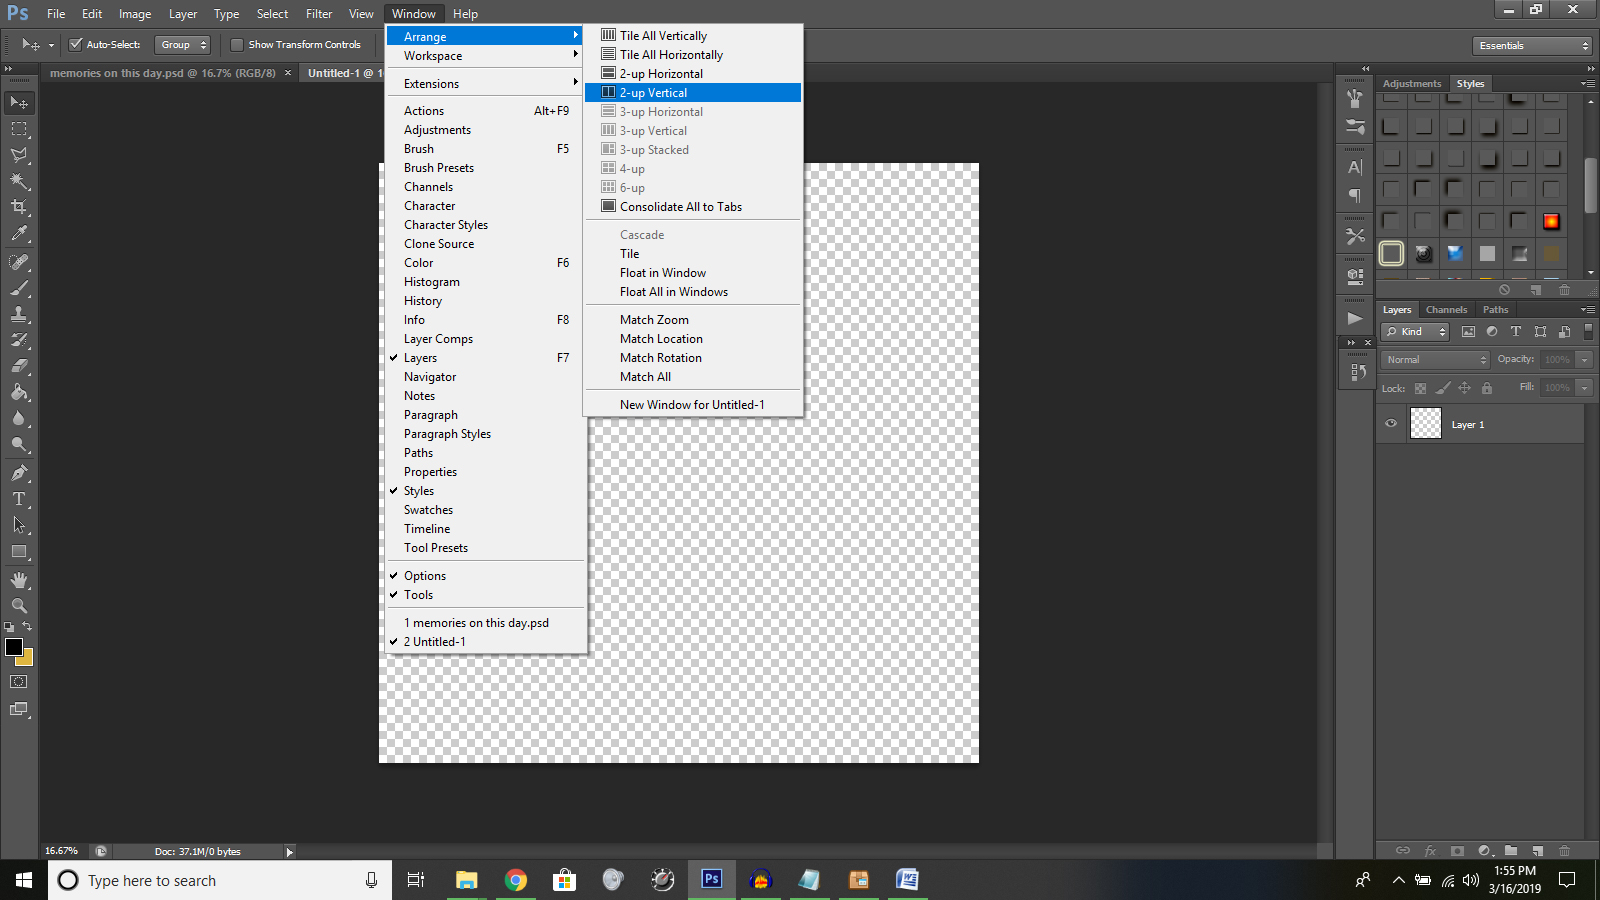
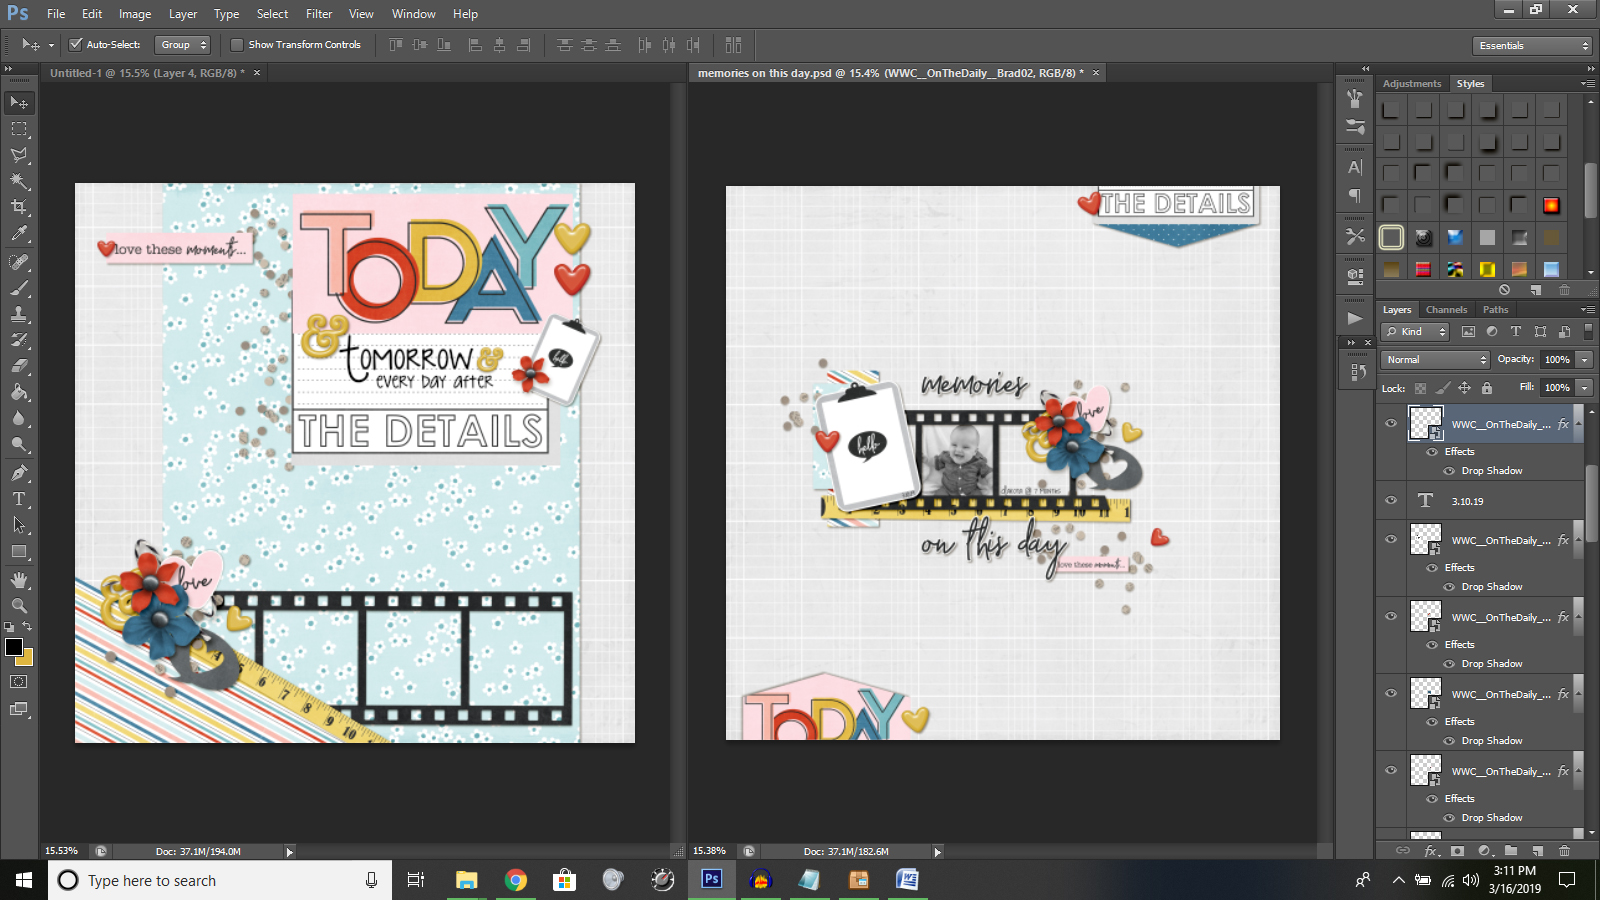
From the menu bar along the top, select Window > Arrange > 2-up Vertical. This will place your original layered page and your new transparent page side by side in Photoshop…
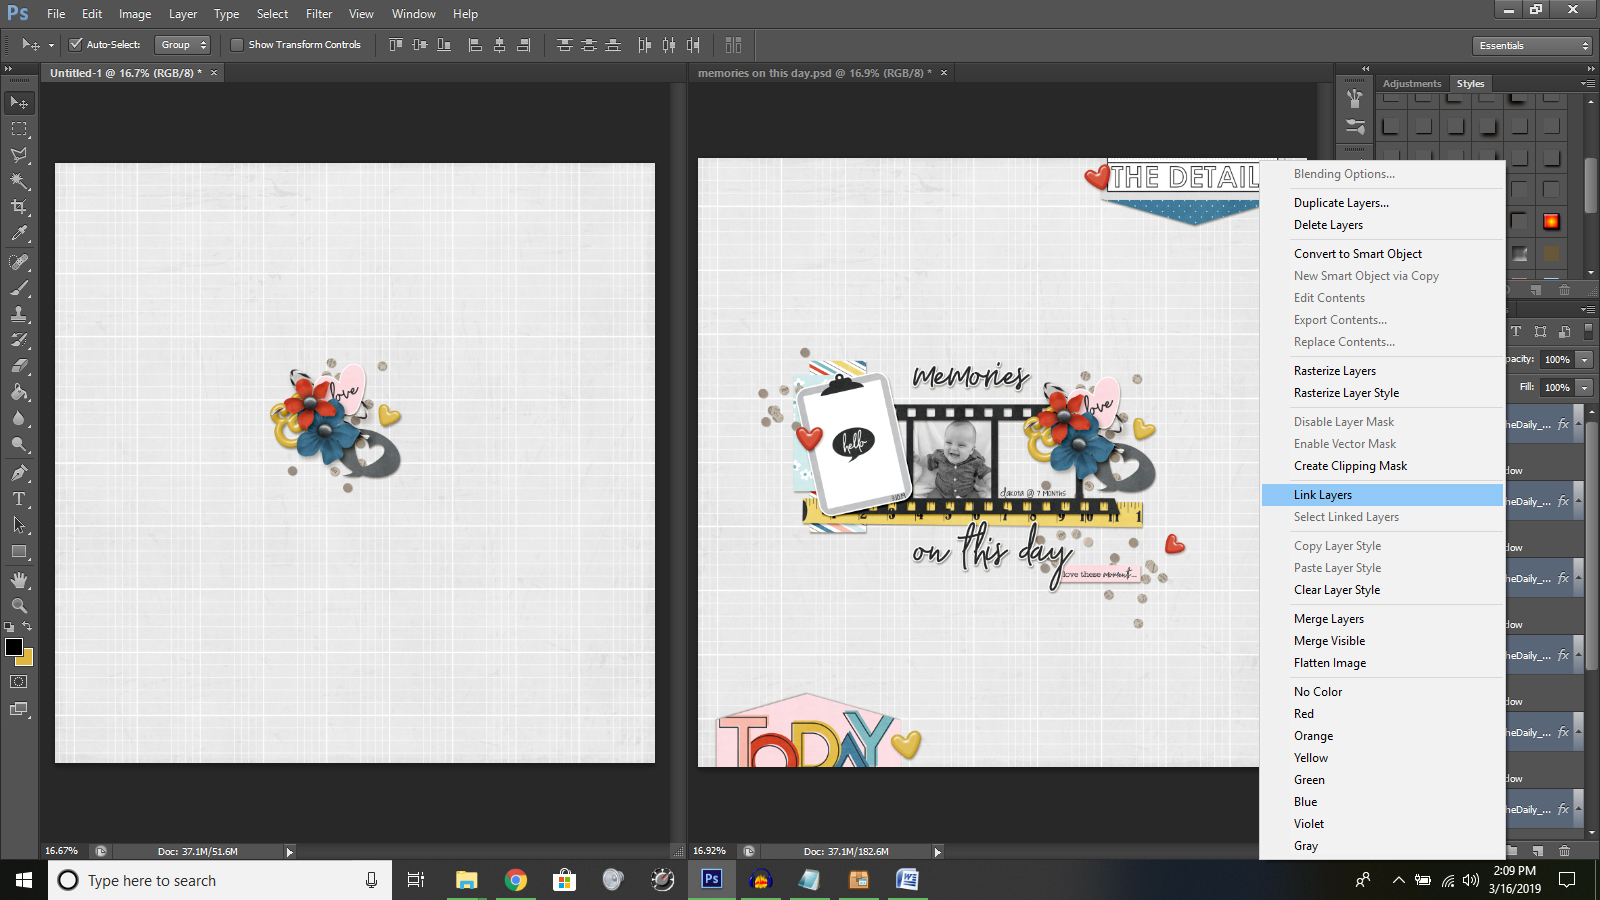
Next, click on your original layered page to make it active. Your layers palette should be visible on the right. Select one of the papers from your original page to use as the background paper for your new page (if you want to use the same background paper as the original, you may need to ‘unlock’ the paper by clicking on the word “Background” in the layers palette and allow it to be renamed; for example as “Layer 0”). Once you’ve selected a paper to use, simply click on it in the layered image and drag it over and drop it onto the new blank page next to it. Re-center the paper onto the new page as needed.
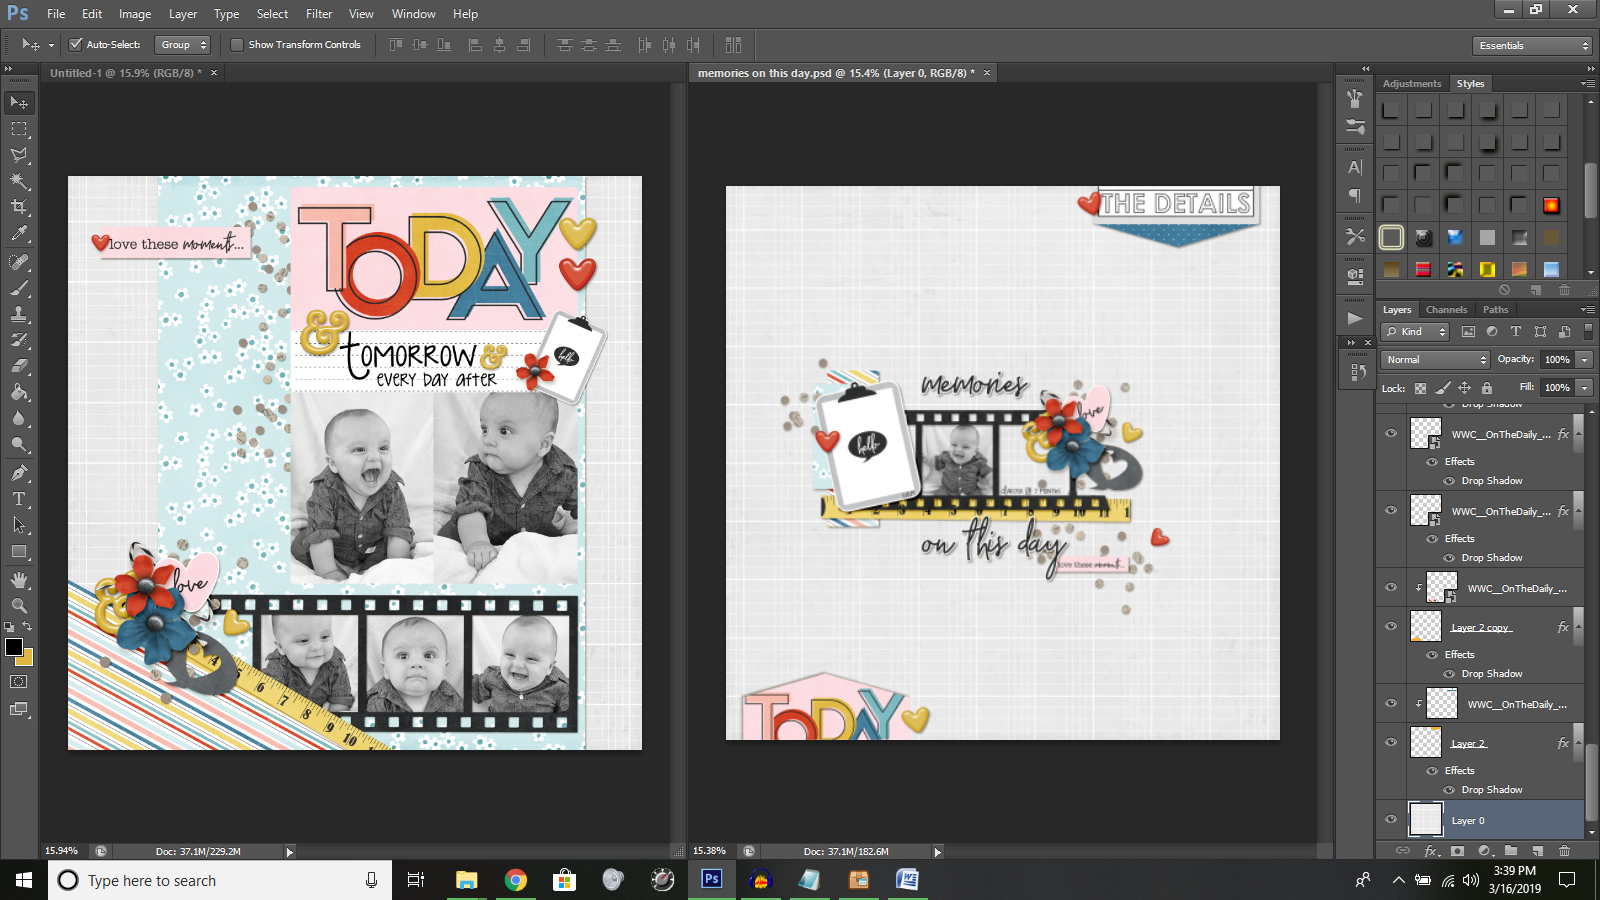
Now you can probably guess how the rest of the process goes: you will continue to select items off of the original layered page and drag-drop them onto the new page.
Another fun trick — you can select multiple items at one time and drag them to your new page together, as-is. For instance… suppose you really like a cluster you created on the original page, and you want to use it again on the new page. Well, you can select all those items together on the original page and then drag them to the new page to create that same cluster. If you want to make sure they stay together you can even “link” those layers together after dropping them onto your new page (in the layers palette you will find all the cluster items highlighted from the recent drag and drop; you can right-click the mouse and select “link layers” from the menu, and these items will now be linked together and move as a unit wherever you preposition them on the page). You can also resize the cluster items together at one time, keeping the cluster proportions the same since they are linked.
As I previously mentioned, another of the great things about this process is that the shadows you applied to the original pieces will follow over to the new page, too. This saves you a step in the time it takes to create the second matching page.
Once you are satisfied with the basic design of the page, it is time to add your photos…
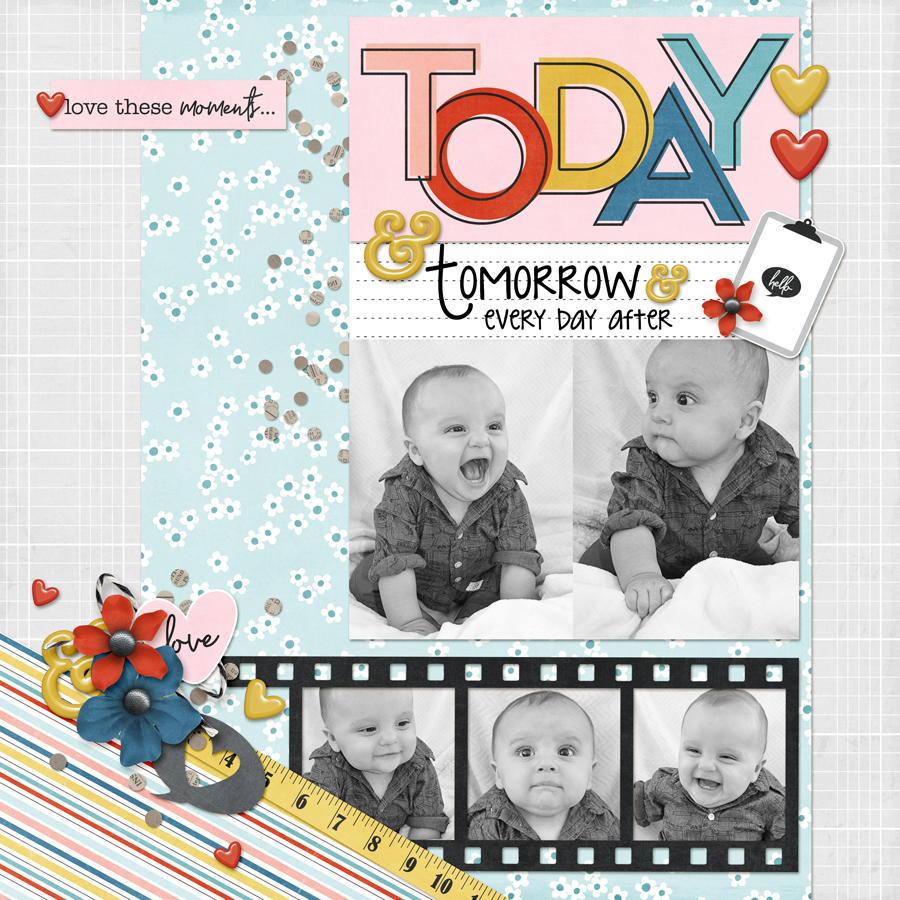
Take a quick look at the page to decide if you need to add any last items or any journaling.
And… as easy as that… you have a page that nicely compliments the original!
I hope you can use some of these ideas to create some matching 2-page spreads complete your scrapbooking albums, too.
![]() About the Author Tiffany is a creative team member at The Digital Press and has been scrapping for over 25 years. She resides with her family in Idaho, but dreams of warmer climates. Family will likely keep her in Idaho so vacations will have to do. Her scrapbook subjects include her husband, four children, one grandson and two dogs – as well as whoever and whatever will stay put for the snap of the camera. Other things that keep her busy include teaching fitness classes at the gym and working as a hospice/home health nurse.
About the Author Tiffany is a creative team member at The Digital Press and has been scrapping for over 25 years. She resides with her family in Idaho, but dreams of warmer climates. Family will likely keep her in Idaho so vacations will have to do. Her scrapbook subjects include her husband, four children, one grandson and two dogs – as well as whoever and whatever will stay put for the snap of the camera. Other things that keep her busy include teaching fitness classes at the gym and working as a hospice/home health nurse.
I like your ideas. Especially using a tape meter as a ribbon.
Thank you for taking time to read the blog and to reply. Happy Scrapping to you!