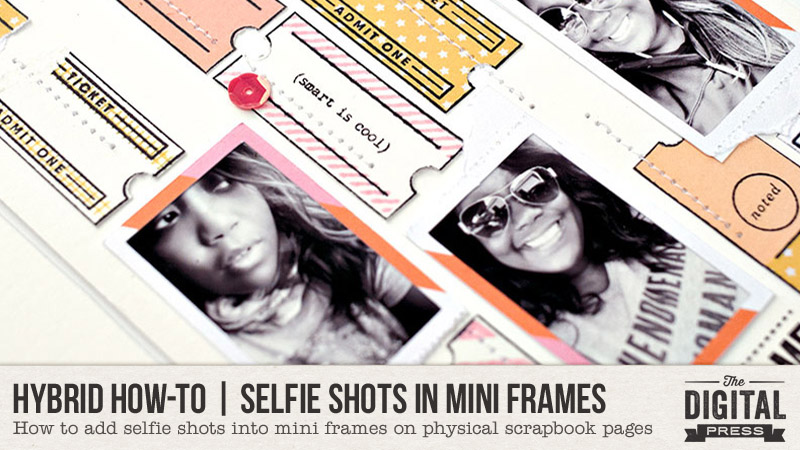
Hello everyone, and welcome to another edition of our Hybrid How-To series on The Digital Press blog! Today I am here to show you how fun and easy it is to add selfie shots into cute little mini frames on your physical scrapbooking layouts. For the purpose of this tutorial, I’m adding mine into a Traveler’s Notebook spread (so you can see how tiny they can be!)…
Before we dive into the details of this process, though, let me introduce myself! I’m Wendy Morris-Saponaro, and I’m a “seasoned” hybrid memory-keeper and super excited to be on the creative team here at The Digital Press as a hybrid artist. I’ve been a scrapbooker for about 20 years in creating for many scrapbooking manufacturer companies… from Prima Marketing to several online scrapbooking companies. Yes, long long time… within the past few years with the changes in the scrapbooking industry, I’ve leaned more to hybrid scrapbooking (using digital supplies to create physical paper layouts/projects)… and typically in the Traveler’s Notebook format. I never see my addiction ending anytime soon. HA!
First, let’s take a selfie… get ready, smile, pose….
You know you are as guilty as myself in grabbing your phone, which is pretty much always glued in your hand, to snap that necessary selfie before picking up the fork and knife, jumping on this-or-that ride, or standing in front of a landmark sign… right? My husband would have his fair share on comments for my selfie shots that consist of about 20 takes before I pick only one from the batch that I like. Ha!
Let’s dive into a few ways that you can use your never-ending stream of phone camera selfies and incorporate them into your next digital or hybrid scrapbook layout…
Browse Through All Those Selfies
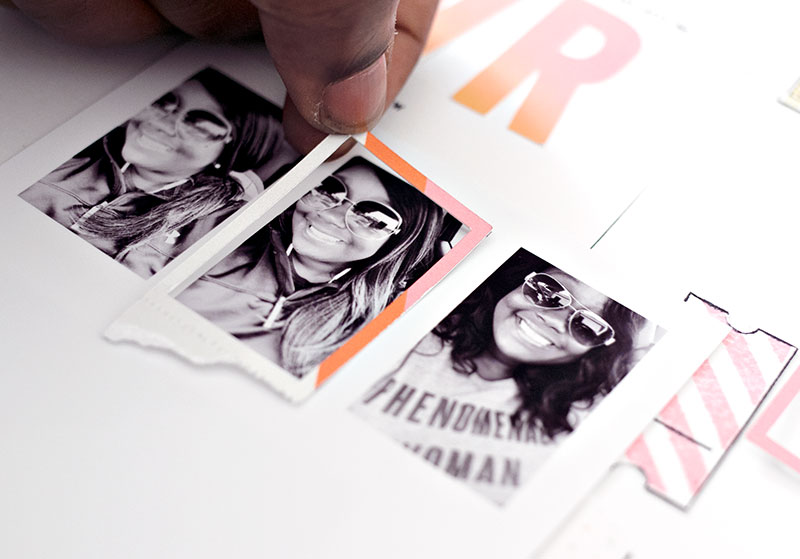
You might be amazed at how many selfie photos are sitting on your phone that you are planning to scrapbook but never print out. In selecting my photos, I browsed through my iPhone (i.e. “solo” selfie, selfies with others, etc.). The auto Selfies folder on the iPhone is a great jumpstart to see what is sorted there to select photos.
I use an Epson XP-6000 printer, and I just arranged my chosen photos in a collage format on a 4×6 photo sheet in the Epson app… and then printed out my top three choices. Don’t be afraid to use duplicate photos if they are your favorites. Just do you! Ha!
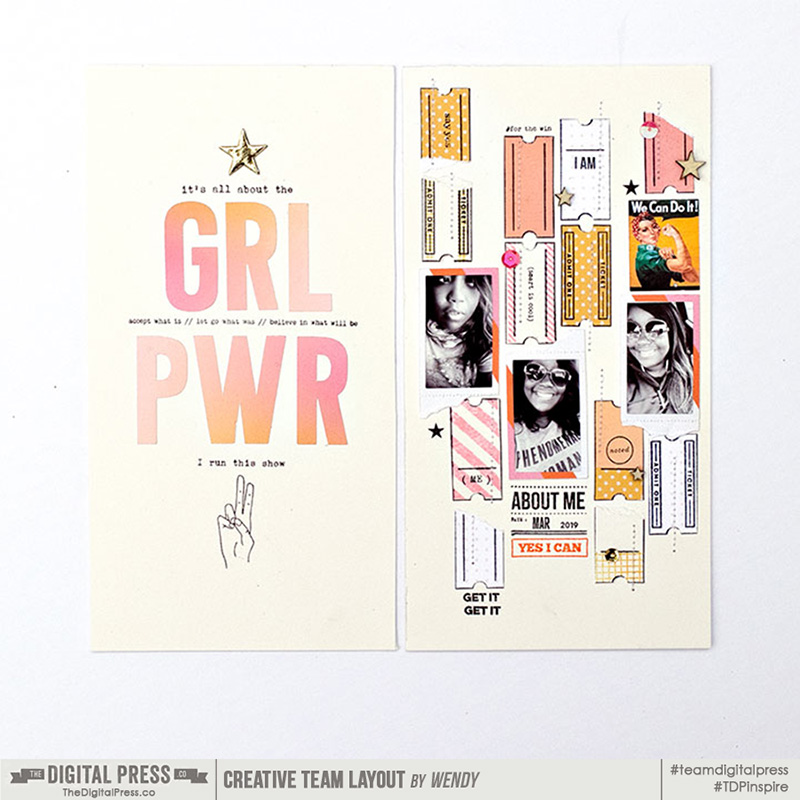
Also, to add, my two-page layout is a Traveler’s Notebook-sized spread, so I was focusing on selfies that would fit a vertical style for the flow of layout. You could easily adapt to a horizontal format, however, if that is your preference.
Frame it Up
I’ll give you a helpful clue… you’ll want to look for a collection over at The Digital Press that has photo frames in the kit…
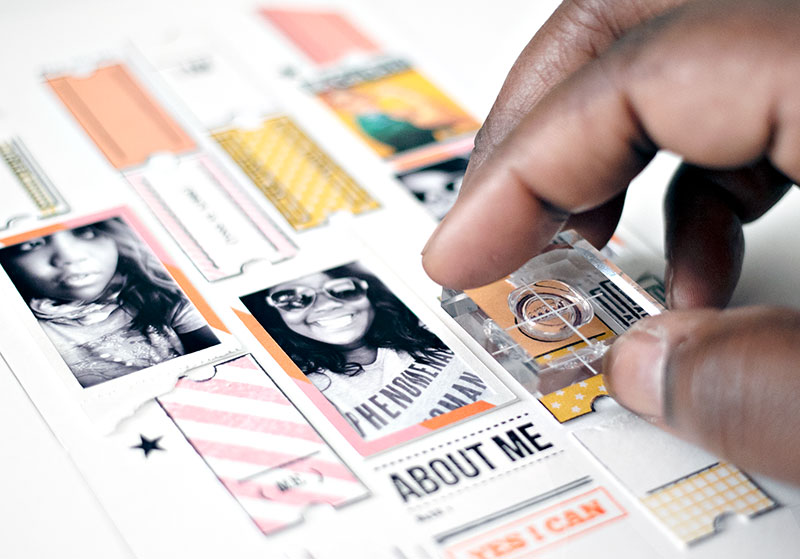
I chose the GRL PWR Kit from ninigoesdigi for my layout. The photo frames in the package of elements from the kit were just perfect for framing my selfie photos. I used the Cricut Design Space software to re-size the photo frames to a mini version. Then, I used my Canon printer and Cricut Explore Air 2 to “print and cut” the frames to the perfect size for my photos, as shown here…
When you choose to print your digital papers, elements, and journal cards, the awesome thing is that you can re-size things to a preference for the size of your project.
As a hybrid artist, I love this ability to customize the digital elements to the size needed for my project!
As you can see, above, I grabbed up some of the items from the elements pack in the kit to print and add as fun bits here and there.
Compliments that Pack the Punch
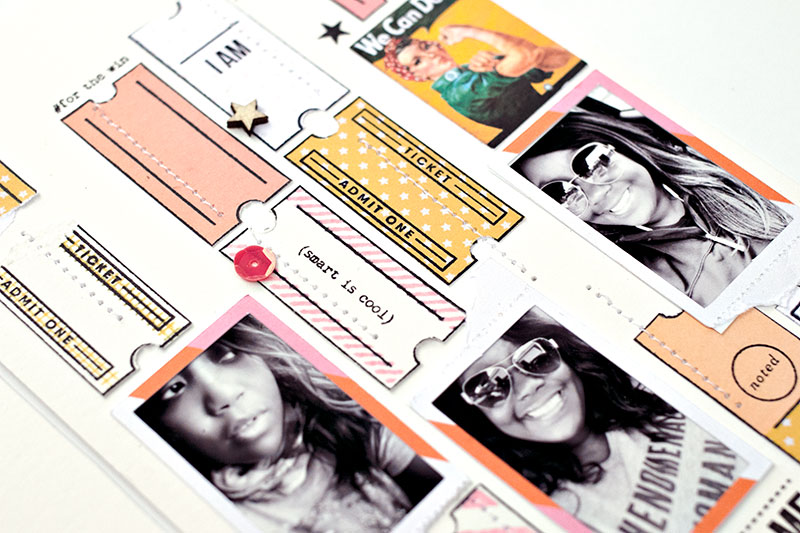
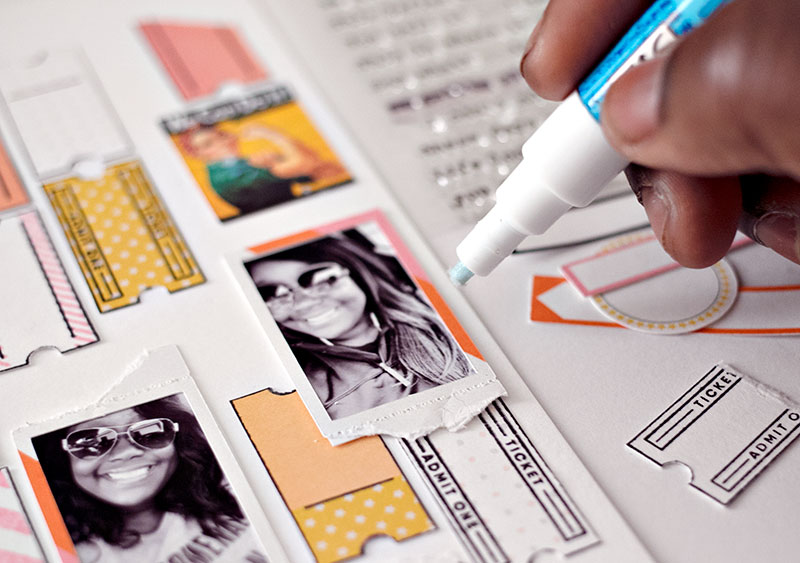
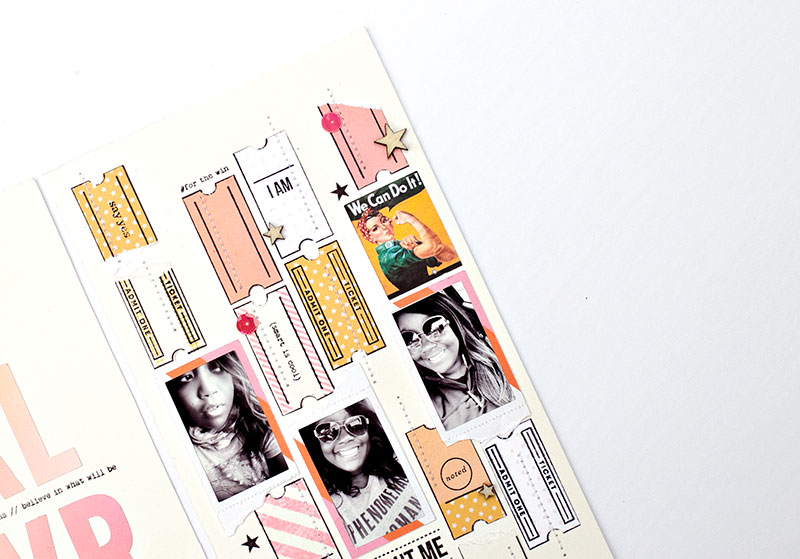
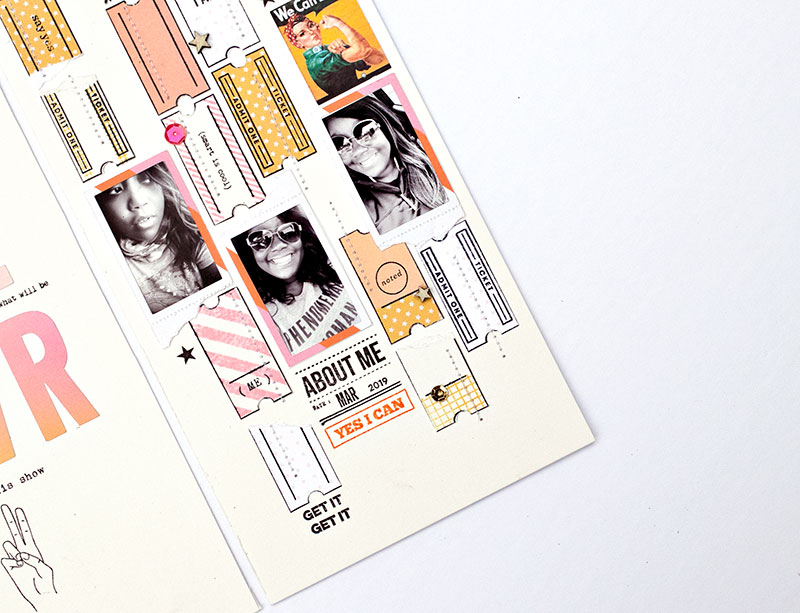
As you will usually find in 99.9% of my layouts, I use stamping as a compliment to “telling the story” around my photos. I have MANY stamps (no shame in that)! HA! I used some stamps to compliment around the theme of ‘girl power’ in my layout, as shown in the next couple of images…
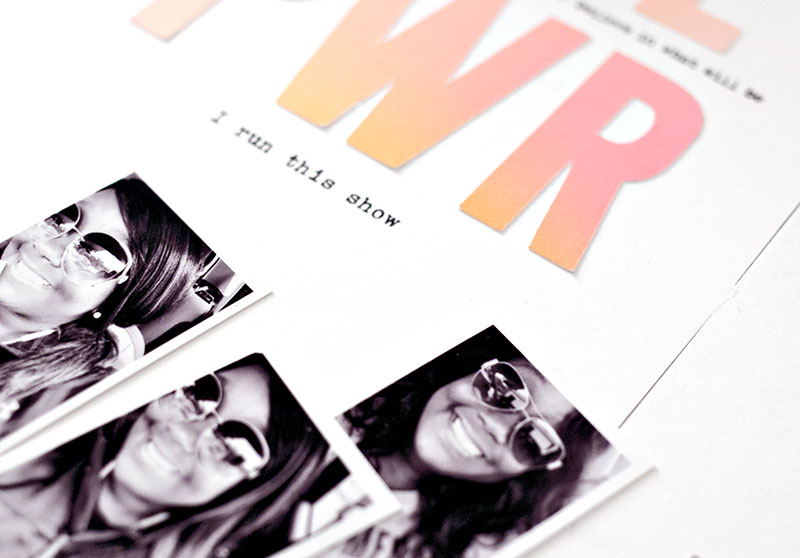
Also, as a fun touch, I love the ombre effect to the paper in the GRL PWR Kit …and the letters “GRL PWR” (shown below) were already in the ombre effect in the elements pack. I wanted that bold effect of the letters as the title…
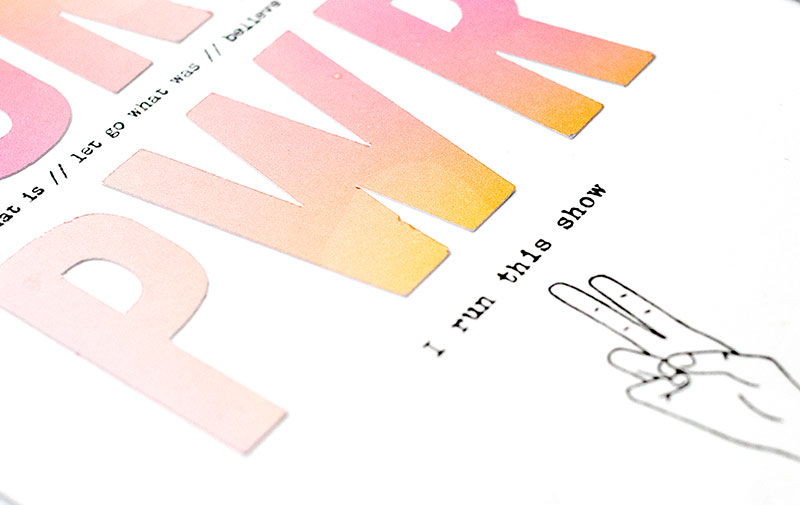
Then, I accented the title with stamped phrases and wording here and there.
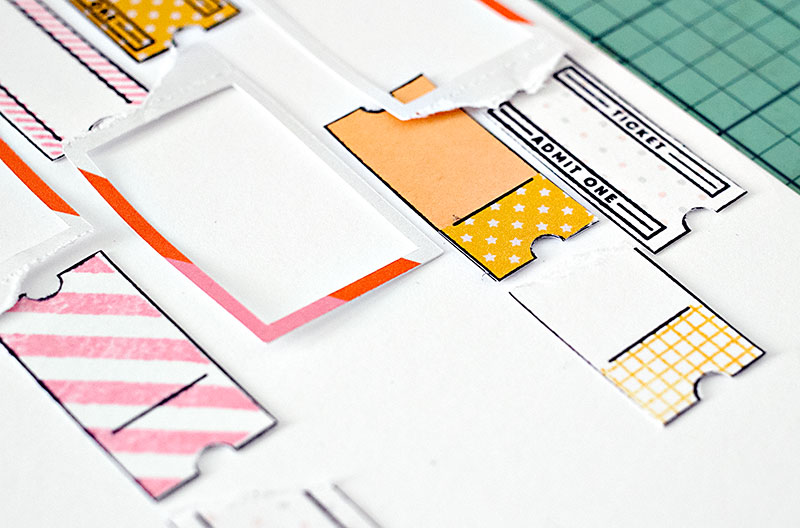
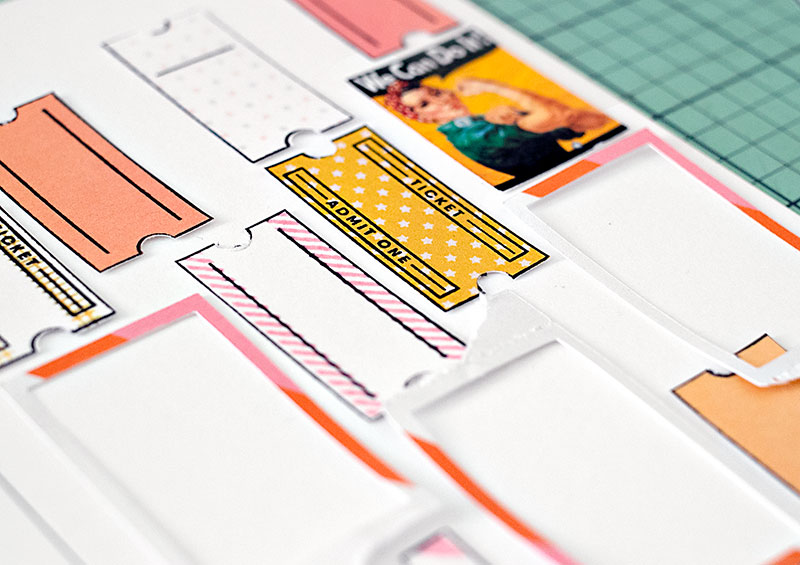
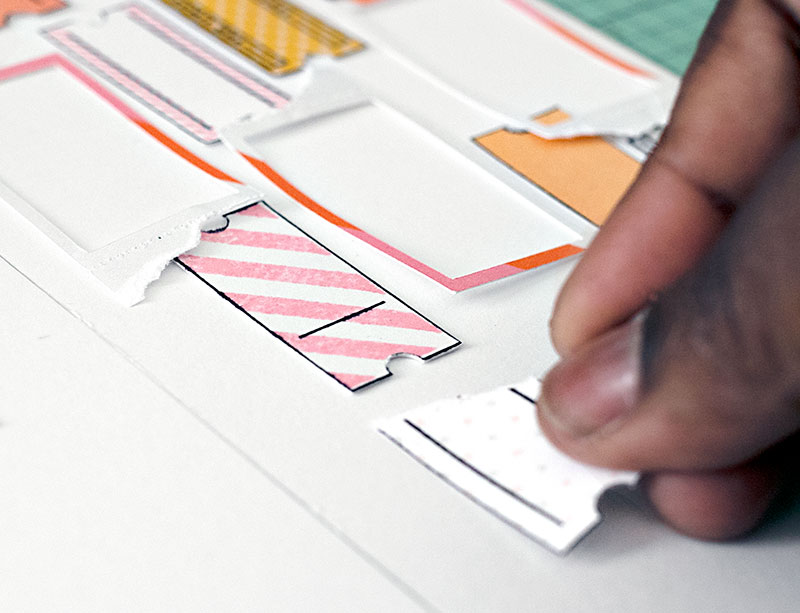
I also used a ticket stub stamp…

…and I even added bits of patterned paper from the GRL PWR Kit to some of the ticket stubs as accents and to add variety.
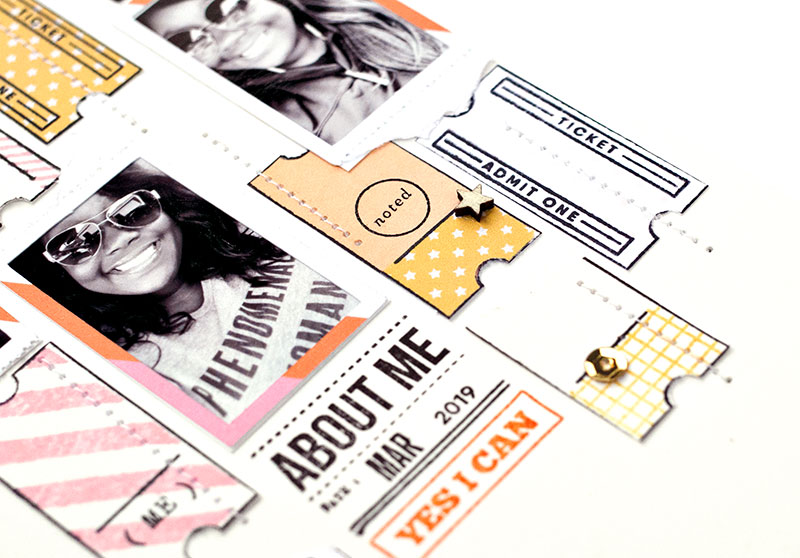
Here’s a look at the overall effect on the right side page of my finished layout…
Isn’t it a fun project?
I challenge YOU to look through your phone and grab up a few selfies to scrapbook, also — either in digital or a hybrid format. Share with me your thoughts in the comments section of this post after trying out my tips for inspiration.
 About the Author Wendy has a strong passion for the arts, lots of creative spirit, and is fearless in working with new products and techniques. During the day, she works full-time as an Audit Manager. Wendy and her family live on the Gulf coast of emerald waters in Navarre, Florida. Her husband is from Italy and is an amazing Executive Chef at an Italian restaurant in Navarre. Her daughter is a Yorkie named Principessa. Wendy has over 20 years of experience in the scrapbooking industry. She has been published several times in print and online scrapbook magazines, and has designed for several manufacturer’s creative teams. Wendy is currently designing for The Digital Press as a hybrid artist.