Hello, and welcome to this week’s edition of our Tutorial Tuesday series here on The Digital Press blog!
This week, I’m going to cover two different ways to use Photoshop (and/or many other photo editing software programs) to remove unwanted objects from the backgrounds of your photos. I find myself using this process a lot when I know I have a great photo — you know, everyone’s eyes are open, everyone is smiling — but there’s something in the background that ruins it a little bit. That’s all easily fixed with one of these two methods!
Both methods ultimately do the same thing: Photoshop samples from the surrounding area to “guess” what would be behind the object you’re removing. I find I use both methods in succession, because each one has its pros and cons.
Method 1: Using the Content Aware Feature
Step 1: Open your image in Photoshop
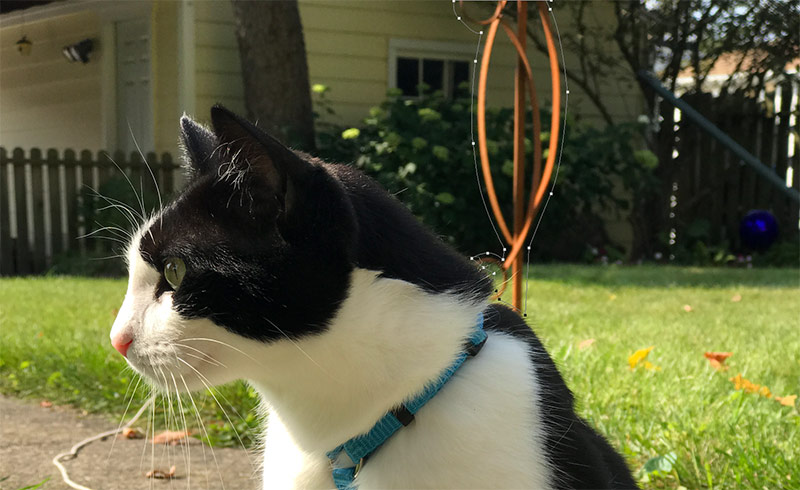
Step 2: Using the pen tool, draw a path around the part of the photo that you want to remove. You don’t have to be super exact here, but still get it as close as you can. You’ll want to draw the path a little way out from the edge of the item you’re deleting, but not too close to any other foreground object nearby. You can see in this screenshot how close I’m getting…
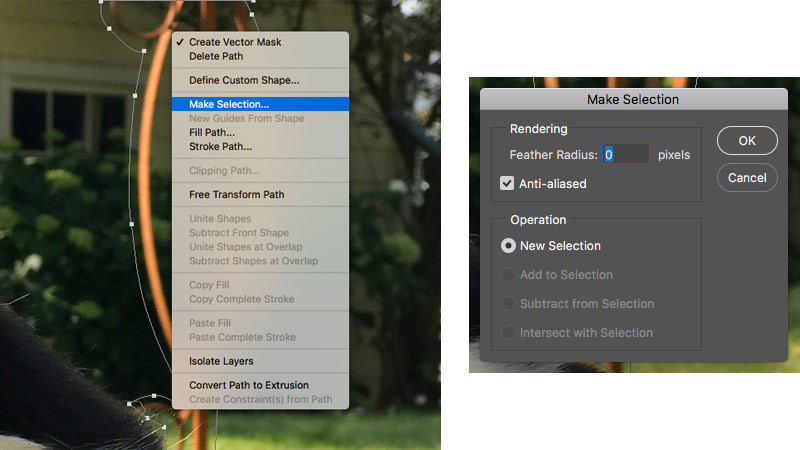
Step 3: Make sure you’ve got a path drawn all the way around the object, and make sure to connect the ends. Then, right-click anywhere inside the path and choose “Make Selection.” In the pop-up window, choose “0” for the “Feather Radius” and leave all the other options as the defaults, as shown here…
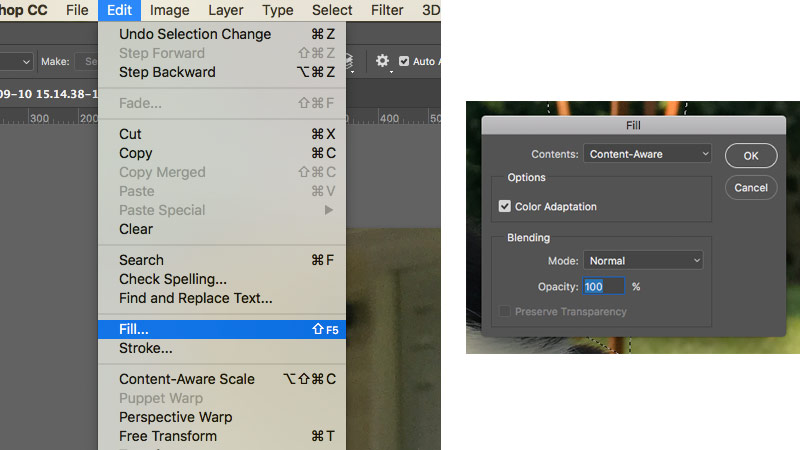
Step 4: Now you should have an active selection around the object you want to remove… so it’s time for the magic to happen! Choose “Fill” from the Edit menu. In the dialog box, make sure the Opacity is set to 100% and leave all the other options as the default…
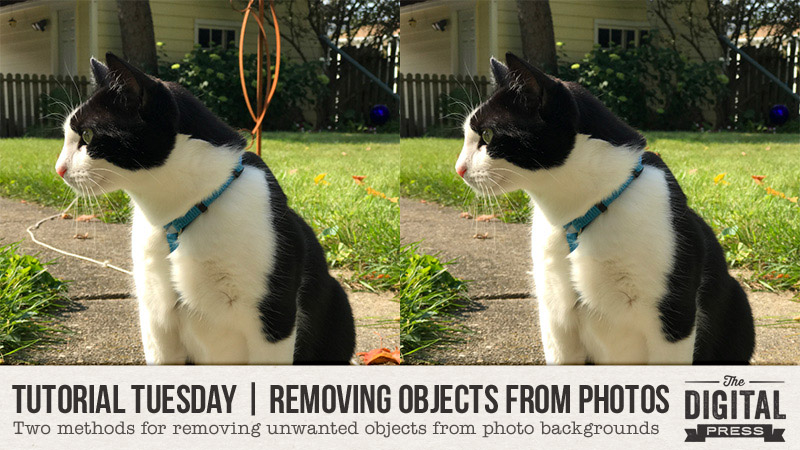
And voila! Your object disappears and Photoshop smartly fills in the space using samples from the surrounding area. Take a look below; on the left side, you can see what the image looked like before… and on the right, you can see I’ve taken out the metal structure and the leash…

It’s important to note that there will occasionally be a couple of places that need to be “cleaned up” where Content Aware doesn’t do a perfect job. For example, the cat’s paws didn’t come out quite right after I removed the leash from the background, using the method above. I’ll use Method 2 to fix this up…
Method 2: The Clone Stamp Tool
Step 1: From the toolbar, choose the Clone Stamp tool. It looks like this —> ![]()
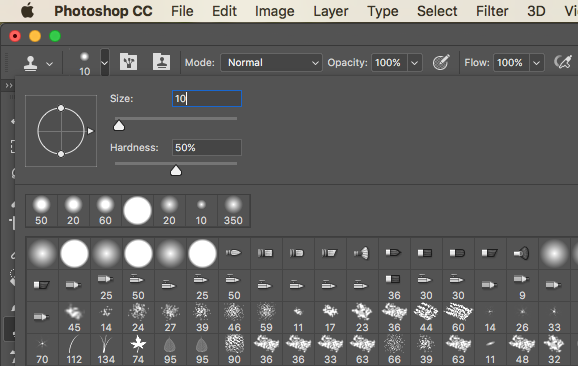
From the options panel, choose a brush size that is appropriate for the area you’re fixing. If you’re removing a larger item, you can choose a larger brush. If you’re fixing up an edge, I like to use a 10 or 20 pixel brush. I like to set the hardness to about 50% so you end up with a blended edge and not a stark and obvious contrast…
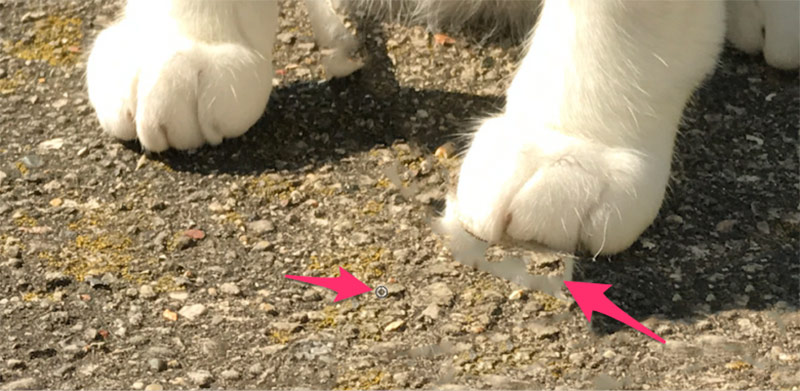
Step 2: Holding down the ALT key (PC) or the OPTION key (Mac), click in an area of the photo from which you want to sample the replacement. You will see a little crosshairs circle icon to know that you’ve got it right. I usually try to choose a part of the image that has some amount of random texture or grain so that it still looks natural.
Step 3: Next, release the click and “paint” in the area you want to replace. Photoshop will copy the image from where you set the anchor… and then paint into the area you’re fixing with the other part of the photo…

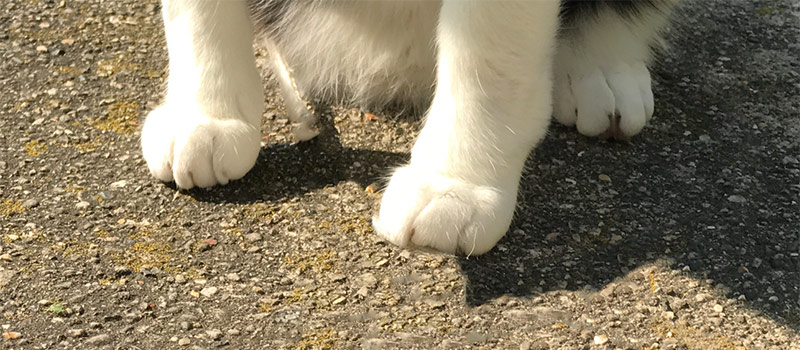
Result: With a little practice and variation of brushes, you can see the result…
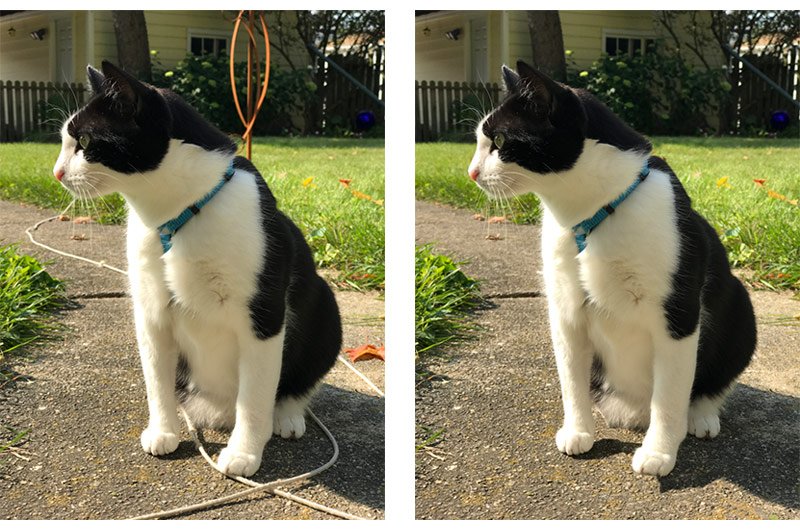
Here’s a look the complete “before and after” of this image, after using both methods. You can tell what a big difference it makes!
Hopefully these two techniques will help you fix up your photos more easily. Happy editing!
 About the Author Shannon has been completely addicted to digiscrapping since she began in early 2016 (though she’s been a scrapper since 2000). Her early morning ritual of a few quiet hours of scrapping while sipping a chai tea is her favorite part of each day. She is also the owner of a web design company, and when she’s not at the computer designing websites or digiscrap layouts, she’s probably hiking one of the local mountains in her hometown of Phoenix, Arizona. She is an avid reader and loves to travel to foreign countries.