Hello, and welcome to another edition of our Tutorial Tuesday series here on The Digital Press blog! Today, I’m here to share some tips and techniques for protecting your privacy when you share your digital layouts online (both in galleries and on social media sites like Instagram and Facebook, etc.).
So many of us go to great lengths to protect our privacy — shredding anything with our names, addresses, or credit card numbers… or using screen names instead of real names, etc. — but not everyone goes to those same lengths to protect their own privacy in public scrapbook galleries or on social media (or maybe even realizes that personal information is being shared for anyone to see). I know this is a very sensitive subject, and there are a multitude of opinions out there, but this tutorial focuses on techniques for protecting privacy — yours, your family’s, and also that of people you don’t know who may have inadvertently ended up in your photos or as part of your story — whenever you publicly post your digital layouts online.
First up, a couple of words on privacy, and what you ethically can and probably should not do. You can post any of your own information, details or photos – up to and including as much personal detail that you want. I’d say you can make this decision for your own immediate family too. You probably should not post identifying information or pictures of other people, and if you decide you are going to post information or photos about other people, you can easily avoid a potentially sticky situation by checking with them first. There are many reasons why people don’t want their name or face posted online without their permission, and accommodating those requests is not only courteous, but in keeping with the posted rules of many online galleries, including the gallery here at TDP.
Let’s start with about journaling. I suppose the easiest way to protect privacy is just to leave out the salient details – exclude names, dates, places and any other identifying details. But this kind of defeats the purpose if you scrapbook for memory keeping and you want those details recorded permanently. One option is to save and print your layout with the complete journaling, but post a modified version to the public galleries. In this scenario, there are many different ways to proceed. First, assign aliases or nicknames to people or places in your journaling. Second, use your original journaling, but obscure the pertinent details. There are several different techniques for hiding words or otherwise camouflaging your journaling that we’ll go over here:
- use the Smudge tool to smear individual words (most commonly names and places);
- use the Brush tool to “line out” words (those redacted military documents come to mind);
- copy your text layer, then either flip it horizontally or apply a blurring filter.
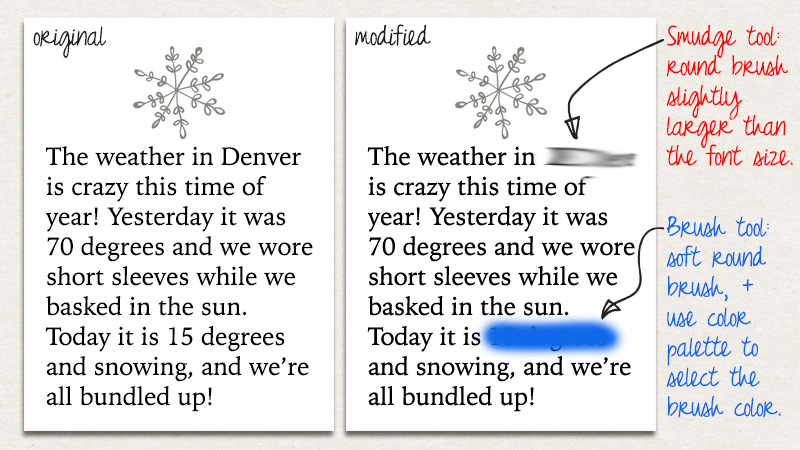
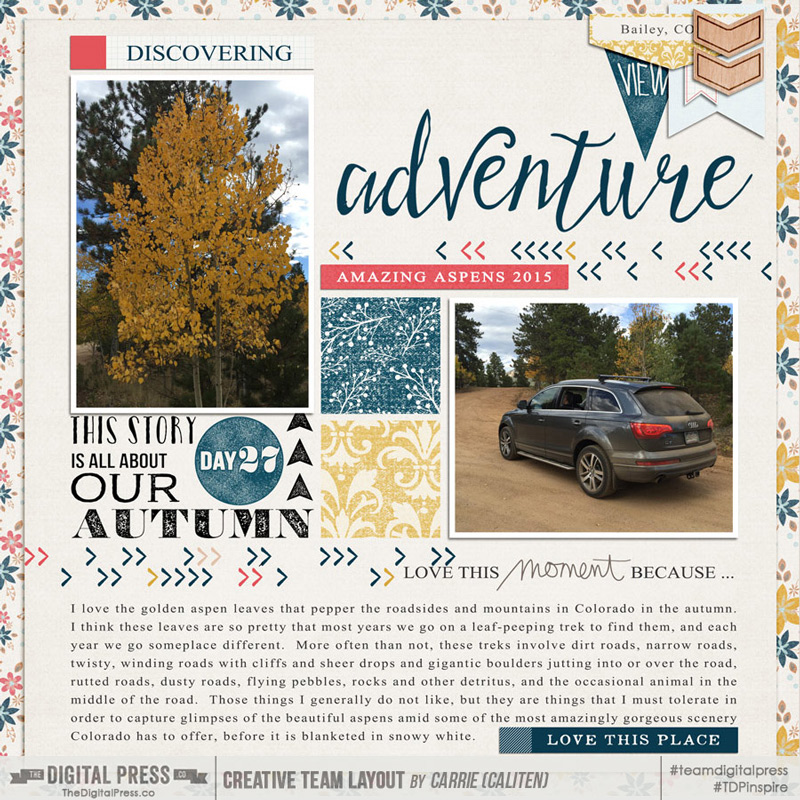
Let’s take a closer look at each of these. First up, the Smudge and Brush tools. The Smudge tool icon looks like a finger pointing toward the lower left corner. Select that tool then choose a round brush and change the brush size to something slightly larger than your font size. I prefer to modify my journaling before flattening my layout into a single layer, so at this point I rasterize my text and work on that layer. You can run that smudging brush back and forth over the words you want to obscure using the mouse, or you can click on one end of the word, push the shift key, then click on the other end of the word to get a perfectly straight line between those two points you clicked. In the image below, I applied the smudge brush twice to the word Denver (in the journaling on the right). This technique is the most commonly applied privacy protection technique I’ve come across in the TDP gallery.
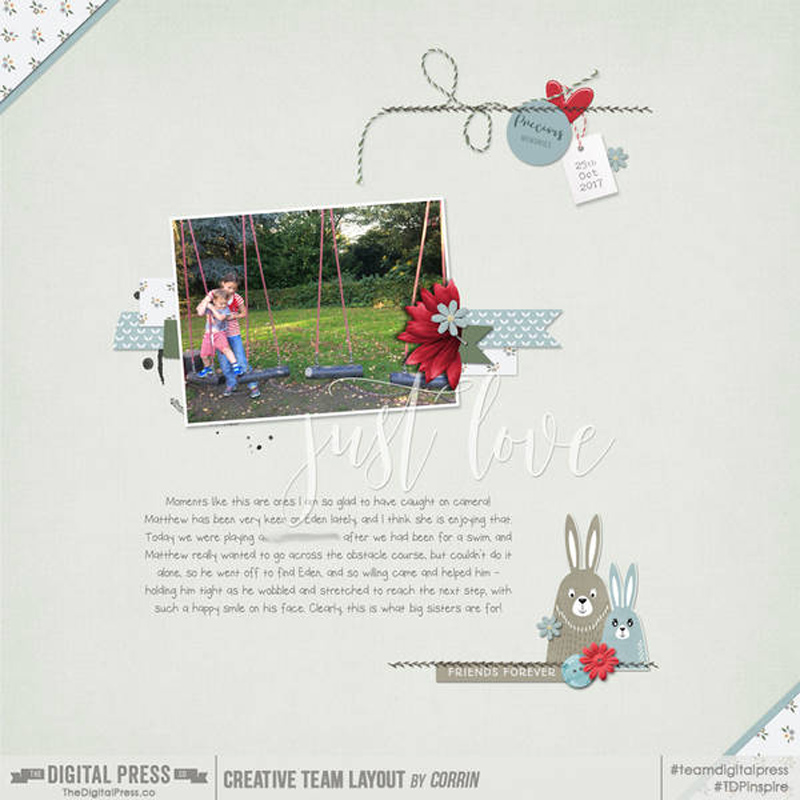
The smudge technique is probably the most commonly used one for removing pertinent details from journaling. In the example below, TDP CT member Corrin smudged out a place name in the middle of her journaling.
The Brush tool, which has an icon that looks like a paint brush, can be used to line out or redact words, or, if you’ve got a uniform background color, “erase” selected words from your journaling. Your text layer does not need to be rasterized to apply this technique. Select a color darker than your text to make the redaction obvious (like the blue in the example above), or a color that matches your background layer to make it look as though the selected words have been erased. (Note that this same technique can be used to highlight words in your journaling; just put the brush layer under the text rather than on top of it.) Both the smudge and brush techniques are useful when you only want to obscure a handful of words. These techniques can get time-consuming for removing more than a few words though, and there are easier techniques to apply to entire journaling blocks.
The third technique, useful for obscuring large blocks of journaling, includes copying and modifying your journaling layer. In the image below, I show two different techniques that can be applied to entire text layers – the horizontal flip and the blurring filter. To use the text-flip method, simply duplicate your journaling layer, then, with that new copied layer selected, click Edit from the top menu bar, then Transform, and Flip Horizontally. Don’t delete the original layer. This creates an effect like the one shown on the left side of the image below. This technique works well for scripty fonts, or fairly consistent and wide leading (spacing between the letters). You can see in the example below that some words are still legible, which may or may not be the desired effect.
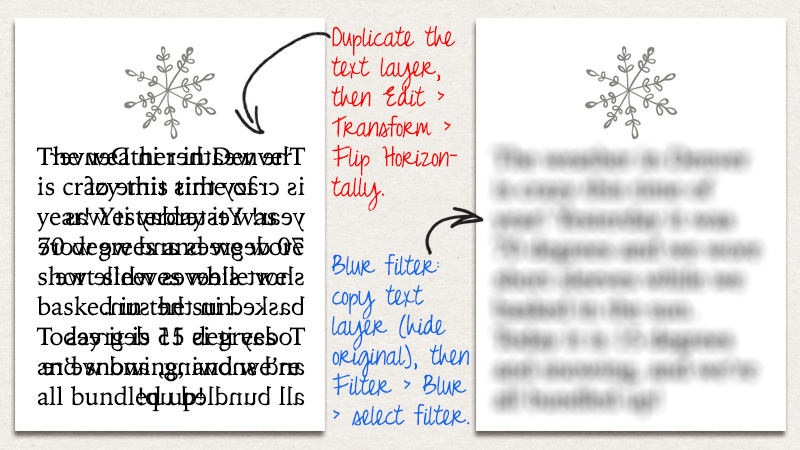
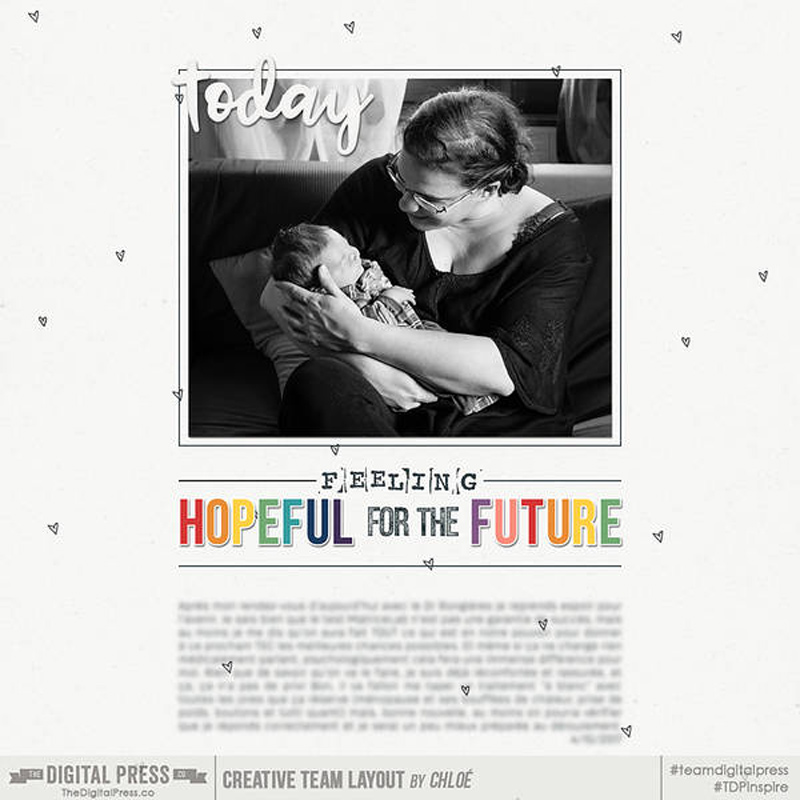
The final technique to obscure journaling is to blur all the text sufficiently that it cannot be read. To use this technique, first duplicate the text layer and rasterize it. Delete or hide the original text layer. Select the rasterized text layer, then select Filter from the top menu bar, then Blur, and choose from one of the myriad different blur techniques. The example below shows a 10-px Field Blur, but the Gaussian blur also works well and is a favorite of several members of the TDP CT. The blur filter is useful when you want all the journaling obscured, but still want to include it for placement on your final page.
TDP CT member Chloe applied a blur filter to her entire journaling layer in this example:
Other, non-destructive techniques for obscuring journaling include using a small font size (I prefer 10-pt font on my printed 12×12 layouts, but that often makes my journaling hard to read on screen), journaling in a color that is very close to the background paper color, or reducing the opacity of the journaling layer, and covering all or just crucial parts of your journaling with digital elements or photos. The possibilities seem nearly endless, but at the end of the day, protecting personal information, identifying details or routines is the name of the game here.
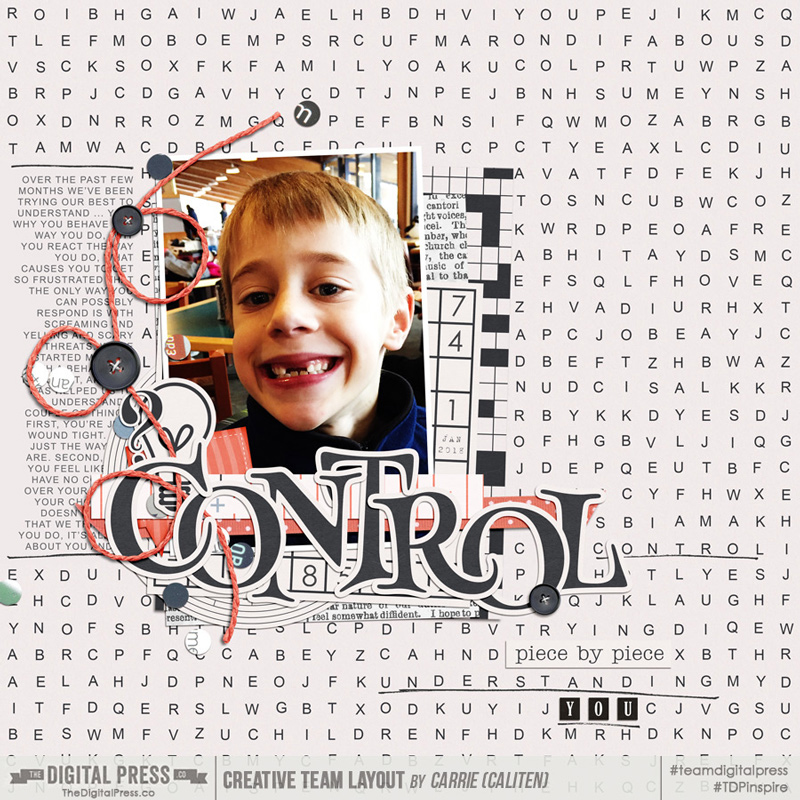
In this example, I used strategically placed elements (a button and some confetti) to cover up parts of the journaling that I didn’t want exposed.
Now let’s talk about photos. Protecting privacy in images may be something you’re more familiar with, but may not think to apply to the photos on your layout. From my experience, some people are more diligent about not showing their face online than they are about sharing personal information. For our purposes here though, we’ll include faces and any other unique identifying details, such as tattoos, license plates or car registration details, parking or access decals on vehicle windshields, and school or other establishment logos. There are times when it’s easy to just strategically crop your photo(s), or cover part of the image with an embellishment, journaling card or cluster, but also times when that just won’t work. Let’s focus on those latter cases. The techniques for obscuring these details in photos are similar to those discussed above for journaling: smudging, brushing, or applying a blurring filter.
To apply smudging to a photo, simply use the Smudge tool as you would for journaling, and go over the detail you want obscured. (With a small brush, this technique also works reasonably well for removing unsightly forehead wrinkles!) To use the brush technique, create a new layer, then select and apply a small brush area over the detail that you want hidden. I applied this technique in this layout of mine below to obscure the numbers and letters on the car’s license plate.
Probably the most common technique for masking faces that I’ve noticed in the TDP gallery is using a blur filter on a small shaped mask layer. To do this, create a new layer, then make a small oval to cover the face. Ensure that the layer is similar color to the background (this technique is far less noticeable when applied to black and white images), rasterize it and apply a blurring filter (Filter > Blur > ….). If you have the time or inclination, you could also do a photo extraction (wherein you make a copy of your photo, and mask out all but the part that you want to have in focus), and then blur the background using a blur filter.
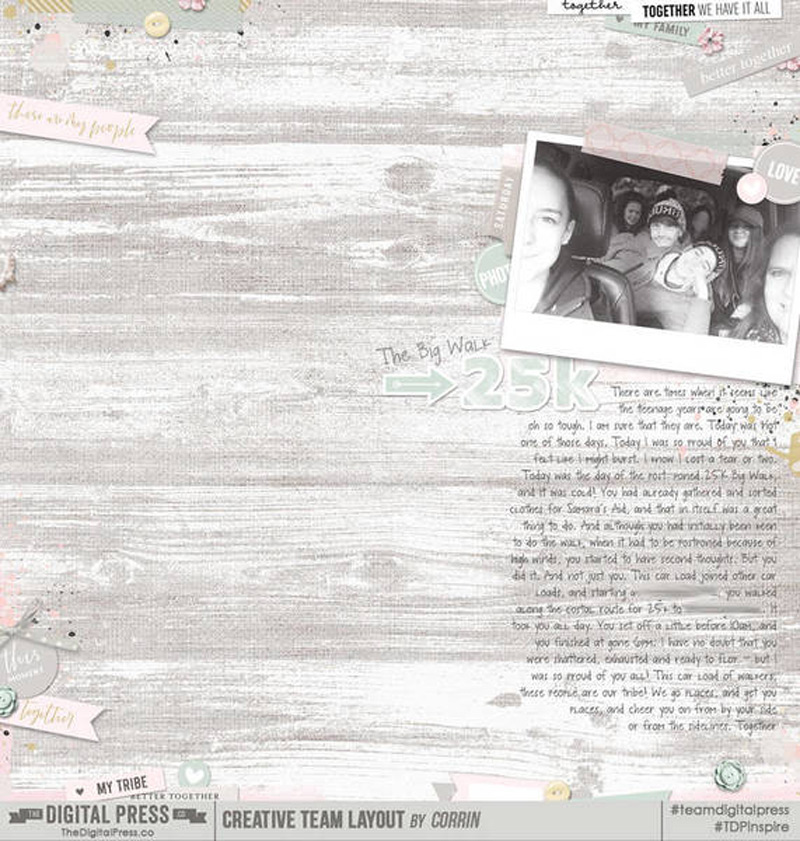
In this example, TDP CT member Corrin very subtly blurred one of the faces in the photo on her layout, below. Using a black and white photo really helped to draw attention away from that one blurred face.
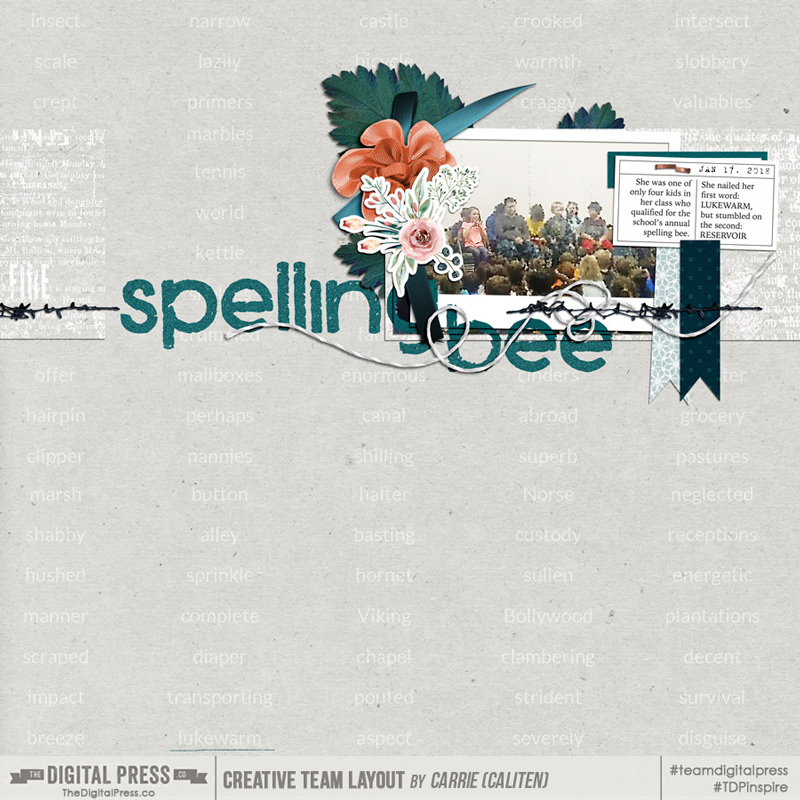
And lastly, in the layout below I used a picture grabbed from my kids’ elementary school web page. It was a grainy photo to start with which really helped the blurring mask to blend in. After placing the photo where I wanted it on my layout, I duplicated the photo layer. On top of the top photo layer, I created a new layer with an oval mask that only included the little girl in the orange shirt (she’s mine, and has given permission for me to show her unblurred in the photo), and moved it below the top photo layer. I sharpened the photo, applied a color filter, and clipped it to the oval mask layer. Then, on the original (bottom) photo layer, I added the same color filter then applied a standard Photoshop blur filter. This particular one was Pixelate > Crystallize.
Protecting privacy in public galleries is a personal choice. Here we covered a handful of techniques for obscuring pertinent information in your journaling and faces or other identifying information in your photos. If this is something you do regularly, or something you’re now considering doing, I hope that you now have a new technique or two to try.
 About the Author Carrie is a creative team member here at The Digital Press. She and her family enjoy spending time outdoors, year-round, near their home in Colorado. In addition to scrapbooking and the occasional hybrid home decor project, Carrie also reads voraciously, accumulates fabric, makes soap, brews beer, grows hops, and tries to keep indoor plants alive.