Hello everyone, and welcome to another edition of our Tutorial Tuesday series here on The Digital Press blog! Today, I’m going to teach you how to use smart objects in managing your layers within Photoshop.
Have you ever found yourself needing to sit back and take a break in the middle of a creating a digital masterpiece in order to contemplate the “how do I do that?” question? I have. Of course, with digital techniques, there’s often more than one way to approach something (gotta love digital!). I ran into a dilemma while working on a page recently, and then had an ah-ha moment; the solution to my problem was the use of smart objects.
Smart objects are layers, just like any other layer that you might use in your layers palette in Photoshop… except that they always retain the original data and file properties, no matter how you alter them. Alterations to smart objects (like changes in hue and saturation, addition of filters, warping, or resizing) are non-destructive… as compared to destructive (permanent) edits like flattening, simplifying, or rasterizing. For example, you can shrink a smart object… save it… and enlarge it again — without losing any of the original picture quality.
You can also treat smart objects as mini layouts embedded within a larger file. That’s how I wanted to use them. (I’ll be using Photoshop CC in this tutorial)
Let me start by explaining the look I was trying to achieve. A photo in a horizontal rectangular-shaped frame, with another photo also in that shape, but clipped to a mask. So, clipping a photo… to a mask… to a mask… that has a photo! Confused?
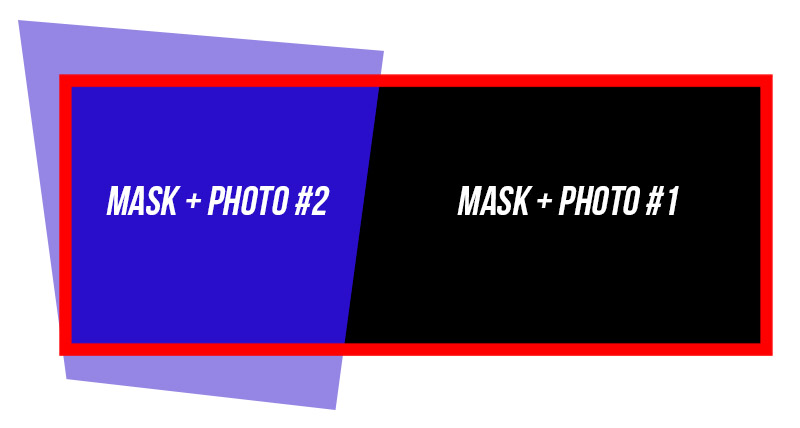
What I was trying to figure out was how to combine two mask-clipped-images into one. In the example above, imagine the red line is my photo frame, and the blue mask/photo combination extends beyond the edges of the frame. The lighter blue portion is what I want to hide or remove.
Remember how I said there are usually multiple ways to tackle problems in digital scrapbooking? Sure, I could have masked off the excess and painted it away, or I could have simply chosen a different mask shape in the first place. But, no. Of course, I couldn’t do that. I have a bad habit of challenging myself — and heaven help anyone who says I can’t do something!
So, let’s jump back to smart objects and the idea of layouts embedded within layouts.
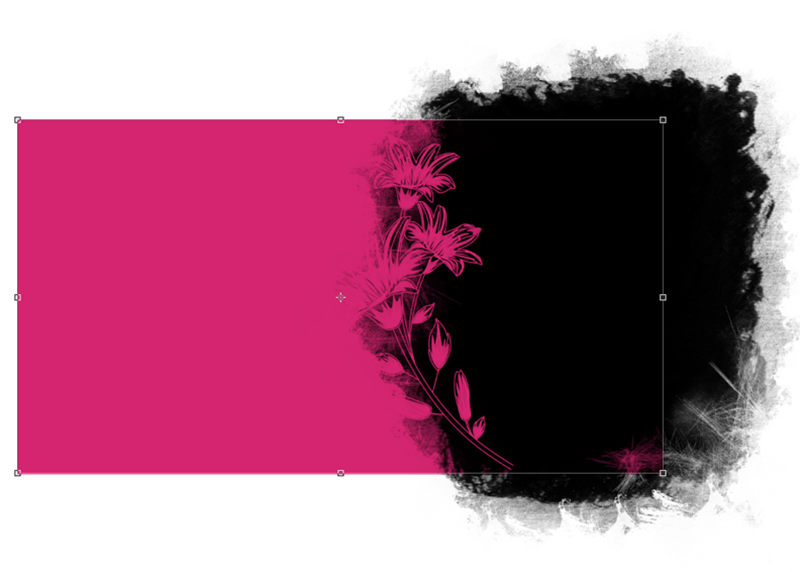
The pink rectangle is the size I needed everything to be, so it would fit within my selected photo frame. However, I really liked the edging on the mask and wanted to include that as a design element. One photo on the pink section, and one on the black mask – but both in the rectangle. Here’s a step-by-step guide on achieving this look. If you’re not using smart objects, this is a lot easier than it looks, trust me! *wink*
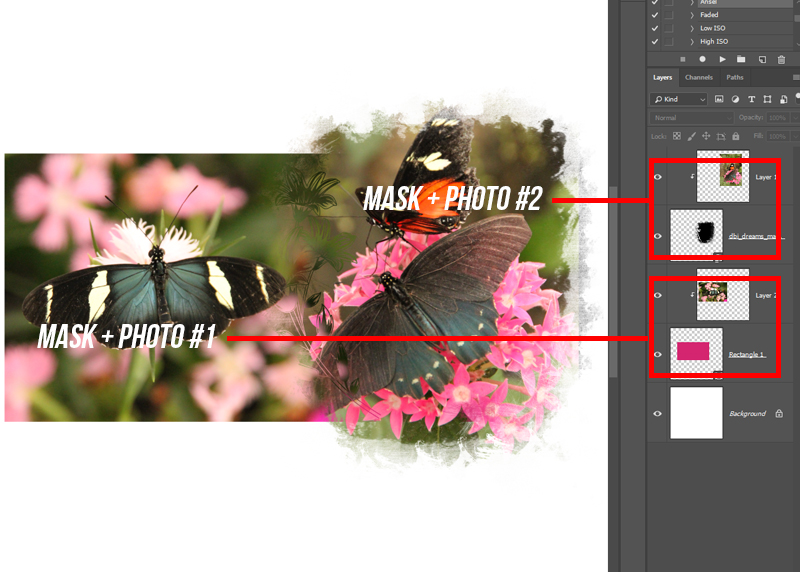
Start by clipping the pictures you would like to use to the shapes or masks. At this point, your layers palette will look “normal” by all accounts…
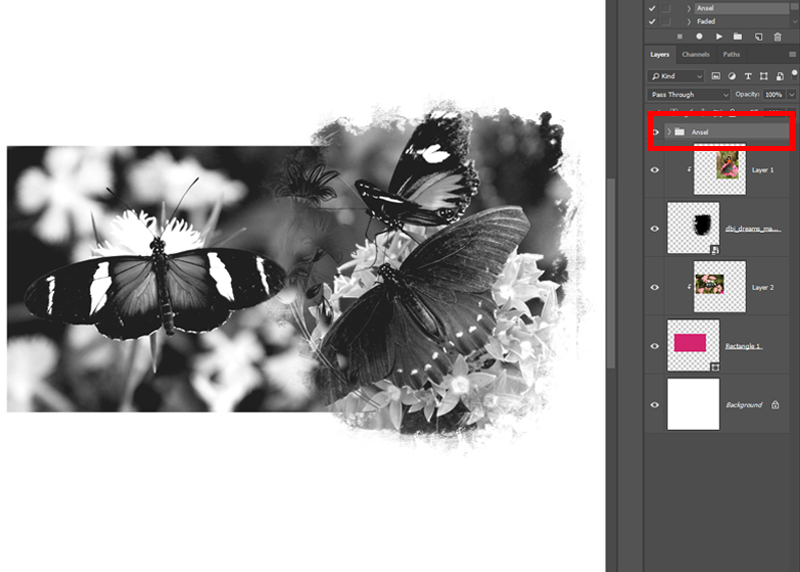
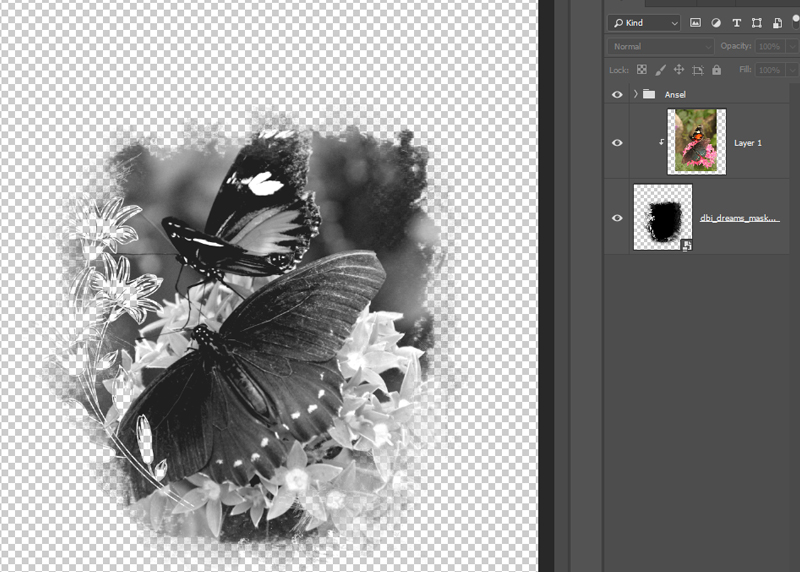
To help delineate the masked images, I converted photo #2 by clicking on that image and running a black and white action (the action I used is called “Ansel,” if you like it). Because the action has been added at the top of the layers palette it turned everything below it – all the way to the background layer – black and white. That’s okay, for now. (Secretly, I kind of like this version, too!)
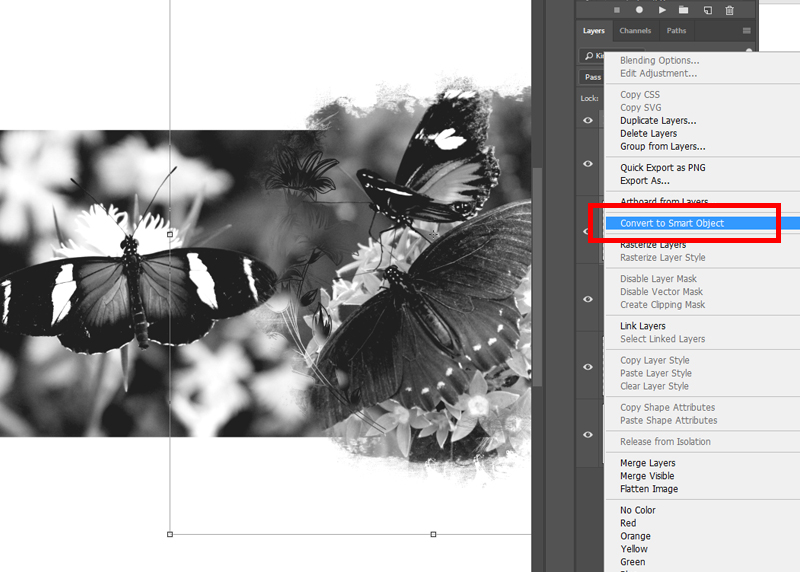
Enter Smart Objects! Select the action layer, photo #2 and its corresponding mask, then right click (in the layers palette) and select Convert to Smart Object…
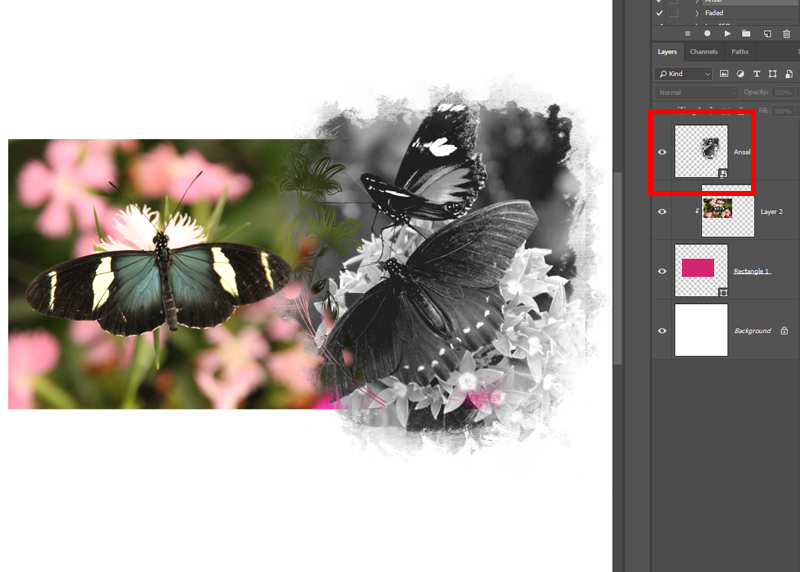
Stop for just a minute and look at how the layers now appear. The three layers of photo #2 (the action, the the image, and the mask) have become one. If I had simplified or rasterized the layers, merging them together, I would have a black and white image in my mask shape… and that would be all. It would not be editable any more.
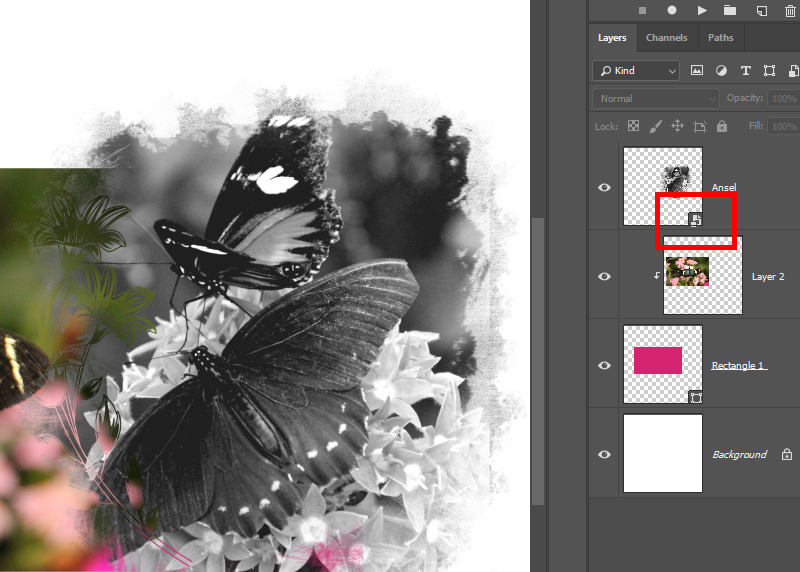
Take a closer look at the thumbnail in the layers palette, though. I encourage you to open up Photoshop and look at your own layouts, too, especially if you drag ‘n’ drop files into your layouts. In the lower right-hand corner of the thumbnail is what appears to be some mini images layered on top of one another. Double-click on them — I dare you.
This is what you’ll see…
Um. #mindblown
Remember at the start, I said to think of smart objects as layouts within layouts? When you open up a smart object, as I did here, all of the original layers are available. You can edit them in any way you wish. I could change out the picture, use a different mask, hide the black and white action – or change it altogether. When I close the tab or file, it will update back to the main file — the one this mini-layout is embedded in…
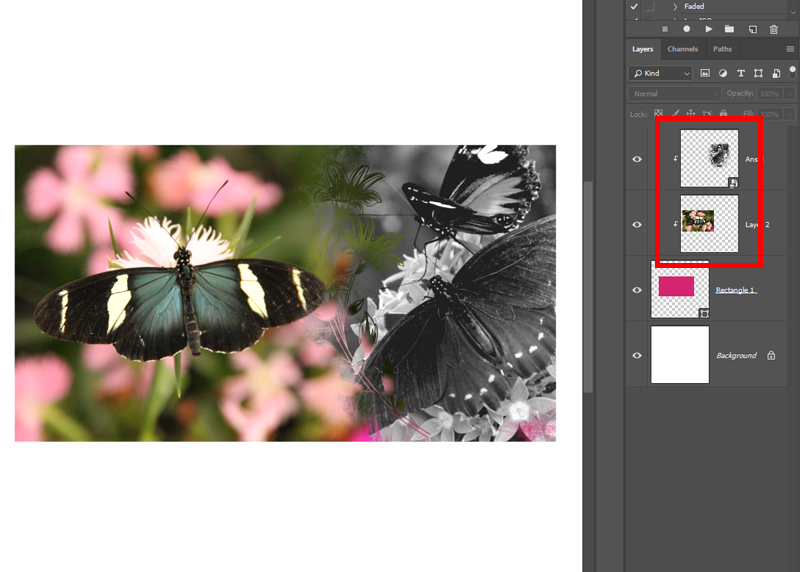
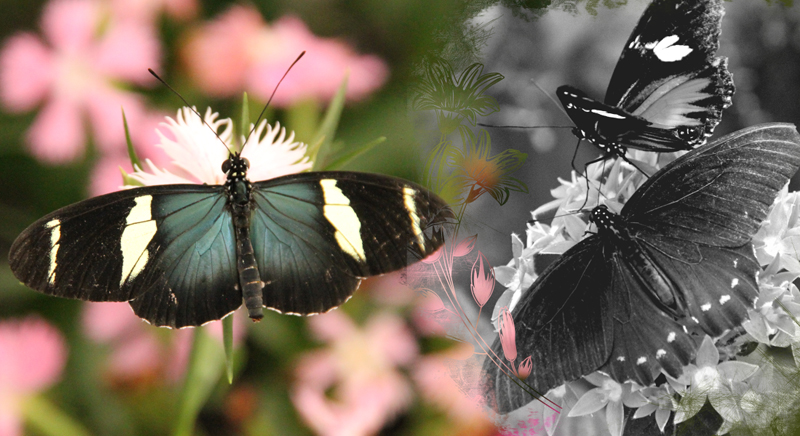
I can now simply clip the smart object layer to the one beneath it — and both images, the original, color butterfly, and the black-and-white-clipped-to-a-pretty-mask one have blended together and taken on the shape of the rectangle. Because the smart object layer has everything nicely bundled together, I can resize things, move them around, and play without destroying any of the original pieces. I made a few adjustments, including changing the color of the underlying rectangle shape (to help it blend in a bit more in sections where it was bleeding through from the smart object’s mask). Here’s the finished image…
I’ve shown just one way I use smart objects… but there are so many more. Let’s take title work, for example. Say you’ve created an awesome title, with alphas or fonts, paint, masks … anything really … and it’s a lot of layers, just by itself. If you convert that grouping to a smart object you can (1) move it around as a single piece, without having to worry about locking and unlocking layers, (2) resize it without any loss of pixelation, and (3) most importantly, open it up to make non-destructive changes.
I hope you’ll give smart objects a try. They are great tools to add to your digital scrapbooking arsenal!

About the Author Kat Hansen is a creative team member here at The Digital Press. A Director of Human Resources by day, she loves the opportunity to spend a few hours each evening being creative. Vacation memories feature pretty heavily in Kat’s scrapbooking pages, as well as her health and fitness journey. Kat has quite the sense of humor (she “blames” her father for this), which she incorporates into her journaling and memory-keeping.