Hello everyone, and welcome to another edition of our Tutorial Tuesday series here on The Digital Press blog. Today we are going to talk about getting in our own photos!! I know I know, most of us say there are a plethora of reasons NOT to get into the photo…. we haven’t fixed our hair, we don’t have on makeup, we think we have cellulite, we don’t like that outfit, etc., etc., etc., But I’m here to implore you to GET IN YOUR PHOTOS! One day, when we aren’t around anymore, our families will beg for pictures of us. They won’t care what we looked like I promise. Those vacations that we take?? Is there much proof that we went?? I swear my kids wouldn’t even know I existed when they look at some of my earlier photos. I was too worried about my appearance after having 3 kids within 5 years, so I never allowed my family to take my photo. Now I would love to have one of me holding a baby or being a part of the fun! So, I’m hoping to not only encourage you to get in your pictures but tell you how to do it as well!! Maybe if you find it easy to TAKE the photo, you will have the courage to be IN the photo 😊
So how do you take that photo? Well, let’s start with the basics – how the actual procedure works!
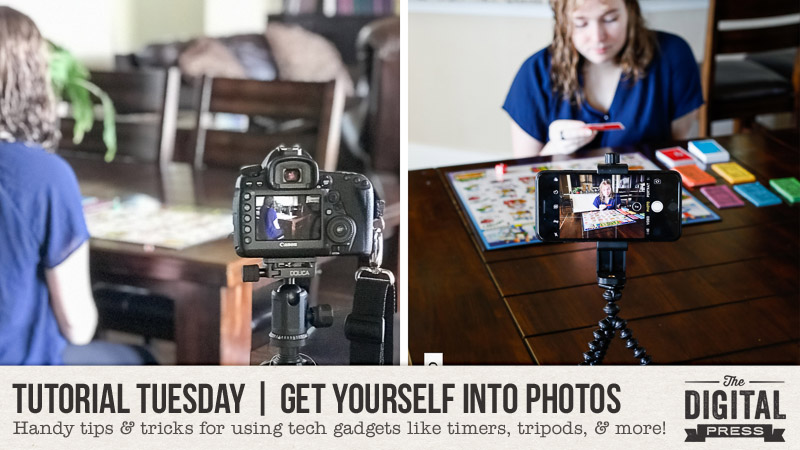
Stabilize the Camera
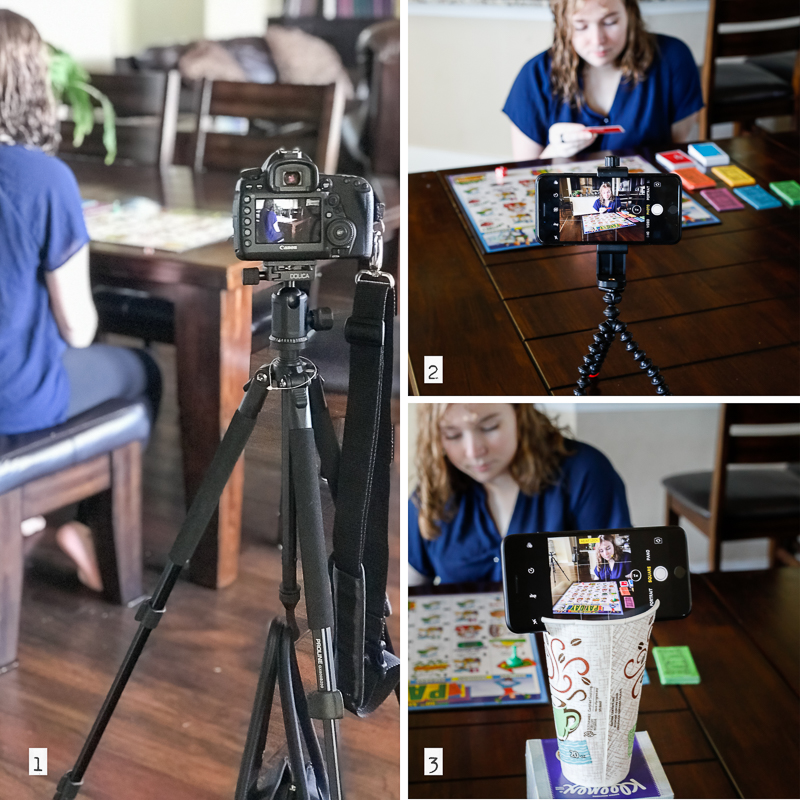
First, you’ll need your camera or phone to stay still while you are taking the photo – no jiggling allowed! You can use a tripod or a solid, steady surface to prop them on. I’ve been known to place my camera or phone on tables, on books, between jars, and even wedged between rocks. If you are using a tripod though, make sure it’s sturdy enough to support your camera. Often, they will have a hook in the center, so you can hang something heavy on it. I use my purse since it’s heavy enough it helps stabilize the camera. I don’t want the dog to accidentally knock it over! Below are some examples of how I have set up my camera and phone. In the first picture, notice my purse. In the second one I’m using my phone which has a dedicated tripod. It’s magnetic and flexible and is so easy to use it stays with me at all times! Now if you don’t have a phone tripod, it’s easy to make one from a sturdy cup. Google “DIY Phone Tripods” for even more options.
Focus
Next, you’ll need to set the focus. If you are taking a photo of just yourself, you can use a child / toy / large inanimate object and place them where you want the focus to be. Or, if you are taking photos with other people also in the frame, you can use them to set the focus. With DSLRs and point-and-shoots, you need to press your camera’s shutter button half way for autofocus. If you would rather use manual focus, feel free to do that instead. If you are using your phone, press and hold the screen where you want the focus to be until it locks in. The main point is that you set your focus before taking the photo. If you’ll look in photo #3 above, you can see that I locked the focus on my daughter’s face.
And a quick tip, if you are using a DSLR and are viewing the scene with your viewfinder (not in Live View), after you set your focus don’t forget to put your eyecover over the viewfinder so that light isn’t leaked in when you take your eye away. This will help you to avoid unwanted darkening of the photo. And if you can’t find your eyecover, you can use gaffers tape – just make sure you take it off as long term use can leave a sticky residue.
Taking the Photo
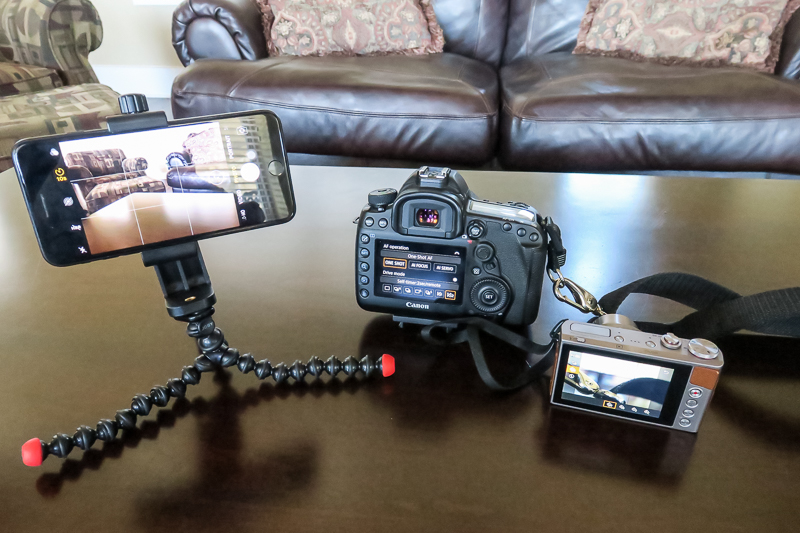
Now decide HOW you are going to take the photo. You have several options and you don’t have to spend a lot of money to use them. There are numerous choices such as self-timers, remotes, interval timers, and timer remotes! For instance, most cameras and cell phones have self-timers. You just decide how many seconds of delay you want to give yourself, press the button, and move quickly into the photo. I choose the greatest amount of time available (10 seconds on my phone) so I have time to settle before the shutter releases. Below you can see some examples of what the self-timer looks like on a phone and some different Canon cameras. Check your manuals to see where your self-timer is!
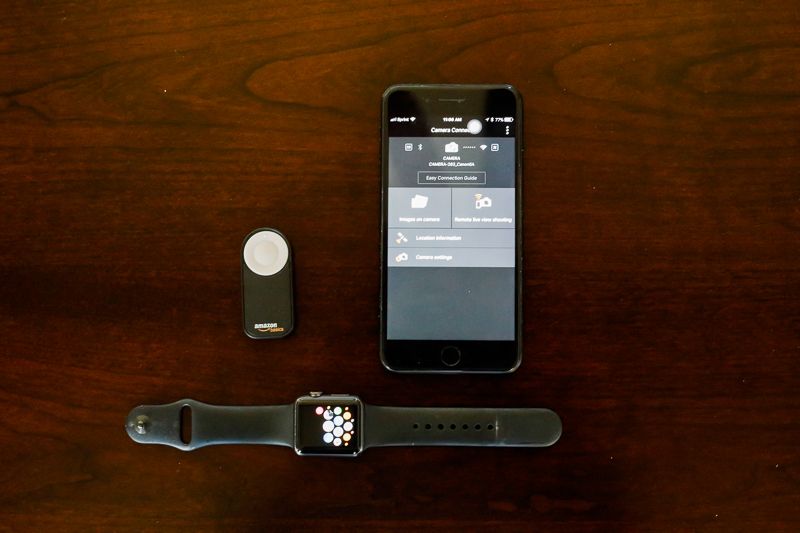
If you don’t like the “run quickly without tripping” scenario, you can use a remote. Remotes are quite inexpensive and can be purchased for most DSLRs. Just Google “(insert your camera here) Remote”, and you can find them at most camera shops and Amazon! They are easy to use since you can position yourself accordingly and then surreptitiously press the remote to activate your camera. No frantically getting into place 😊 If you use this method, try to set your camera on the 2 second delay so you have a chance to hide that remote. If you don’t have that option, position your hand so it’s not in the photo. Don’t forget, many DSLRs have the capability of using a phone app as a remote tool! I use my Cannon Connect App with mine. I set my camera to take the photo after a 2 second delay, then I get into position and use my phone to trigger the camera just as I use my hand held remote. The disadvantage to this is much like the remote, you have to hide it, but since my app lets me set the focus remotely, it’s worth it! Also, if you happen to have an Apple Watch, it too acts as a remote for your iPhone camera. There are so many ways to remotely trigger your camera and below are some few examples. You can see a basic remote from Amazon, my Canon Connect app, and my Apple Watch.
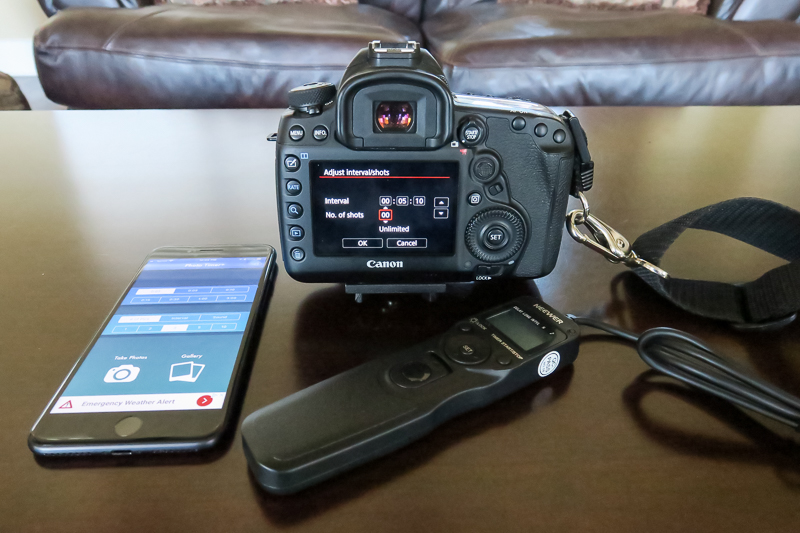
You don’t have to use a remote though. Another way to take the photo is to use your camera’s interval timer mode. You’ll need to check your manual on how to set it up, but if you have this option, USE IT! It’s by far the easiest way to take multiple pictures at a set interval so you have plenty of opportunity to get the photo you are looking for. It’s not just for DSLRs either. If you are using your phone, there are a multitude of apps that do this as well! For my iPhone, I use Photo Timer+. It’s free and easy to use. I usually select 5 or 10 photos with a 3 second delay between them, and I turn the countdown sound on if we are posing. This is one of many, so just do a search for interval timer apps for the phone. And for you Android users? Check your phones since many have interval timers built right in. Additionally, you can purchase an interval timer remote if your camera doesn’t already have one. Amazon has them relatively inexpensively and they are easy to set up and use. In general, I have to say this is my preferred method. I love interval timers because I can set the camera to do its thing and then just be in the moment with my family. On Christmas mornings, birthday parties, reunions, etc., I turn my interval timer on to take unlimited photos every few minutes. Then I place my camera into a corner on a tripod and walk away. Not every photo turns out wonderful as you can imagine, but I get enough good ones that I’m happy. Below is the app on my phone, my DSLR camera set up, and a interval timer remote too.
We’ve talked a lot about different ways to have your phone or camera do the work, but don’t forget the simplest method of all, allowing someone else to take your photo. This can include your kids too. It’s quite fun handing your phone or camera to them and seeing their joy when they are photographing you!
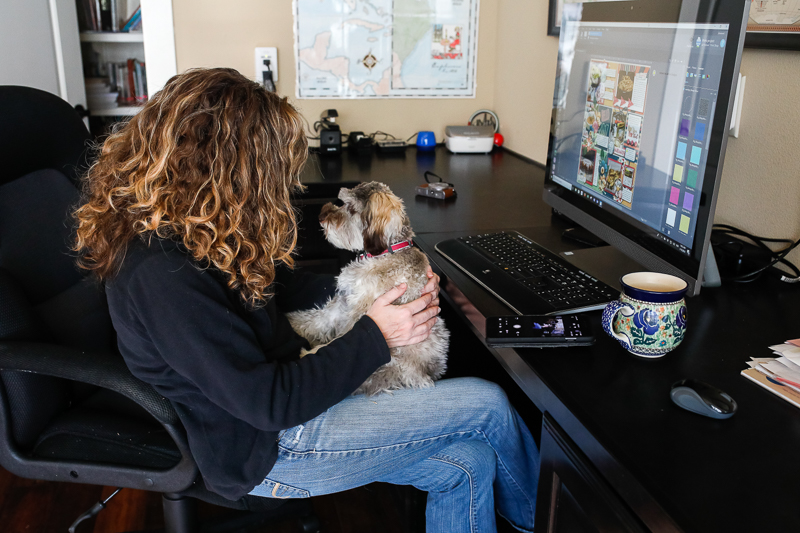
And just to show you that it can be done, here are two photos that I set up with the intention of being in them myself. It’s hard but my kids will thank me some day!

See how easy this is? Yes, not every photo will be to your liking, but the point is YOU ARE IN THEM! Truly, that’s what matters most. I promise you that YOU are the most critical person, not your friends and family. So, do yourself and your family a favor, and jump in those photos – messy hair and all. 😊

About the author Robin is a member of the creative team here at The Digital Press. A wife of 25 years and a mom of 4 crazy children (3 in college and 1 still at home), she says that her life occurs mostly in the car as she transports said crazy kids to their many, many homeschool activities. When not driving, Robin loves to make her family cringe by pulling out her camera again (and again, and again…).