
met·a·da·ta
ˈmedəˌdādə,ˈmedəˌdadə/
noun — a set of data that describes and gives information about other data
Clear as mud, right!? Basically it’s the additional information attached to all digital files. For example, most photo files have metadata included within the file structure — info that tells when the photo was taken/created, for instance… or the file type (JPEG, etc.)… and/or other technical information like what type of camera was used to shoot that particular photo. That information stays embedded within the photo.
Now… I imagine you are asking yourself, “how does that relate to my digital scrapbooking?”
One of the best and easiest ways to keep track of the credits for your layouts (i.e. the supplies you’ve used to create your layout or project; kits/templates/fonts/etc.) is by adding in the information into the layout’s metadata! Not only does that information stay with the layout (wherever it is saved, stored, moved, etc.)… but it is also easily & quickly accessible to copy/paste into galleries!
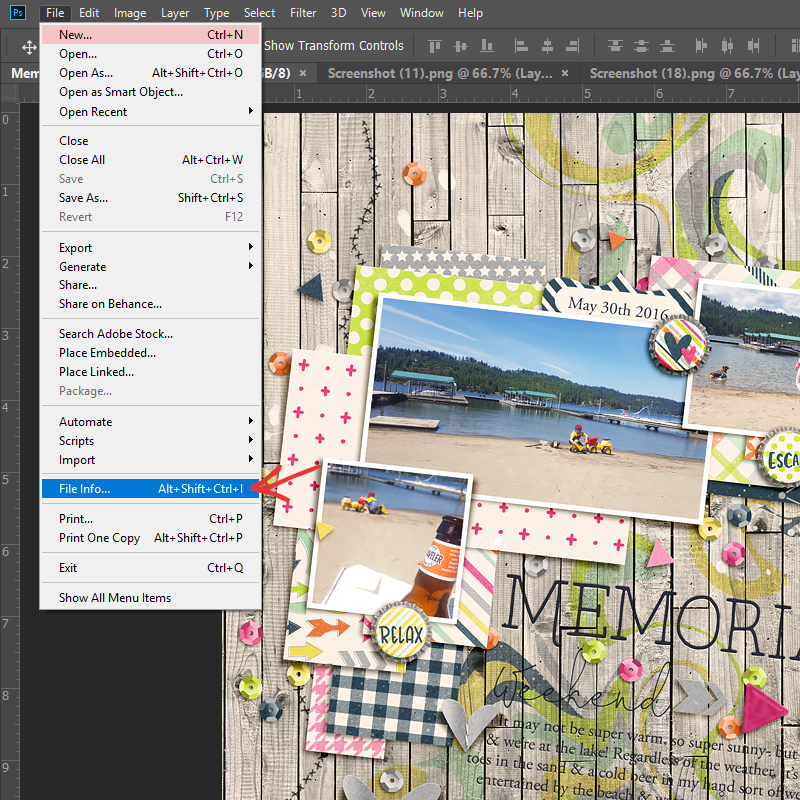
Here are a few screenshots demonstrating how I save my credits to each of my layouts’ metadata. First, to open the File Information dialogue box… select “File,” and then “File Info” (or use the Photoshop keystroke shortcut Alt + Shift + Ctrl + I)…
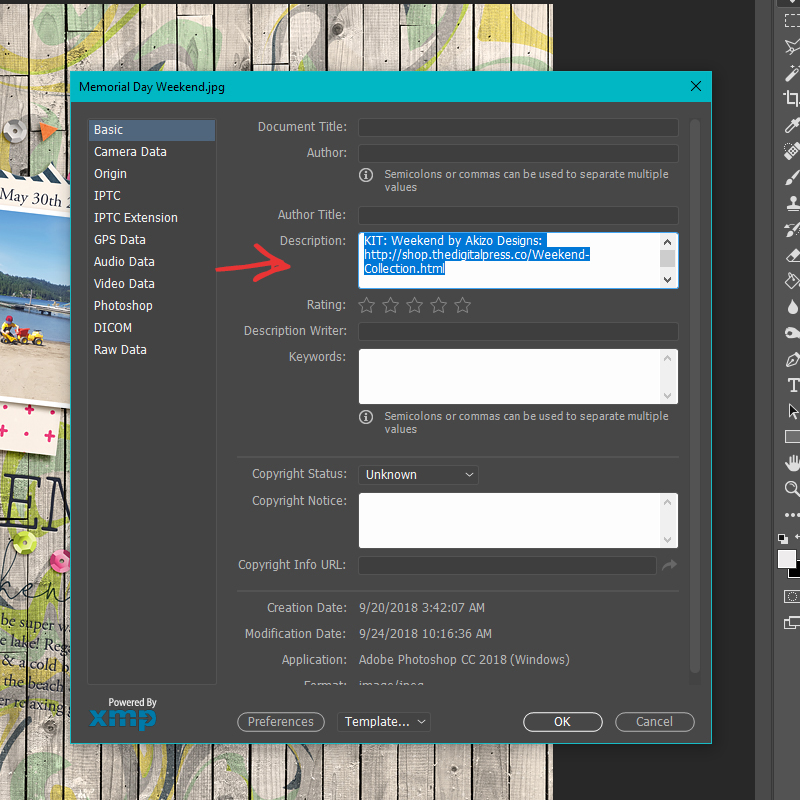
There is a lot of information stored here — and under the “Basic” tab is where we will type our information.
You are welcome to edit other fields if you wish, but all I do is fill in the “Description” box. I type in any product names (kit, template, etc.), as well as the actual links to the products in the shop (especially important for creative team members who are posting layouts into galleries)…
After entering the information, select “OK.” After this step, you’ll want to re-save your layout (to ensure the new changes to the metadata stay put).
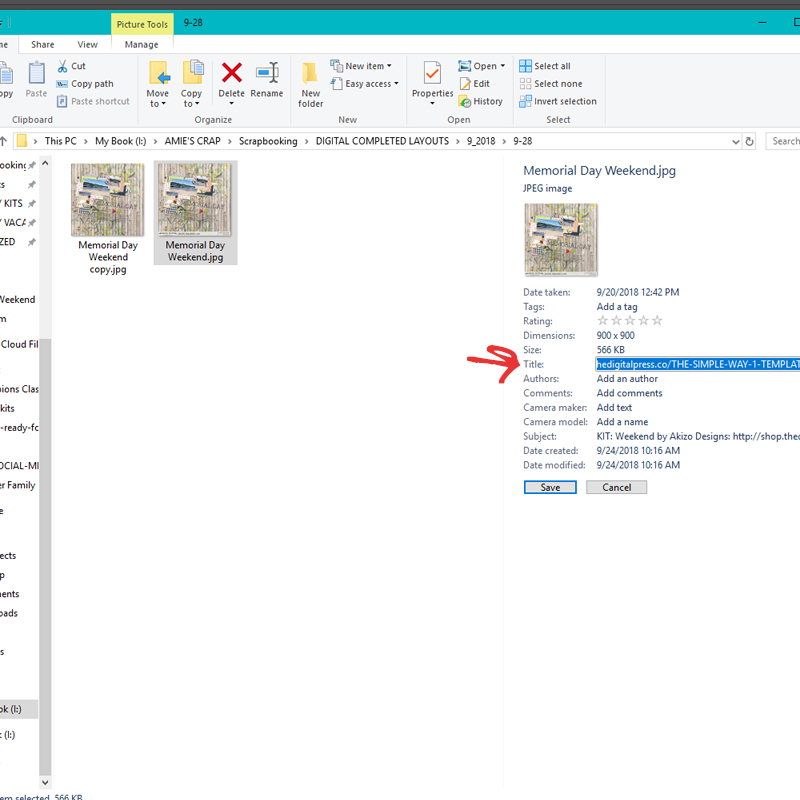
The coolest part about inputting the information here is that when you are posting to online galleries — you can quickly find it in your file folders. On my computer, I have it set up to show this metadata information on the right side of each file folder…
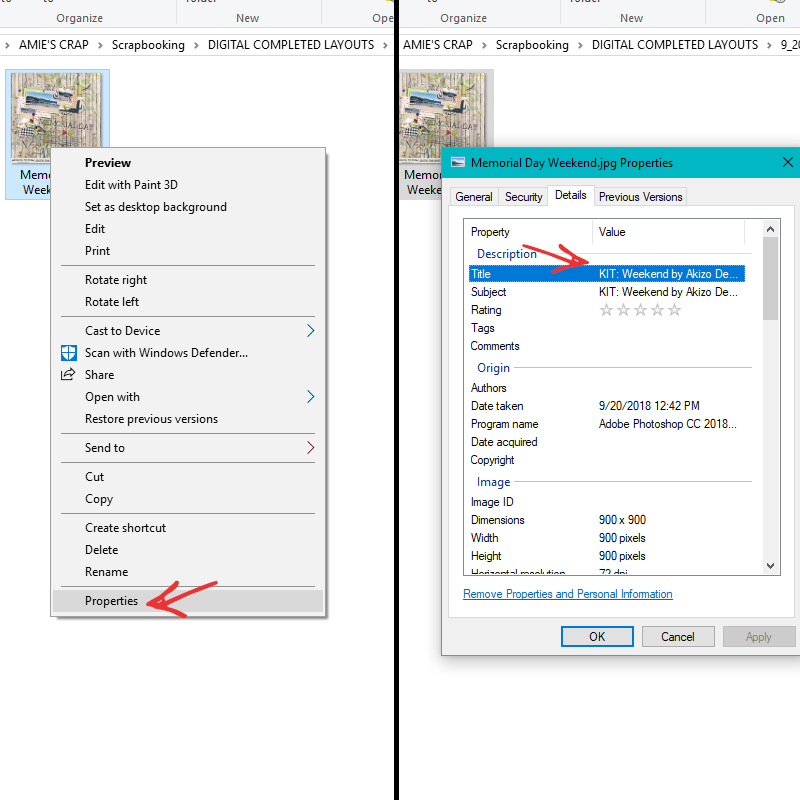
You can also get to the metadata info by right-clicking on your image & selecting “properties”. Under the “Details” tab, you’ll find your credits…
All you have to do then is copy & paste the info into the online galleries. Voila… you’ve done your good deed by crediting the fantastic designers’ products, while also ensuring that you have followed the rules for any gallery that might require credits to be listed! Win-win!
I have also found that when I am uploading my layouts to any of my Facebook albums, it automatically pulls the credits into the description box when the info is in the metadata. What a time-saver, right?! 🙂

I hope that taking this extra step becomes a habit for you, too, and that it eventually will become a huge time-saver when you are posting your beautiful creations into online galleries like the gallery at The Digital Press!
 About the Author Amie is a craft-loving dental hygienist who lives in Washington state. She loves her husband, her two crazy kids, and her English Bulldog… as well as coffee, baking cupcakes, daffodils, glitter & sprinkles, reading a good book, and lip gloss — not necessarily in that order.