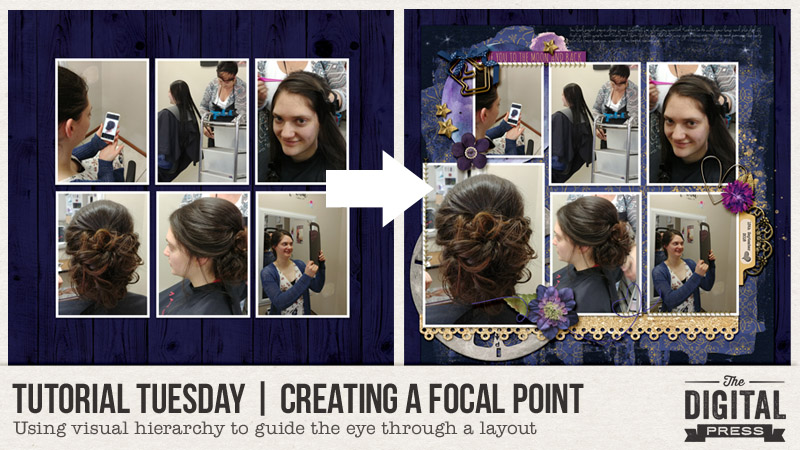
Hello everyone, and welcome to yet another edition of our Tutorial Tuesday series here on The Digital Press blog! Today, I am going to share a few very simple tips for creating hierarchy on a layout in order to create a focal point.
The definition of “hierarchy” by the Oxford Dictionary is: “a system in which members of an organization or society (or photos on a scrapbooking layout) are ranked according to relative status or authority.”
I love using multi-photo layout designs in my memory-keeping, as they give a great overview of the context of the photos as well as up-close details of the event. But the question becomes… how to include so many photos without them all competing too much for attention? How to focus on the most important part of the story?
For example, let’s use the following group of photos as an example…
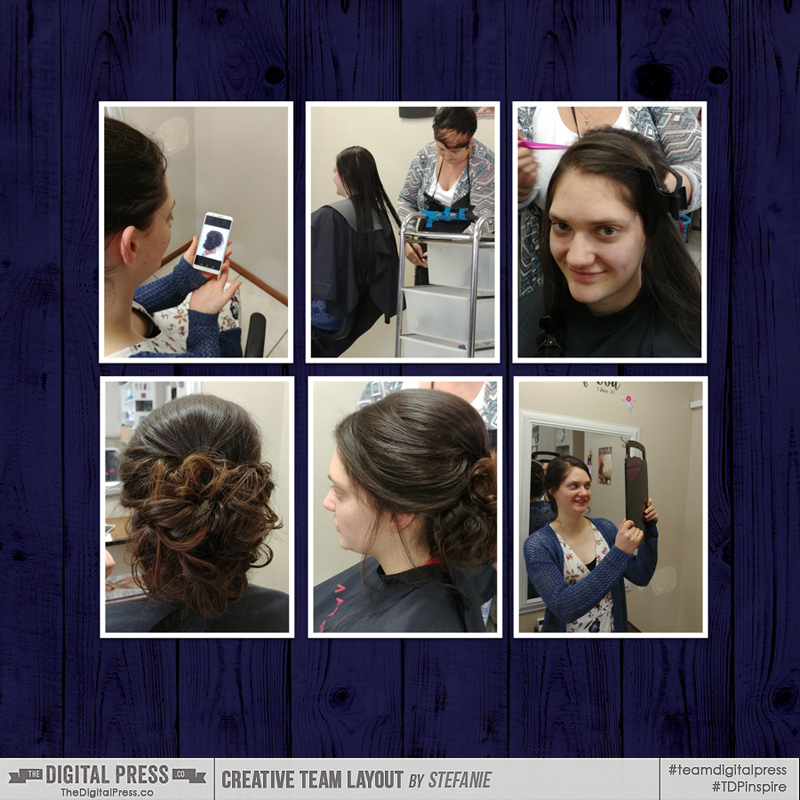
Step 1. Six same-sized photos will be “read” from the top left, across and then down to the second row… left to right… in our Western culture. But I want a way to cue the viewer as to which photo is more “important”…
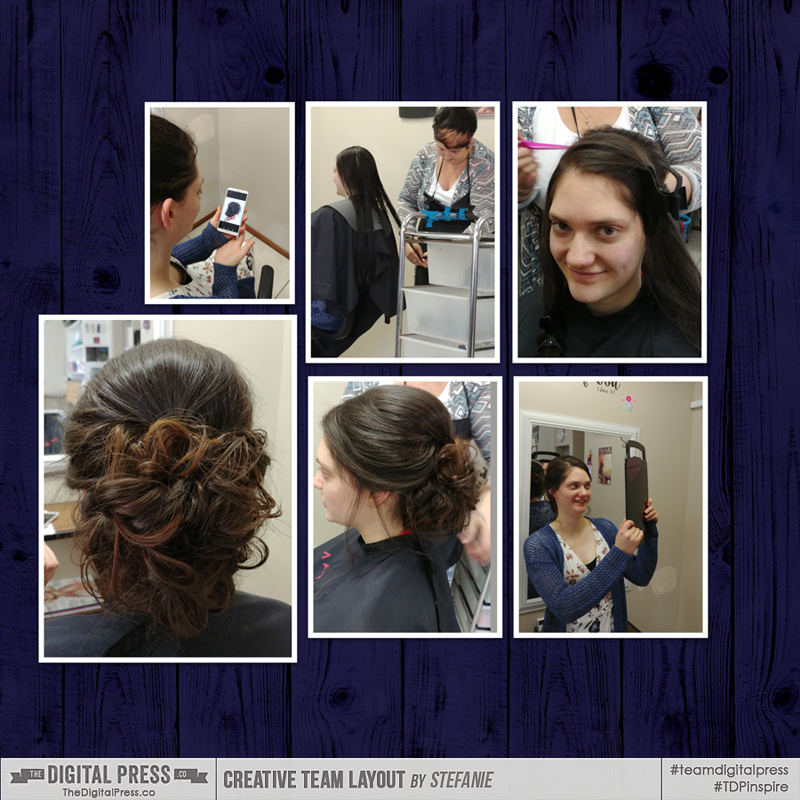
Step 2. As you can see, I experimented with making the first photo smaller and the “after” photo of her hair much bigger. Just by changing the photo size I draw more attention to it (in a similar way, keeping one photo in color and converting the others to black and white would create the same sense of hierarchy). Then, to cement the large photo’s importance, I add the embellishments, layering them to be eye-catching and to add a pop of contrast in the glittery gold border and the light viewfinder, which also contrasts as a circle shape below the rectangles of the photos. I also add a large flower to visually anchor the photo, and add a subtle cue to the colour of her Dance dress, finally adding a pop of dimension and movement with the floaty string.
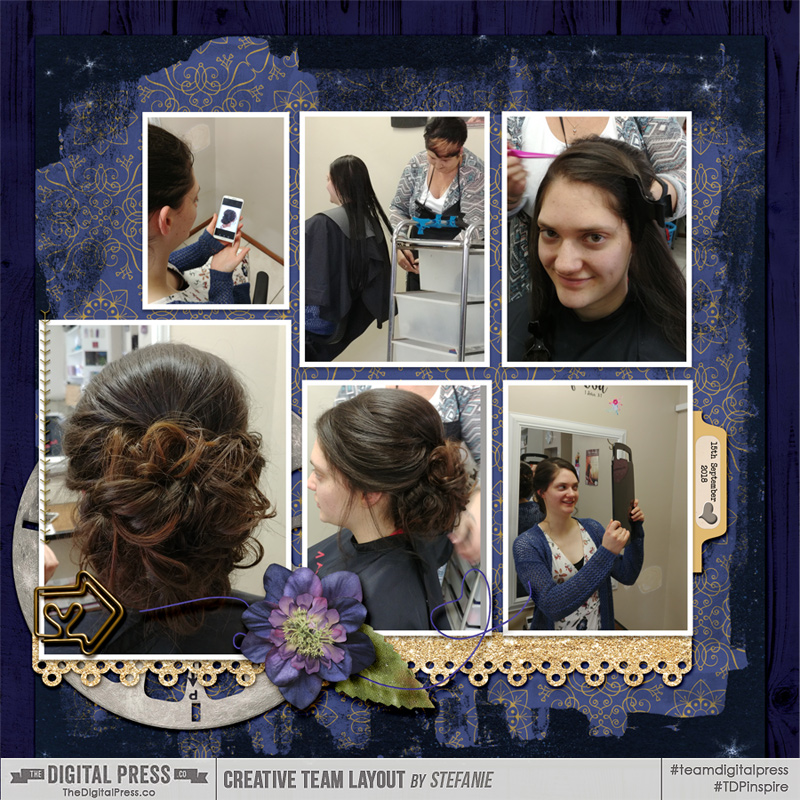
Step 3. I begin my second hierarchical cluster with the gold date tab. This is the final photo in the sequence, showing her delight at the finished view of her hair. I add some more gold wire elements to complete that visual triangle. A second smaller flower and layer some gold splatter under that cluster. The point of the heart faces into the photo.
Step 4. My third cluster at the top left is the entry point into the layout. I add the third circle element, the third pop of the pinky-purple in the wordstrip, and finally three spots of stitching. The third cluster is the least dense, made up of smaller elements… so while it serves as an entry point into the layout’s design, it does not steal any of the focus away from the focal photo.

Step 5. This is when I usually save the layout, make a cup of tea, and then come back to re-evaluate it later. At this point, I decide to move the paper clip into the top cluster and add a curled ribbon up there. This is pretty and plays off the curls within her hairdo. I add the journaling at the top of the layout in a white hand-written font so that the eye will now be led from the top left, through the top row of the photos, down to the date tab and then from right to left across the bottom row of photos. This solidifies the circular movement into the foundation of the design. 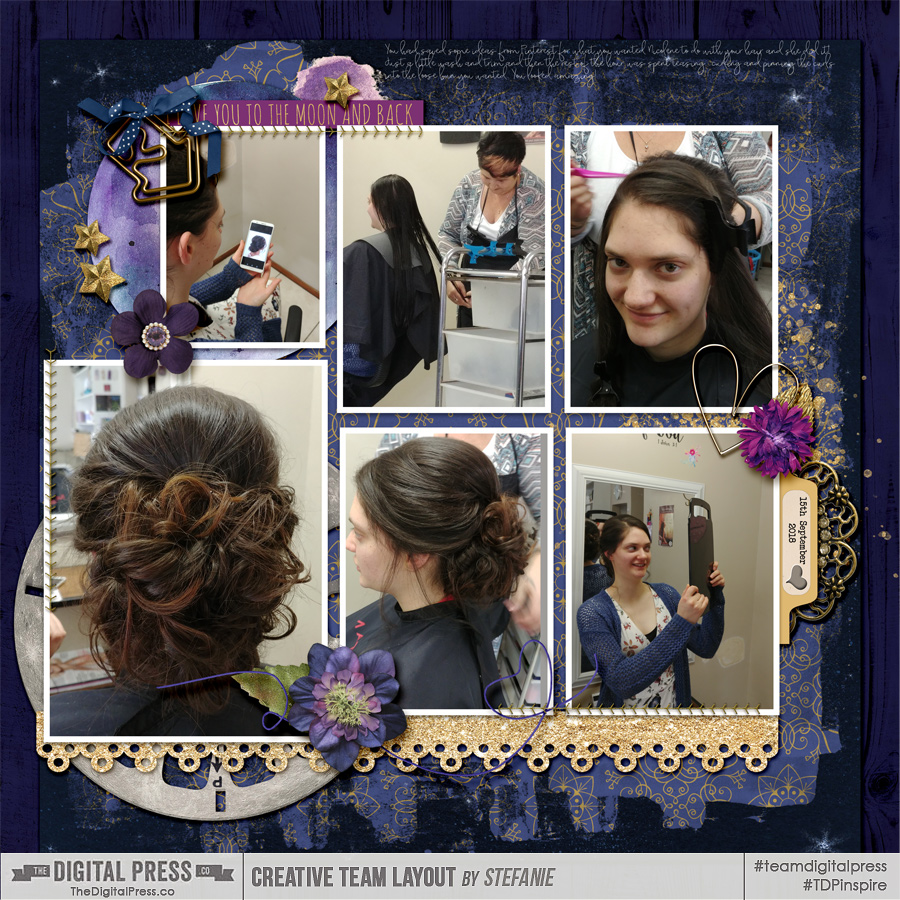
Step 6. I resize, sharpen and save it.
I hope that this post has given you some ideas and tips on how to create a focal point within a layout (especially one that uses a large number of photos). I hope you’ll give it a try and create this sort of flow within your next scrapbooking layout.
About the author Stefanie is a member of The Digital Press creative team and a stay at home mother of three older children living in Cape Town, South Africa with her hubby of 30 years, two of their three children, and 3 Siamese cats. She loves photography, traveling, and digital scrapbooking — documenting the good and the ordinary everyday.
One comment