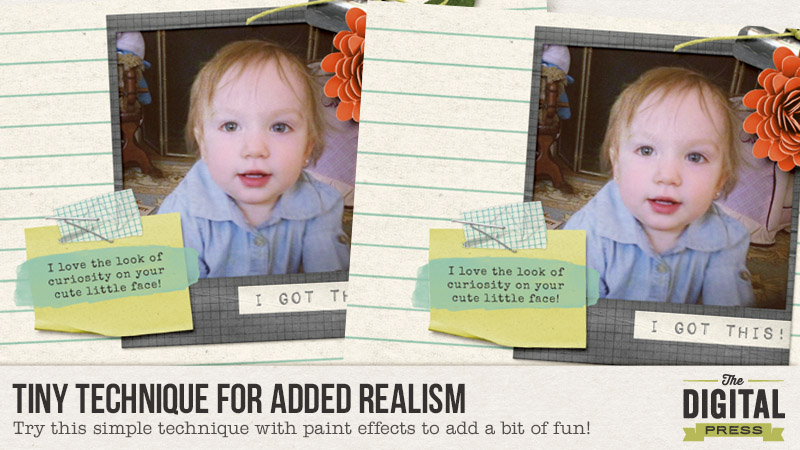
I really enjoy creating layouts that are simple… but look as realistic as possible. Today I am going to share with you a very easy technique (just a few simple steps!) to add a dose of realism to your layouts.
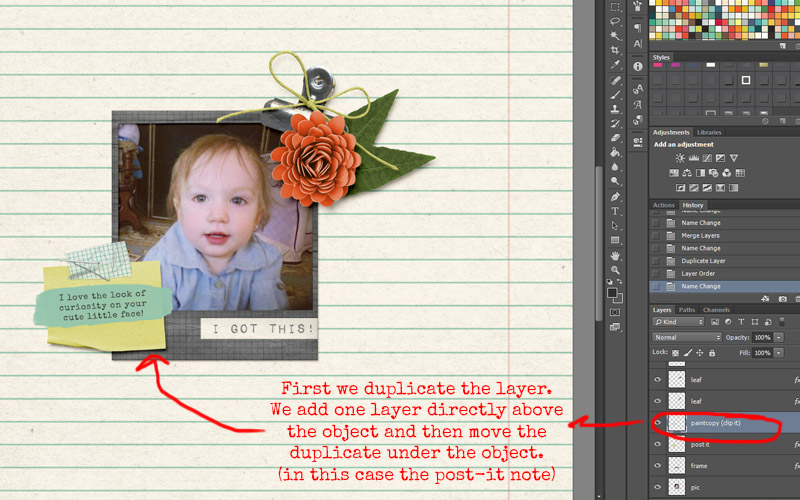
1. I want to accent the text on the post-it note with a paint element, but I also want it to look like it really was painted on top of the elements.
2. As you see, I had originally placed this paint layer right under the text layer… but it is about to get a makeover!

3. You’ll take your paint layer and place it directly above the top element that it is being painted onto. In this case, that is the post-it note. Then you will duplicate your paint layer and place it BELOW the post-it, as well.
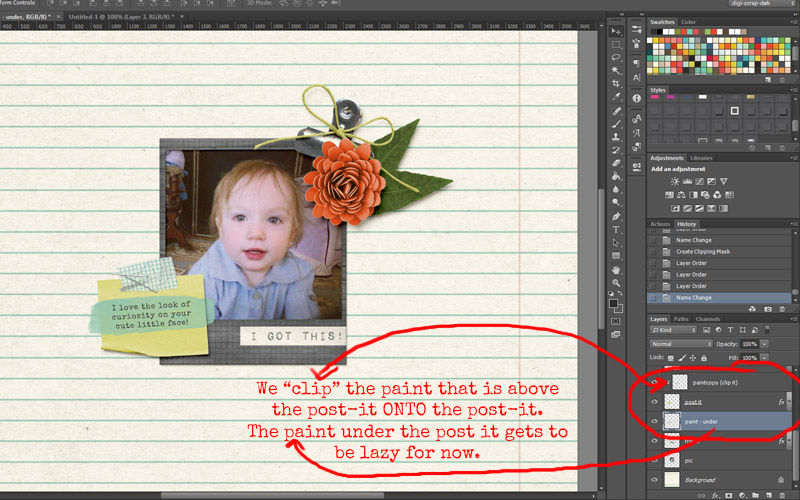
4. This next part may sound tricky… but it isn’t. You will take the top paint layer and “clip” it to the object underneath it (which, in this case, is the post-it note). For this layer, you are now done! NEXT!
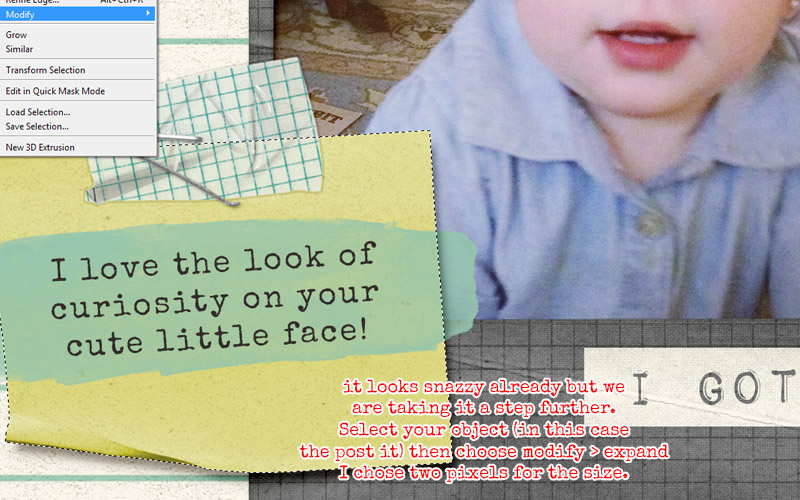
5. Next, you will select the object you’ve painted onto (again, for me, it’s the post-it)… and do one of those snazzy “selection” thingies. I do Control+A, and then I double-click the layer (thereby selecting the layer and creating the “marching ants” around it). Then you will Modify > Expand > 2px (or whatever you want… when you see the effect you can decide if you want yours larger or smaller).
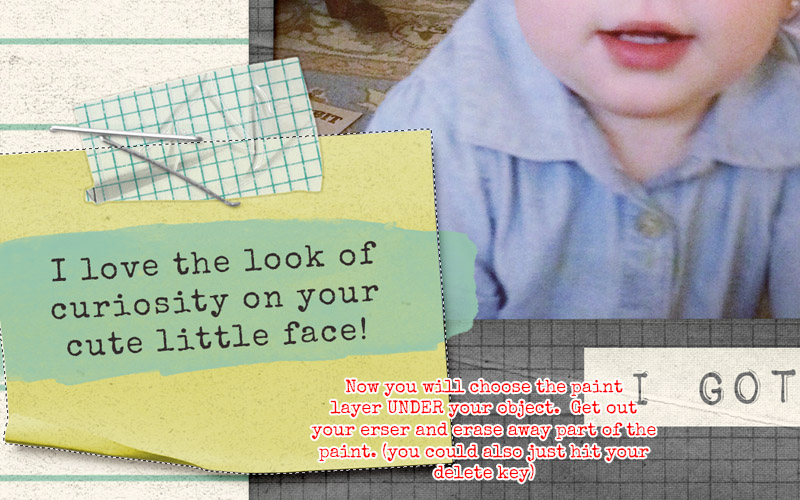
6. With your “marching ants” still active… select your 2nd/duplicate paint layer (the one that is under your object), and get out your eraser. You will erase inside the selection area.
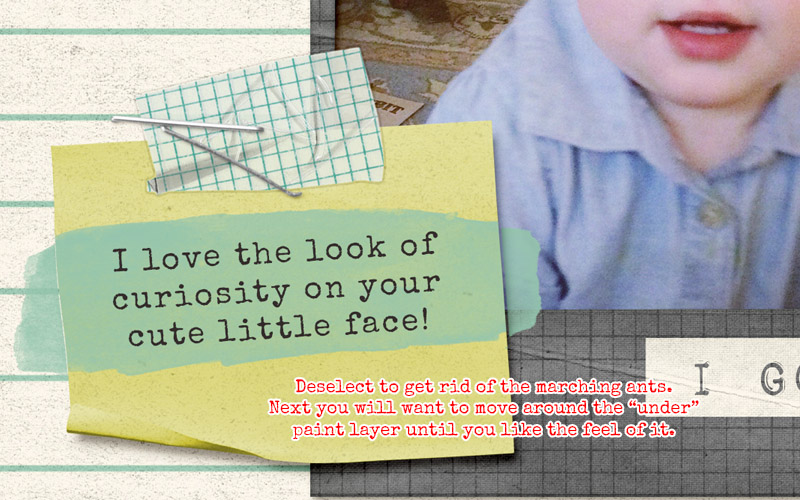
7. You can stop there… but personally, I like to move the paint layer around a bit (in this case, slightly down and to the right). Depending on your lighting angle, you may want to move your paint element a different direction. Totally up to you!
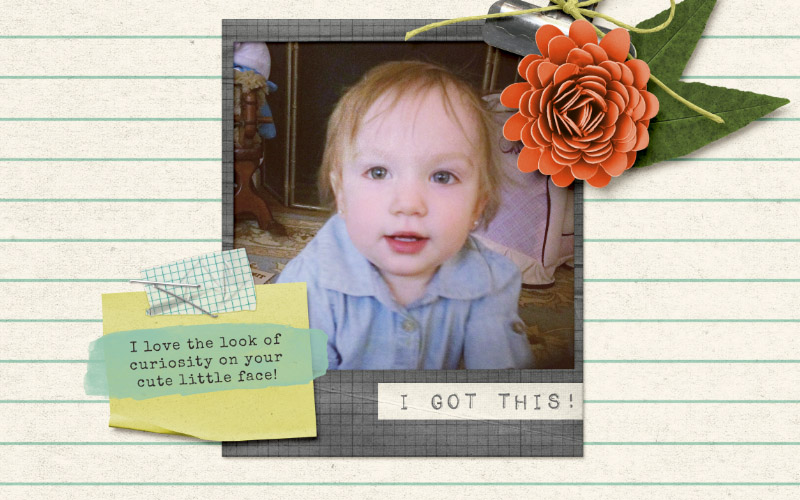
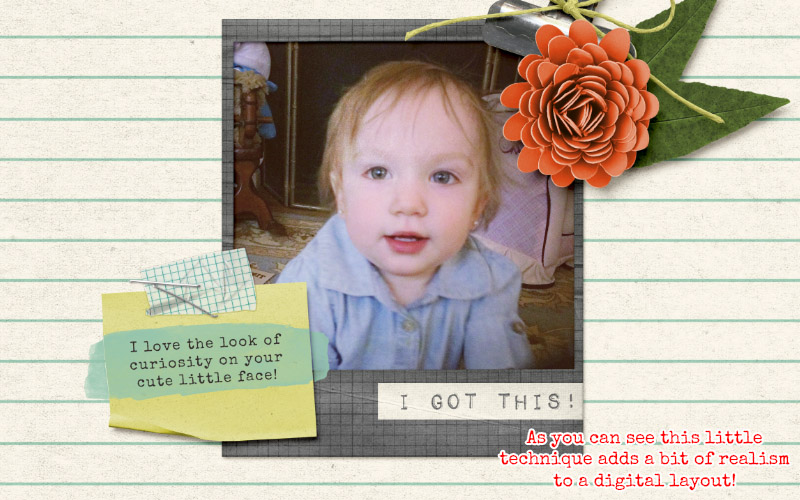
8. TADA! As you can see, the effect may be minimal… but it is one that adds just a tiny dose of realism to a digital layout.
Another little tip: if you have multiple layers that your paint will need to be “clipped” to after you duplicate your layers… you can “link” them together. This ensures that if you’d like to move the paint around, each layer moves as one, also.
I hope you enjoyed this tutorial! Don’t be afraid to give this technique a try!

About the Author: Leah is the designer behind Mommyish and owner of The Digital Press. She lives in the beautiful lower Hudson Valley of NY with her husband, her two girls, and her in-laws! She has a love for all things geeky and quirky. In addition to being a graphic designer, she is an avid pianist.