Where has this year gone? I don’t know about you, but even summer is just a blur to me. Before we know it, we will be singing Christmas Carols and opening Christmas gifts. I’m so not ready for that… and neither is my pocketbook.
I do love fall, though. I love the colors, the smells, the crisp cool air, cooking soups, and cuddling under my warm blanket. This year, I’m going to try some of those Pinterest crock pot recipes. Fall also means that Halloween is quickly approaching. I love to decorate and hand out candy! We don’t do all the scary stuff, but I love pumpkins, bats, and the traditional Halloween colors.
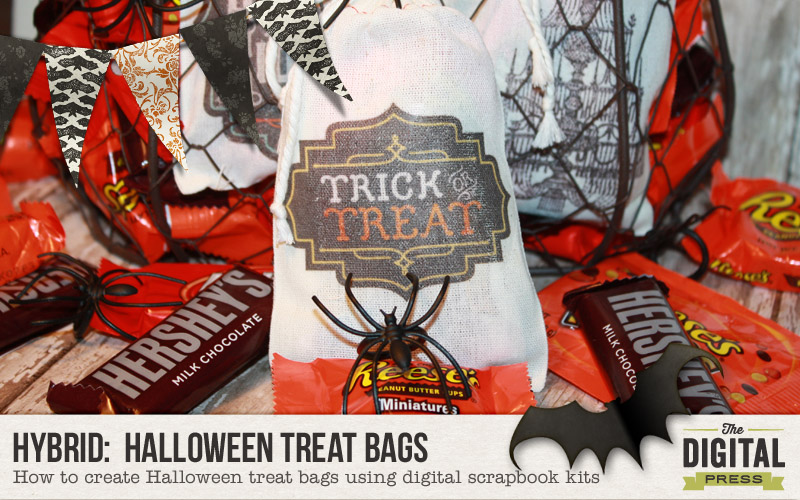
I love creating fun treats for Halloween, and am excited to show you how! I had a bunch of muslin bags stashed away that I bought online… and I knew this would be the perfect time to use them. These treat bags are perfect for school parties, co-workers, friends, and family.
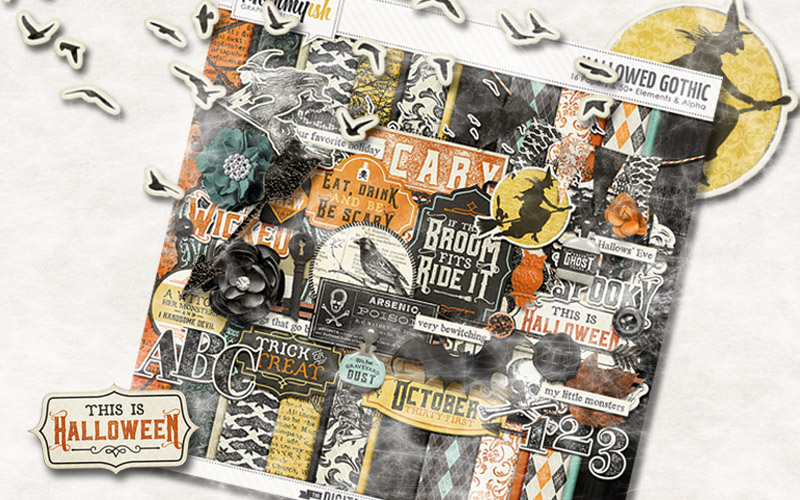
To create these treat bags, I used Mommyish’s kit Hallowed Gothic. There are some GREAT papers and elements in this kit, and it is perfect for making everything from cards, to a fun banner for that big Halloween party you have planned, to cupcake toppers, and more! The list goes on and on. Put that imagination to work.
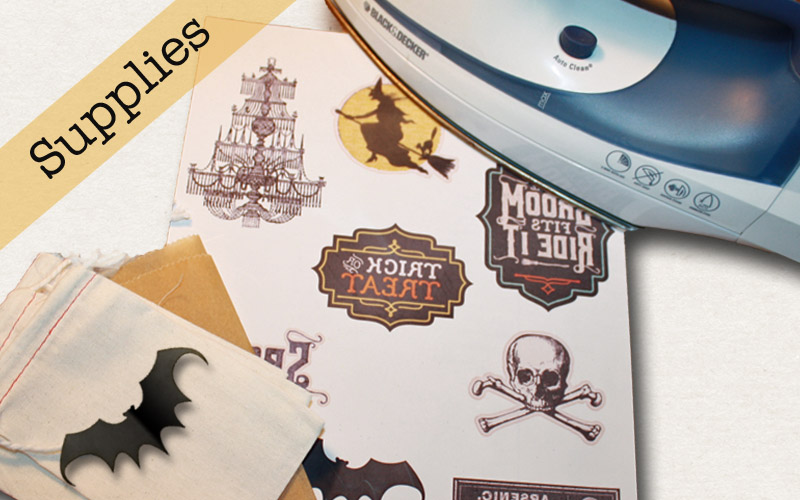
Supply List: any Halloween-themed kit of your choice; muslin Bags (I purchased mine online & they are 3″x5″); parchment paper; scissors; iron-on transfer paper (I got mine at Wal-Mart); iron; printer; and, of course, lots of candy to fill the finished product with.
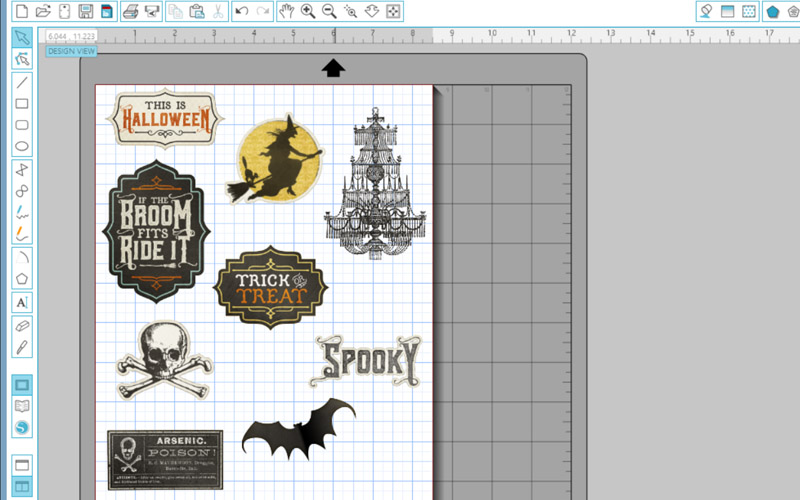
I used the Silhouette Designer Edition software to create the print page, but you can use just about any photo-editing software out there. First, I opened all of the elements I wanted to use and positioned them on the 8.5″ x 11″ mat because my printer will not print any larger than that. As you can see, you can put more images on the page. Because you can trim close to your image, I would recommend doing that (a penny saved is more in my pocket to purchase more crafting supplies! …OK, it takes more than a penny, but you get what I am saying!).
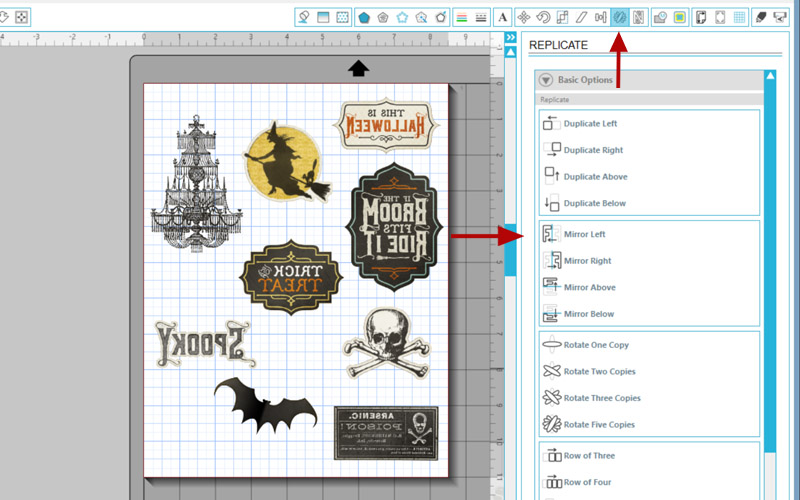
Now, this is an important tip — to ensure that the images aren’t backwards when you iron them on, you have to do a “Mirror Image.” I mirrored left, but I don’t think it matters which way they are mirrored, as long as they are “backwards.”
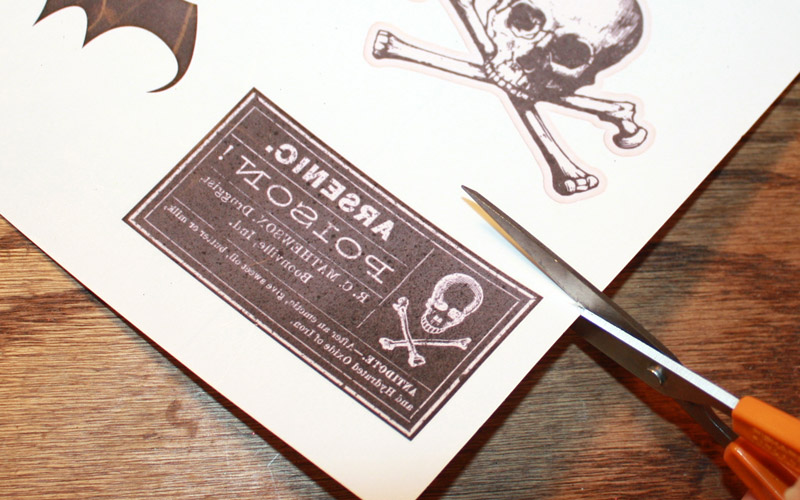
After printing the images onto the iron-on transfer paper, cut around the images. I find that the closer you cut, the better your finished project looks.
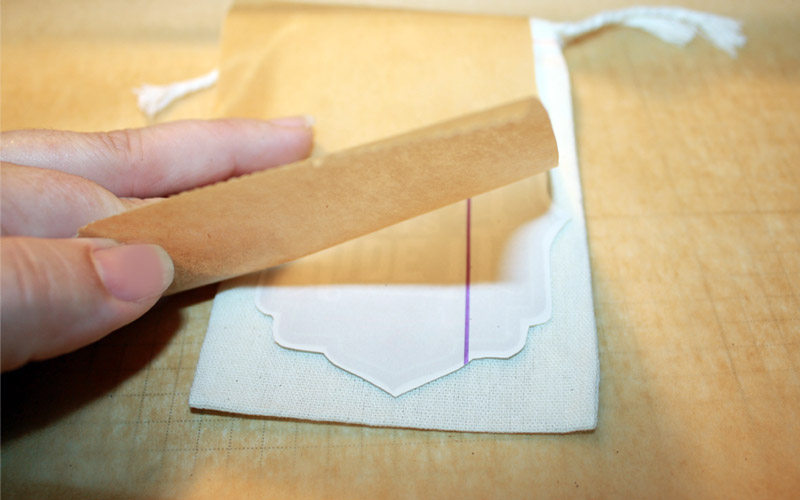
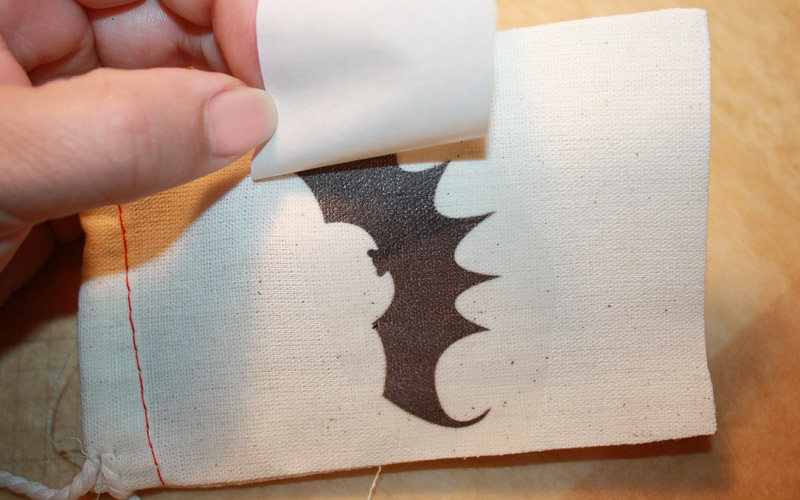
Once you have cut them out, lay them face down on the bags and put a piece of parchment paper on top. This keeps the item you are ironing from burning. I also laid a piece down under my bag (because I was using my desk as an “ironing board,” and it’s all wood — not really the ideal place to iron).
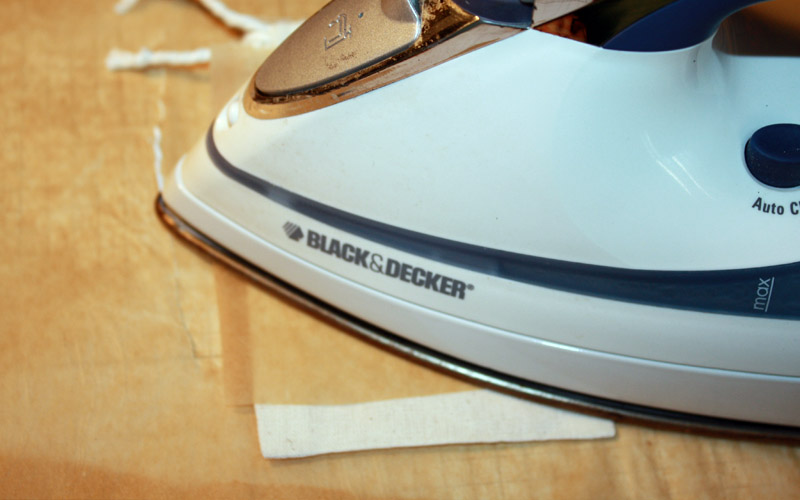
Apply the iron firmly with your body weight for about 20 seconds, while moving it around the whole image. If you are using a steam iron, make sure that it is NOT set on steam, but instead — on the highest cotton setting. You can take a peek by lifting the edge, and go over it again if needed (I have done this and it does work). I’ve found that if your iron is not hot enough, it leaves more of a worn look on the finished product.
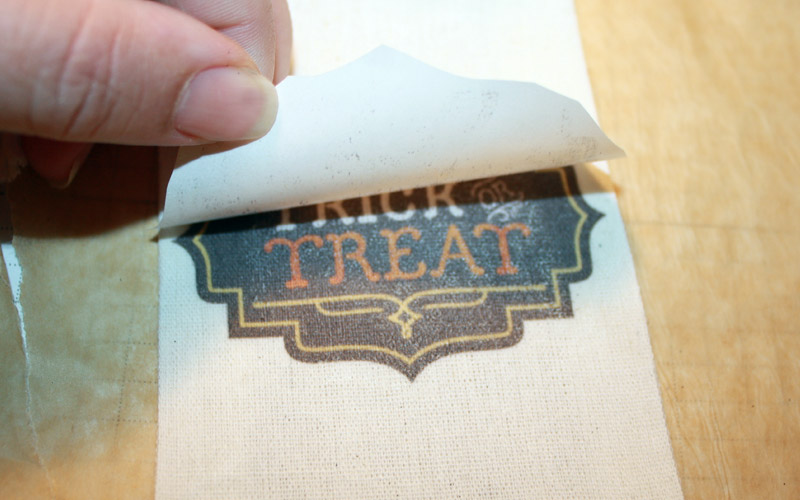
Wait 2-3 seconds before removing the backing. This is called a “hot peel” and it leaves a matte finish.
For a glossy finish, however, wait until it is completely cool before you remove the backing. You guessed it… this is called a “cold peel.” It really does make a difference.

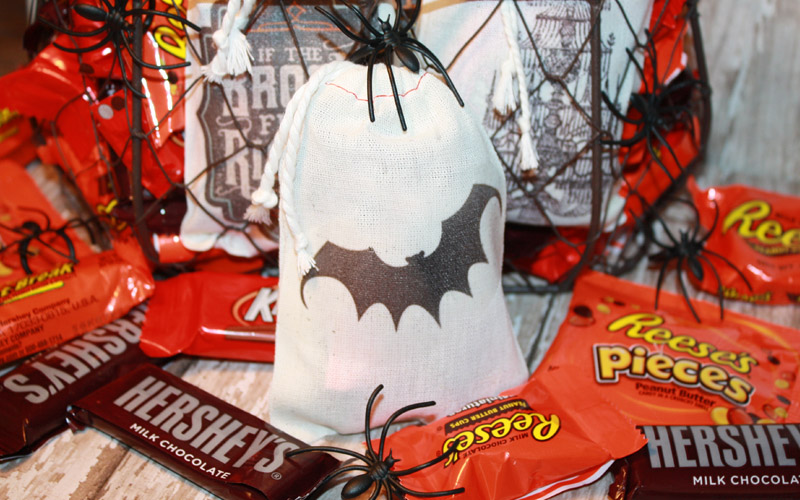
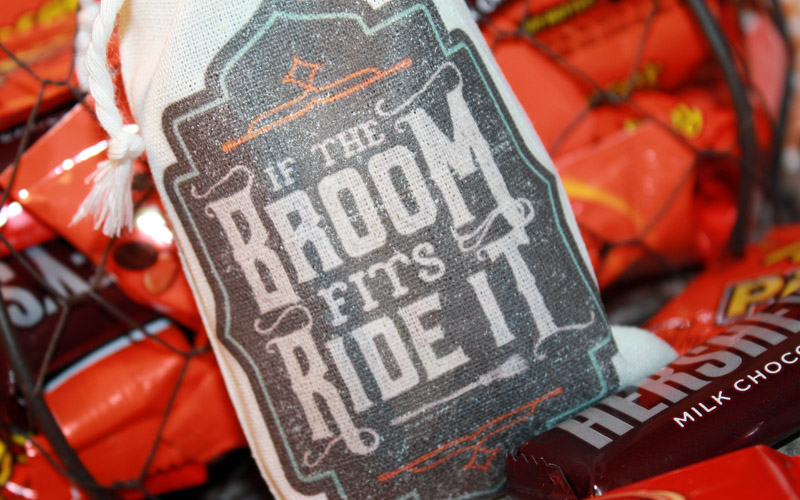
I can’t wait to hand out these little treat bags! I hope the Trick-or-Treaters enjoy them as much as I enjoyed making them. We don’t usually have a lot of kids come around in our neighborhood, so I’m able to make these for those who do. If we had more, I would probably make something different… like a tag attached to the treat or something simpler like that.
I Hope this tutorial was helpful and that it has inspired you! If you’d like to give it a try, head on over to the challenge forum and you can participate in the corresponding hybrid challenge… while having fun creating something awesome for Halloween. I can’t wait to see your creations!
You can pick up this kit for 50% off using the code listed below!

About the Author:  Tanya is a part of the Hybrid team here at The Digital Press. She has been hybrid crafting for at least 10 years now, and loves creating and sharing those creations with others. Her all-time favorite tool is her Silhouette Cameo. She says “with the Cameo the sky is the limit!” Tanya has been married for 26 years and has two sons: Chris, 23 and Chance, 19. She also enjoys crocheting, photography and woodworking.
This is SO cool Tanya! I’m inspired! 😀
Thanks so much Amie!! Join the challenge…..I’d love to see what you come up with. I love creating Halloween projects.
Those are just sooooo cute! Very crafty of you!
Thanks Rae!! Glad you like them.
Wow, very impressed at your witch-craft! Those are the cutest! You are so talented Tanya!!
Thanks so much Reevie!!
I’ve always wondered how to do this! (Seriously! LOL!) Very cool. I just might have to make some this year! 🙂
Keela…just let me know if you need additional info/tips….I would be glad to help!
Love it! How cute!
Thanks Kristin…:)
I love this! You are so talented! I wish I had your creativity!
Awwww Teresa, you are too sweet!! You could so do this! It’s very easy and if you have a printer and an iron you can do it!
Tanya, these are awesome! I am definitely inspired to get back to crafting. I have had an itch to get started but fear work will get in the way…I feel like a ticking time bomb with the itch to craft! What do you print these on to make them iron on? I don’t know much about digital papers at all, but want to learn!
I am always amazed at the beautiful things you create! You are so very talented!
So sorry Bev, I’m just now seeing your comment. Thanks so much! Work does get in the way. Why do we have to work? lol. The iron on material came from Wal-Mart. It’s pretty cheap and super easy to use. The instructions are on the back. My son is making leather wallets and wanting to do some type of packaging. I told him we need to create a logo for him and iron them on these little bags. He like the idea.