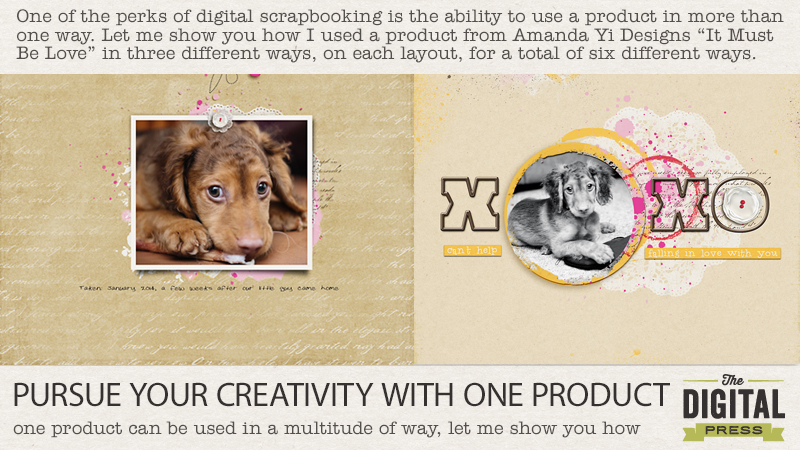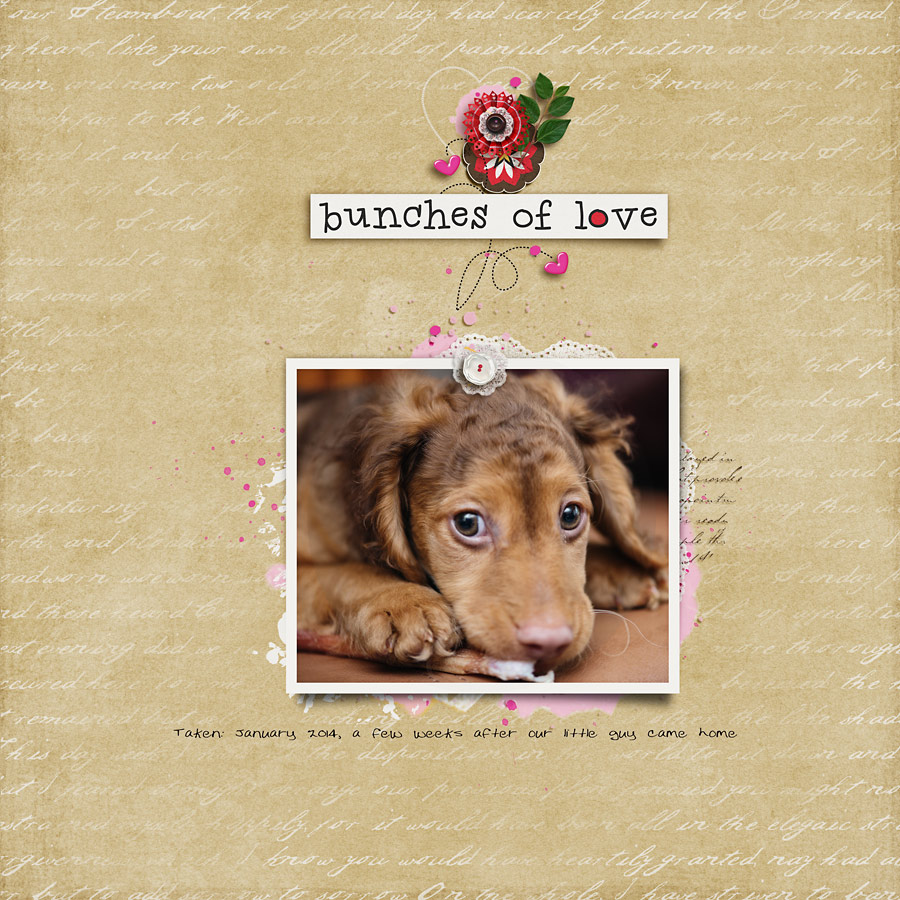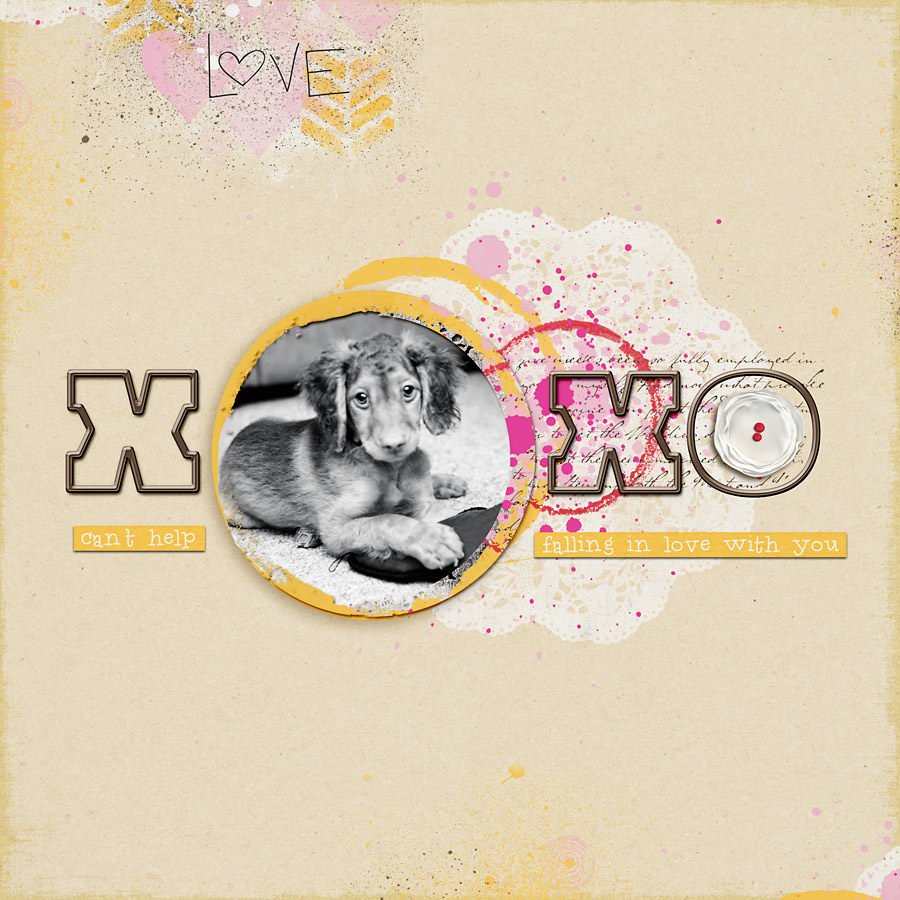
There are so many ways to alter a digital product that can really extend the usefulness of your digi stash. There is usually more than one way to alter a product and, depending on your editing software and preferences, you can determine what alterations best suit your project. I’ve created two layouts, both using the same kit, “It Must Be Love”, and on each page I have used a paint element in three different ways. Let me share with you how I’ve altered the paint to use in different ways.
Here is a link to the kit I used. Amanda Yi Designs – It Must Be Love

On my first page, I placed the paint under my photo, resizing it to just peek out from under my photo. The doily was just too cute to not want to use again so I decided to extract it from the paint layer. There are different ways to do this. Sometimes I will use the magic wand or lasso tool to extract from a layer but this time I found it faster to duplicate the paint layer, select the doily using the quick mask and then extract it from the layer. I resized it and placed it under the white flower. Thirdly, I used the quick edit again but this time I selected pink and red splats from the paint layer, duplicated them a few times and placed them scattered around the page.
Use whatever extraction method you prefer but if you want to try my method of extracting with quick mask in photoshop, duplicate the layer, select the quick mask icon, select a brush and paint over the area you wish to extract and then click the icon to turn off masking. You will now see marching ants. Hit “delete” and Ctrl + D to turn off the marching ants. Now you can move your selection as desired (shortcut key “V”).
Now I’m going to use the same paint layer three different ways on my next layout.

I placed the paint just to the right of where I knew my photo would go. I wanted to use the large yellow circle as a frame for my photo so I duplicated the layer, chose the elliptical marquee tool and selected the outer edge of the yellow circle within the paint element. I used the shortcut keys Ctrl + Shift + I to select the area outside of the yellow circle which I didn’t need and hit the delete key. Now, using the same method, I created another circle with the marquee tool which I deleted to create a circle frame with an inner hollow area where my photo would show. I placed my photo behind the cutout frame and chose a shadow to add some depth to it. Thirdly, I used the paint to stamp along the edges, resizing and turning as I positioned the paint along the outer edge. To do this, on the paint layer, I used the shortcut key “V” (move), held down the ALT key and dragged and dropped the duplicated paint over the edge of the layout. I continued these steps, positioning the paint off the edge of the page, turning and resizing, and also recolored a few layers with a hue/sat adjustment layer.
So now you have learned six ways to use one product. I hope this inspires you to experiment and look at your digi products in a new light, thinking of different ways to use them.
I hope this inspires you to create! Head on over to the Challenge Board and join in! Pursue Your Creativeness With One Product Challenge
ABOUT THE AUTHOR:
 Rae Clevett is part of the Creative Team at The Digital Press. She lives on the west coast of BC with her hubby and Taz, their labradoodle. As a photographer and avid digital scrapbooker, most days she is either behind the camera or scrapping some of her personal photos. There is usually a cup of coffee on her desk and some chocolate treats, as she is a chocolate addict. Her laptop sits next to her computer so she can watch tv or movies. Taz usually lies on the floor beside her, playing with his toys. It’s a pretty sweet set-up, comfy and casual.
