Hello everyone! It’s Tanya here, and I’m excited to share another edition of Hybrid How-To with you here on The Digital Press blog! With Valentine’s Day just around the corner, I thought I’d show you how to use your digital stash to create these fun matchbook Valentines.
This is a great project, because you can truly use just about any of your favorite digital products to create these matchbooks. These are really fun to make for a child’s whole class in school, even! Depending on the age/grade of the class, you can repurpose a ton of different digital kits.
SUPPLIES NEEDED:
- Your favorite digital scrapbooking products
- White card stock paper
- Coordinating card stock colors for your printed pieces
- Double-sided tape
- Fun-size candies (I used M&M’s for this tutorial)
- Paper cutter
- Stapler
Here’s a look at the kits I used for my matchbooks…
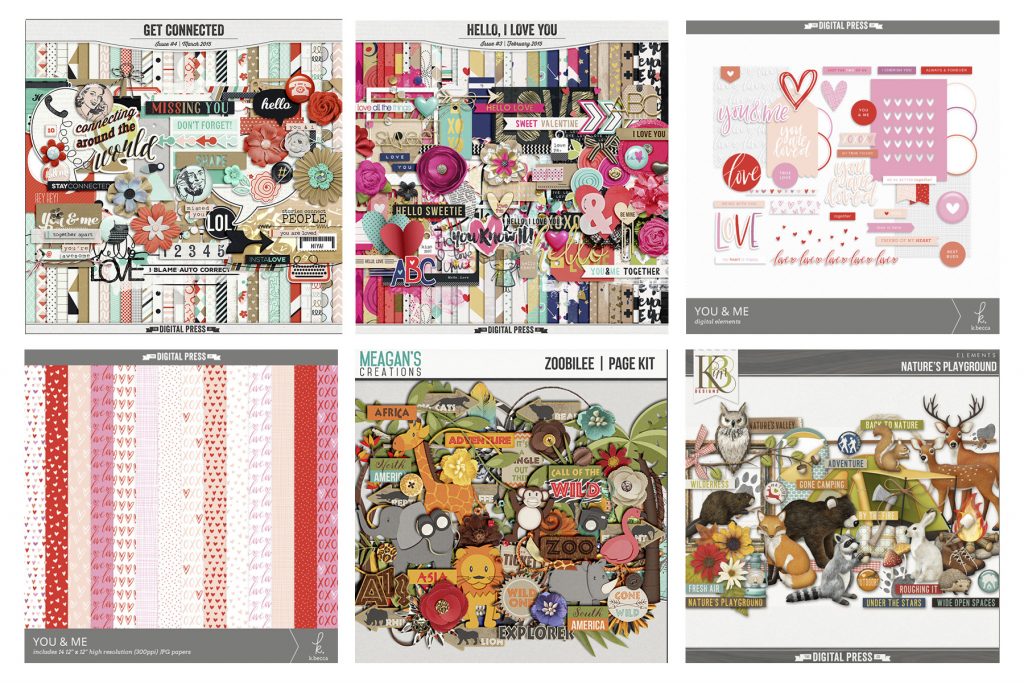
[1] Get Connected, [2] Hello, I Love You, [3] You & Me Elements, [4] You & Me Papers, [5] Zoobilee, and [6] Nature’s Playground
INSTRUCTIONS:
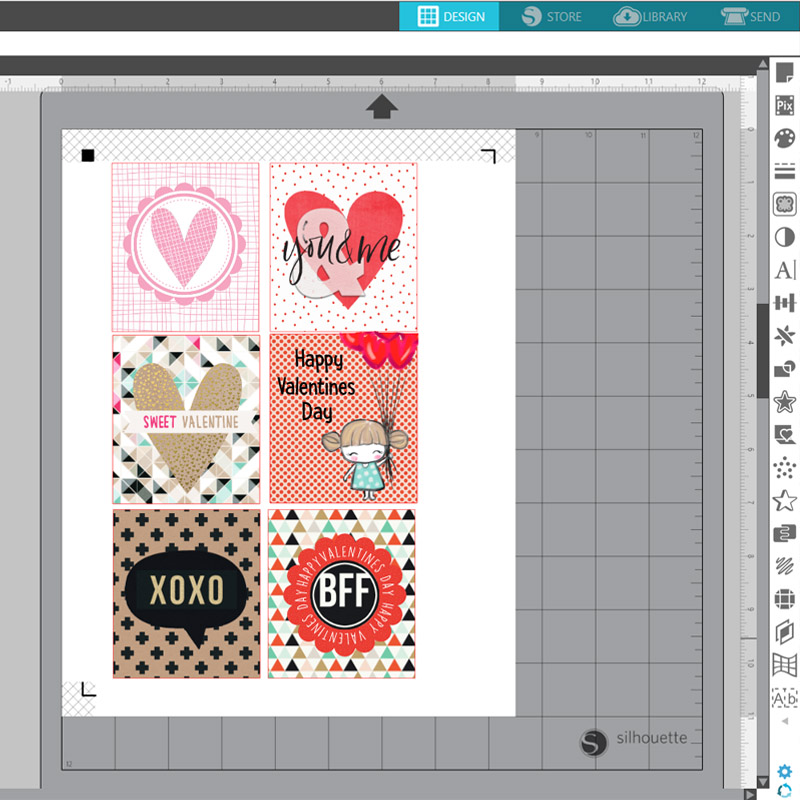
I used the Silhouette Studio software to create the tops of the matchbook, but you can use whatever photo editing program you prefer.
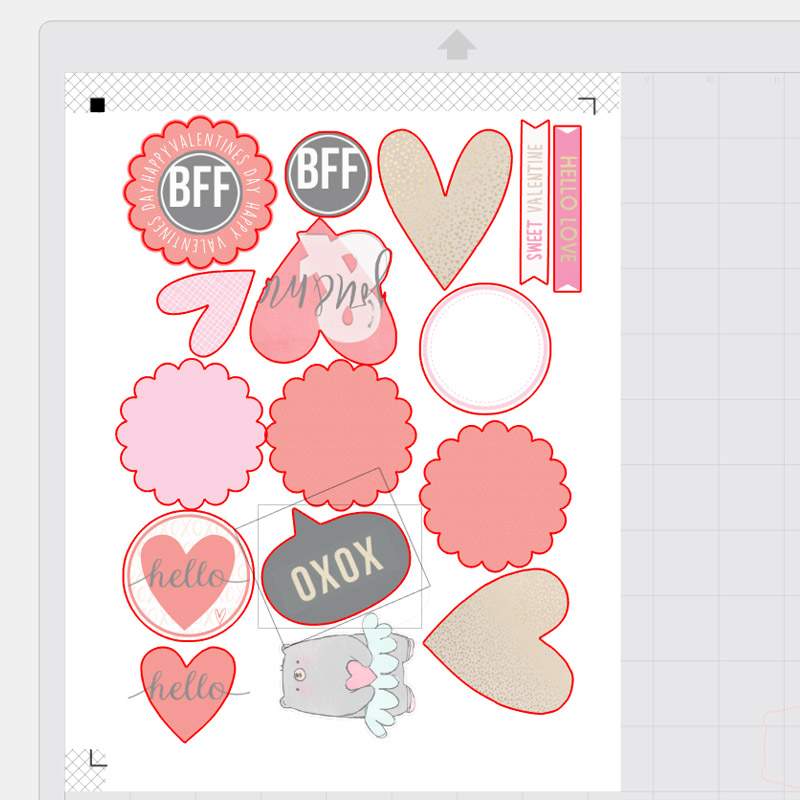
First, I drew out a rectangle 3.15″ high x 2.75″ wide and replicated it to fit as many as I could on my page. Then, I filled each one with papers that I thought would be good for Valentine’s Day. Next, I added some elements from the kits to match the papers…
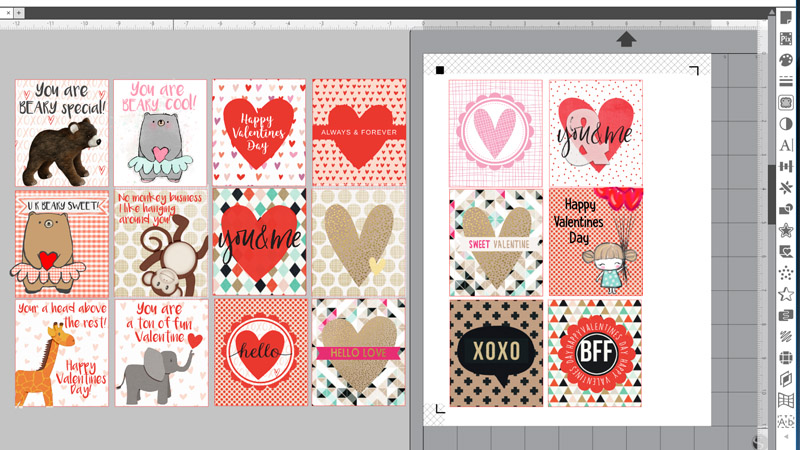
It was so fun to make the cards! To get ideas, you can google “Valentine’s puns” and you’ll find a bunch of great ideas and inspiration. Here are some of the card ideas that I came up with (I had to stop myself because I could have just to keep on going!)…
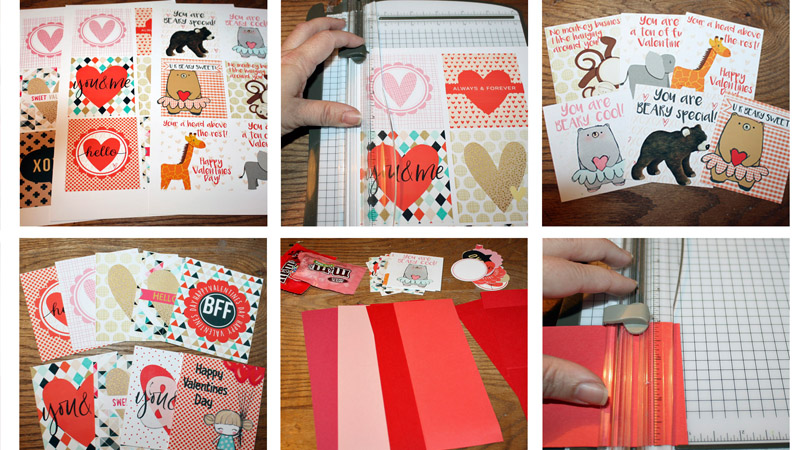
For the cards themselves, I was going to use the print and cut feature on my Silhouette Cameo cutting machine… but in the end, I decided it would be just as easy (and maybe quicker!) to use my paper trimmer.
I did do some layering with some of them, though, because I love dimension. For this, I just printed out individual elements and used the print and cut feature because I’m terrible fussy cutter…
For the actual matchbooks, I took coordinating card stock and cut 3″ x 9″ strips. Then I scored & folded the cardstock at 1″ and at 5.25″. I have a scoring blade on my paper trimmer, but you can also use something flat like a credit card or gift card to achieve a good, clean fold…
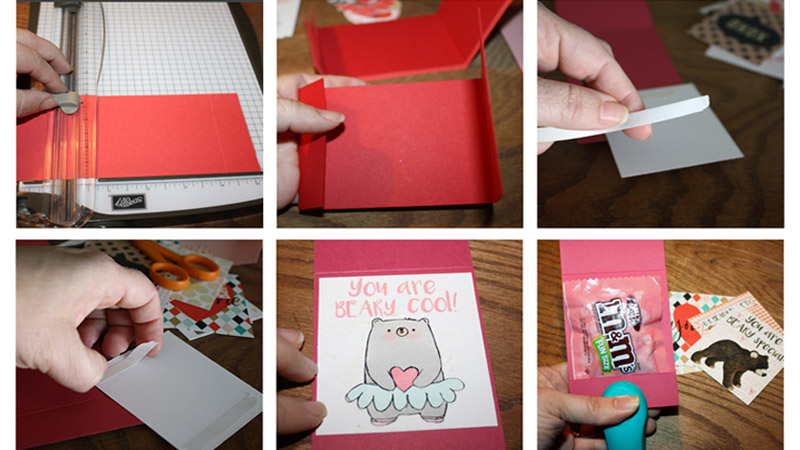
After that, I added double-sided tape to put the printed pieces onto the colored card stock… and then I folded up a flap at the bottom and stapled in my M&Ms (see bottom right photo, below)…
Finally, I completed everything by tucking the top into the bottom, under the flap created by the staple. On some of the matchbooks, I added a little extra dimension by adding double sided tape and adhering the extra pieces I cut out…
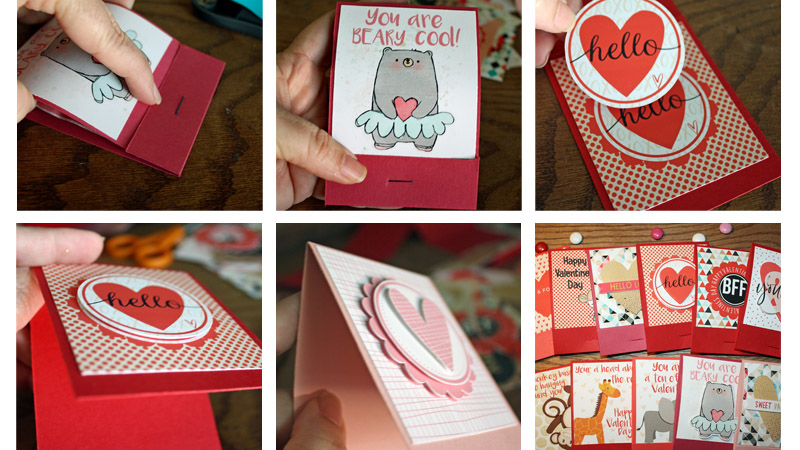
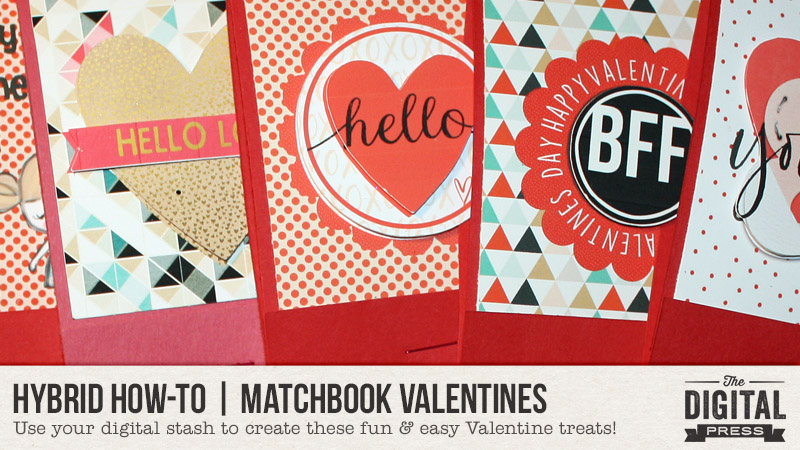
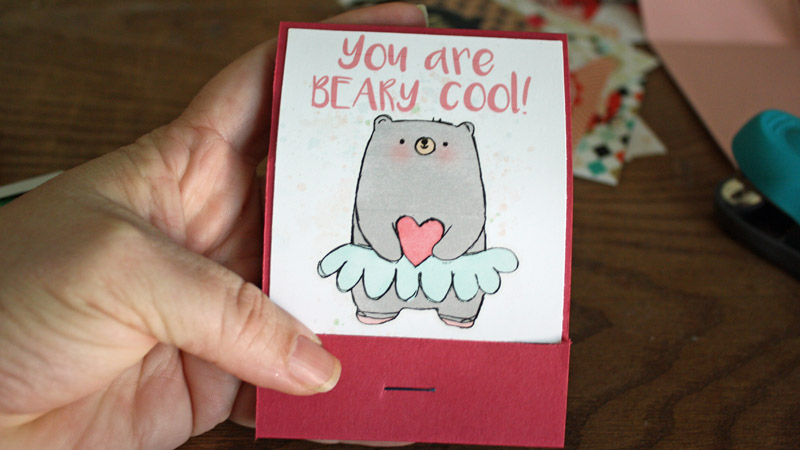
Here is a look at one of the finished matchbooks up close…
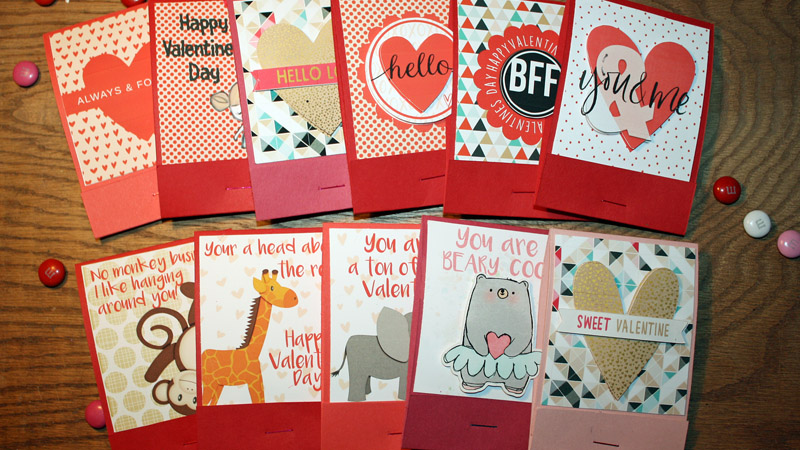
Aren’t they so cute?! So many possibilities! Here’s a look at a bunch of the different designs I created…
I think I might even give these to my co-workers! 🙂
I hope that you have enjoyed this edition of Hybrid How-To, and that you will give this a try and come up with one of your own matchbooks! Don’t forget to visit the CROSSWORD SECTION in The Digital Press forum, and jump into this month’s Hybrid Challenge if you are thinking of trying this project. You can earn points toward discounts & FREEBIES! I hope that you will join in!

About the Author Tanya is a part of the hybrid team here at The Digital Press. She has been hybrid crafting for at least 15 years now, and loves creating and sharing those creations with others. Her all-time favorite tool is her Silhouette Cameo. She has been married for 28 years to her high school sweetheart, Richard and has two sons: Chris, 26 and Chance, 21. She also enjoys crocheting, photography and woodworking.