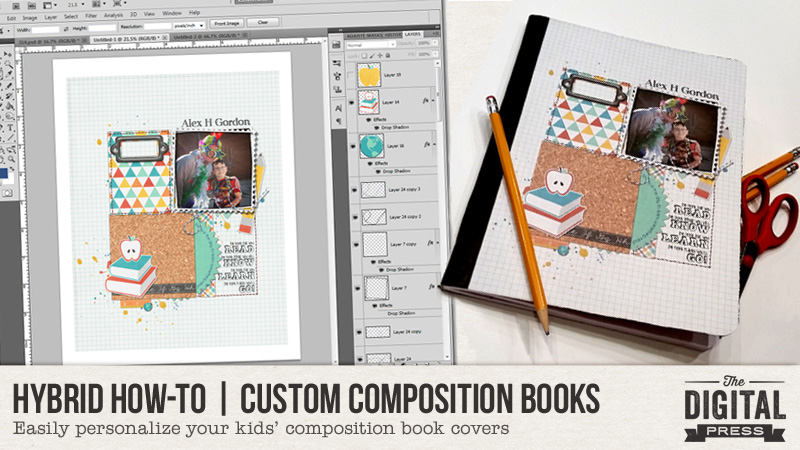
Hello and happy Saturday! Summer is quickly coming to an end. Can you believe it? My kids go back to school in 2 weeks and we’ve been busy getting their supplies. I noticed both kids have composition notebooks on their lists — woohoo! Why have a plain notebook, when you can have a fantabulous notebook? I thought it might be fun to create some personalized covers, and am here today to show you how to use your favorite digital kit to do so!
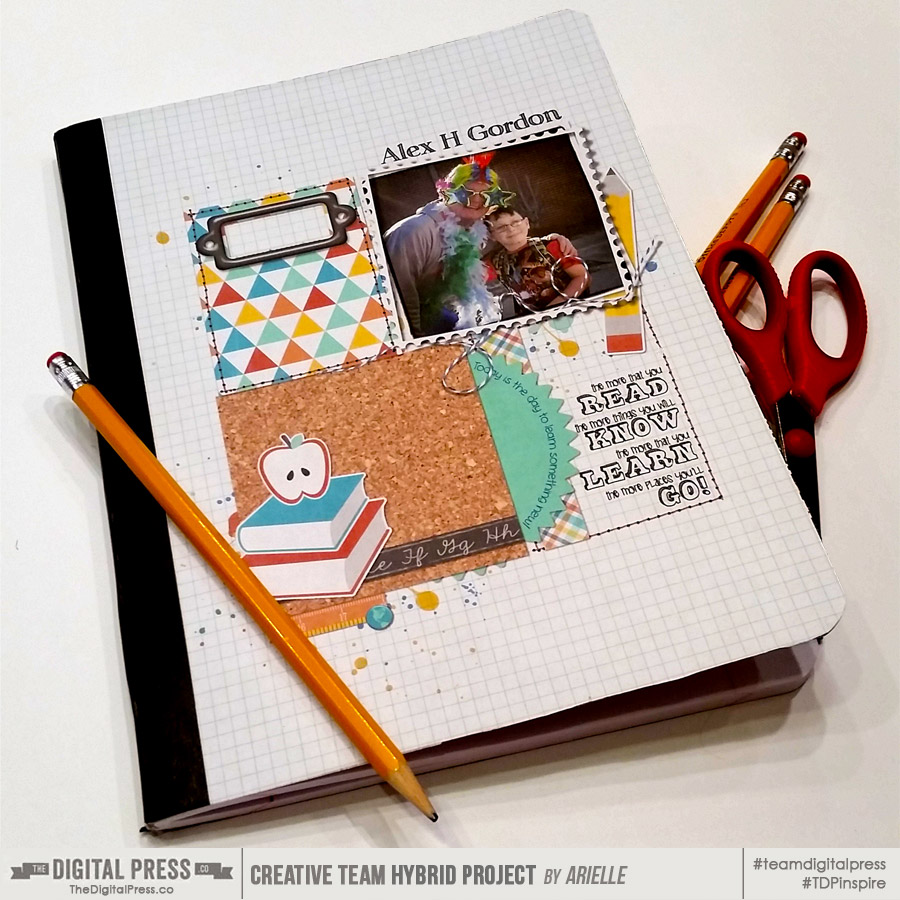
For my own composition book cover, I included a happy memory from my kids’ previous school year, as well as a little inspirational quote. I even left a blank space to write in the subject. I’m also putting a blank sheet of adhesive on the back, too, so the kids can add their own personal touch! Anything to keep them motivated, right?
Supplies Needed:
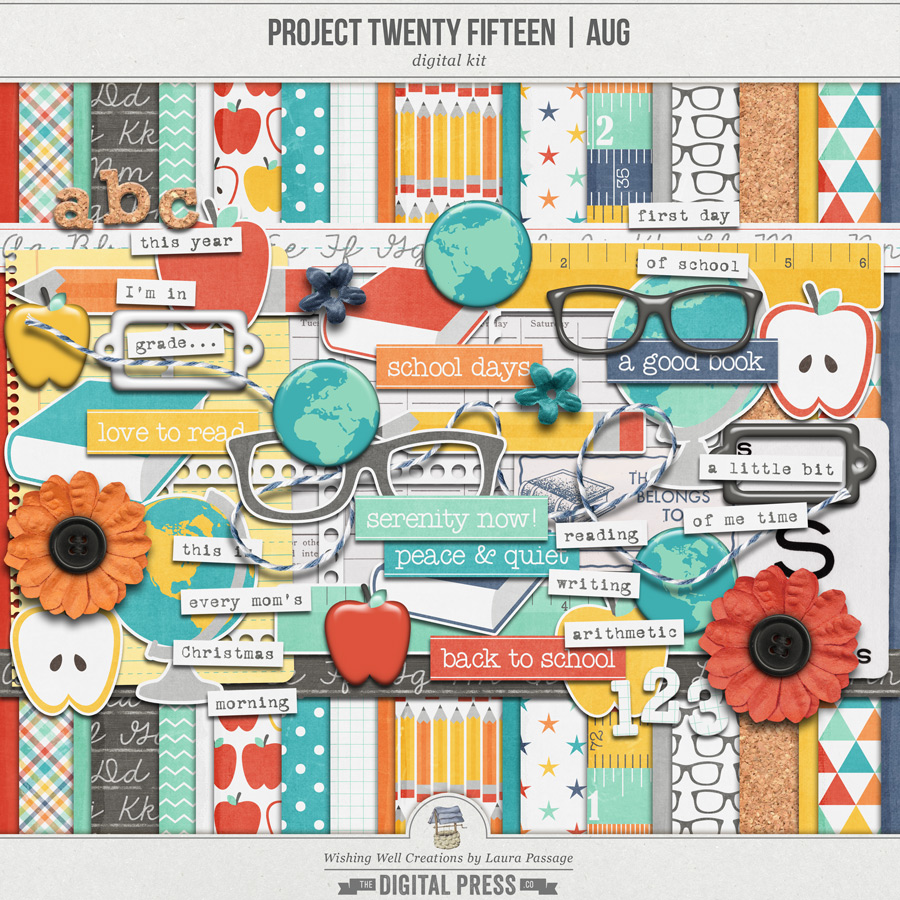
- Digital kit of your choice (I used Project Twenty Fifteen | August by Laura Passage, shown below)
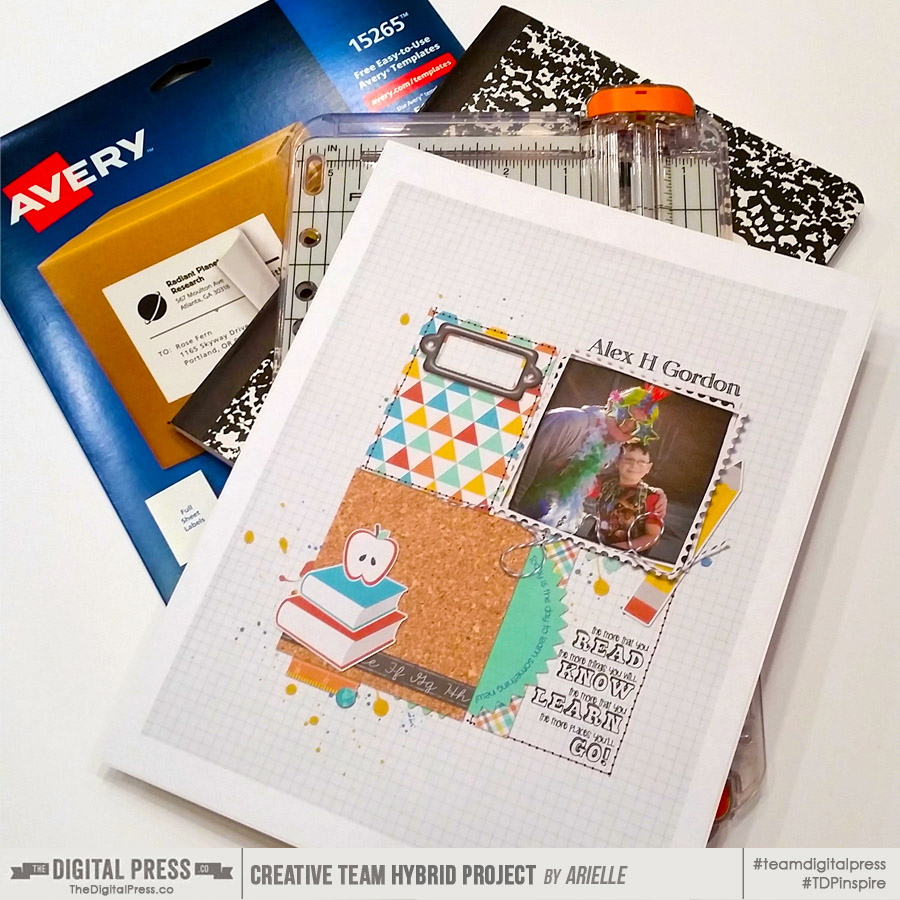
- Full sheet adhesive labels (I used Avery #15265)
- Paper trimmer, scissors, pencil, and a ruler
- Composition notebook(s) of any size
Directions:
- Measure the cover of your notebook.
- Create a document in Photoshop that is the exact size of your book’s cover — plus an extra 1/4″ on the top and bottom (this will ensure the design you are about to create will cover the front of the notebook).
- Print your design onto the full-sheet adhesive label sheet.
- Using the paper trimmer, trim the excess from the left side of your design, the side closest to the binding tape of the book. Don’t peel the backing off yet! First, you will center it and mark where you’ll need to cut the other 3 sides. Trim those before adhering.
- Start to peel the backing from the left side, only a half inch or so, and adhere it starting on the left. Then slowly continue to peel back an inch or so at a time, as you adhere it. Doing it this way not only ensures you get it centered, but also eliminates pesky air bubbles!
- Using the scissors, trim around the corners.
- Optional — If you want it to be just a little more permanent, add clear contact paper on top of your cover.
And that’s it — easy peasy!
Now it’s your turn, make one of these super simple comp books and come share your creation with us in the forum! During July 2016, you can even receive points in TDP’s challenge system if you complete this project and enter it into the July 2016 Hybrid Challenge. 🙂
 About the author Arielle H Gordon is a wife and mom of two crazy kiddos, ages 6 & 7. She moved around (a lot!) before returning to settle down in her hometown of Enterprise, Alabama, to marry her sweetheart and start her family. She is an avid crafter — digital, hybrid and otherwise! She LOVES Jesus, family time, camping, gardening, reading cozy mysteries, hot tea, popcorn, and anything on BBC! This time of year, you’ll find her buying school supplies, gearing up for VBS and reading like it’s going out of style (while sipping sweet tea!)…