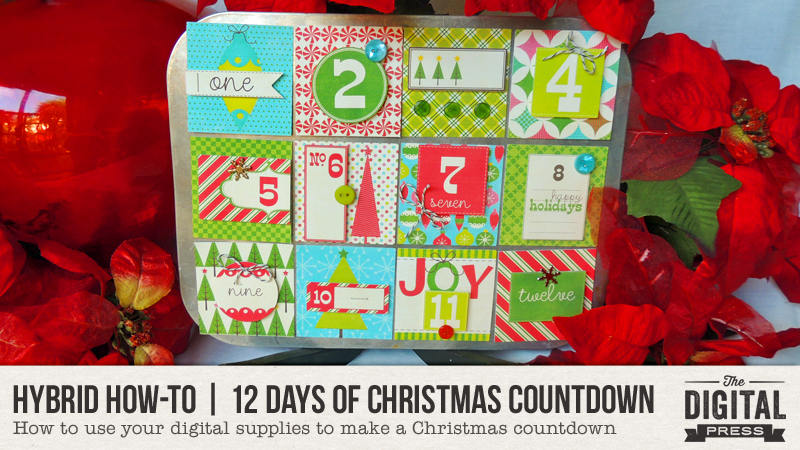
Hello everyone! It’s Donna here, and I’m excited to share another edition of our Hybrid How-To series with you here on The Digital Press blog! Today, I am going to show you how to make a 12 Days of Christmas Countdown calendar, using digital supplies and a muffin/cupcake tin.
The idea behind the muffin tin is quite simple: on a daily basis, uncover the appropriate day’s lid to reveal a treat or small toy hidden in the cavity below. The little ones in my family love any type of advent or countdown calendar and this will be no exception, I am sure!
It’s a really easy project, too… so let’s get started!
The first thing you’ll want to do is choose a digital collection that you would like to use for your project. For my example, I decided to use pieces from 12 Days | The Collection by Mari Koegelenberg Creations (edited to add: a product which has since retired), as shown here…
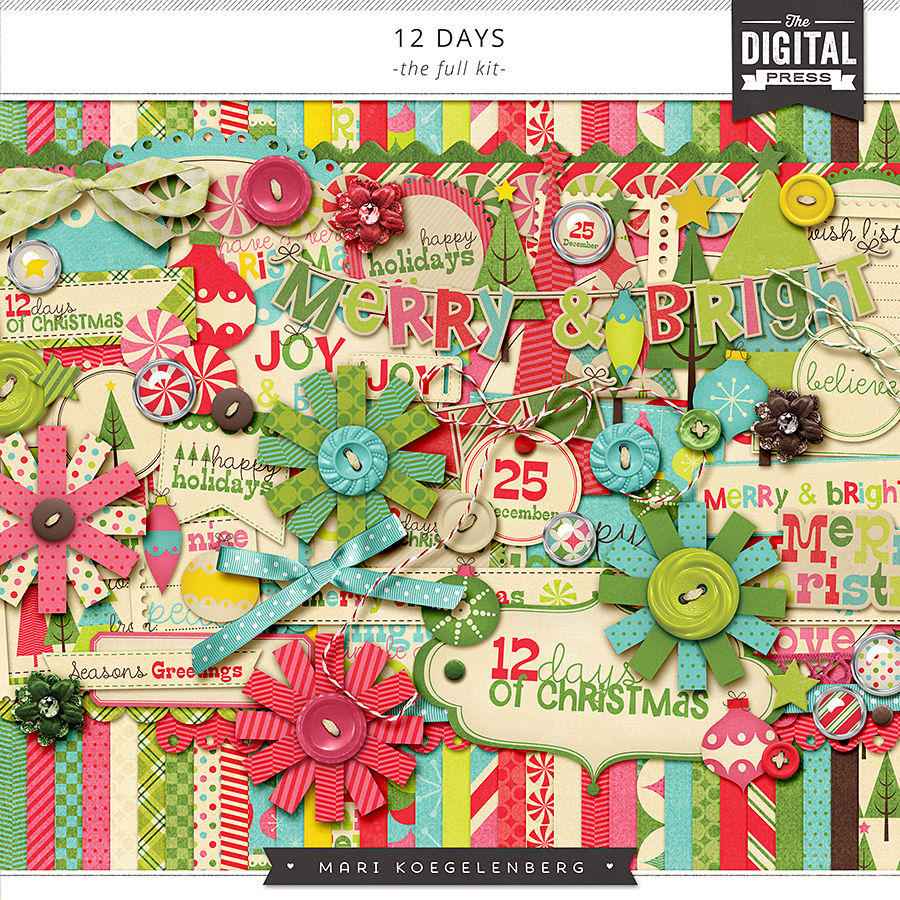
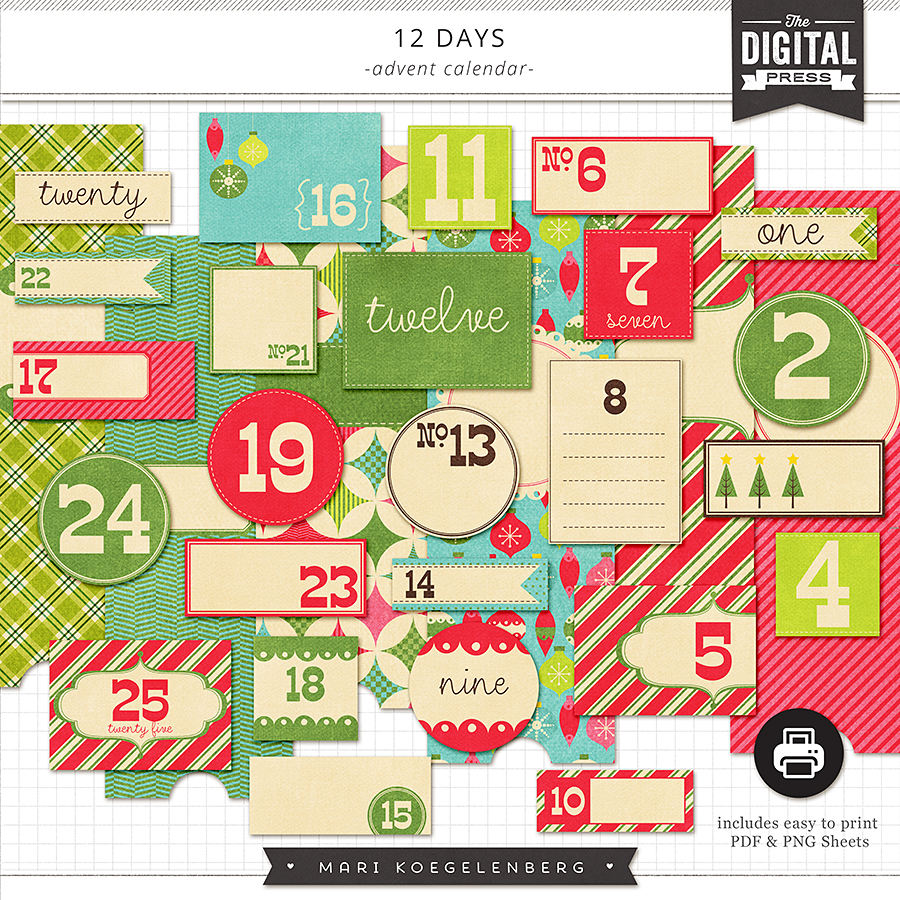
I love the fun, whimsical feel and the bright colors of this collection… and a bonus is that the countdown numbers are simply perfect for this project!
OTHER SUPPLIES NEEDED:
- photo editing software (I used Photoshop Elements, i.e. “PSE”)
- empty muffin tin
- matte photo paper
- scissors or a paper cutting machine (I used my Silhouette Cameo)
- magnet strips or double-sided tape
- adhesive (I used white glue)
- pop dots (optional)
- buttons, string and brads (optional)
The first step is to design the lids that will fit over every cavity of the muffin tin. My tin cavities are 2.50 inches wide with .50 inches between each opening…so my finished lids will need to be 3 inches square. I used a 12 cavity muffin tin, but you could always use one with 24 cavities to create a full advent calendar.
Fun Fact: The 12 Days of Christmas begins on December 25 (Christmas) and runs through January 6 (Three Kings’ Day)… whereas, an advent calendar countdown begins on December 1 and runs through December 24 (Christmas Eve).
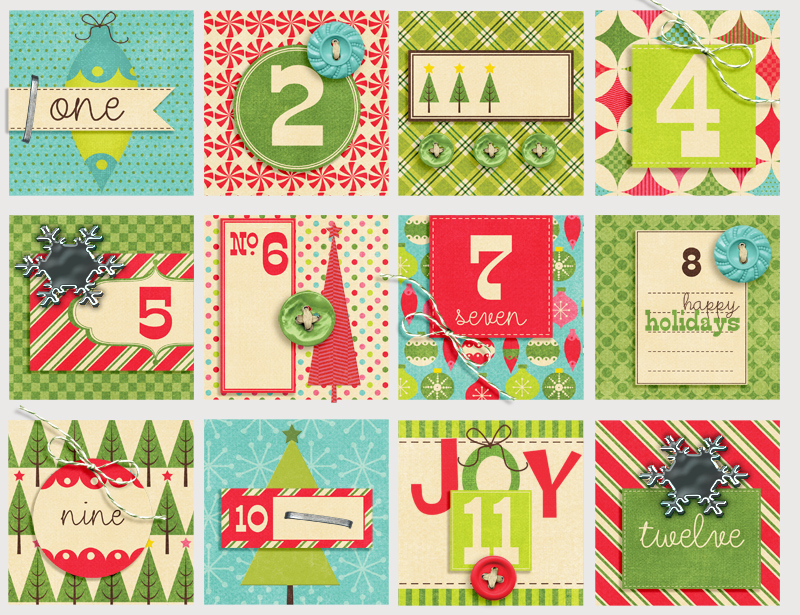
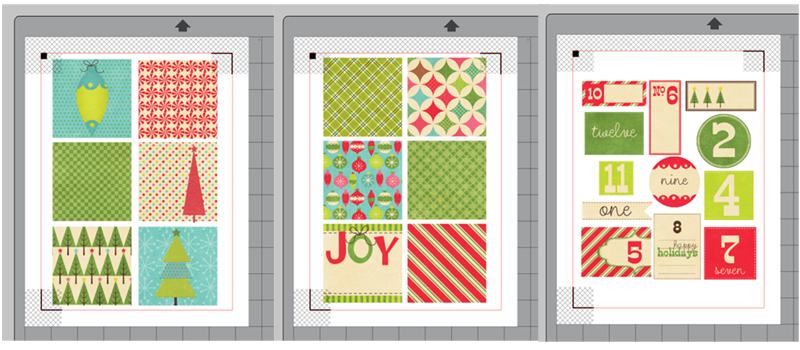
I always design my hybrid projects completely digitally, first, so as to get a visual feel for what the final project will look like. Once I am satisfied, I then pull apart all the layers onto separate pages for printing/cutting. After that, I will be replacing some of the digital elements shown below by using real buttons, strings, and brads… but in order to determine their placement, I used digital ones in my initial design. Here’s what I came up with…
The next step is to pull apart the layers onto separate pages for printing/cutting. I did this in my Silhouette Cameo software since this is what I will use to cut everything out.
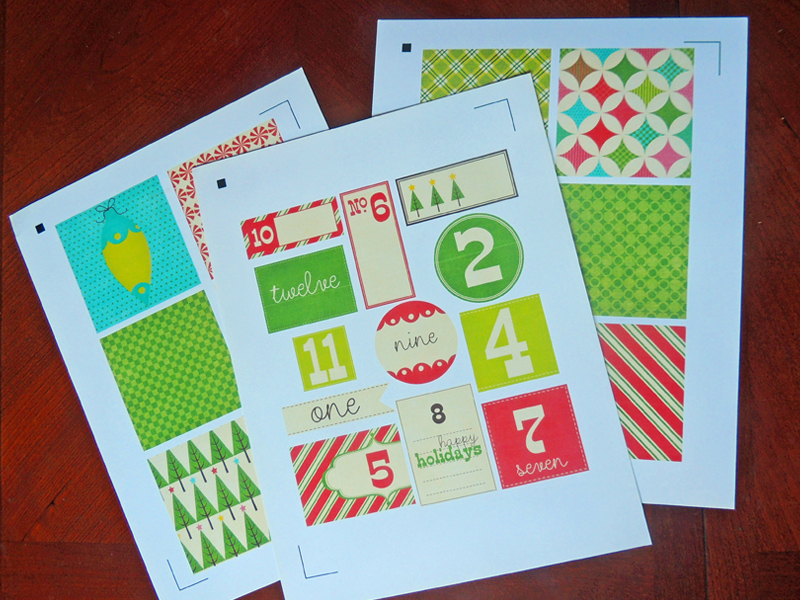
Here’s a look at my papers after I printed them out… once they were ready to be run through my Silhouette Cameo for cutting…
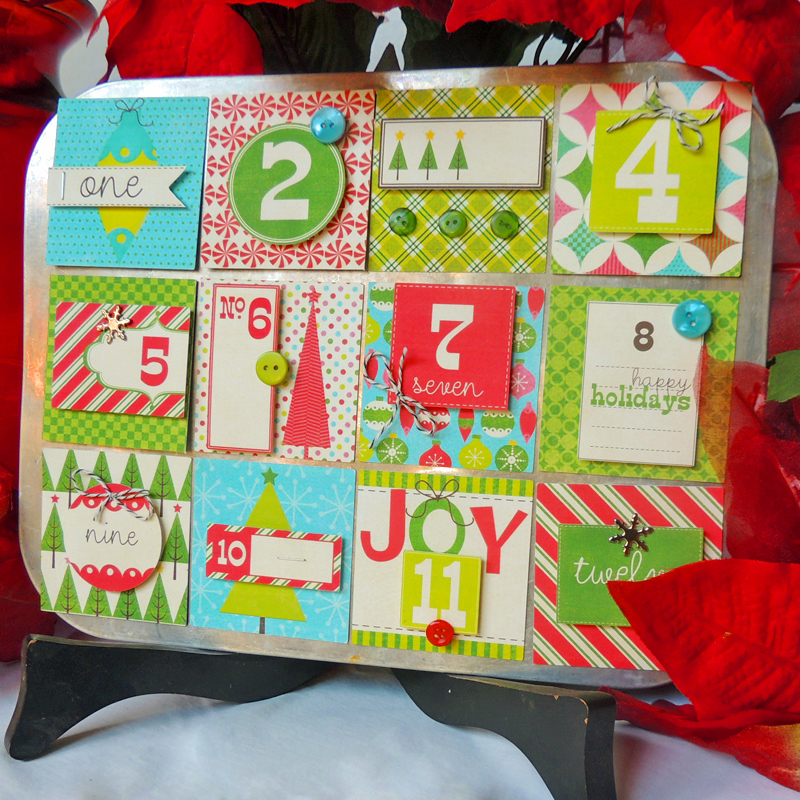
After cutting out all my elements, it was time to assemble each lid. To add some dimension, I used pop dots to attach the daily numbers to the lids, and white glue to attach the buttons and bows. I then attached a magnet to the inside corners of each lid to make sure they each stay put on the muffin tin (you could also use double sided tape if you don’t plan to use this year after year).
Here’s a look at the finished project, once I had it all assembled…
I hope this tutorial will inspire you to create your own countdown calendar this year, using your own favorite digital collections from your stash! If you decide to have a go at it, please let us see it! You can load your project into the hybrid gallery at TDP and leave a comment on this post, below, with a link to your project… etc. We would love to see what you come up with!
 About the Author Donna is a member of the hybrid team here at The Digital Press. She has been a digital scrapper and hybrid crafter for over 10 years, and loves the flexibility digital products provide. When she’s not scrapping you’ll find her in front of the TV, at the computer, or in the kitchen cooking up something scrumptious. She has been married for 40 years to her husband, Sonny, and they live in South Florida with their sweet little dog, Roxy, and kitty siblings Cashmere and Velcro. She also enjoys swimming, gardening, traveling, and chocolate (of course!).