Pocket scrapbooking is hugely popular at the moment, and especially at this time of the year when we’re all excited about recording our year. We’ve all seen beautiful page protectors filled with gorgeous physical and hybrid goodies, but for some of us the thought of getting all covered in glue and glitter or having to spread out all over the kitchen table (and clear it up for every meal!) doesn’t appeal.
Digital pocket pages are a great option and have some advantages over the physical version. For me, the best thing about digital pocket scrapbooking is the space that I’ll save. I print my pages in a photobook at the end of the year, so rather than a large album or two, I have a slim volume which sits nicely on my shelf. Of course, if you prefer to print throughout the year and put the pages in page protectors you can absolutely do that too. I don’t need to print my photos in advance so much, simply drag my photos into Photoshop Elements (or the image editor of your choice…) and get started. And of course I don’t glue my fingers together.
The easiest way to start is with a pocket scrapbooking template. I’m using the Project Twenty-Fifteen templates by Laura Passage.
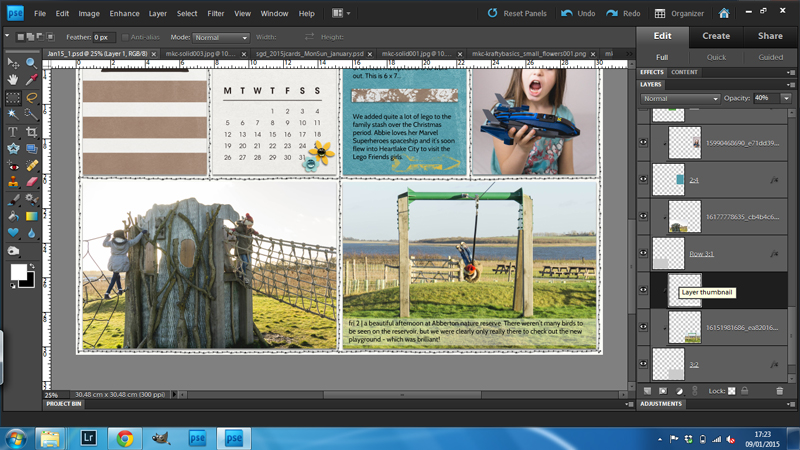
When the PSD file is opened in Photoshop Elements it looks something like this (I’m using PSE 9) but it shouldn’t be different in other versions.
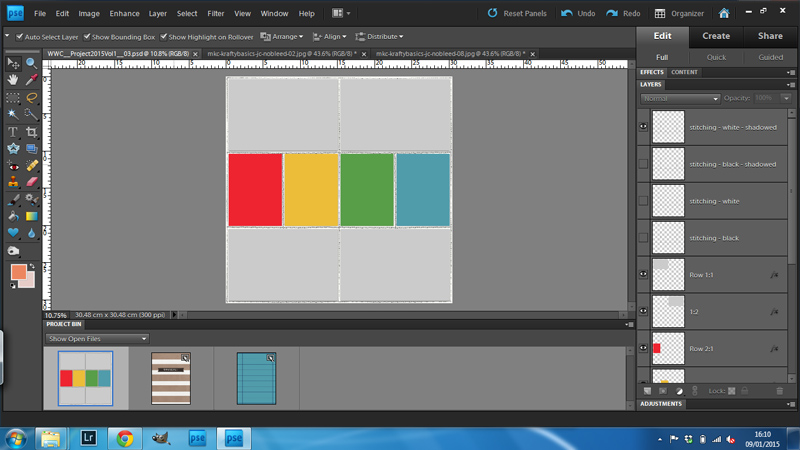
Each rectangle is a shape on its own layer. I’m going to be replacing them with my photos and cards from Krafty Basics by Mari Koegelenberg. I’m also using a card from 2015 Calendar Journal cards by Scotty Girl.
Let’s start with a card. When I open the card file, it appears in the project bin at the bottom of the screen. Click on the rectangle that you want to use so that we’re working on the right layer, then drag the card onto the template. The card will be on the layer above the rectangle. Move the card to where it needs to be, then click ctrl-G (cmd-G on Mac). This applies a clipping mask so that the card is now the exact shape of the rectangle below. You can see where you have a clipping mask applied as the layer appears indented in the layers list on the right.
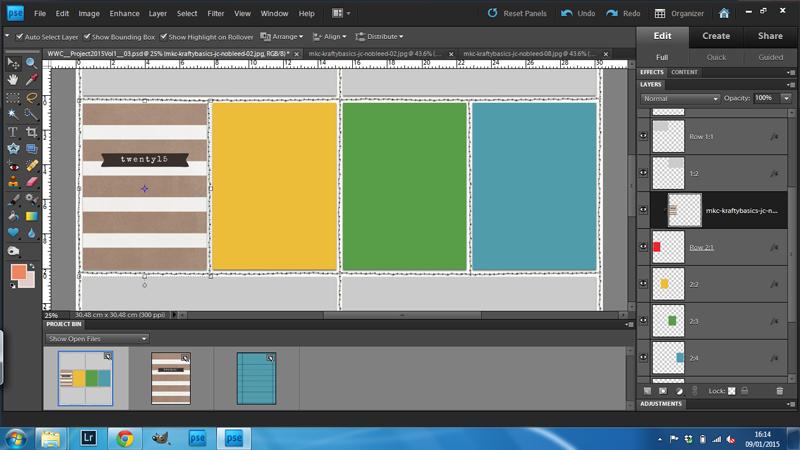
I do exactly the same thing with my photos and any other cards or papers I want to use. The size of the photo layer can be changed by dragging one of the corners until it’s the size you want. It’s best not to increase the size though, as that affects the print quality.
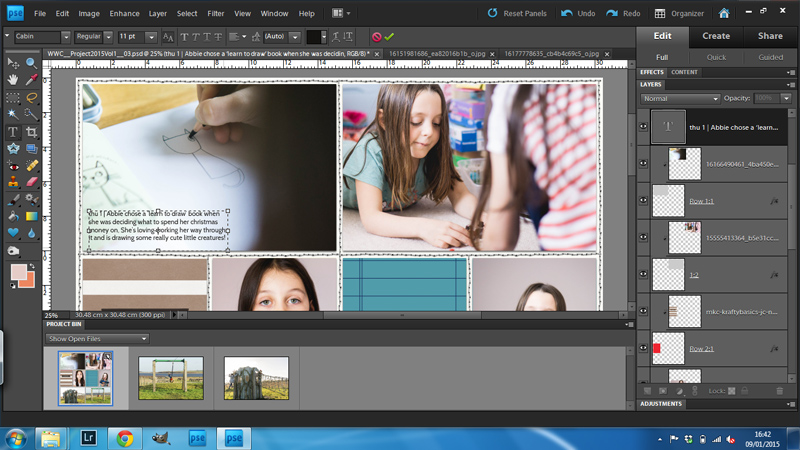
We are scrapbooking here, so I’ll need to add some journalling. I use the text tool to draw out a rectangle to type into, either on a card or right on top of a photo.
I could be done at that point, but sometimes it’s nice to add a few embellishments. I’ve just used a couple of tiny flowers from Mari’s collection. Laura’s template comes with shadows included, but if I add extras, I’ll need to add them. Right click on one of the shadowed cards in the layers panel (the layer name has ‘fx’ next to it), click ‘Copy layer style’. Now select the element you want to shadow and right click on it in the layers panel. Click ‘Paste layer style’.
One last tip that I’ve found really useful. I really like to journal directly on top of my photographs so I can get more pictures and more words in. Sometimes though, it can be hard to read so I add either a strip of paper, or just a rectangle of white underneath the text and adjust the opacity of the layer (at the top of the layers panel) so it doesn’t completely obscure the photo beneath.
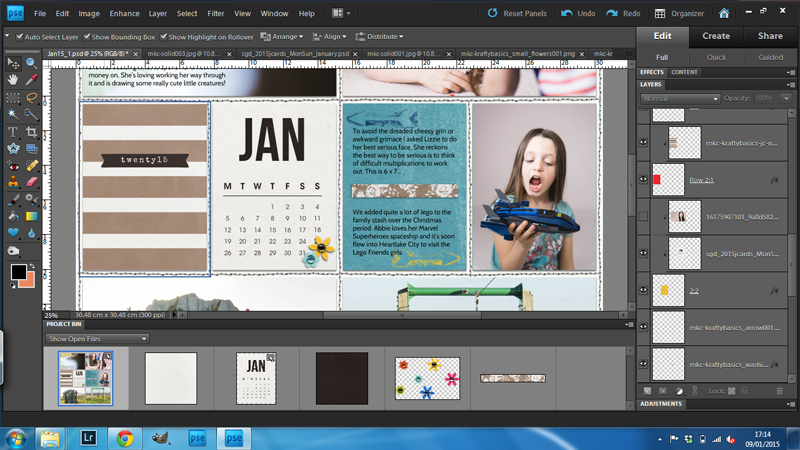
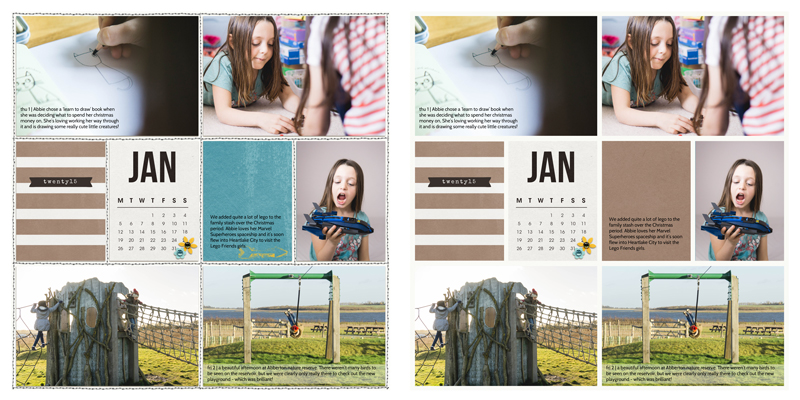
And that’s it, a completed pocket page! Remember you can adjust the page to suit your style. This template comes with stitching to make it closer to the style of the physical products, but you might prefer a cleaner design. I changed it up by removing some of the embellishment, shadowing and using more neutral colours. Which do you prefer?
I hope that’s inspired you to give digital pockets a go. If you have any questions, feel free to ask in the forums! We also have a pocket scrapbooking section in the gallery where you can head for inspiration.
![]() About the Author: Jude Toone is part of the Creative Team at The Digital Press. She lives in the UK with her husband and two fantastic girls. She’s loves travelling and would be off in her campervan every weekend if she could get away with it and loves time spent exploring new places and trying new experiences – and photographing them! She also spends too much time on the computer and doesn’t go running as often as she says she’s going to.
About the Author: Jude Toone is part of the Creative Team at The Digital Press. She lives in the UK with her husband and two fantastic girls. She’s loves travelling and would be off in her campervan every weekend if she could get away with it and loves time spent exploring new places and trying new experiences – and photographing them! She also spends too much time on the computer and doesn’t go running as often as she says she’s going to.
I just started digital scrapbooking in the pocket style using Photoshop elements 11 this year. I noticed in your article you mentioned having your project printed up in a book. This is how I prefer mine. Could you share where you upload your pages to have them printed into a book?