Category: Tutorials

Tutorial Tuesday | Scrap Your Current Favorites

I often find myself struggling to ensure that I’m present in our family’s scrapbooks. Anyone else have this trouble?

Often, it’s just easier to focus on all of the photos and stories about my children, my husband, and our other friends and family. It’s easy to simply forget to ensure that I’m present, too! Today I’m here to share a few ways for you to easily document yourself and your life when you’re preserving your family’s memories.

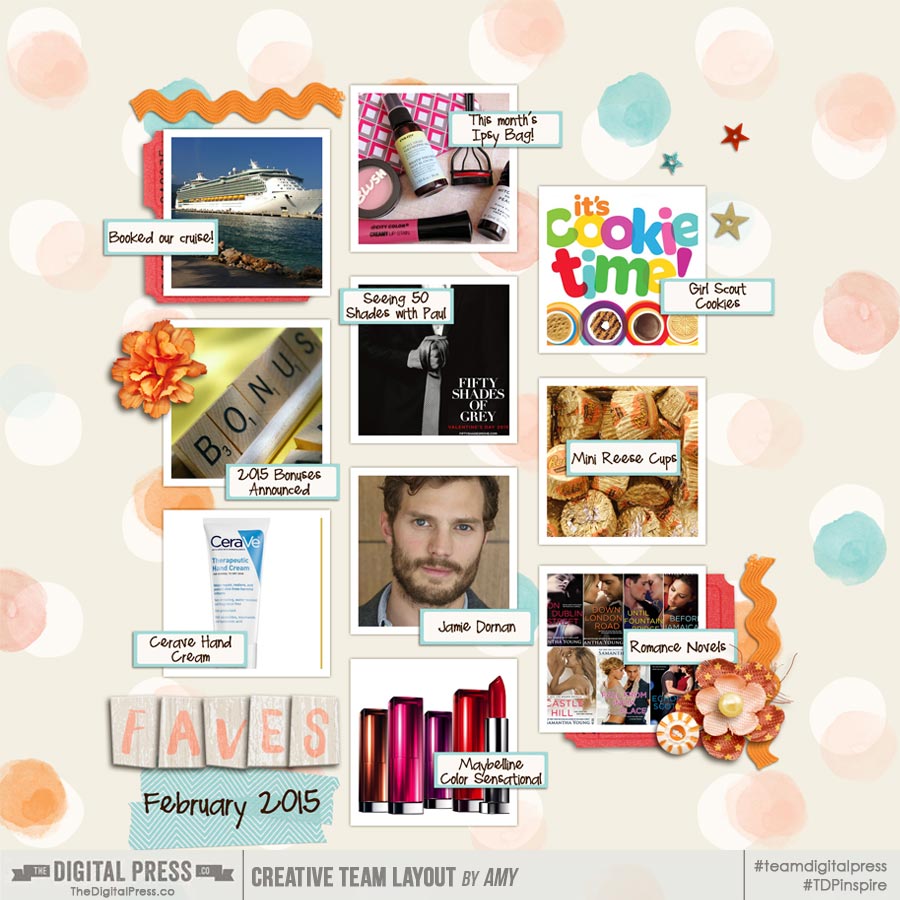
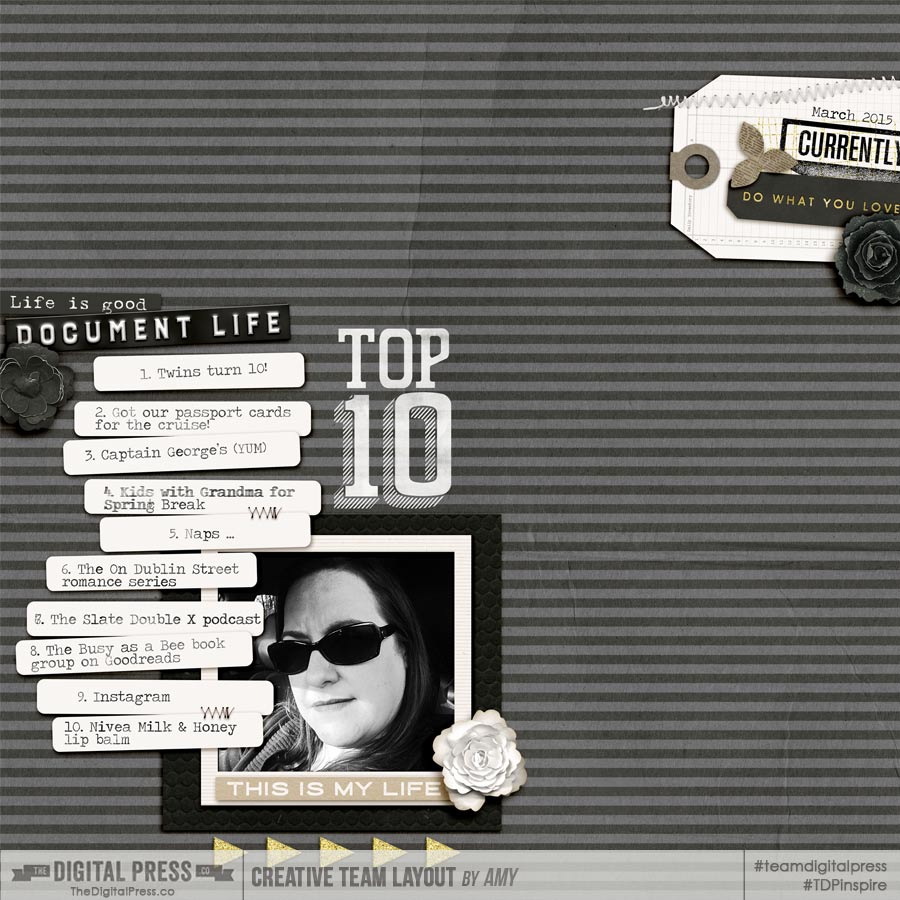
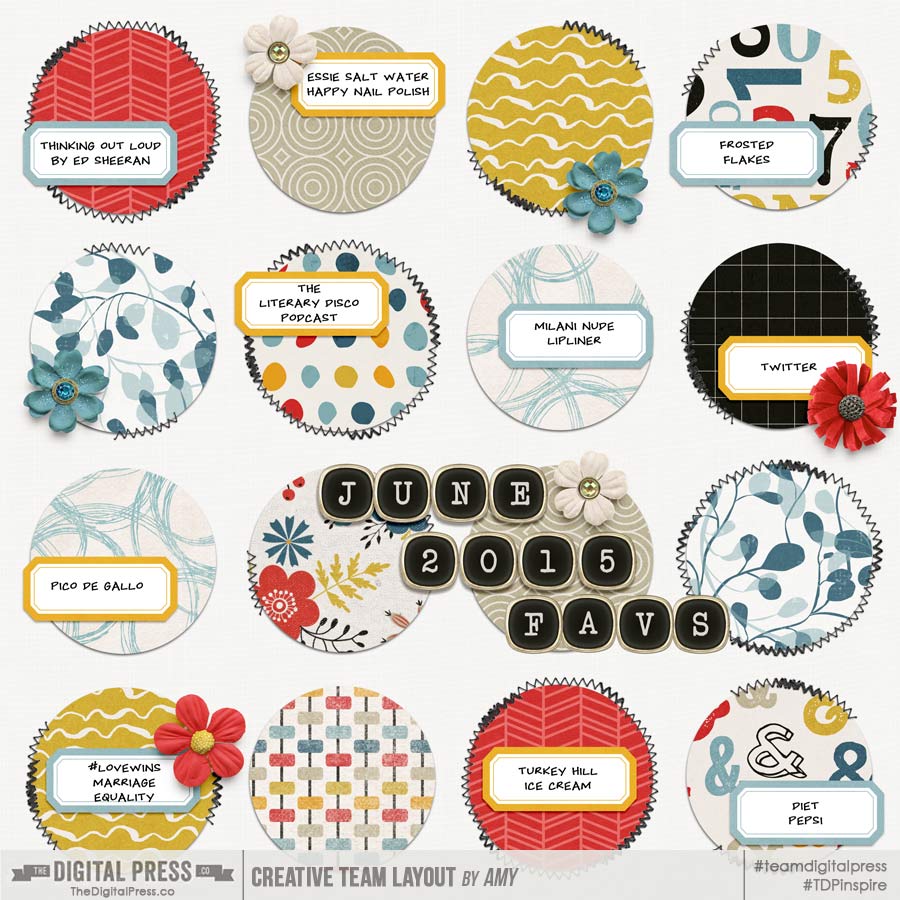
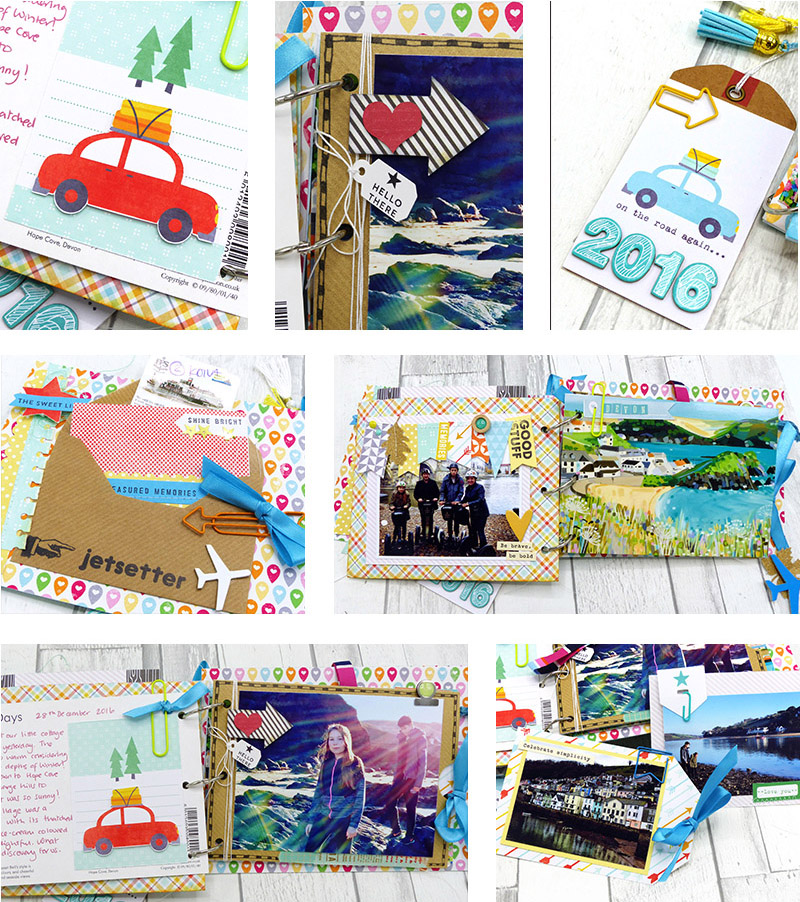
One simply way to ensure that you are included in your memory-keeping is to create a monthly “Current Favorites” layout that captures the things you’re enjoying in any given month. It’s almost like adding a time capsule to your scrapbook… you will be amazed at how much these simple memories can transport you back into a time in the past when you are looking through an album!

For myself, I tend to try to capture 12 things that I enjoyed during the month. Things such as… a book I read, a food I loved, a favorite TV show, or even something I worked hard toward throughout that month.

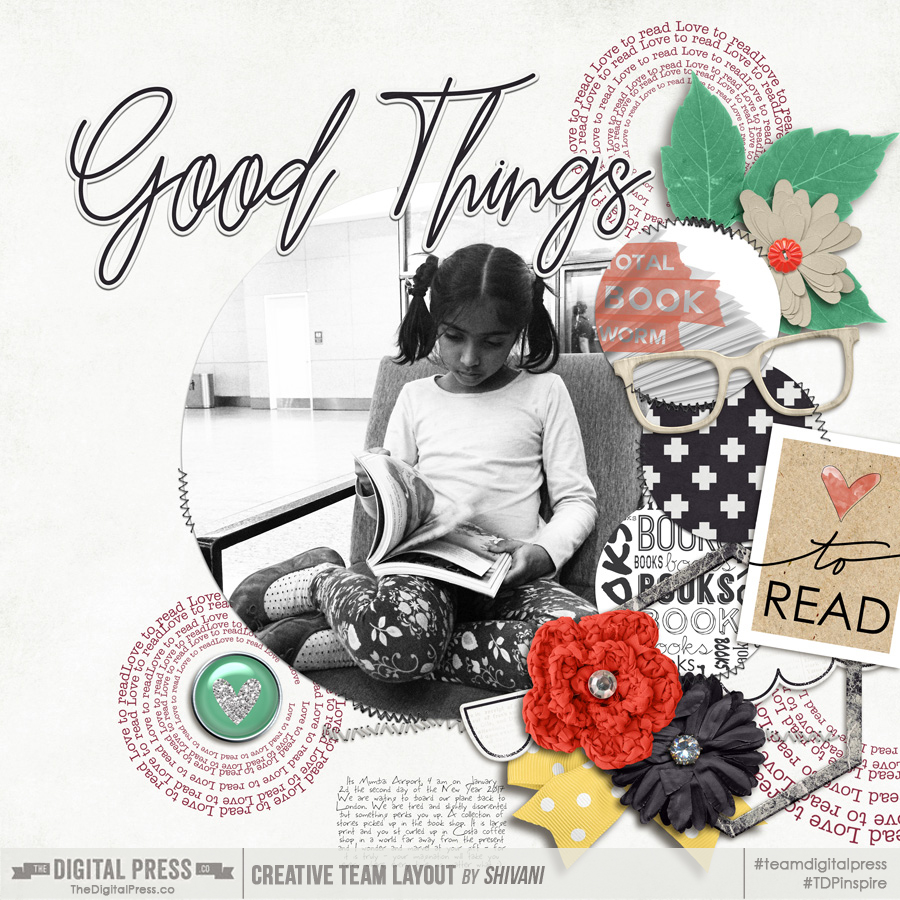
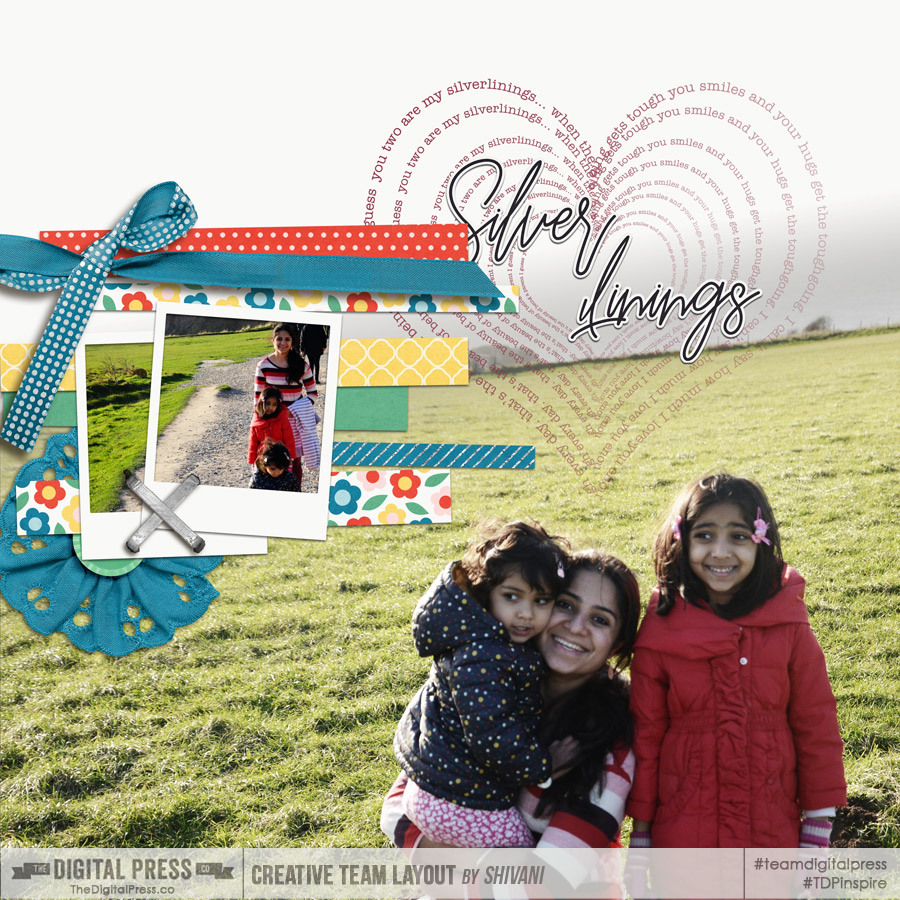
Here are a few examples of the memories I was able to capture during 2015, using this memory-keeping technique…

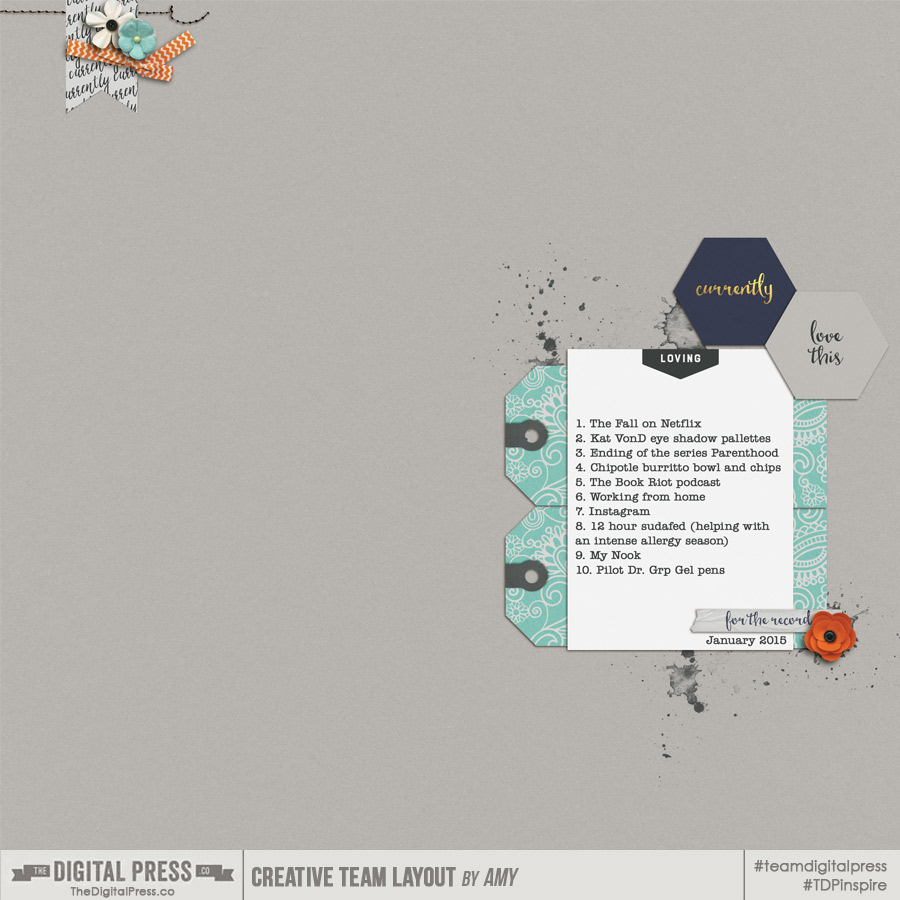
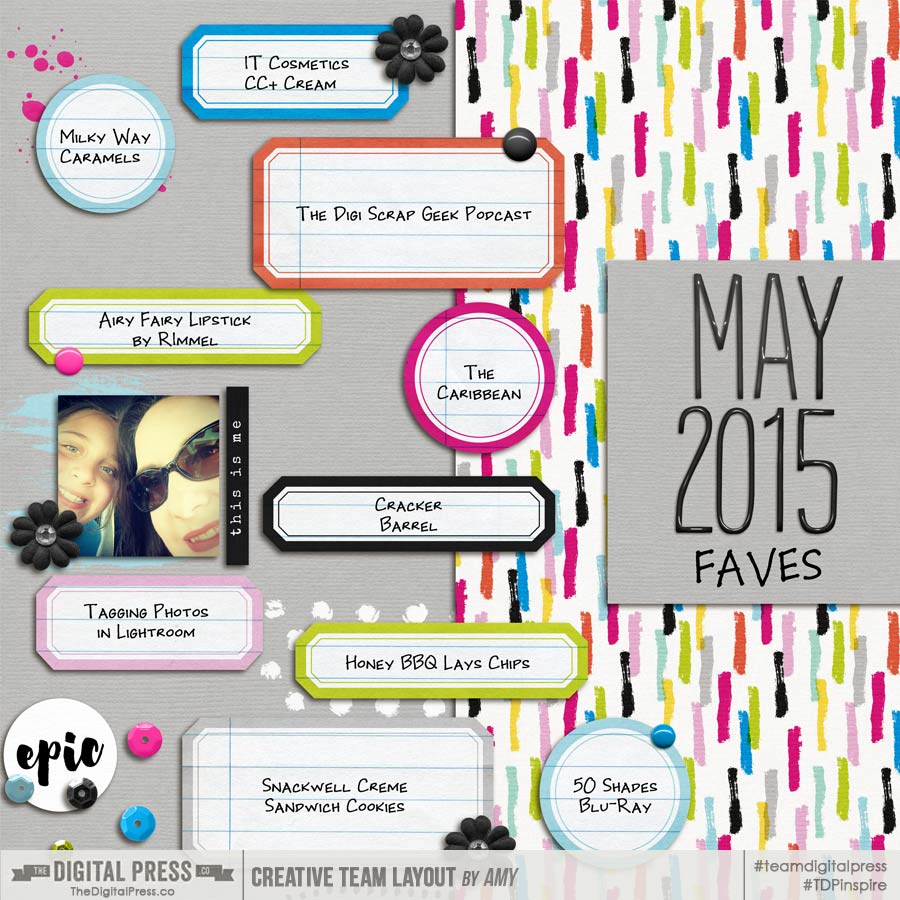
The thing that I’ve come to love the most about these pages is how easy they are for me to create! I can make them simple… or add a ton of elements. I can create them with photos… or without. I can be super creative and think outside of the box with them… or I can make them very quickly and easily. No matter what, however, they afford me a great way to tell the story of MY life over 12 months. I have loved looking back at my pages over 2015, and it’s so fun to see a full year’s worth of the things that I loved. I know that it will be so fun to continue to revisit these in the years to come!

Other options to make this type of project work better for you…

  1. Change the time frame of the pages — you could create them monthly, weekly, or even just quarterly (whatever works better for you and your schedule)
  2. Finding and using a consistent template is another way to make page development quick and easy
  3. Use the same digital kit for each of your “Current Favorites” spreads, to keep things simple
  4. Switch it up and do a “Current Favorites” page for other members of your family, as well (possibly even including your pets!)
  5. Use the concept to document particular categories of favorites… such as your favorite foods, favorite TV shows, favorite books, etc.
  6. If “Current Favorites” doesn’t work for you, you can even try other titles such as “Random Highlights,” “Month in Review,” or simply “Favorites”
  7. Make an entire “Favorites” mini-album to catalog all of your favorites… documenting your thoughts, moods, trends, and treats in one album to enjoy later

I hope this overall idea might give you another way to include yourself into your scrapbooking! It really does add something special to your memory-keeping when you ensure that you and your life are represented! 🙂

Happy scrapping!


Amy

About the Author  Amy lives in Richmond, Virginia with her husband of  15 years and their 11 year old boy/girl twins. Their 20-year-old daughter recently finished her final year at West Virginia University in December 2016, and will begin graduate school in the fall at Clemson! Amy has been scrapbooking since the early 1990s but discovered digital scrapbooking in 2005 when her twins were born and has primarily scrapped digitally since that time. She is passionate about telling her family’s stories and documenting their life together! Amy is a huge reader (mostly literary fiction), and is a pop culture junkie! She also LOVES all things beauty & makeup!

Tutorial Tuesday | Crop Tool in Lightroom

Today we are going to talk about the crop tool in Lightroom. I absolutely love this tool, and I think you will, too!

Mainly, I love this tool when I am sorting through pictures that I would like to print and put into frames. How many times have you struggled to make the photo you want to print the right size to fit in a particular frame? If you are like me, this happens a lot! That’s where this crop tool comes in really handy.

If you are a Lightroom user, you can find the crop tool in the Develop module within the software program. First, select the picture you want to crop… and then click on “Develop” near the top right. The crop tool is a small rectangle box found just under the histogram. I have highlighted it in the picture below…

When you click on that crop button, you will see a few different options. Click on the one that says ”original” and then, in that drop-down menu, you will see various size options.

The size options are the typical photo sizes: 4×6, 5×7, etc. (basically, the most common frame sizes). There is also a custom option in case you have a frame that does not match the given sizes.

When you select a particular size, a hand icon will appear on your image. You will be able to move your image with this hand and decide what section of your image you want printed and what section you want outside the printed area.

In my image below, you can see that I have chosen the 5×7 size. Once I selected that size… I could then move the highlighted part of my image (shown below with the 9 rectangular boxes) to select the area of my image that I want included when I crop the original…

This next part is what I like the best, however… the option to easily switch between a vertical and a horizontal orientation (portrait or landscape) with a simple keystroke.

See, the thing I struggle with most when framing photos is trying to use a horizontal picture and make it fit in a vertical frame (or vice versa). It is almost like putting a square peg in a round hole, and I have wasted quite a few photo prints trying to do just that! Lightroom has a very easy fix for this, however.

Once you have selected the photo/frame size in your drop-down menu, you can simply press ”x” on your keyboard. The crop orientation will then change from horizontal to vertical and you can go about the business of moving the active area of the photo to crop it down to just the portion you would like to print. Yes, it’s that easy! I use this technique a lot! You can see the vertical crop in the picture below. You can toggle between vertical and horizontal by pressing “x” multiple times.

I hope these simple Lightroom tips and tricks will help you more quickly process and prepare your photos — whether for printing and framing, or for exporting to Photoshop in order to scrapbook them, etc.

If you have any questions… definitely feel free to reach out to me using the comments on this post, and ask away!


Pallavi

About the Author Pallavi resides in the United Kingdom with her husband and their son, Rajveer. She has previously lived in Calcutta, Pune, San Francisco, Chicago, London, and Mexico City. She reflects all these places in her pages as she captures her everyday stories. She is an alumnus of Northwestern University, and currently she is learning photography and working towards getting to a healthy weight. Her days are full and she loves it that way!


Hybrid How-To | Printing & Cutting Digital Elements

It’s Saturday… and time for another edition of our Hybrid How-To series here on The Digital Press’s blog! Today, I’m here to help you all see how easy (and fun!) it is to use digital embellishments in your physical projects (like mini albums, and more)!

For those of us who can’t resist pretty paper and embellishments — digital kits are a fantastic way to stretch your crafty budget. For me, patterned papers and adorable die-cuts are probably the best thing about crafting. I am always a little reluctant, however, to use pretty items from my stash because they’re just so cute. For me, the real beauty of digital products is that I can print and cut as many times as I like. Buy a digital kit once, and you can use the items contained within it again and again and again!

For the mini album project I am going to show you today, I chose two kits from The Digital Press — the Go.See.Do collection by Mari Koegelenberg, and also Laura Passage’s Project Twenty Fifteen | July kit, both shown here…


I like to choose kits that are versatile and can be used for lots of different topics or occasions. Although each of these two kits are travel-themed, there are also plenty of generic elements and papers that I know I can use for so many different purposes (and also, for other projects in the future, as well!). For instance, see those tags and labels above? Or the word art stamps, flowers, stars, etc. in this next kit…

For my project, I documented some of our family travels from 2016 in a handmade mini-album.

I used a variety of methods to create the pages. For instance, as shown in the photos below, I created pages by printing out some of the digital papers as foundations for each page; some I made rectangular, and others I notched so that they were flag/pennant-shaped.

Once I had the foundation pages, I came up with some interesting things to attach to each of them (in addition to the photos). For example, I upcycled some old clothing tags to add a bit of interest… creating a title tag with date (top photo, left). I also upcycled some old envelopes that I saved from Christmas, and turned them into pockets (middle row, left). I filled a plastic page protector with sequins and sewed it shut (middle row, right). I also used various fasteners (paper clips, mini clothespins, string, etc.) to add dimension and decoration to each page. So easy!


But the main embellishments on my pages came from the digital kits. Not only did I print out the papers to create pages, I also printed out some of the flat elements and added them to my pages after cutting them out.

I’m lucky enough to own a Silhouette, and the best feature of a cutting machine is the ability to quickly print and cut the adorable elements found in digital kits. The Silhouette makes it a cinch to create my own die-cuts. Today, I’ll take you through the basic steps to trace an element and ready it for cutting.

Step 1:
First, you will need to set up your page to the correct size and add registration marks. These are printed on your page and used to align the cut later (see the marks in the corner of the page in the image below). Then you will drag and drop your digital element onto the page (that car is cute right?!). Anything in the cross-hatched area shown in the picture below won’t be cut… so make sure you position your element in the main body area. In order to cut around the outside of the element, click the Trace button. Then click Select Trace Area.

Step 2:
Now you will drag the box around the shape. The software analyzes the shape (yellow means that it won’t cut in that area). Depending on the shape and color, you may need to drag the sliders for High Pass and Low Pass filters (the more contrast in the image, the better the results). Note that in my example image, below, the car windows are not highlighted in yellow — so the Silhouette can cut the window detail if I want. I just want to go around the outside of the car, however, so I chose Trace Outer Edge.

Step 3:
Voila! In the next image, I moved the car so that you can see the cutting outline that has been created. I group the object and the outline together so that they can be moved around the page easily.

Now that we’ve dealt with how to trace an element… give it a try! Go wild and look at all of those fabulous elements in your digital kits in a completely new light. Think of the things you can do!

As shown in the next image, I added a couple more elements to my project. The trace function did an amazing job on the bicycle shape…

Another way to make the most of those great digital elements is to combine them to create your own elements. Above, you’ll see the yellow tag with “Family Time” written on it. To create that, I dropped the “Family Time” word art from the Project Twenty Fifteen | July kit onto a block of yellow paper… and then I inserted a tag shape over the top. Now I have my own custom-made tag element!

Of course, if you don’t have a cutting machine, you can also do all of this by hand. Fussy cutting is very therapeutic! I often find myself cutting out shapes by hand just because it’s relaxing and a lot quieter! 🙂

Here are a few more photos of my finished project… so you can see a few more examples of the fun things you can create when you print and cut digital elements…

Are you up for a challenge? If you come to the CROSSWORD SECTION in The Digital Press forum, you’ll find this month’s Hybrid Challenge thread… and if you try one of the two hybrid projects we’ve featured on the blog this month, you can earn challenge points for January! For today’s project, all you have to do is print and cut some digital embellishments and include them on a hybrid project of some kind. It doesn’t have to be a travel album — it can be anything, really (a card, a physical scrapbook page, a mini-album like mine, etc.) — as long as you can decorate it with some cut-out digital elements, any project goes! Give it a shot, and share your final results with us! We can’t wait to see what you come up with…


About the Author  Morag Cutts is part of the Hybrid Creative Team here at Digital Press. Morag has been an avid scrapper and photographer for ten years.  Although she adores the flexibility and creativity of digital, Morag can’t resist playing with paper and embellishments – so hybrid scrapping is the perfect medium for her!  Morag lives in the UK with her hubby, two kids and recently adopted puppy.


Tutorial Tuesday | Extracting Digital Elements

Today I am here on the blog to share with you how to use simple extraction techniques to create your own digital elements from journal cards (or similar). This is a fun little trick I find myself using over and over on my layouts… and it is a really easy way to create your own customized embellishments and extend your digital stash!

The journal card I will be using for this tutorial is from Anthology | Pocket Cards by Little Lamm & Co., shown here…

First, you will want to open the journal card you want to use in a photo editing program (I am using Photoshop Elements 10 (PSE10) for this tutorial). Select the Magic Wand Tool on your toolbar…

With the Magic Wand tool, hold down the Shift button and click your mouse on the element/shape you want to remove from the journal card (here, you will see that I selected the orange area). Once it is selected, you should see little “marching ants” around the element…

***TIP*** to select the insides of letters — like the portions of the letters O and E, shown here — hold the shift key and click the inside of the letters so those areas are surrounded by the ‘marching ants,’ too.

Now you will need to right click (with your mouse) on the selected element and it will pull up a menu that looks like the image below. Move you mouse down and highlight ‘Layer via Copy’…

Once you do that, you will see a copy of the selected element in your layers palette. In the layers palette, de-select the original layer of the journal card… and you should be left with the extracted element. Voila! Now you can drag and drop that element anywhere you want onto your layout!

You can see examples of how I used this technique on this layout…

On the layout shown above, I used this extraction technique to create the “stories” circle brush on the top left photo, and also to create the navy word strips (shown at lower left).

Once you know how to extract simple digital elements, the possibilities are endless! You will find that this trick opens up a whole new world… with not only journal cards, but many other items found in digital kits (i.e. you can create a flower sticker from a floral paper… or word art from papers/cards… and more!).

If you try this trick or your own, please share your finished project with us in TDP’s gallery! We’d love to see what you come up with. Happy Scrapping 🙂


JenniferHigniteJennifer Hignite is a mom of three boys and new homeowner with her fiance in the mitten state of Michigan. When she is not scrapbooking, she enjoys photography, decorating, and shopping at Target.

Tutorial Tuesday | Text Boxes


Hello everyone! Today I’m here with you on the blog to go over some of the basics of using text boxes, while also exploring some of the lesser-known functions. I will also share some thoughts on how journaling doesn’t always need to be about documentingsomething; it can very well be simply used as a design element.

I will be demonstrating the methods shown in today’s tutorial in Photoshop Elements 11 (PSE11); the information should translate very similarly to other versions of PSE and/or to Photoshop (PS) itself.

So… let’s get started!

1. Using a basic rectangular text box

Choose the text type tool on your tools panel and draw the boundary of the size of the text box that you would like. Once you have done that, you will see the flashing point of the cursor inside the box. Any text you add will be automatically wrapped to fit the boundaries of this box.

Re-sizing: Once you start your journaling, you may realize that you need more (or less) space that you initially thought when you created the text box. Fear not! Simply drag the diagonal corner of the box outward or inwards to the desired size. Note that the default settings in PSE will either make the text smaller or larger to fit proportionally into the newly-sized text box. You will simply need to change the font size back to what it was originally… and then carry on!


2. Adding a bit of flair to the text box

Imagine that you don’t want your text box to be nice and clean (straight lines, etc.). There are some very simple ways to add a bit of a ‘zing’! Consider the warp text tool; it changes the shape of the box (and in the process, the text within it) to create some very unique results. What better way to add some playfulness to your layouts!


3. Using other shapes as text boxes
Text does not have to be limited to the rectangular or square shapes; we can use other custom shapes too. There are many ways to do this… one of which is to actually create a path that follows your shape. Not all versions of PSE have this capability, however, so I came up with a “hack” that allows you to create a faux-text-path, of sorts. 🙂

To do this… choose the shape you want to use, put it onto your page (temporarily), and then with the text type tool selected… follow the same steps as described above. Because the text is on a separate layer from the text, you can approximate the shape you chose with the text itself. Then, once the underlying shape is hidden (something you can do by clicking the “eye” shape to the “off” position in the right-hand layers palette area)… you will have an interesting shape of journaled text…


4. Using Text as a design element

Another way in which text boxes can be used is as a design element. There are quite a few ways to do it. Repeating captions or phrases in an interesting shape, warping text to fit in with the design of the layout, blending it with the photo, etc.

I’ve created a few examples for you here. In the first layout shown below, I have used the text “on a shape” option to write a few phrases in a circular path. Copying this multiple times and nesting the circles within each gives a nice effect…

In this second layout, I have followed he same approach… but instead, I merged all the various text in the shape of the heart and blended it with the background…

As you can see, there are lots of uses for the text box… and fun little tricks you can use to open up its many possibilities and realize the many different ways it can be put to use. If you try some of these tricks or your own, please share your finished project with us in TDP’s gallery!

‘Till next time… keep scrapping and keep sharing. 🙂


Profile pic avatar small

About the Author Shivani Sohal is a donner of many alter-egos. A finance professional by day in busy London, she morphs into a seemingly normal mum of two in the evenings and weekends. She is constantly found with her fingers in too many pies and juggling the metaphorical balls. That is living on the edge for her; aided by the two ankle biters and a darling hubby who define the warm and mushy for her. She is ferociously dedicated to memory keeping — almost immune to any nay-sayers (or equally-disruptive crying children or annoying house fires!); keeping her head down and forging ahead at all times.

Hybrid How-To | School Valentine Exchange

Okay, I don’t know about you… but I totally CANNOT believe Christmas has already come and gone so quickly! Where in the world did this past year go? It’s 2017! I think I would love for things to slow down a bit, but I know that isn’t possible. 🙂

I know that most of you likely aren’t thinking about Valentine’s Day already (heck, most people don’t even have their Christmas decorations put away yet!)… but ready or not, Valentine’s Day is just around the corner! Therefore, I thought I would get a head-start and today I will be showing you several fun hybrid Valentine’s ideas! Some of them are for Valentine’s that have candy, and some are for those that do not. Either of them can be tweaked to your liking.

For this project, you do not need to have a cutting machine. All projects can be achieved with the supplies listed below. I did, however, use my Silhouette Studio Design space to create my ideas… although similar things can truly be achieved in any photo editing program.

There are tons of digital kits that would be great for this project… and remember, just because it isn’t actually a Valentine-themed kit doesn’t mean it can’t be used for Valentines! For instance, the kit Kindess is Cool (by LJS Designs) has a lot of Christmas-themed elements in it, but I also thought the bear would be adorable for Valentine’s Day. You could even use robot or space-themed kits for Valentine’s Day. This holiday is fun because you can come up with so many Valentine puns… just let your imagination run wild!

In the end, for the projects I will show you today… I decided on these two kits — It’s You I Like by Dunia Designs… and Kindness Is Cool by LJS Designs (I also used the coordinating Kindness is Cool Journal Cards that match the main kit).

The first 2 projects are related, and they’re both perfect for non-candy items like pencils. To begin, I simply drew out a 8.5″ x 11″ square and added the heart paper shown here…

Next, here is the image that I created using the digital elements from the same kit…

If you are using your cutting machine, simply print the image above, place it on your mat and send through to the cutter.  If you will not be using a cutting machine, print your image and follow the steps found below.

Here is a close-up look at what I created…

Once you have your papers/elements printed out… you will punch the layered pieces…  assemble them with the double-sided tape or glue dots (whichever you prefer and/or have on hand)… and then you attach them to the pencils and add a bow. Ta-da! That’s it! Pretty easy, huh?

For this next version, you will trim your printed paper down to the size you want (I cut mine to 2″ x 4-1/2″ and then after trimming, I used a corner punch and rounded the corners). Use the same punched embellishments from the first project, shown up above, and tape them to the center of your trimmed digital paper, as shown below. All you have to do then is add your pencil and that’s it! SO EASY!

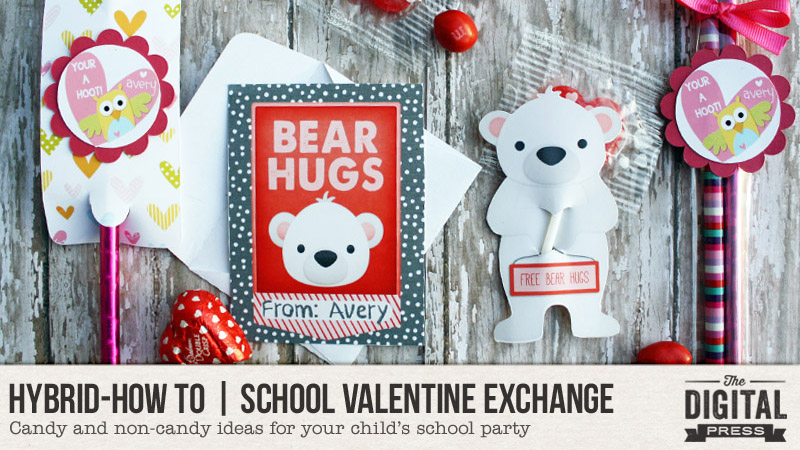
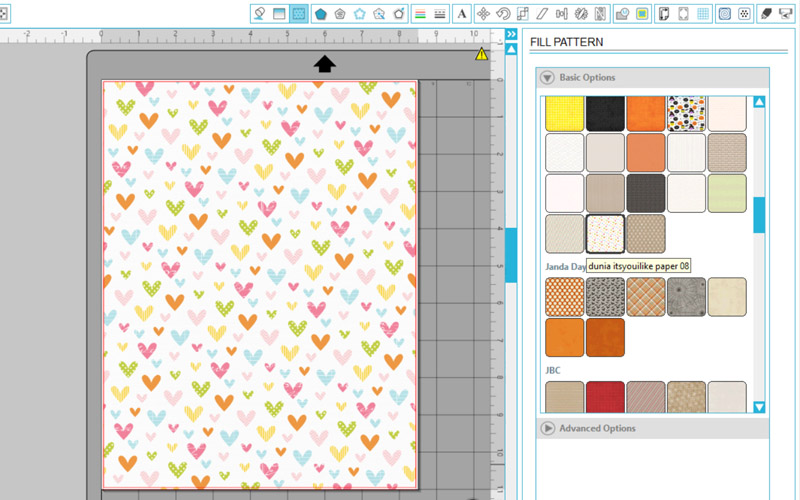
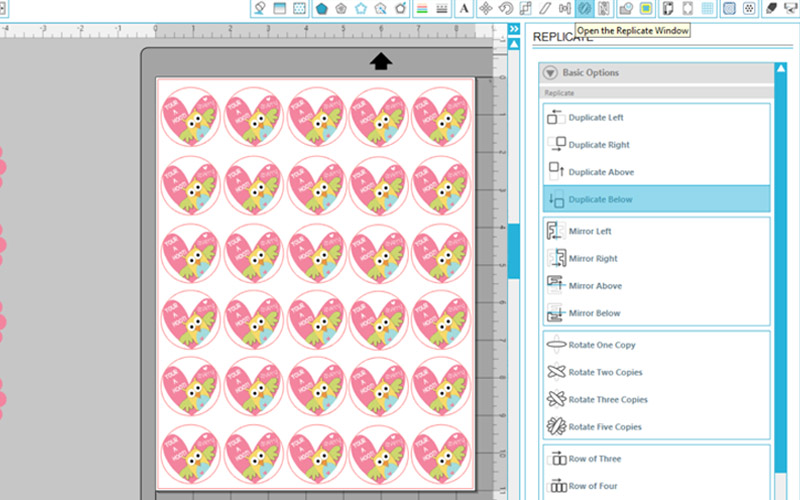
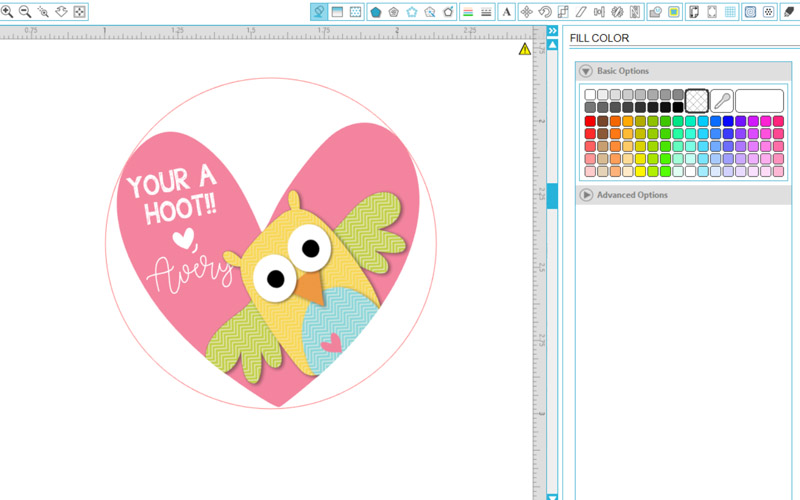
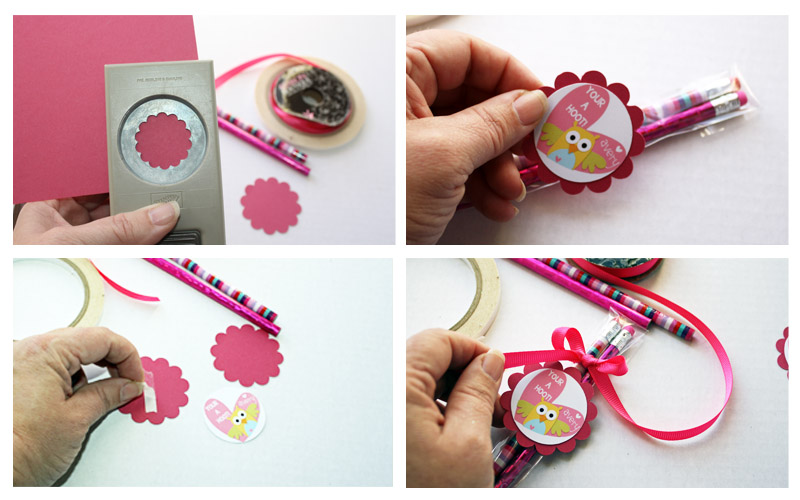
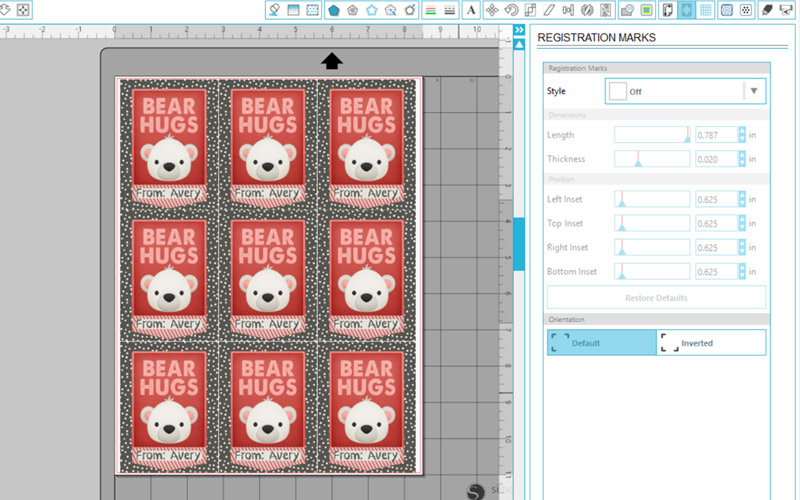
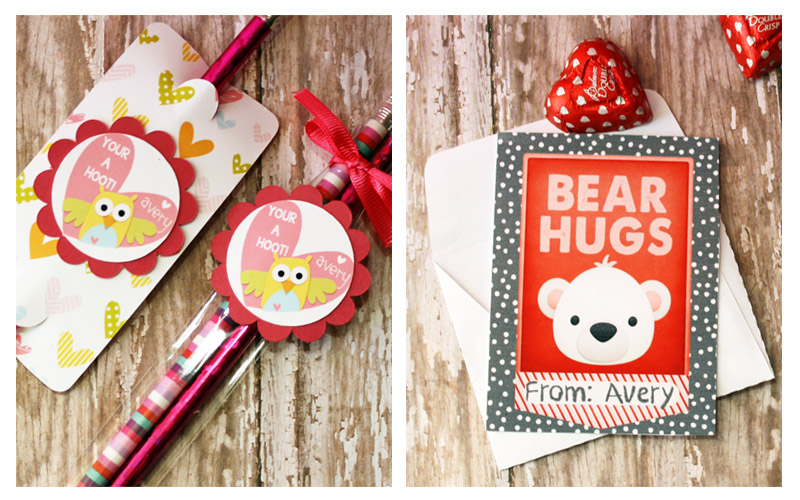
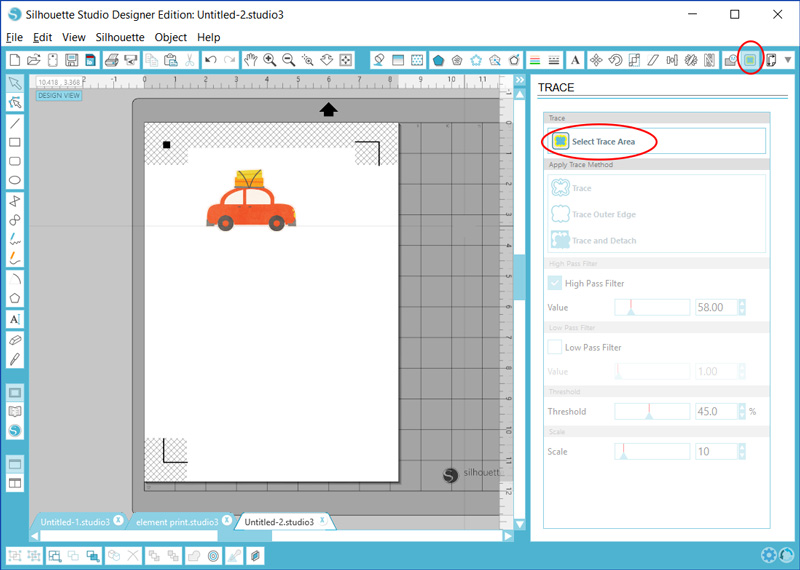
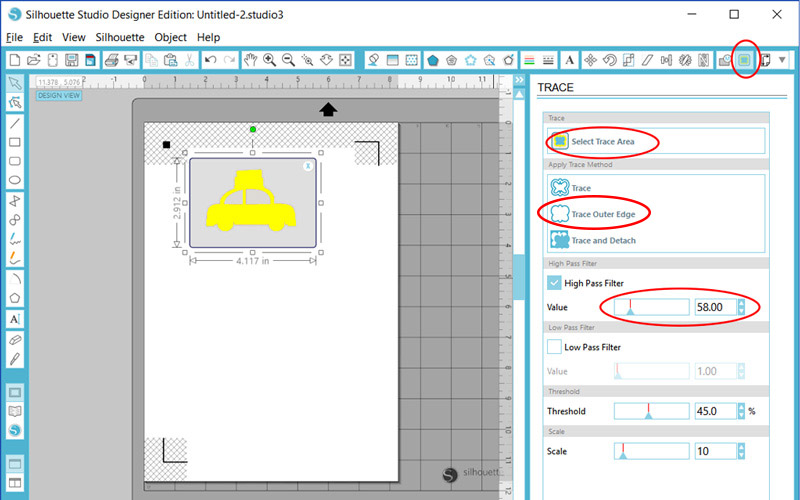
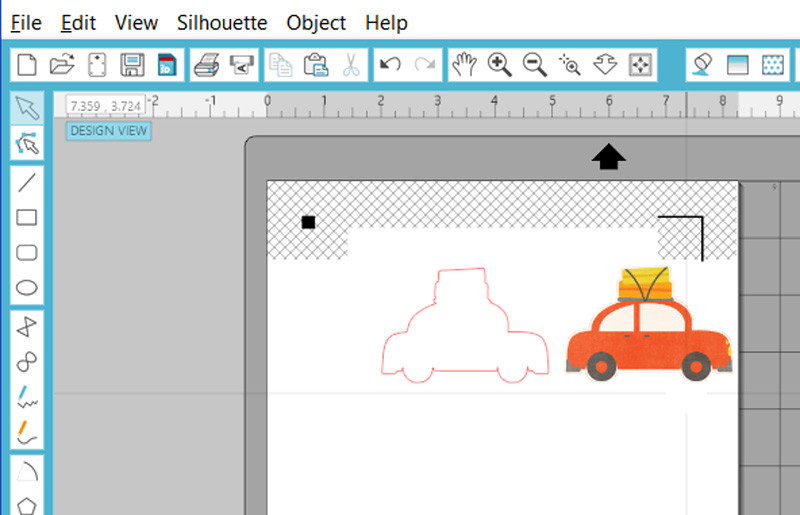
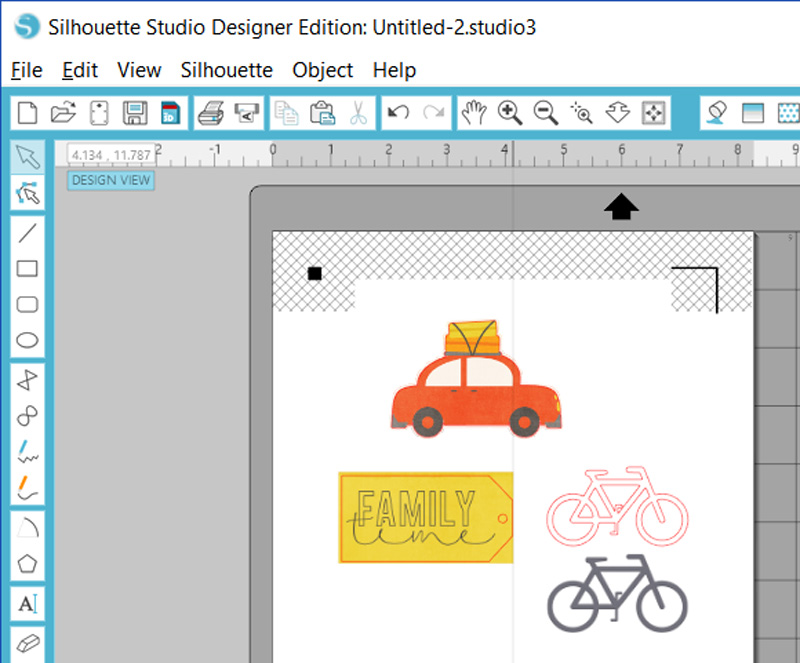
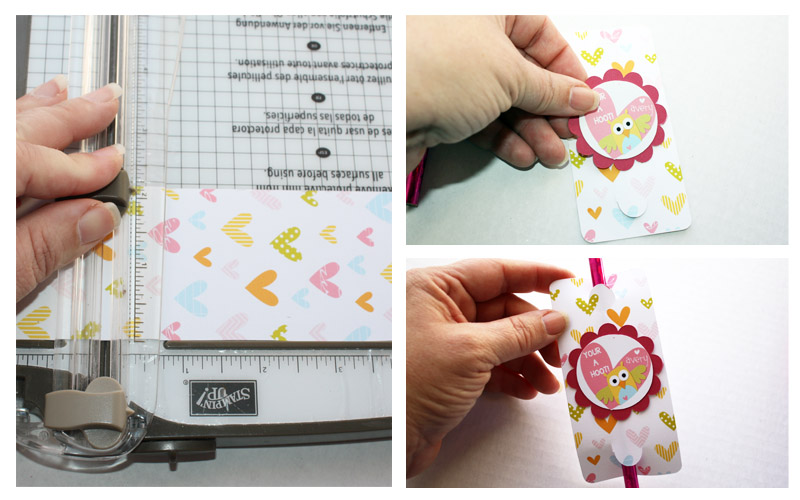
The next idea is perfect to use as a plain Valentine’s Day card (and/or when paired up with a candy treat)… it’s super cute and super easy! Again, it can be created in just about any photo editing software; I used my Silhouette program to do mine because it is just as easy and sometimes even simpler than using Photoshop, etc.).

First, I picked out a journaling card from the set I was using, I added some embellishments, and I personalized it…

Next, I sent it to my printer and cut with my paper trimmer. I also made cute little envelopes out of white printer paper to go with the cards. You can tape a piece of candy to the back or not, whichever you decide…

As you can see, there are several quick and easy ideas to create unique and personalized treats for your child’s Valentine’s Day party. They don’t have to be exactly like the ones I’ve done here; you have plenty of time (as of right now… LOL) to get started and come up with a cute idea that you love! So rummage through that craft closet, pick out your favorite digital kit, and get started!

I’m always here to answer any hybrid questions you may have, so leave me a note in the comments if you need to know anything. Also… if you want to earn challenge points at The Digital Press during the month of January by creating one of these items… head over to the forum and join into our monthly challenge system!


Tanya


About the Author  Tanya is a part of the hybrid team here at The Digital Press. She has been hybrid crafting for at least 14 years now, and loves creating and sharing those creations with others. Her all-time favorite tool is her Silhouette Cameo. She has been married for 28 years to her high school sweetheart, Richard and has two sons: Chris, 25 and Chance, 20. She also enjoys crocheting, photography and woodworking.