Category: Holiday Tips & Tricks

10 Holiday Tips & Tricks | Day Six

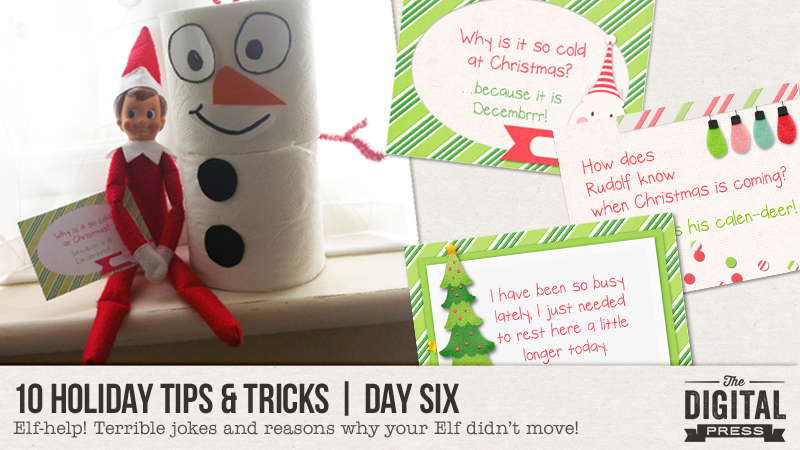
Today is Day Six of our 10 Holiday Tips & Tricks series… and I am here with some Elf-help, for anyone who has an Elf on their shelf this year!

Elf on the Shelf is fairly new to England, where I’m located, and so this is only our second year of having Max (our Elf). I have been so glad for the help and ideas that are available — different stunts for Max to try out (especially the less inventive and less time consuming ones!). There have, of course, been a few times when I have climbed into bed, and then remembered that Max hadn’t moved yet! Ugh! Therefore, this year I decided to have a few corny festive jokes on hand, ready to go, so I can just sit Max down with a joke and call it done. And then I went a step further, and prepared for the possibility (*ahem* reality!) that there might be an occasion when I totally forget to move him at all.

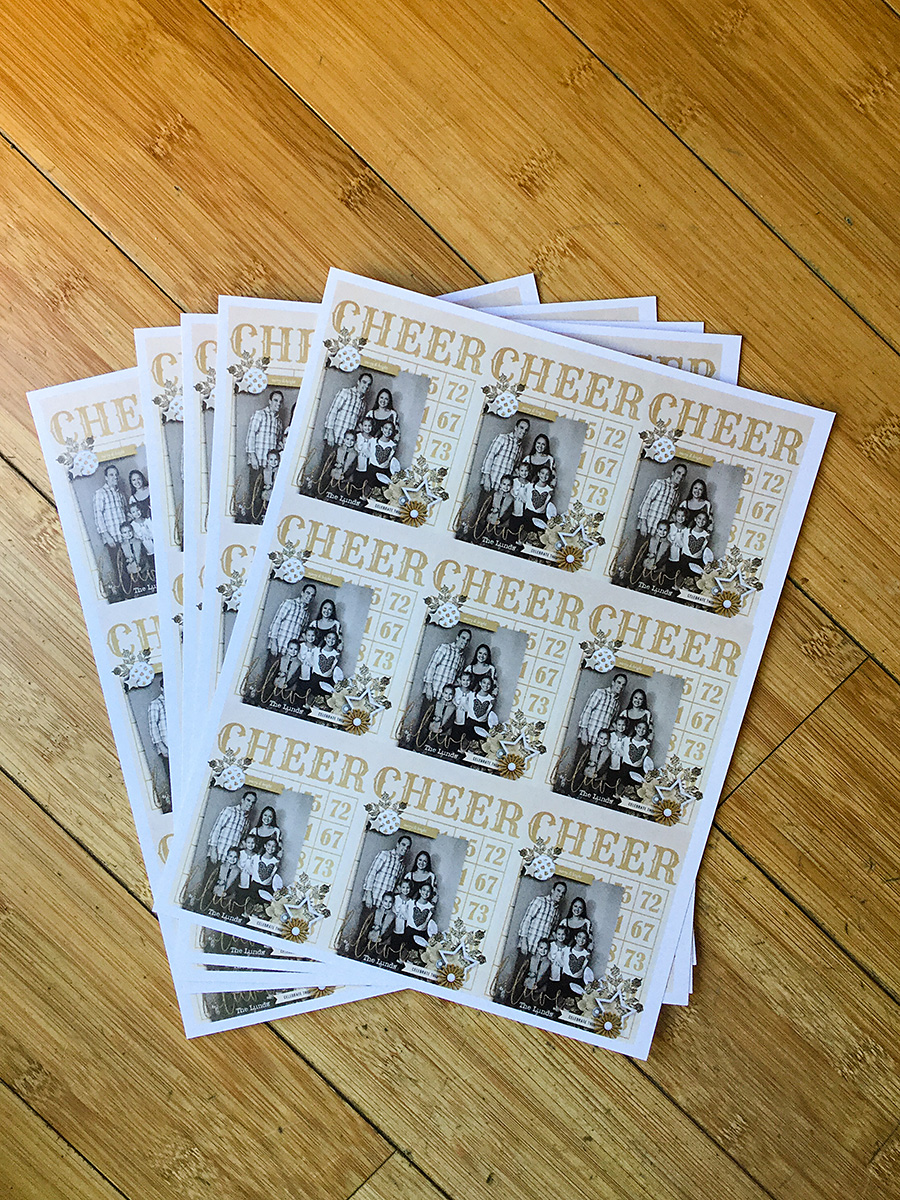
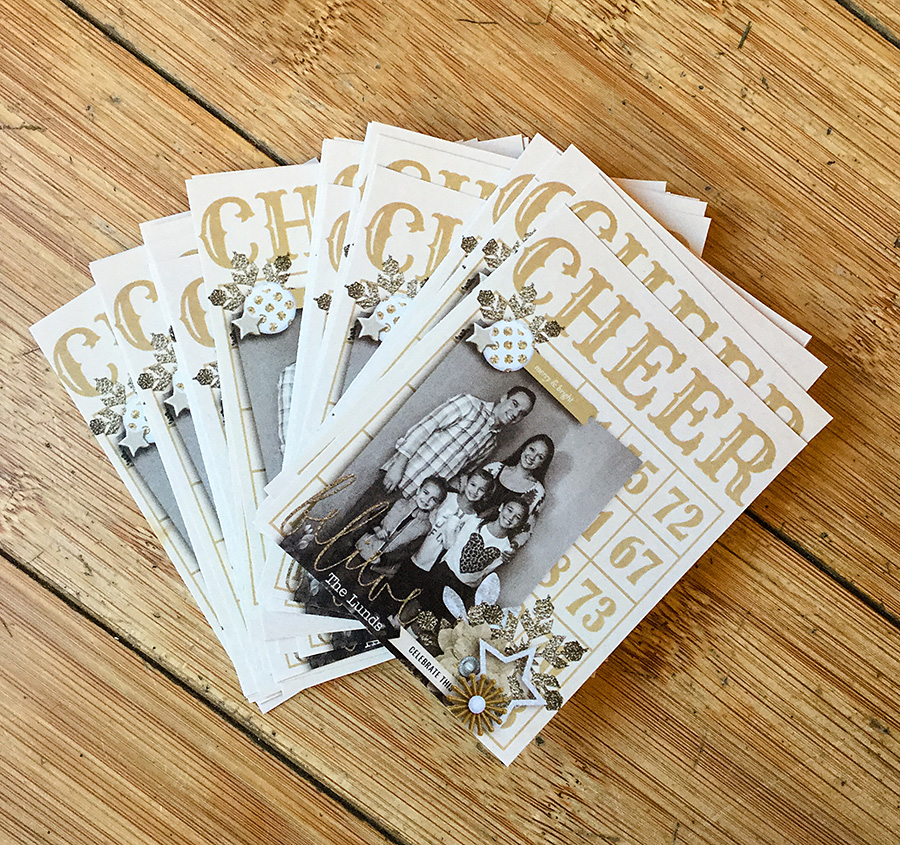
To create my printable cards, shown down below, I used one of River Rose Designs’ new kits — Deck the Halls — to make some blank journal cards (I started off using 3×4 size cards, but then shrank them a bit so I could easily fit 8 on a page). After that, I found 8 fantastic jokes, as well as 8 excellent excuses… and added them to my cards, as shown here…

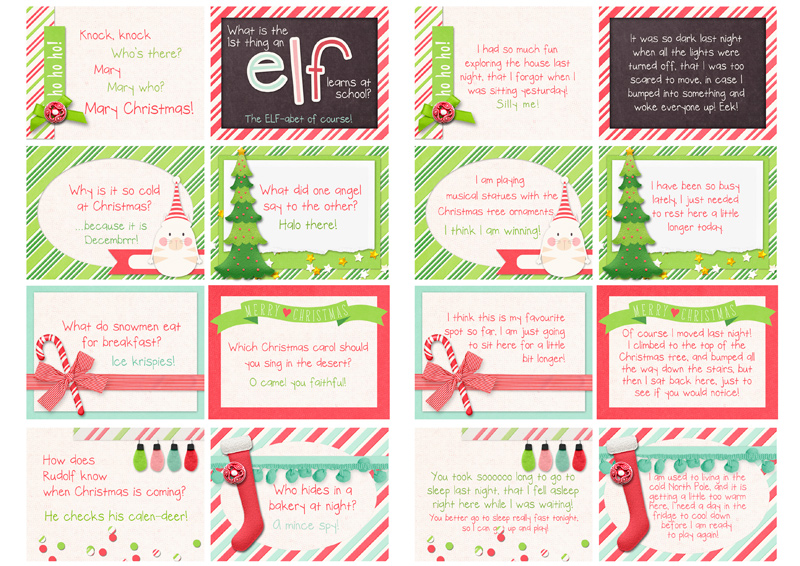
Once I had everything the way I wanted it to look, I printed out all of my cards and cut them to size.

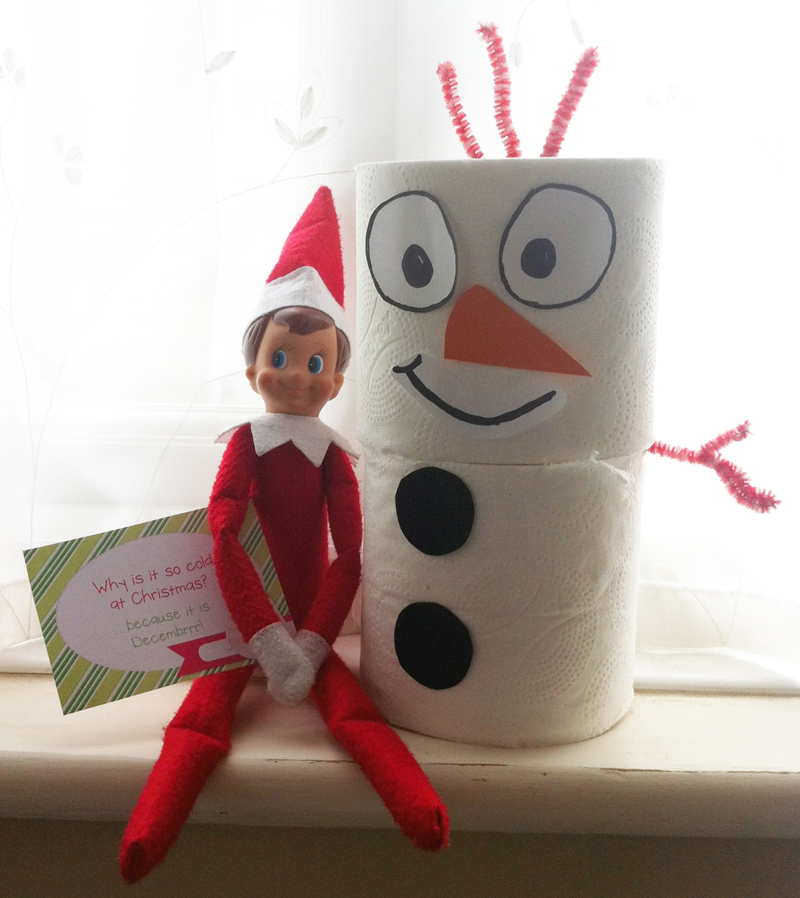
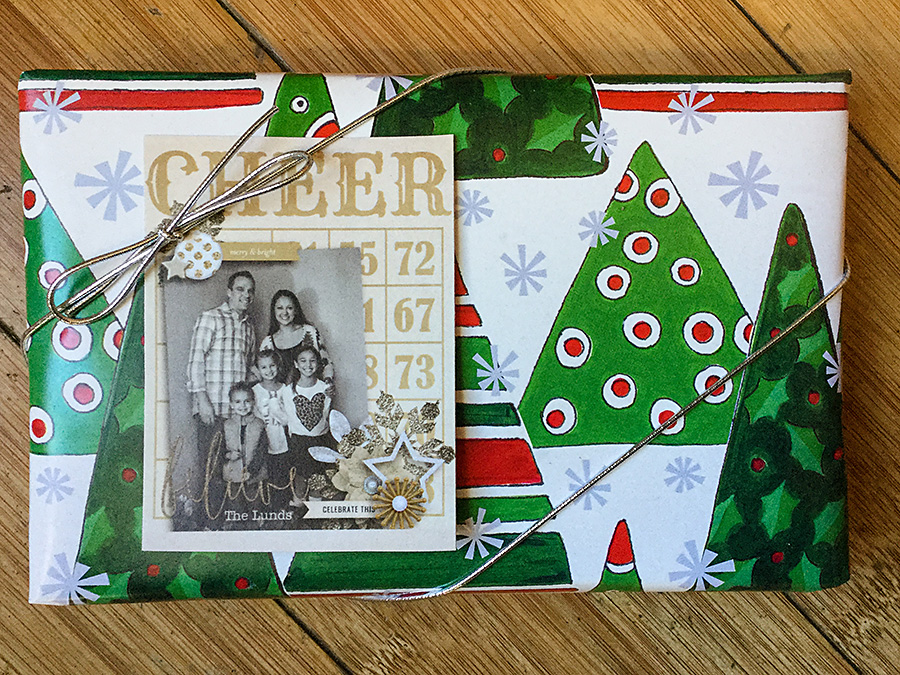
Now I feel like I am ready for anything! 🙂 Here is Max sitting on a window sill with his friend Frosty (can you guess what Max did yesterday?!), laughing at the joke of the day! This window sill is right where my children put their school lunch boxes when they come home from school each day, so this is a great place for those jokes to be noticed…

I hope these ideas help you out, as well, if you have an Elf in your home this holiday season! And if you have no elf, well… festive jokes are great to pop into lunch boxes or in gift bags just for fun! Merry Christmas!


CorrinAbout the Author  Corrin is on the creative team here at The Digital Press. She is a fan of the Big Bang Theory and a lover of cozy pajamas. She lives in the breezy South of England with her husband and 4 crazy kids, who regularly discover & plunder her secret chocolate stashes! She is still trying to get the house straight after moving nearly 3 years ago. Who knows… maybe this will be the year she reaches the bottom of the laundry pile!

10 Holiday Tips & Tricks | Day Five

Hello everyone! It’s Day Five of our 10 Holiday Tips & Tricks series this month… and I am here today to share a fun & inexpensive craft project/home decor idea.

December is usually a crazy month for me. It’s often hard to find a balance between work and family; as a photographer, I have a lot of photos to edit… but I want to make time to do fun things with my kids. This string art project was a fun and inexpensive craft that my kids just loved!

We’ve been crazy about string art lately, and I happened to find some inexpensive wood boards in the dollar section at Target. They are called “menu boards,” and even have their own stand built in. Once you have a board, all you need is some small flat-head nails, a hammer, and some string.

I used cut-out patterns I found on Pinterest to trace the shapes. I used a simple tree pattern for my 7 year old, and a more intricate deer pattern for my 10 year old, and they both did great! I helped some with the nailing, and I highly recommend using a small craft hammer instead of a big one from the tool box!

After the nails were in place, I tied the string around one of the nails and let them go to town winding the string all around. There’s really no wrong way to do it! I finished it off with a secure knot and voila! Here’s a look…

These make great decorations…

…or you can even give them as gifts!

I hope these tips will help you create some fun string art!


FarrahAbout the Author  Farrah Jobling is a member of the creative team here at The Digital Press. She lives in Denver with her amazing family — Mike, Nicholas (9), Claire (7), Hope (2 yr old puppy) & Kringle (9 mo old bunny). She works from home as a photographer and enjoys scrapping her personal photos.

Save

10 Holiday Tips & Tricks | Day Four

Hello everyone! It’s Day Four of our 10 Holiday Tips & Tricks series this month… and I am here today to share a fun & easy gift wrap idea.

One of the ways that I make the holidays easier is by simplifying my Christmas gift wrapping. Instead of having many rolls of different Christmas wrapping paper, each year I buy a huge roll of kraft paper. Then, I buy a different roll of pretty Christmas ribbon for each family member and use the ribbon to “color code” the gifts.

This process cuts down on clutter, in that I no longer need to have so many different rolls of wrapping paper… and it also simplifies things when I am doing my last minute wrapping on Christmas eve (even makes it possible to skip tags!). I adore the look of kraft paper, whether digital or in real life… so the style works for me. If you want to get even fancier, you could add stamps or custom tags to dress up your packages further.

Hopefully this tip of mine will help simplify your holiday season. However you choose to wrap up your gifts this year, though, I hope you have a wonderful holiday season with all the special people in your life!


About the Author  Katie is a member of the creative team here at The Digital Press. She lives in Central Florida with her husband and their four sweet but crazy boys. When she’s not dodging Nerf bullets or trying to dig out from under the never-ending pile of laundry, she enjoys photography, cooking, going to Disney World with her family, and, of course, digital scrapbooking.

10 Holiday Tips & Tricks | Day Three

Hello everyone! It’s Day Three of our 10 Holiday Tips & Tricks series this month… and I am here today to share a super simple photo gift tag idea.

While creating a scrapbooking layout using the new December 2016 TDP Designer Collaboration Holiday Sparkle, I simultaneously created a photo gift tag to adorn our packages this Christmas (two birds! one stone!). Here’s a look at the layout that inspired it…

After creating the layout, I opened the “Cheer” journaling card separately… and then I dragged a few of the clusters from my layout onto the card. I also added a family photo, and resized as needed…

Once I had the finished card/tag, shown above, I opened a new 8.5 x 11 document and dragged in my flattened image. I duplicated it 2 more times to create a row of 3, and then I copied this row of 3 two more times so that I had a grid of 9 tags. Then I re-sized all 9 layers to fit the page, as shown here…

After I had a printable page full of tags, I printed them out on white card stock…

…and cut them into separate tags…

Now, I have an adorable stack of ready-made custom tags that I will add to gifts that we give out during this holiday season…


Krista


About the Author  Krista Lund is a mom of 3, married to her high school sweetheart and living in the San Francisco Bay Area. Some of her favorite things are brownies, chips ‘n’ dip, taking pictures, and documenting her family’s story.

10 Holiday Tips & Tricks | Day Two

Today is Day Two of our 10 Holiday Tips & Tricks series… and we have something really yummy (and easy!) to share with you today — Christmas Tree Cupcakes!

If you’re in need of something yummy and festive for a holiday goodie exchange, or a holiday party, or simply to give to friends/neighbors… these cupcakes are perfect! You can make a few dozen in no time at all & have plenty to share!

I made a layout about these cupcakes a few years back, and I have been asked to bring them to our annual goodie exchange every year since! Here’s a look…

To start — let’s gather our ingredients:

  • 24-36 cupcakes, cooled
    (go ahead & use a boxed mix! Just add an extra egg, use sour cream instead of oil, and milk instead of water… and no one will know you didn’t make them homemade!) 😉
  • 1-1/2 cups (3 cubes) of room-temperature butter
  • 3-to-4 cups of powdered sugar (exact amount to taste)
  • 1 tablespoon vanilla extract
  • 1M frosting tip & frosting bag
    (I prefer the disposable Wilton bags because #easycleanup)
  • Green gel icing color
  • preferred decor
    (for the following photos I used rainbow nonpareils, but any sprinkle will do! In the previous photo/layout, I used holiday-colored nonpareils and gold stars)
  • Extracts, if desired
    (peppermint is a fun one to use with the green color!)

Start with the butter in the mixer & beat the heck out of it — seriously — approximately 10 minutes! Once it is white & super fluffy, you’re good to slowly add in the powdered sugar.

As you add the sugar, taste it occasionally as you go; typically, I use about 3-1/2 cups of sugar.

After the sugar is all incorporated, add the tablespoon of vanilla. Now it’s time to add coloring or extracts. Add a teaspoon at a time until you reach the desired color/flavor.

To decorate… trim the tip off of the frosting bag, drop in the 1M tip & then fill it up with your delicious buttercream. To make the tree shape — start on the outside of your cupcake & make 3 circles- going smaller as you get to the top. Finally, add your sprinkles… and voila! Christmas tree cupcakes!

*FOOTNOTE* my favorite thing to do with the left over buttercream (besides squirt it straight into my mouth!) is to put it between graham crackers & then into the freezer. My kids call them Freezer cookies! 🙂


Amie
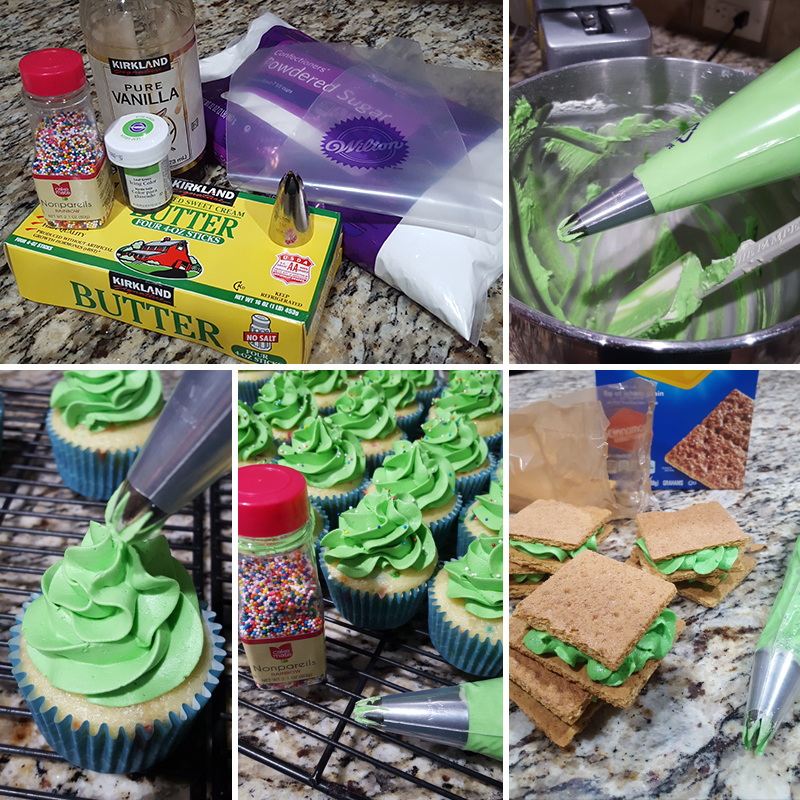
About the Author  Amie is a craft-loving dental hygienist who lives in Washington state. She loves her husband, her two kids (ages 8 & 5), and her English Bulldog… as well as coffee, baking cupcakes, daffodils, glitter & sprinkles, reading a good book, and lip gloss — not necessarily in that order.

10 Holiday Tips & Tricks | Day One

Exciting news today! We’re deviating from our normal monthly blog schedule for the month of December… in order to bring you a fun series of 10 Holiday Tips & Tricks! This series will run every Mon/Wed/Fri throughout the month of December, leading up to (and ending just before) Christmas weekend. That means you can expect ten (10) different posts this month full of fun and inspirational ideas that are sure to make your holiday season simpler… craftier… cuter… and/or yummier!

Today is Day One of our series… and we have a really fun (and easy!) project to share with you — hybrid gift tags!

How to make these beauties? It’s so easy!

First, I always create the entire tag in Photoshop (PS) or Photoshop Elements (PSE) before printing and assembling. For the tags you see here, I used Dunia Designs’ December Documented product line (papers | elements | journal cards).

Here are a few details about my overall process…

  • First, I find a digital tag that I like and use it as the foundation for everything else. In other words — I just find any tag shape in any kit, and use it as a clipping mask for the rest of the items found in the main kit I choose for my project.
  • Next, I add the elements and papers I want to use from the kit I’ve chosen… and I clip them to the tag shape (CTRL-G in PSE; CTRL-ALT-G in PS).
  • This next part is a personal preference thing… but I like to build out all my tags together on one 8.5 x 11 canvas. This means that I layer them and make them look the way they’ll look once they’re assembled later… but in digital format, on my computer screen, so I can see a preview. Sometimes I even add digital stitching as a place holder for the real deal later on (again, to see what it will look like). This is a look at the digital version of my tags, which I created fully in PSE…

Once I have the tags the way I like them, that is when I pull the layers apart and create a print sheet, as shown in the next image (notice the the digital stitching isn’t included as a part of the print sheet)…


Once I have my print sheet ready… I save it, print it, cut each embellishment out, and assemble (using my original digital/layered mock-up as a guide).

Also, once they’re assembled… I always real-stitch all of my hybrid Christmas tags. I just think they’re cuter that way! 🙂

And that’s it! That’s all there is to it. The fun thing about this is that you can create a file to use over and over again, and simply swap in new names/etc. in the text areas (to use the same tag for different people/gifts). It can be different every time you print it!


Kate 
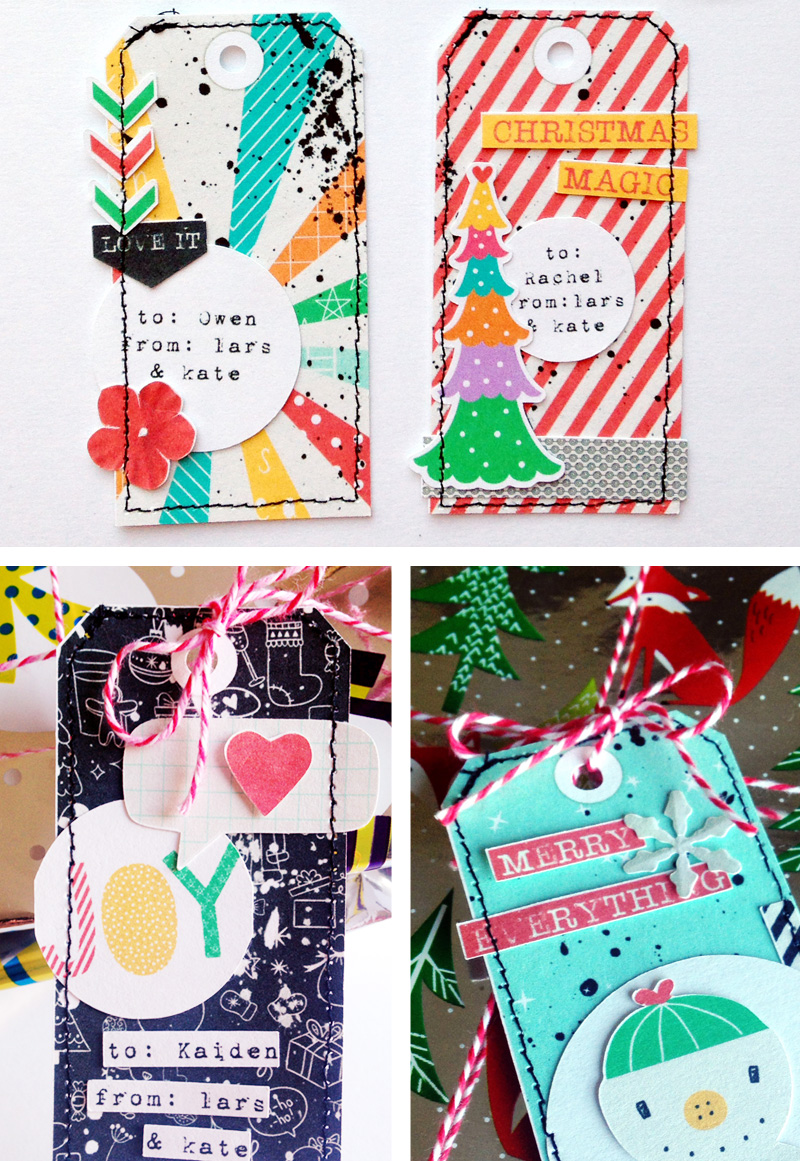
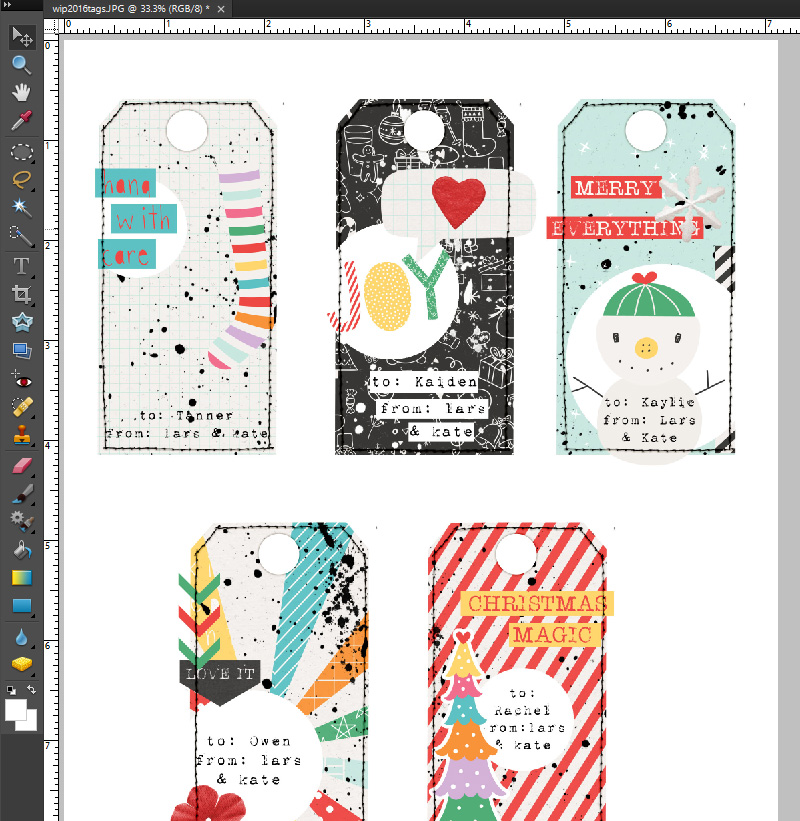
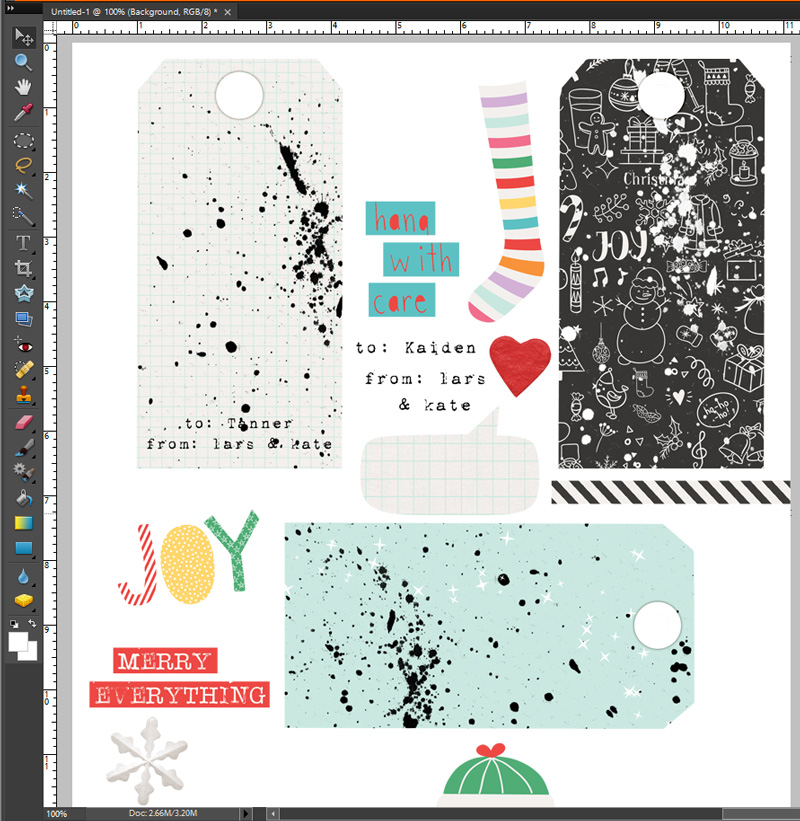
About the Author  Kate is on the hybrid team here at The Digital Press. She lives on the Utah/Colorado border with her husband, 5 kids, 10 chickens, and a dog named Gracie. She’s a city-born girl who found she’s really a country girl at heart. She can be found outside, barefoot, and probably in her garden.