Creating a Heart Halo

It’s Tutorial Tuesday! If you’re anything like me, you like to recreate techniques you see on other layouts. I’m a sucker for paper layouts and saw a lot of them lately that included heart halos in some fashion. If it’s either cutouts or paper pieces, I love them all.


Creating a Heart Halo


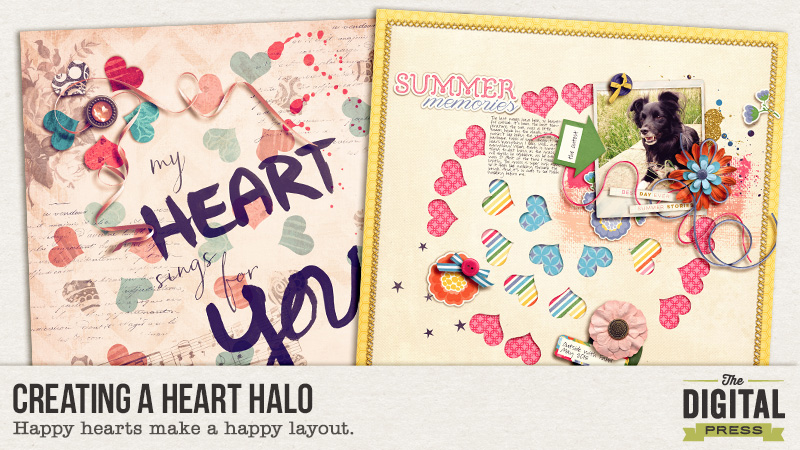
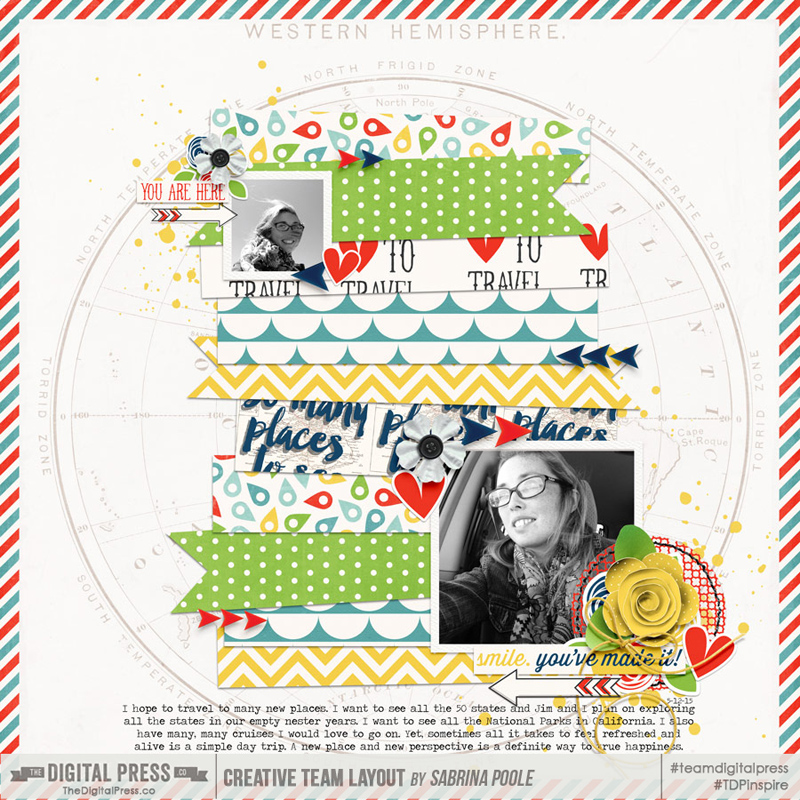
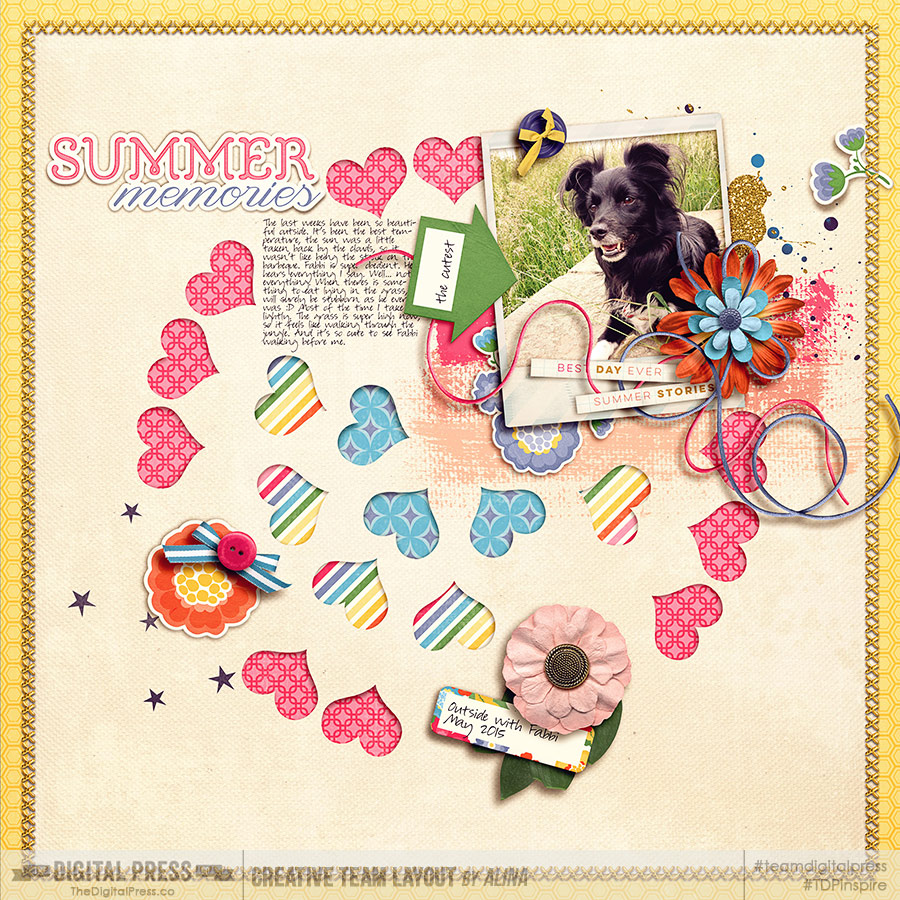
My first layout with heart halos came out pretty, at least in my world.

Creating a Heart Halo
The image is linked to the gallery for the credits.

I hope now you know what I mean by heart halo. It’s a circle of hearts. With their bottom pointing to the center of the circle. I’m going to scraplift myself to show you how I did it.

  • Prep your canvas first, in my case it’s 3600×3600 px and get a solid paper in or leave your solid background.
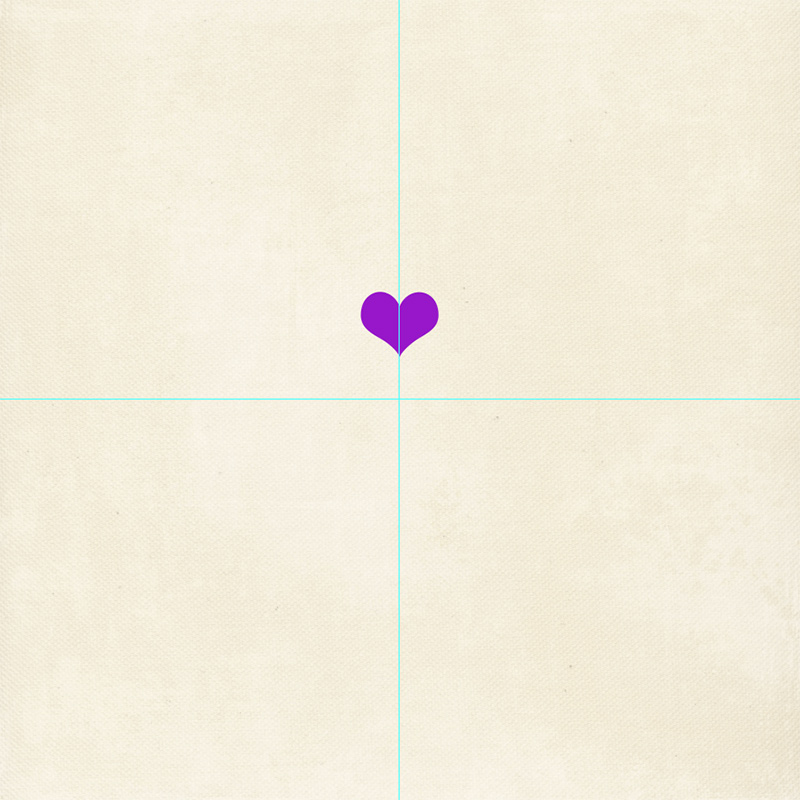
  • The first thing you want to do is creating a virtual middle of your heart halo. I did this with two guides, one vertical, one horizontal. Click on View → New Guide and type in half of the width of your canvas (6 inch or 1800 px for me). Do that again and check the other orientation the second time.

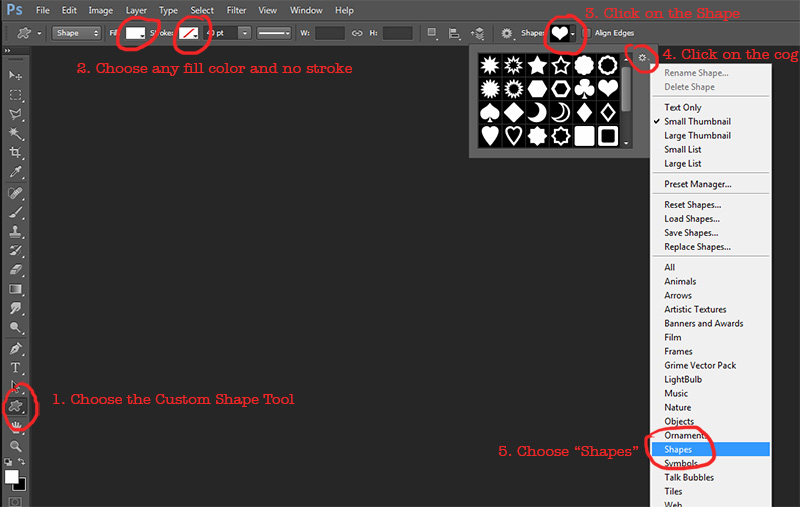
Next you draw a shape.

  • Click and hold the Shape tool, choose the Custom Shape tool. Click on a fill color that is different enough from your background, no stroke.
  • In the Shape window, click on the little cog and on Shapes. Now load the „Shape“ collection. When you are asked to save before, you of course can. If you only used PS shapes this far, there is not much to save.
  • In the „Shape“ collection you will find the heart. Click on it to make it active.


Creating a Heart Halo


  • Now click and drag on your canvas and when you feel you got the shape like you want it, release the click and go back to your move tool (shortcut v).
  • Align the vertical center of your heart with the vertical guide a little above the crossing of the guides. Do this manually with your move tool active. There is no need to make it 100% exact. It should look something like this:


Creating a Heart Halo


The Math

Before you proceed, make a decision on how many hearts you want in your halo circle. In my first example both inner and outer circle have 12 hearts. This is the easiest to recreate, because you don’t have to do any math. I will show you later why.

I show you now how to do the math anyway, because in the upcoming layout, I will use 5 hearts in the inner circle. I will try to make it as easy as I can, even for the math challenged. One round of a circle has 360 degrees. If you want to evenly distribute your hearts around your circle (what I’m doing here), you have to divide the 360 degrees by the amount of hearts you want to have in your circle. In my example with 5 hearts in one circle: 360 degrees : 5 hearts =72 degrees. Math can be so beautiful when you combine it with hearts! So every heart will be 72 degrees apart from the next heart when you are having 5 hearts in your circle.

  • With that in mind, we continue with our aligned heart. Copy it (ctrl/cmd+j)
  • Click on one corner to make the Transform tool active
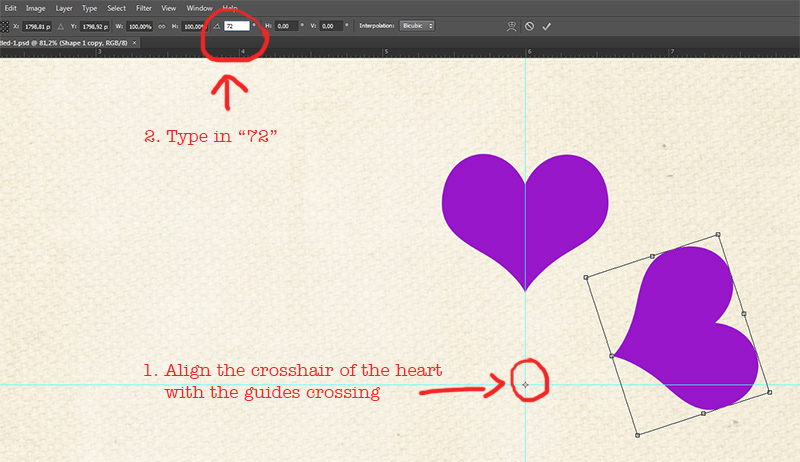
  • You see that little crosshair in the middle of the heart. Pull that one to the point where the two guides meet. It’s good to be as close as you can but don’t worry about placing it 100% correctly.
  • In the details for the tool you see that little degrees sign. Type 72 into it. Press Enter two times.

Before you pressed Enter two times it should look like this:


Creating a Heart Halo


You’ve now got two hearts and they are 72 degrees apart. Isn’t that romantic? Well, but you want more hearts. You can now proceed slowly by copying the second heart, align the crosshair and type in 72 into the degrees, or you can do it faster by doing more math.

  • Copy the first two hearts, have both copies active
  • Align the crosshair of the two of them with the guide crossing
  • Type 144 into the degrees (72 x 2=144)
  • Press Enter two times


Creating a Heart Halo


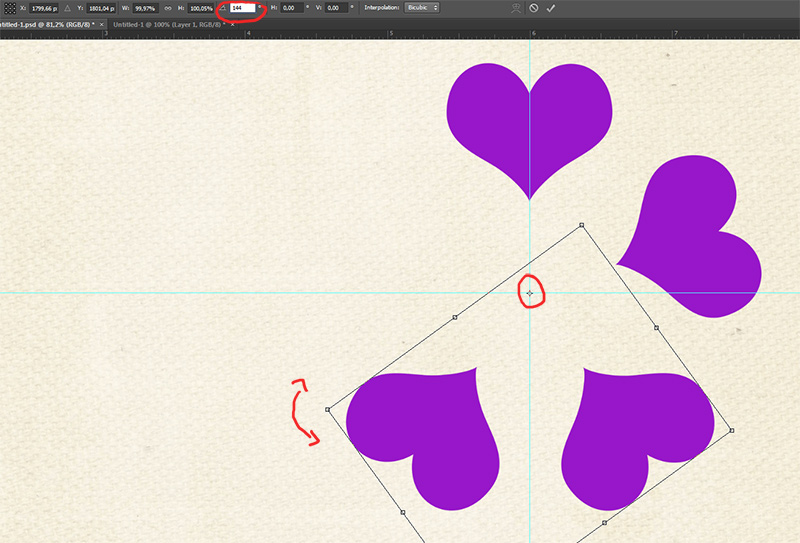
  • Now make the 5th and  completing heart.

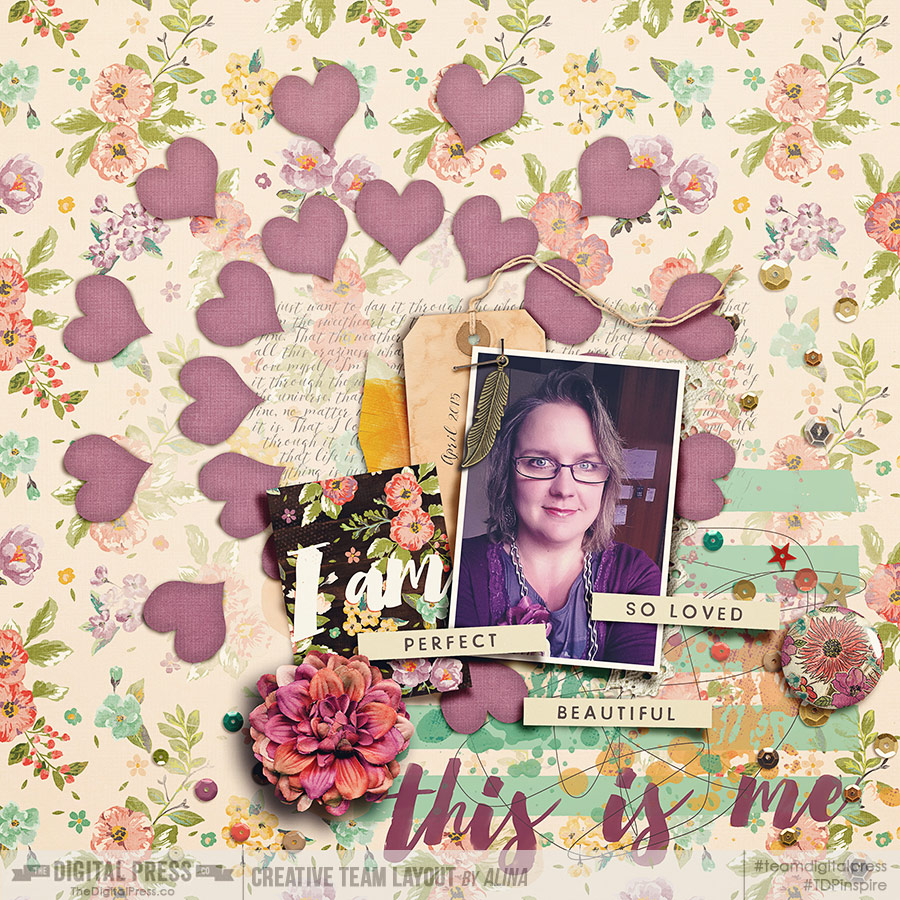
In my upcoming layout I created two more halos concentring (is that a word?) my first halo. The middle circle has 10 hearts which are 36 degrees apart from each other (360 : 10), the outer circle has 20 hearts, 18 degrees (360 : 20) apart. You can see in this picture, that I didn’t work very exact. The lowest heart is not 100% aligned with the guide. It doesn’t matter though as you can see in the following layout.


Creating a Heart Halo


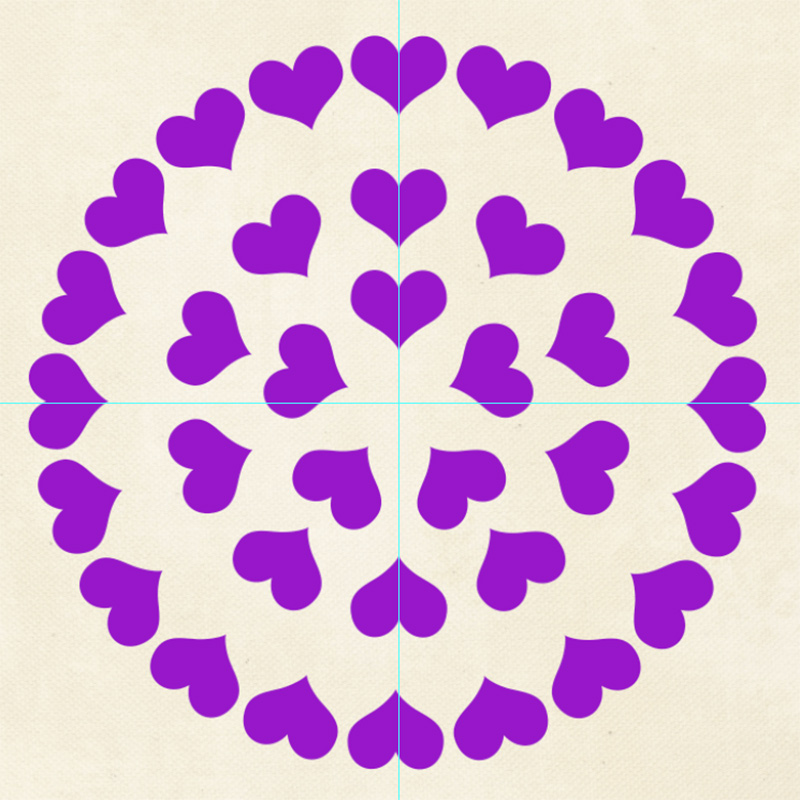
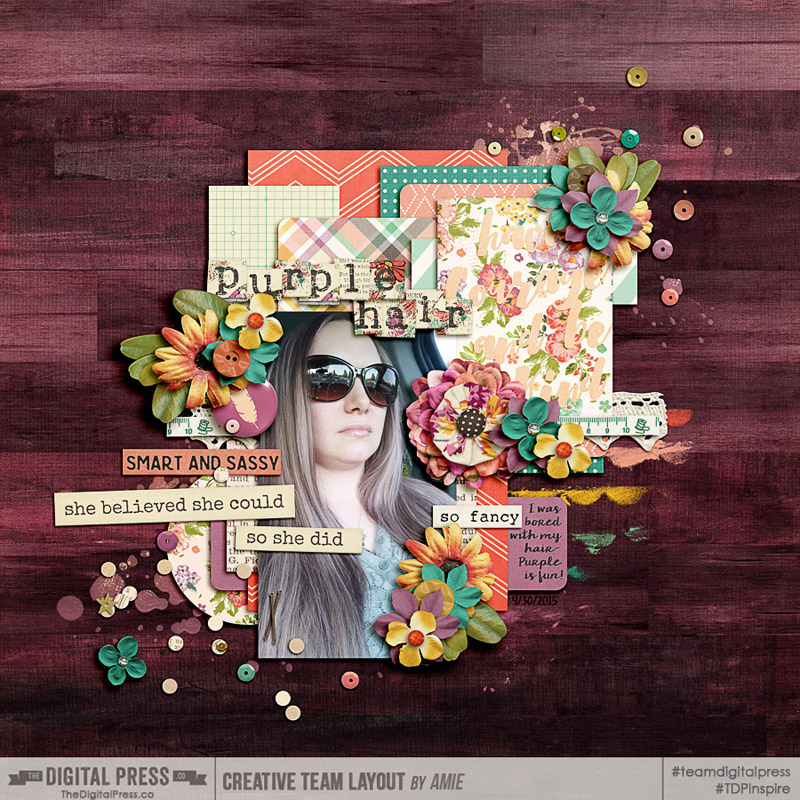
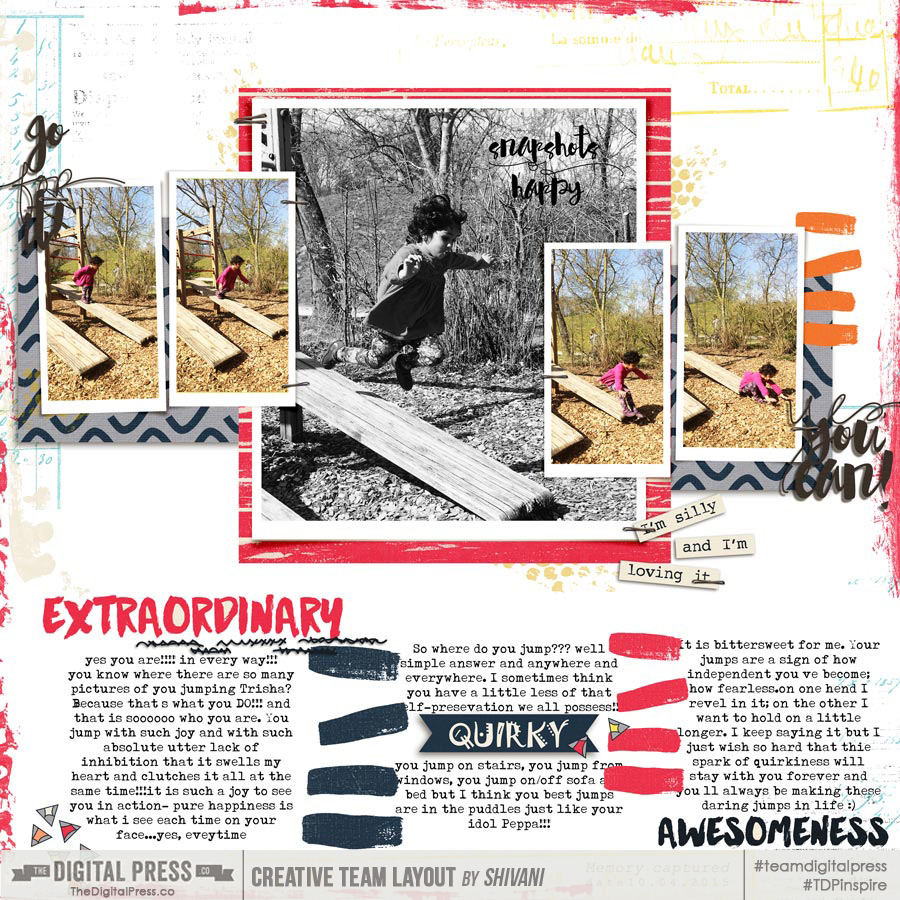
You can leave all hearts single as they are (*sob*) or you can group them or merge them to your liking. I merged every circle into a single layer for my layout and used the hearts to make cutouts. I also randomly erased a heart (*cry*). So that’s what I came up with:


Creating a Heart Halo
The image is linked to the gallery for the credits.

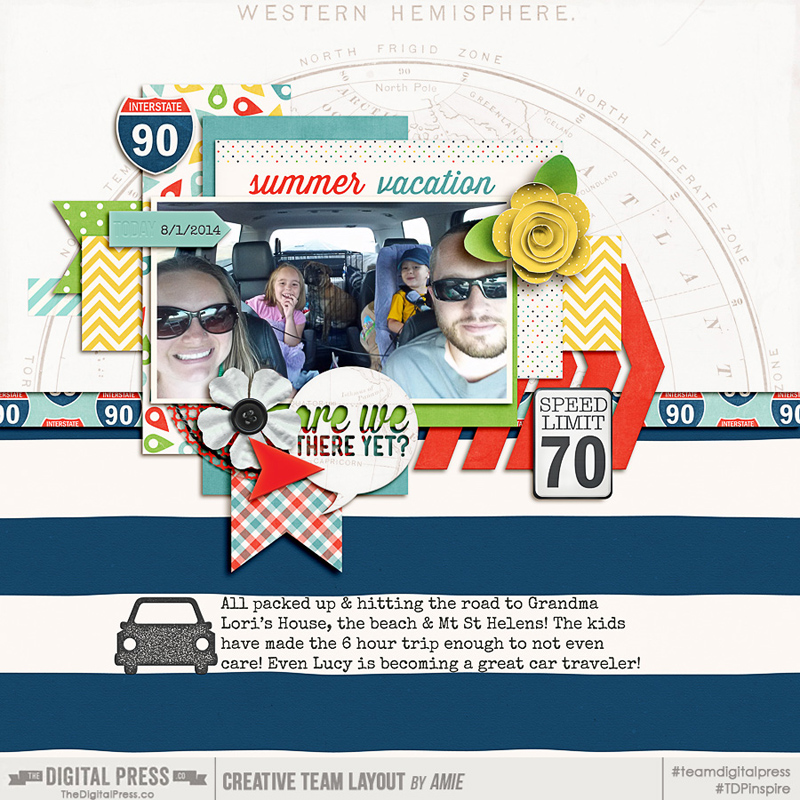
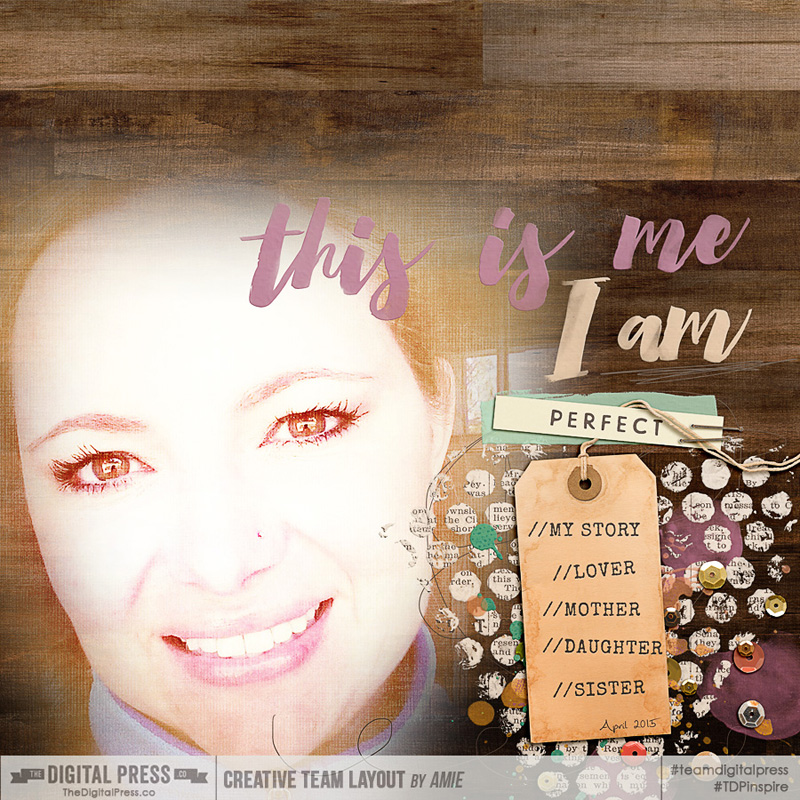
And I tried something else: I made several small heart circles and blended most of them into the background for an art jounaling layout.


Creating a Heart Halo
The image is linked to the gallery for the credits.

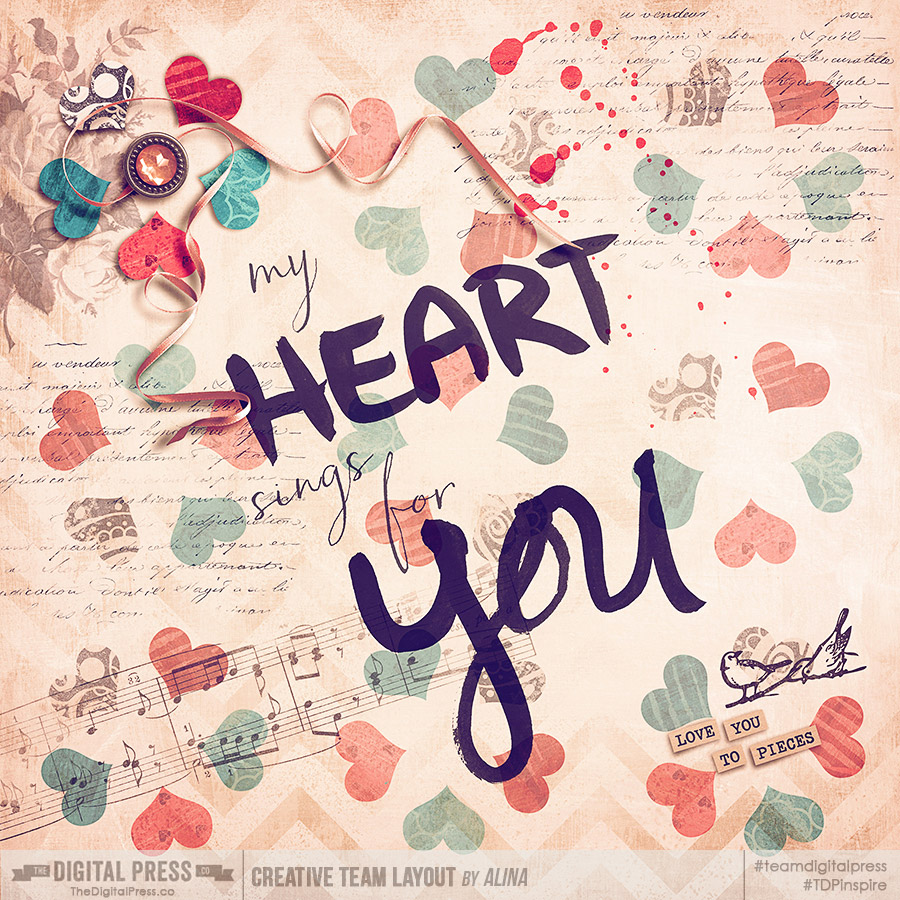
My second and third layout above have a multiple of 5 hearts (1 x 5, 2 x 5, 4 x 5). If you want to use a multiple of 2 hearts in a circle (like 2 x 2 = 4 hearts or 6 x 2 = 12 hearts like me in my first layout), you don’t have to type in the degrees and don’t have to do any math. PS has a standard feature that makes it easy for you. When you copied your first heart and aligned the crosshair, hold shift and click/drag one transformation corner to turn the heart around. The heart will move in 15 degrees increments around your circle until you let go of the corner. This way you can create up to 24 hearts in your halo (360:15), depending on which increments you use.

Of course you can use any shape you want for making halos. This is not limited to hearts.
If you have any question, feel free to ask in the comments. Also if you see a technique that you want me to explain, I will do what I can to recreate it for you and prepare a tutorial for you! Let me know what you like to see in the comments, too! Have fun creating!


AlinaAbout the Author: Alina enjoys sitting in front of her large computer screens too much. Apart from that she loves walking her dog and watching sunsets while being amazed of life in general. She is married to her best friend. Tries to manage the needs of her two cats and her dog and badly fails when they all want their cuddle time at once. Everything else is scrapping, taking photos and currently crafting. Having said that, she needs a bigger craft room.


Celebrate Your Family

Celebrate Your Family


Where would we be without our families? 🙂

People who unequivocally support us, get behind us in every thing we do – no matter how big or small. People whom we can count on, take them for granted – but not in a bad way…and who are the first to dish it out to us – like we deserve. Honest, undivided attention (well – not so much in this age of mobiles :)) and unconditional love – who can give these to us? … only our families.

Since this month is all about Celebrations here at The Digital Press, what better way to kick off the month, than with Celebrating our families ? 🙂

Coming from India, we use the term Family quite freely..really. The neighbour who’s been living next door for years…is family. The aunt’s sister’s husband’s brother who has been coming to our house for years…is family. Our extended families are quite close to us in both my own side and my husband’s side of the family. So where our own ends and the extended starts…we have no clue 🙂 Not really the aunt’s sister’s husband’s brother….but you get the drift 🙂

Its quite easy to get pictures of my son, my husband and few others in my memory keeping. However, I cherish the opportunity to capture few from the extended family who have had an impact on me and make me who I am today. Thanks to one of my aunts – I am a voracious reader. Thanks to a first counsin, I didn’t blow up every penny I earned and started saving early on…stories that are small, easily forgotten, but are important to me. The challenge is, we don’t meet with them often enough. So how do we go about documenting their details?

There are many ways we can do so. The simplest way to do so is on special occasions. When the family meets for birthdays, Christmas, christenings etc. There are enough opportunities to click the dreaded family portrait 🙂

CT Stacia captures exactly that through her layout below –

Celebrate Your Family

CT Krista captures her day with her Mom and kids beautifully through this Mother Day layout.


Celebrate Your Family


Now, special occasions….thats easy 🙂 Another photo op is when we meet up. It doesn’t matter the occasion, whenever I meet up with the family, it is an opportunity to click pictures – possibly because we meet once in say two years – so not very often. Therefore everyone is enthusiastic about the pictures.

Like in this layout below – Not a peep from my cousins about so many pictures! 🙂

Celebrate Your Family

Another example is this layout below of my son with his grandparents, doing an activity that they love to do everytime they meet – feeding the pigeons together.

Celebrate Your Family

If capturing new pictures, like in the examples above, is not an option … then just pick up an old picture and scrap away! 🙂

CT Stacia captures little details about her Mom here, through this sweet layout which is truly a timeless treasure.

Celebrate Your Family

With these ideas, I hope you get inspired to scrap some stories close to your heart, with people who don’t often get featured in your pages.

I am hosting a challenge in the forum to celebrate our families. Hope you join in the celebrations there 🙂

Pallavi

About the author: Pallavi Sureka is a wife and newly designated stay at home mom to 3 years old Rajveer. She currently lives in Mexico City but her family moves around a lot. She has previously lived in Calcutta, Pune, San Francisco, Chicago and London. She reflects all these places in her pages as she captures her everyday stories.

CELEBRATE the Everyday

CELEBRATE the Everyday


For the month of June we are focusing on the word: Celebrate

I am super excited about this month’s word because for me, this is the reason I scrap – to celebrate those everyday moments in life.  To celebrate the small accomplishments along with the big events.  Yes, this month is huge for weddings, babies, etc. but what else can you celebrate in your life?

Searching for inspiration on Pinterest, I came across several quotes that inspired me:

CELEBRATE the Everyday

Sources (1, 2, 3, 4, 5, 6, 7, 8, 9)


As you can see, the word Celebrate can be used in many different ways.  I love how happy the word is and how it conveys a feeling of being positive.  Yes, we may have our down days, but there are so many ways we can look for elements to Celebrate.  Of course, we also have our jump out of our seats and cheer days as well that give us cause to Celebrate.  How about you?  How do you view the word?

Each month, we like to encourage you to step out of the box at times with our challenges. Below are the list of upcoming challenges for the month that focus on Celebrate. For more information about our challenge system please read this post in our forums.

CELEBRATE the Everyday

This gorgeous challenge schedule was created by creative team member Alina, using the brand new store collab Summer De-Lite that you can purchase for only $4 for the first 4 days of the month! We look forward to seeing you in the forums and here on the blog! Have a great June!


About the Author: Rachel Alles is on the Creative Team here at The Digital Press.  She is fortunate to share her life with her loving husband, Doug, and two blessings: Madeline and Maxwell.  The three of them are her main source of inspiration for her pocket and traditional style pages.  When she’s not scrapping, she enjoys anything Disney related, learning more about photography (and attempting to turn the dial off Auto) and dabbling in home decor projects.

Summer Planner Pages: Hybrid Style

Summer Planning: Hybrid Style

Real life happens! Work, children, school, sports, scouts, doctor appointments, volunteer duties, house work…oh the list goes on and on! My real life has been crazy busy and shows no sign of stopping any time soon. Which is not exactly great for someone like me who can barely remember what day it is, let alone where I’m supposed to be! I’ve tried organizing myself using a calendar app on my phone, but that requires me having the time to type on that tiny little keypad and hit the right buttons to save my entry (um, fail times 100). I’ve also tried using scraps of paper to quickly jot down appointments but, while this is easy, I’ve lost the slips of papers too many times to count! So, a year or so ago, after being fed up of living such a scatterbrained life (I’m truly responsible – really!), I went the agenda/planner route.

I used to use one years ago and was on top of things so I figured it was time to give it a go again. But with 4 kids and a busy life, the days get filled up super fast. This is my past month – I can barely read where I am supposed to be and when!

Summer Planning: Hybrid Style

Luckily, the daily pages work out well, but I still like to see the overview of each month. Unfortunately, life gets pulled in so many directions, that the things that I really want to do, get forgotten about. So this summer, I’ve decided that I want to use the planner to really get myself organized and find some smooth sailing.

Wishing Well Creations by Laura Passage and Amanda Yi Designs have products are perfect for this! Laura’s Summer Bucket List Printable Planner pages will supplement my usual calendar pages and let me plan out the special activities that I want to do this summer (I LOVE making lists! And now they will be in my planner and not lost in a bag somewhere!). I’m also using them to plan meals (what a novel idea…no more last minute desperate phone calls to take out places) and organize my thoughts. Amanda’s Summer Bucket Stickers help highlight important dates and just look cute.

Summer Planning: Hybrid Style

Here is what I did:

I used Laura’s Summer Bucket List Printable Planner pages which easily and perfectly sized down to fit my smaller binder. I printed them double-sided on cardstock so that they will hold up and ink won’t bleed through. A simple trimming and hole punch, plus a bit of corner rounding, and they are good to go!

To use Amanda’s Summer Bucket List Stickers, I created a file sheet in Photoshop with the stickers I wanted to use. I imported the sheet into my Silhouette software, traced the cutting edges with the trace function, set the registration marks, and sent it to my printer. I used sticker paper for this.After it printed, I then loaded it into my Silhouette Cameo, and after a few registration fails (oh real life you can be bothersome! Haha), it fed through properly and cut out the elements exactly as planned.

Summer Planning: Hybrid Style


Summer Planning: Hybrid Style
Summer Planning: Hybrid Styleer-6

Now life should be organized, smooth sailing, and stress free! One can dream, right? 🙂


LoriAbout the Author: Lori Pereyra is a member of the Creative Team here at The Digital Press. She is a stay at home mom to 4 children and loves capturing life…the good, the not so good, & the perfectly imperfect… and documents it all through photos, paper & pixels. She feels this is modern scrapbooking at it’s best!

Be REAL! Let’s be present in our Photos & Layouts!

Be Real: Be Present in Photos

This month, we have been “REAL.” We’ve covered the real parts of real life- it’s messy, it’s hard and focusing on telling real stories in our scrapbooking. Today, I want to talk about something that I have struggled with lately- being present in my life as far as photos go. I have all these fabulous pages & stories told from my perspective but hardly any evidence of me “being” there. This month- I want us all to start showing up on our layouts (via photographic evidence!)

Let’s just be honest for a second here- we’ve all had our trials & tribulations & looked better. I will be the 1st to admit that I don’t love the photos taken of me- in my head I see a much different picture than what I see on the screen/camera. After my son was born, I still have hung on to that ‘baby’ weight- even though we just celebrated his 4th birthday! I know I’m not the only one that didn’t put on clothes with buttons on or (gasp!) got a good shower today (and by good I don’t mean the 5 minute necessary parts.) I know that many of us- not just mommas- avoid the camera for our reasons, but that stops today!

My mother gave me a wonderful keepsake book all about her. There are photos of her all throughout her childhood, teenage years, the early days of her & my dad’s marriage & then of course my sister & I with her. I LOVE it with big old bold capitals & italics. This got me thinking of what evidence my kids have of my life with them? They won’t remember the minutiae of our daily lives or all that I do for them, but having a picture of us reading together, playing with the dog or of our family at the lake house- will be cherished (or at least I hope so!) I also read somewhere on the interwebs about how our sons and daughters need to see us as ourselves- human & beautiful in our natural womanly ways- especially with all the media they are inadvertently exposed to. What message are we sending to our kids if we’re avoiding our picture because we don’t like how we look?

Lastly, I want my kids to not only have photographic evidence of me IN their lives, but also to remind them that I am my own person- with my own likes, dislikes, flaws and all. I want them to see that I loved to bake. That I enjoy doing crafty things. That I enjoy reading. That I love their Daddy. That I loathe laundry (please someone invent something that folds & puts it all away!)

I’m trying harder to make sure when I’m snapping pictures, to at least get a selfie or even ask someone to take one of me in the photo too! Here are some examples from the gallery that I love that have MOM in the picture!


Be Real: Be Present in Photos

Be Real: Be Present in Photos


Be Real: Be Present in Photos


Be Real: Be Present in Photos

Be Real: Be Present in Photos


Let’s make sure that we’re documenting all the joys in our life, our family and ourselves. Please join me over at the forum for a fun challenge!

AmieAbout the Author: Amie is a craft loving, dental hygienist in WA state who loves her husband, two kids (ages 7 & 4), English Bulldog, coffee, baking cupcakes, daffodils, glitter & sprinkles, reading a good book and lip gloss- not necessarily in that order. 

Bringing Out The “Real” Story

May 27 2015 Bringing out the real story blog header
Hello hello howdy aloha!!!! I am wayyyy excited to be writing my first blog post and hosting only my second challenge. (you couldn’t tell could you?!!!)

You know how everyone talks about a picture being worth a thousand words. I couldn’t agree more but sometimes just sometimes pictures also need a bit of help – with words. Especially when documenting those little firecrackers otherwise known as children! I’m fortunate to have two of the species and I can’t be more thankful or grateful for having given this opportunity to grow up (once again!) with them. Sometimes I feel like an outsider observing and documenting their changes, their ups and downs and their extra special every-day-not-one-like-any-other one!!!!

What I’m trying to say is that if I could capture all the nitty gritties and quirks of my ever-restless and unpredictable rug rats, I would consider myself  a photographer par excellence! Sadly that doesn’t always happen. Most of the times I’m laughing too hard, clutching my stomach to reach for my iphone or Nikon D5100! What I can do is grab my notebook and write down the precious moment to be preserved for posterity. If I can find pics from the similar time period I will most likely include them or I’ll just go on with the story solo.

You will have come across many different ways of documenting the “real” story. It can be in form of interviews or lists or just a conversation captured. I personally like to make these pages with an eye-catching tile so it is quite evident what they are about – what happened, what was said and the aftermath lol!!!

Here are a few of examples to bring the concept alive for you:

1. I used this for the recently hosted NSD journaling challenge. The pictures here tell a contradicting story to the “real” moments. So it was quite important that I recorded those details for posterity with a pinch of humour of course!

bringing out the real story
(Not) love!!!


2. Here’s one where just two lines of conversation tell you the entire story – the dynamics of it and brings the scene alive for you. These photos are from the same day but not exactly when the conversation happened.


brining out the real story
You are welcome didi!


3. Here’s another style I like – capturing a sort of theme around my daughter’s dare-devil jumps.


brining out the real story
Trisha’s jumps


4. And here’s my final example. I didn’t have photos for this but that didn’t stop me from documenting the very cute and important aspect of the two sisters’ talk. It is much more fun this way I think. Leaves you to do the imagining bit.


brining out the real story
No way you said that!!!


So that’s it. There is no one mantra for story telling, it should be what appeals to you, what brings it alive for you. Hopefully, this gives you a bit of inspiration to scrap about things that don’t always have photos or the right corresponding photos or any photos at all!!!

I am also hosting a challenge on this theme.Come join me in playing here;use some of the tips from above or share one of  your own.

Happy story telling – the “real” way.


Profile pic avatar small

About the author: Shivani Sohal is a donner of many alter-egos. A finance professional by day in busy London, she morphs into a seemingly normal mum of two in the evenings and weekends. She is constantly found with her fingers in too many pies and juggling the metaphorical balls. That is living on the edge for her; aided by the two ankle biters and a darling hubby who define the warm and mushy for her. She is ferociuosly dedicated to memory keeping – almost immune to any nay-sayers (or equally disruptive crying children or annoying house fires!!!);keeping her head down and forging ahead at all times.