Celebrate summer hybrid mini-album

DonnaEspiritu-TDP-Junetutorialpinterest


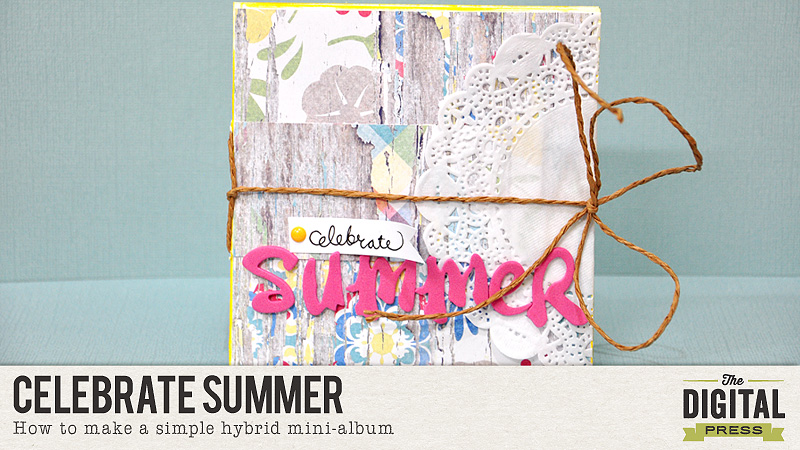
Donna here to show you how to make a hybrid mini-album for some of your summer photos

DonnaEspiritu-TDP-Junetutorial900


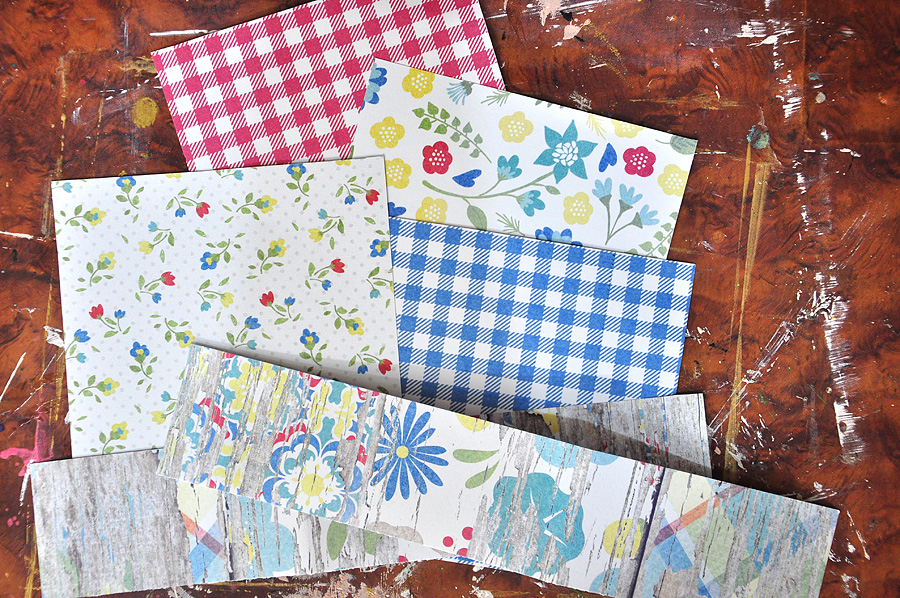
1. Print and cut papers from your chosen digital kit. I used the paper pack from Kim B Designs’ “Simply The Best”. Since I will be adhering my printed papers on cardstock, I used a 120 gsm photo paper. The size of the square pieces were a little less than 4 inches by 4 inches and the strips were approx. 3inches by 8 inches (I cut them in two before taking this photo).

DonnaEspiritu-TDP-Junetutorial-1


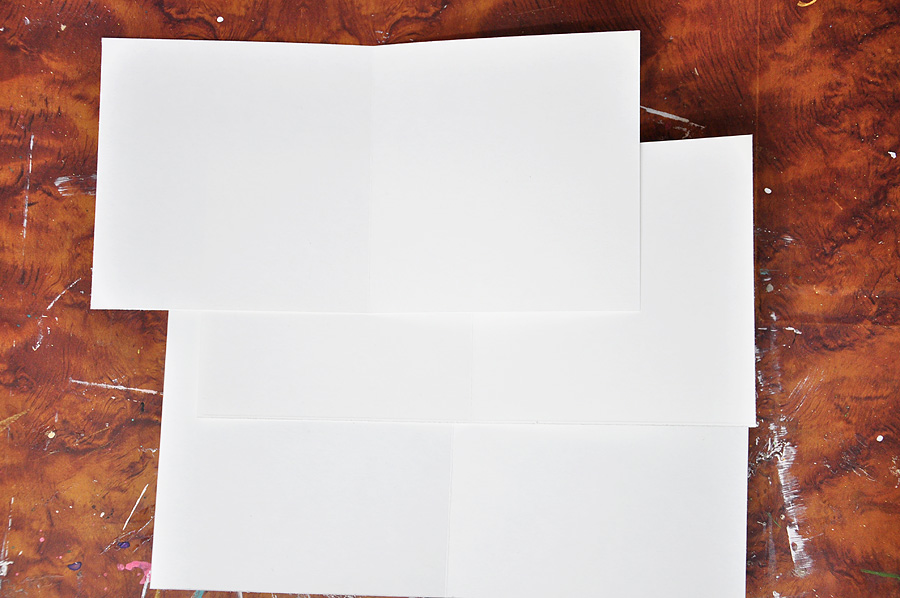
2. Cut 1 piece of 4.25 inches by 10.5 inches cardstock, 2 pieces of 4 inches by 8 inches cardstock and score in the middle as seen in the image below.

DonnaEspiritu-TDP-Junetutorial-2


3. Punch holes in the middle of these scored cardstocks. I use my compass to do this and a piece of paper scored in the middle as guide where to punch the holes.

DonnaEspiritu-TDP-Junetutorial-3


DonnaEspiritu-TDP-Junetutorial-5


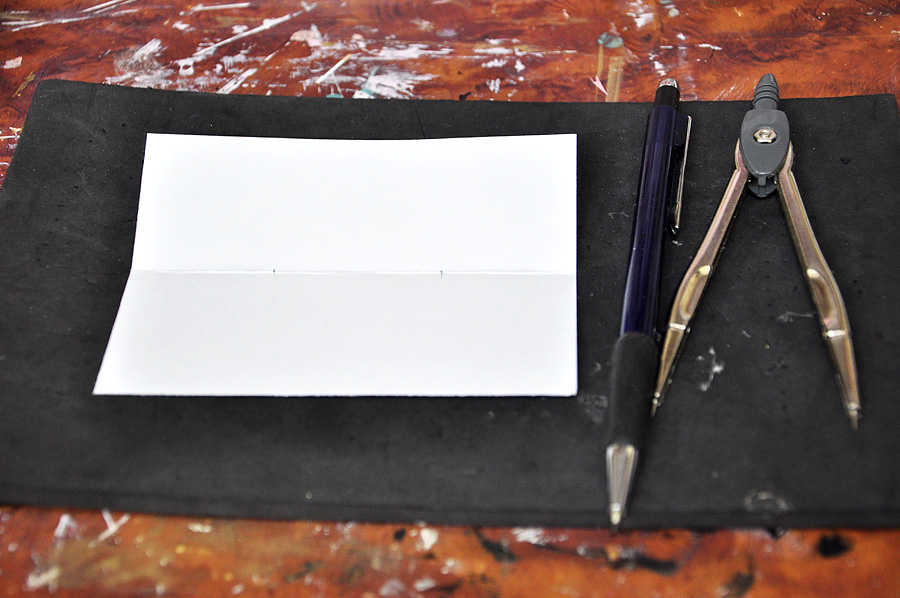
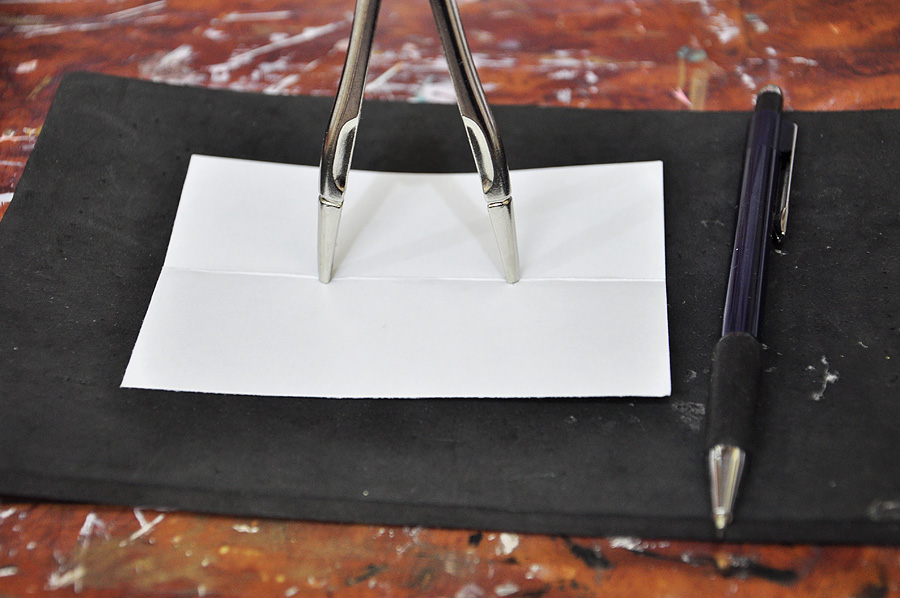
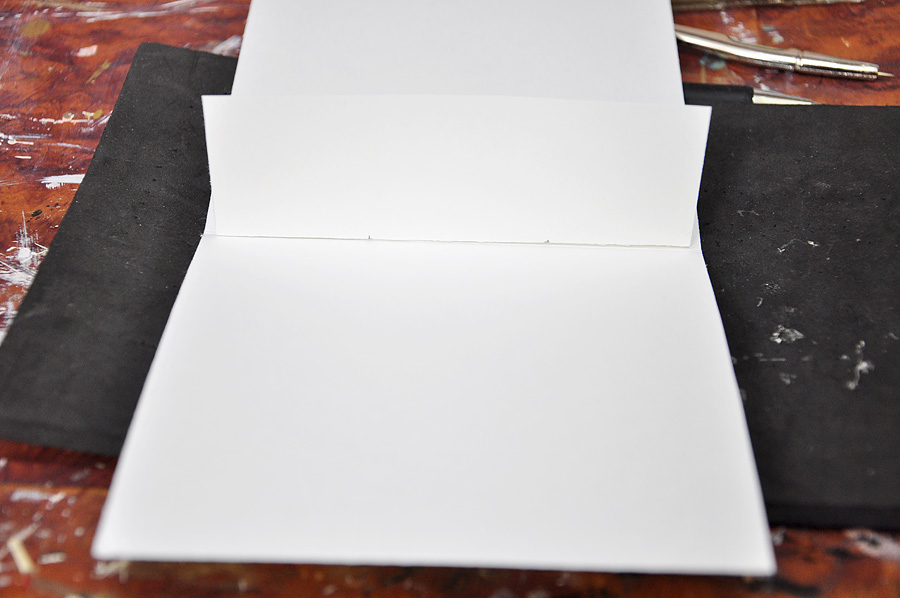
This will ensure holes will be aligned when the pages are assembled.

DonnaEspiritu-TDP-Junetutorial-4


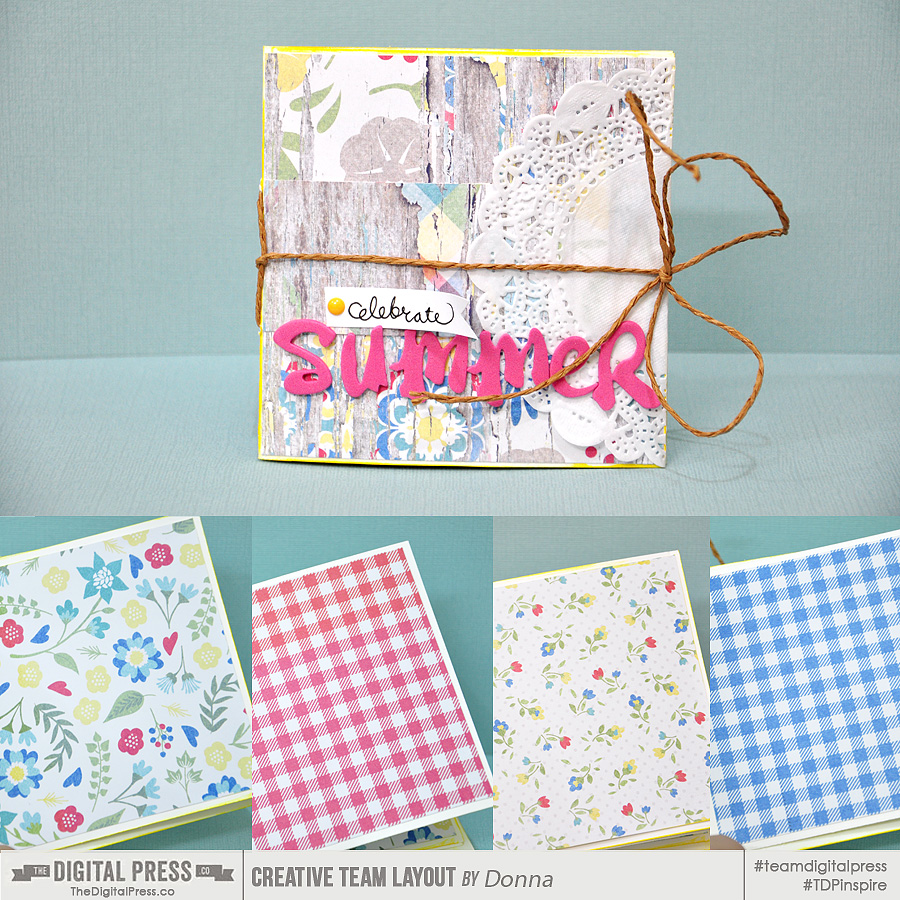
4. Use some twine (or in my case, a brown paper twine) and tie around the album. Decorate the front cover. I used a doily, some thickers, handwritten sub-title and an enamel dot. The edges were inked with distress stain.

DonnaEspiritu-TDP-Junetutorial-6


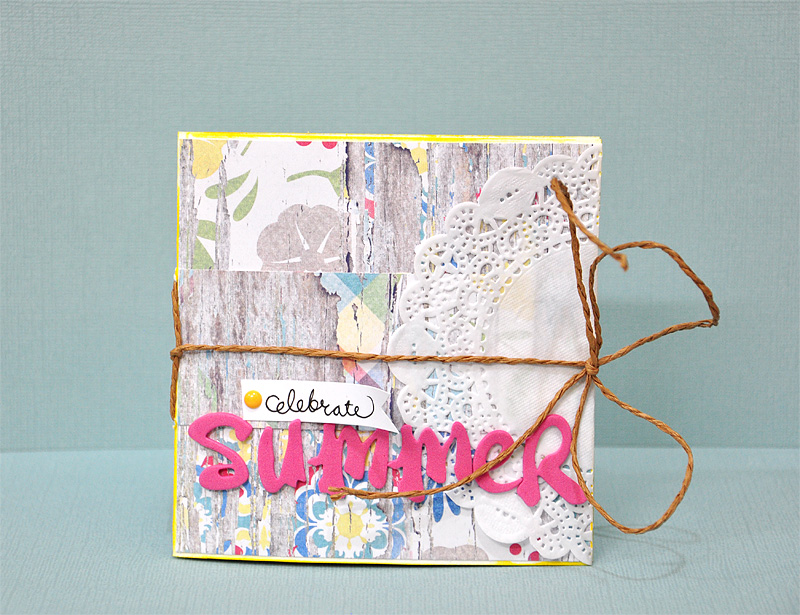
Hope this mini-album get you inspired to create one. I would use this with Instagram photos, perfect for it’s square size.

Thanks for dropping by!

Happy crafting,

Donna


About the author: Donna Espiritu is a mom to a little girl who just turned 8 months and wife to a very supportive husband. She is currently living in the Kingdom of Saudi Arabia with them. When she is not scrapbooking, she likes to read books/e-books (sci-fi/romantic/time-travel) or watching old episodes of some of her favorite TV shows.

Celebrate Life – The Good & The Bad

Hello fellow digital artists!  I’m happy to be back to talk about celebrating life – the good and the bad.  So often, we want our pages to reflect bright happy memories and we shy away from scrapping the bad stuff.  After all, who wants to remember the negative?  However, it is amazing how therapeutic it can be to get the bad stuff out of your mind and onto a page.  I have a cool trick for those of you who want to scrap the bad stuff, and like to share your pages with others – but don’t necessarily want to do both.  One of my favorite artsy techniques is to journal about whatever is bothering me and then incorporate it into a bright, happy page in a way that disguises the journaling from view.  This technique symbolizes the act of letting go of the negative stuff that is weighing you down and replacing it with positive, happy things.


There are several ways to accomplish this technique:


1.  Go for the obvious and journal away on the base layer of your layout and then totally cover it up with background paper.  This technique is similar to writing on a canvas and then painting over it (something I love to do).


2.  Incorporate journaling into the design of your page by using a sketchy or hard-to-read font and then erasing parts of it with a grungy brush set at varying opacity levels.


3.  Use a dingbat font to journal.  That way you don’t have to worry about covering things up because no one will be able to read it anyway. 🙂


4.  Cover the journaling up with “painty” elements and digital stamps.


5.  Use the blending options panel in Photoshop to blend the journaling into the background paper.  This technique works especially well on high contrast and wood papers.


Do you have to coordinate the happy with the bad?  Absolutely not!  Of course you could if you wanted to, but feel free to mix completely different subjects.  For example, in this layout I journaled about some negative work issues but scrapped a happy page highlighting my nephew to remind me about what matters most in life.  After all, work issues fade with time, but family is forever.  Two completely different subject matters, but the technique still works.


Everyday-Happiness


Can you see my hidden journaling?  I’ll give you a hint:  digital paint covers it well.  Still can’t see it?  Here is a close up . . .


Everyday-Happiness-Crop


If you weren’t looking for it, you’d never know it was there.


So the next time you want to get something off your chest, but not necessarily show it to the world via the Internet, try this technique out.  I think you’ll find it artistically and emotionally liberating. 🙂  And be sure to check out my Challenge this month in The Drawing Board forum HERE.


Until next time ~
Judie

TDP-Blog About the Author:  Judie is a member of The Digital Press creative team.  She spends most of her time engaged in creative endeavors of all sorts.  Traveling, Starbucks, football and Harry Potter are just a few of her favorite things.

Celebrate the Everyday

Celebrate the Everyday


Have you been playing along with the June TDP challenges? This month’s word is “Celebrate.” My challenge for you is to celebrate the EVERYDAY. Sure, we all scrap the big events of life, but how about the normal, sometimes boring, mundane “everyday” stuff that makes life great (or crazy, or whatever!)? It’s the normal everyday stuff of life that is so easy to forget if we don’t document them somewhere and for me it’s these memories that I really want to remember years down the road.


I’m going to share with you a couple of pages that celebrate the “Everyday”:


My daughter loves to use FaceTime to connect with her cousins who she doesn’t see super often. As time goes on technology is going to change and the way we connect with people will change as well and I want to remember these moments, so I snapped a couple photos of her FaceTiming and created this page. Click here for credits.


Celebrate the Everyday


My daughter has always loved to bake. On this “Life is Sweet” page I documented her excitement over a purchase of a cupcake stand. Not a big moment, but something that made me smile because she combined her love of baking and her love of photography!


Celebrate the Everyday


This page from Erin called Makes me Smile” does just that!


Make-me-smile-Erin


Selfies. We all take them, right? Laura created this page using some of the selfies her little guy took while riding in the car one day. What fun moments to showcase on a page!


CelebrateTheEveryday_Laura_Selfies


Here’s a fun page by Rachel titled “Unique” where she scrapped some photos of her daughter making funny faces.


Celebrate the Everyday


And finally, here’s a super fun page by Katie showcasing her kids playing in the water.  I love pages of kids concentrating on the work of playing!


CelebrateTheEveryday Katie Waterplay


I hope these pages motivate you to document the everyday. I’m hosting an “Celebrate the EVERYDAY” challenge. Head on over to The Digital Press Challenge Forum for details!


BarbaraUnzen-100x100

About the Author:  Barbara is a member of the creative team here at The Digital Press. She lives with her husband, two teenage kids and their adorable dog; although as she types this she’s misting up thinking about the fact that her son is moving away to college in just two months and she will no longer be able to say she lives with her two kids. EEK! In Barbara’s free time she loves to digi scrap, take photos and hang out with her family.


Tutorial: Adding a Vignette

Adding Vignettes in Lightroom

In photography, a vignette means adding a (usually) darker border which fades into the photograph. It draws the eye in to the center of the image where the subject is by framing it.

I normally add vignettes in Lightroom. There are two ways to go about this – first the vignette tool and secondly by using a radial filter.

The Vignette tool is found in the ‘lens corrections’ section of the develop module. This is because it can be used for removing optical vignettes that we don’t want as well as adding them.
The options are :

Amount – how dark or light the edges are.
Midpoint – how far towards the center the vignette appears, effectively the size of the vignette.

The post-crop options are used if you’ve already cropped the image, otherwise you might not be able to see the effect.

Adding Vignettes to Images

I actually much prefer to use the radial filter tool as it is much more flexible. It is also found in the Develop module, right at the top of the sections and it has lots of options. The reason I much prefer it is because I can decide exactly where I want to center the vignette and I can easily change it’s size and proportions.

Vignette-Screenshot-2

To add a radial filter, select the tool – it looks like a circle. Set the effect to ‘Burn (darken), then click where you want to center your effect and drag it out until it’s the right size. Once it’s in place, you can drag the edges around to change the proportions of the circle (or oval!) until it’s perfect.

Depending on the image, it’s easy to adjust the darkness of the vignette by increasing or decreasing the exposure change.

Here you can see the final effect:

Creating Vignettes in Lightroom

JudeAbout the Author: Jude Toone is part of the Creative Team at The Digital Press. She lives in the UK with her husband and two fantastic girls. She’s loves travelling and would be off in her campervan every weekend if she could get away with it and loves time spent exploring new places and trying new experiences – and photographing them! She also spends too much time on the computer and still doesn’t go running as often as she says she’s going to.

Celebrate Friendship


Friendship is one of the most meaningful relationships that we experience in life. It teaches us how to connect to other people and how to nurture relationships outside of your family. Friendships can be established throughout life and can last for small amounts of time (friends you make at camp, for example) or they can last a lifetime. It’s important that we celebrate all aspects of friendship in our scrapbooks since it has such a big impact upon our lives!

In this post, I am going to help give you ideas to help you celebrate friendship in your own scrapbook pages. There are so many different approaches that can help you tell stories related to friendship … the easiest, in my opinion, is to start with simply documenting the important friendships in your life. The closest friends, the ones who really make an impact in your life. I wanted to be sure to document my daughter’s close friendship with Lilah who is, without a doubt, her favorite friend. They’ve consistently been friends for the three years since we moved to our town and they definitely share something special. I created the layout below to celebrate this very important relationship.


Another fairly easy way to document the friendships in our lives is to tell the stories about the get togethers and events that we attend with our friends. In the layout below, Pamie tells the story of a birthday celebration and uses this photo which gives us great insight into their friendship! We all attend a lot of events with friends so be sure to get those stories into your scrapbook pages!


In our digital world, many of us spend a great deal of time working on staying in touch with our friends around the world. Some of those friends are people we’ve met but some of them may be on-line friends. This is a great thing to document in your scrapbooks! In the page below, mommyish has created a page about the long distance friendships she has and celebrates how friendship really knows no distance!


mommyish_stayingintouch


Another way to tell your friendship stories is to document your friendship milestones. If you’ve had a friend for many years who has really been there for you, be sure to celebrate that milestone with a page like the one that Sabrina has created below about her 8 year friendship!


Sabrina_documentingmilestons


I  think that it is a great idea to create scrapbook pages about your friends’ admirable qualities – what are the wonderful things about your friends that make them so indispensable to you! Stacia’s layout below demonstrates how great it can be to honor the great things that our friends bring into our lives!
Stacia_adimrablequalities


Before I finish up, I thought I’d share a few more ideas for friendship pages that will help you to celebrate the friendships in your life –

  1. Document your friendships with your pets – the animals in our lives are definitely our friends!
  2. Tell the stories of your childhood friendships – those early relationships are some of the ones that most affect who we become as adults! Be sure to include those friends in your scrapbooks!
  3.  Friendship isn’t always easy – be sure to tell the stories of how friendships have faced adversity! It’s important to document the good and the bad of the things that come at us in life!
  4. Create pages about the contrasts between friends – is one of you quiet and the other one outgoing, for example? Those contrasts can tell us really interesting things about one another!
  5. Don’t forget to document the friendships that you’ve experienced in specific settings – friends at work, friends on sports teams, etc. Even if a friendship doesn’t go beyond a particular setting doesn’t mean it’s not important!

I hope these ideas will help you to add more scrapbook pages to your albums that celebrate friendship and all that it brings to our lives!  I’m hosting a challenge over on the forums at The Digital Press and I hope you will come play along!


Amy

About the Author: Amy lives in Reston, VA with her husband of 14 years and their 10 year old boy/girl twins. Their 19 year old daughter has just completed her second year at West Virginia University!  Amy has been scrapbooking since the early 1990s but discovered digital scrapbooking in 2005 when her twins were born and has primarily scrapped digitally since that time. She is passionate about telling her family’s stories and documenting their life together! Amy is a huge reader (mostly literary fiction) and is a pop culture junkie! She also LOVES all things beauty & makeup!

Out of the pocket

outofpocket

When I saw pocket pages by Karla Dudley, I directly fell in love with the little details outside of the pockets, which make her pages so faszinating. You can find her templates with sample pages here: shop.thedigitalpress.co/Snapped-templates-12×12.html

First I thought I wanted to recreate something like this with a real pocket page. Do you know the feeling when something looks totally amazing in your head, but when you are done with it it looks just not at all like what you’ve imagined? Well, this was one the moments where I felt exactly like this! With real pockets, so matter what I did, it just looked strange to have something be in front of the plastic sheets.

Of course it didn’t stop me from trying to get this page as awesome as it was in my imginations! Because I had this photo which looked too cool when it is divided into pockets to let go of this idea.

2015-06-12 21_34_43

The photo was taken at the beach in denmark where we went by bike to find a beatiful place for a picnic. I photographed it with my mobile phone while I was sitting on the bike. I’m still impressed by the quality of mobile phone cameras today.

Next I tried to use the photo still inside the pockets, but the page itself is a normal 12×12. I removed all other pockets and was left with this in photoshop.

2015-06-12 21_33_41

This was much close to what I expected. I printed everything and added some real splatters to the page. The journaling is printed directly on the cardstock with an A3 printer. Here is how the page “out of the pocket” turned out:

_MG_9385_2
Oh and by the way… just a few minutes after the photo was taken it started to rain and I was so happy I already had some good shots included the one I used on this page!

Anika About the Author:  Anika is part of the hybrid team here at thedigitalpress.com. She loves to travel and use the photos her boyfriend takes (thanks for that!) to scrapbook. Digital, paper and hybrid. When she is not scrapping, she is most likely playing a computer game or in a city searching for a geocache.