12 Days of December – Day 6 – Scrapping Your Favorite Recipes

12dodecday6

Well, the end of the year has crept up on us once again. Can you believe it is already December? November flew by way too fast for my tastes, and now Christmas is just around the corner. It’s that time of the year when everybody is feeling festive and getting into the holiday spirit. It’s also that time of the year when you won’t be able to resist the holiday goodies.

Holiday parties, cookie exchanges, holiday meals with friends and family… why is it we always schedule our social events around FOOD? It’s because we LOOOOVE to eat, of course! As an added bonus, it’s always fun to include this time of year in our scrapbooks. I love to document the parties… but even more than that, I love to scrap my recipes! One of my ongoing projects is to create a family recipe book. I’m always printing off recipes from the web, and I also have a lot of old, handwritten recipe cards that have been passed down for generations.

Here are some tips to creating recipe pages and recipe books:

  1. Add recipe pages to your books or create a dedicated album with divided sections for main entrees, sides, desserts, etc.
  2. Take photos along the way as you cook. Everyone loves to see the progression, so photograph the steps as well as the final product.
  3. Handwritten recipes are a bit more sentimental, so scan the original cards in to add some of that old-time charm.
  4. Keep it simple. I LOVE using this template album from Anita Designs. The pages of my book look coordinated and easy to read.

So, in the spirit of the holidays, let’s share some of our favorite holiday recipes! I will be posting more of my favorite recipes, ranging from side dishes to cookies to cocktails in the forum. Head on over to share your favorite recipes.

Banana-bread1 Banana-bread2


FarrahAbout the Author  Farrah Jobling is a member of the Creative Team here at The Digital Press.  She lives in Denver with her amazing family — Mike, Nicholas (8), Claire (6) and Hope (1.5 yr old puppy). She works from home as a photographer and enjoys scrapping her personal photos.


12 Days of December – Day 5 – Christmas Bottle Tags

header-blog2PS

I love the holiday season! It’s a great time to share gifts with friends and family. Today I’m here to show you a simple way to dress up a gift with bottle tags! I plan on making quite a few of these tags this month to add to my neighbor gifts this year — things such as bottles of sparkling cider or hand soap. To make mine, I used elements from both the All Spruced Up Kit and and All Spruced Up Journal Cards by KimB Designs…

All Spruced Up Kit by KimB Designs

All Spruced Up Journal Cards by KimB Designs

Supply list:

  • Digital kit of choice
  • 1.5 inch circle punch
  • Scissors
  • Glue dots
  • Hand soap / sparkling cider (or other bottled gift)
  • Optional: digital template for a bottle label tag pocket (or you can approximate yours using the following image as a guide)

tag

To begin, I started with a canvas sized at 11″ x 8-1/2″. I  used the Christmas tree element cards and word brushes from the All Spruced Up Kit.

template

If you choose to freehand a simplified template and don’t use a cutting machine… measure a rectangle 9″ x 3″, and then make a scored fold line at 2.75″ from the top. You can leave a square edge or round the edges.

Now, for those of you who are using a template similar to mine (shown above)… I loaded the template image into my digital program. I centered the Christmas tree and word art inside my transparent 9″ x 3″ template, and then I designed the image on the front of the tag as 2.5″ x 6″.  If you choose to add the pocket card on the back, you will need to create a journal card  2.5″x 6″ to slip inside. It will be the same dimensions as the image on the front of the tag.

As you can see on my image above, the right side is the front of the tag. On the left is the card for the back. In the photo, my template is on the side you will straighten the template to fit over the Happy Holidays image.  Once you have your page ready, you can print it on card stock from home or send it off to your local printer. Trace the template and cut it out by hand, or use your cutting machine. Punch a hole with a 1.5″ circle punch (or freehand it with scissors like I did). Score the dotted lines and fold, and then secure the back of the pocket with glue dots.

KimB back

I have included the front and back view of my completed bottle tag with the hole punched. Scored edges and pocket tag are shown on the back.

front

Here’s a look at the bottle gift tags attached to apple cider and hand soap… ready for gift giving!

KimB bottles

So simple to create… and you now have a personalized gift for friends and neighbors.  Join us in the forum for a fun challenge!

Merry Christmas and happy gifting!


TerresaAbout the Author Terresa is a mother to 5 beautiful children. She loves capturing memories with her digital camera and then creating a visual family memory book to be enjoyed and treasured. She also loves to design and create personalized items for her home and children. Other interests are crafting and gardening, and you will often find her enjoying the outdoors and soaking in the beauty of nature.

12 Days of December – Day 4 – Simplify Your Holiday Baking!

Simplify your holiday baking

Have you ever participated in a Cookie Exchange? Last year was my first time, and let me tell ya folks… it is the BEST! Especially around the holidays. I am totally a baker, and I love to make things homemade. I am also a cupcake addict & I always bake some around Christmastime. But… who has the time for all of this baking? I have 2 little rottens, which means I totally over-extend myself with planning lots of fun holiday activities. By taking a few things off the to-do list, my sanity is preserved! Enter the Cookie Exchange.

The details of the Goodies Exchange that I attended this past year were as follows:

  1. Our host (a good friend of mine) had everyone give her an advance idea of what we were making (to avoid having too many repeats).
  2. Everyone brought 2 dozen of the same thing (i.e. cookies, cupcakes, bars, etc.).
  3. When it was time to exchange… we all got a basket, went down the line, and took a few of each item (the quantity received for each item was dependent on the number of guests; we got 4-5 of each goody).
  4. Take home your basket.

Easy Peasy! You get to sample everyone’s favorite Holiday goodies, with out having to go through the trouble of all the baking!

I made a layout documenting our experience last year. My daughter came with me, so we brought 2 dozen gingersnaps & 2 dozen chocolate mint tree cupcakes. Thus, the basket of assorted goodies we brought home was FULL!
Simplify your holiday baking


[To make this page, I used the collab kit Baking Spirits Bright by Mari Koegelenberg and Valorie Wibbens]

I encourage you to gather a few family members, friends, &/or neighbors this year… and exchange away!

Please Join me over in the forum for a Recipe Challenge!


AmieAbout the Author: Amie is a craft loving, dental hygienist in WA state who loves her husband, two kids (ages 7 & 4), English Bulldog, coffee, baking cupcakes, daffodils, glitter & sprinkles, reading a good book and lip gloss- not necessarily in that order.

12 Days of December – Day 3 – Reminiscing Past Holidays

12 Days of December - 12/3 - Reminiscing past Holidays


When you are a kidless family like my man and I, Christmas doesn’t hold exactly the same magic as it does when you have kids around (or as it did when you were a kid, yourself). Looking back at my childhood, I still remember with vivid emotions my huge family gathered together to celebrate Christmas in my grandparents’ “chalet” in the Alps. My cousins and I often got the same present (to avoid jealousy)… we tried to figure out which of my uncles was playing Santa that year… and we laughed at our younger cousins when they were afraid of said Santa (forgetting that a few years before that, we were the ones who were scared!). We used to read fairy-tales, watch Disney programs, and have a “Christmas show” in which all the kids would perform for the adults. Big tables (and I mean BIG… we often were 30 or 40 people) and noisy rooms were the norm. The next day, we would get up a bit later than usual and go skiing together, even when we would have preferred to play with our brand new toys. In my dad’s family, things were much quieter with only 4 grand kids, and my cousins were much older than my brother and I. We ate the same Christmas dinner almost every year: ham with dried green beans and mashed potatoes. My grandparents lived in a small town in the mountains, so every Christmas was a white Christmas… and it was beautiful.

If you want to remind yourself of past Christmases (or memories in general!), try to use all your senses. We all have various ways to remember things, and even though visual memory is usually the strongest one — don’t forget to also use the smells, the tastes, the sounds, the feelings to bring back memories. Think of that itchy (and ugly!) wool sweater; those shiny shoes and velvet dress you wore on Christmas eve; your favorite dish from the Christmas feast; the first time you stole a sip of hot cider; the smell of fire in the chimney, or the smell of tangerines; the sound of Christmas carols; the sound of church bells ringing for midnight mass. Use all those bits and pieces as tools to jog your memory, then save those precious moments in a layout. That’s what I did here, using the fabulously-vintage kit Twenty-Five by Mari Koegelenberg.


Here are two other examples by talented TDP creative team members that show you how using all of your senses is a good way to jog your memory, even for more recent events. First, this gorgeous page by Erin (miimsgirl) using Season of Joy by Scotty Girl Designs…


12 Days of December - 12/3 - Reminiscing past Holidays


Here, Erin doesn’t write about a specific past Christmas — just the Holidays in general — but she uses the same tip of putting her senses into action: the sound of Christmas music, the taste of festive snacks, the view of decorations. It’s a great way to put yourself in a Christmas-y mood!

Another example is this beauty by Heidi, using Tidings of Joy by River~Rose…


12 Days of December - 12/3 - Reminiscing past Holidays


Here, again, the journaling isn’t about a specific year — but about the holiday season in general. She describes all of the pleasures of Christmas using various senses. She even added an additional dimension to her journaling by adding feelings and love, which is really the icing on the cake… or the star on top of the tree! LOL

I hope these tips will help yout dive into your memories and, using your five senses, help you document all of those precious little details which aren’t really all that little after all. 🙂

Merry Christmas in advance, everyone!


Chloé

About the author: Chloé is in charge of PR and communication for her small town by day, and “by night” is a digiscrapper and photographer whenever the light is beautiful. She lives with her man and fur-babies in the small town of Alsace (in the northeast of France), where she loves to read, watch good TV shows (TWD being her absolute favorite), and just hang out with her friends — no matter if they are close by, online, or away in her Swiss hometown.

12 Days of December – Day 2 – Simplify Your Holiday Songs


holiday songs

Miranda here today… and I would love to talk with you about something that really puts me in the holiday spirit and gives me the “Holiday Shivers.”

I love Christmas songs. For me… when I hear the first Christmas songs on the radio, the Holiday season starts. I love the sound of the bells that are in most songs. I especially love the older Christmas songs… like those from Dean Martin and Bing Crosby.


Homemade with Love-tdp
These holiday songs remind me of the Christmases we had when I was just a kid, when my Grandparents were still with us and Christmas was white. It reminds me of the nuts we ate in the afternoon… Christmas dinner and the candles my mom only used for those meals… etc. I think sometimes I can even smell those early Christmas days when I hear some particular songs.

Rockin Retro Kit-tdp
My all-time favorites are Mariah Carey’s ‘All I want for Christmas is you’ and  Happy X-mas by John Lennon’. Both songs bring back memories from when I was around 18-20 years old… the Christmas parties always started with one of these songs. I still have the same old feelings when I hear the first tones of these songs.

But with so many Holiday songs, I sometimes feel the need to clean up — just like I feel the need to de-clutter by donating clothing, cleaning up my closets, or selling items from my garage just to get more space. 😉

De-cluttering your music, you say? Yes! I found an article written by Courtney Carver where she gives us some tools to simplify your music. Here are some of her tips:

  1. Albums — If you still have them, you often keep them for sentimental reasons… maybe in a few years you’ll feel differently, and will be able to minimize your collection.
  2. Cassette Tapes — There are companies that can transfer your tapes to digital media; however, quality may not be perfect, as these tapes were not the best. But it’s likely still better to have a digital copy than a cassette copy (as you’ll be more likely to listen to it more often)!
  3. CDs — Transfer your CDs to iTunes (but only those that you really listen to!). Donate the CDs you never listen to (so that someone else will).
  4. Jewel Cases — For the CDs you keep… there is really no reason to hold onto the jewel cases or album artwork (unless they are collectors items); you can discard or donate them, and store the CDs in page protector albums.
  5. Playlists — If you put all your music into iTunes/etc. in Step 3 (above), the best way to hear your favorite Holiday tunes is by creating playlists. You can create them for lots of reasons (not just to pull all of your holiday music together): organize them by season, or create a list for your running/exercise music, or a list of “dinner music,” etc.
  6. Shuffle — Use the shuffle feature on your iPod/etc. and you might get surprised by some of the tracks you’d forgotten about!
  7. Digitally De-clutter and Purge — Go through your iTunes library and permanently delete the media that you do not use and will not use. For instance… there are CDs you bought for just 1 or 2 songs (and you can delete the other 10 songs! it’s OK!).
  8. Save Hard Drive Space — Rather than use your computer’s hard drive, you can use external hard drives to store your iTunes Music and save space on your computer; just remember to back up your playlists and library.

After you have done all of this, you might find that you do not want more music… but you will likely have more space to add to your collection! Or, you might just realize that you want/need more free time to enjoy your newly-simplified music collection.

Do you have any holiday music favorites? Are there any special Christmas songs that give you the “Holiday Shivers”? If so, please share your favorites with us in the comments, below, so we can can create our own “TDP Christmas Playlist”!

Enjoy!


Miranda

About the Author: Miranda is mom of two teenage boys, aged 13 and 15 years old, and is also a fur-mummy for her 3 Bernese Mountain Dogs. She lives in the South of the Netherlands, close to the beach where she loves to walk with her dogs. In real life she is HSE-responsible for few companies in the construction industry. She loves to bake and decorate birthday cakes and wedding cakes; loves to read Danielle Steel novels; and has been digiscrap-addicted since 2007.

12 Days of December – Day 1 – Make a Festive Advent Calendar

Make a Festive Advent Calendar

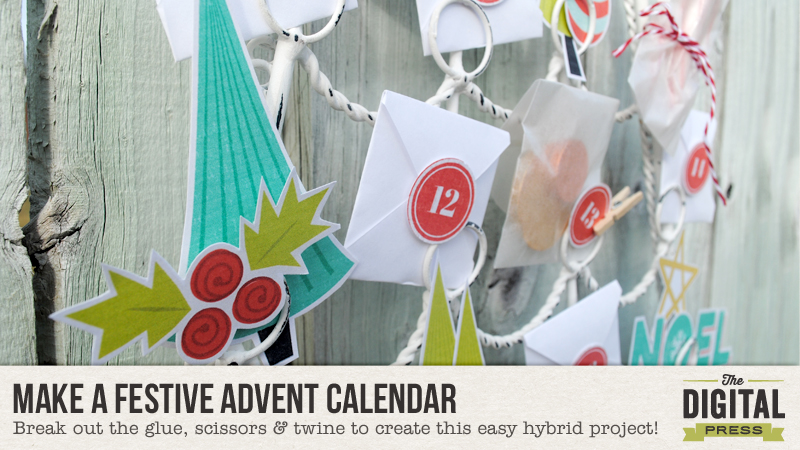
I love everything about Christmas, especially traditions. For the last few years, I have dreamed of having an advent calendar for my family as a new tradition… but what a seemingly-HUGE undertaking! I like quick crafting (another reason I love digital scrapping!), and taking on such a project has always daunted me. When I saw this gorgeous digital kit, however — Season of Joy, by Scotty Girl Designs — and this fun Whitewash Christmas Tree Cardholder from World Market, I knew I had to make it happen this year!

Make a Festive Advent Calendar

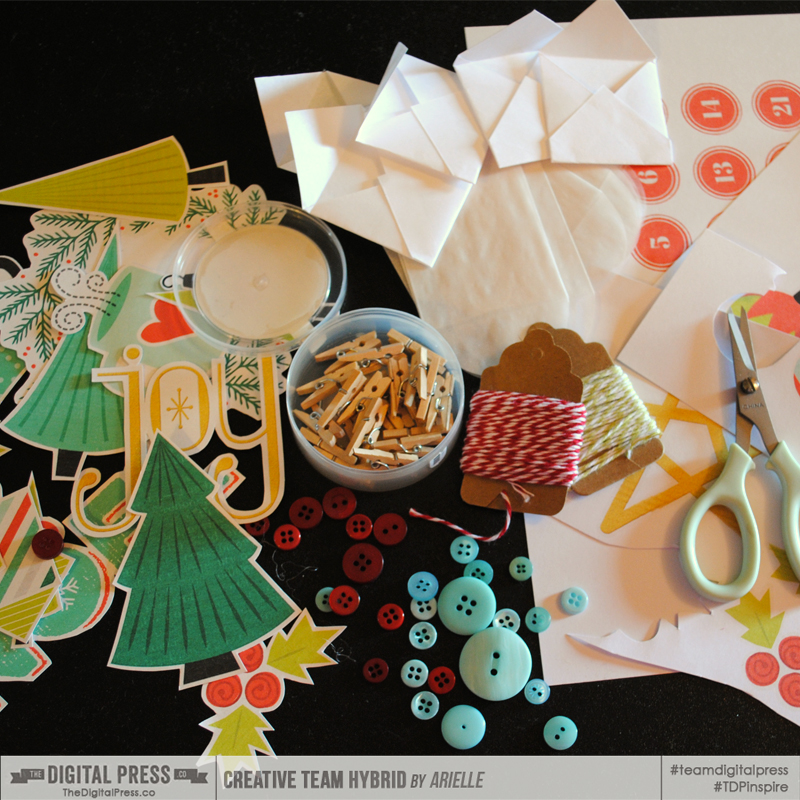
First, gather some crafty supplies —

  • Digital kit of your choice (I used Season of Joy, by Scotty Girl Designs )
  • Thin cardstock & plain bond white paper
  • Adhesives (I used dimensional glue dots & an ATG gun)
  • Scissors & paper trimmer
  • Other embellishments such as twine, ribbon, buttons, and mini clothespins (I ended up not using the buttons, which is crazy — because I usually put buttons on EVERYTHING!)
  • Cardholder, or other frame to the calendar elements

Make a Festive Advent Calendar

I started the project by taking a photo of the tree cardholder and then enlarging it to 100% in Photoshop, so that I could measure/resize the elements and decide on their placement. I quickly figured that my little envelopes needed to measure 2″ square, and then I was able to fill in the gaps with elements from the kit, and size them appropriately. The numbered circles are from one of the patterned papers in the kit – I sized them to 1″ inch so that I could quickly use a 1″ punch to punch them all out. Once that was squared away, I set up 8.5″x 11″ documents of what I needed, printed them, then trimmed out all the pieces.

Make a Festive Advent Calendar

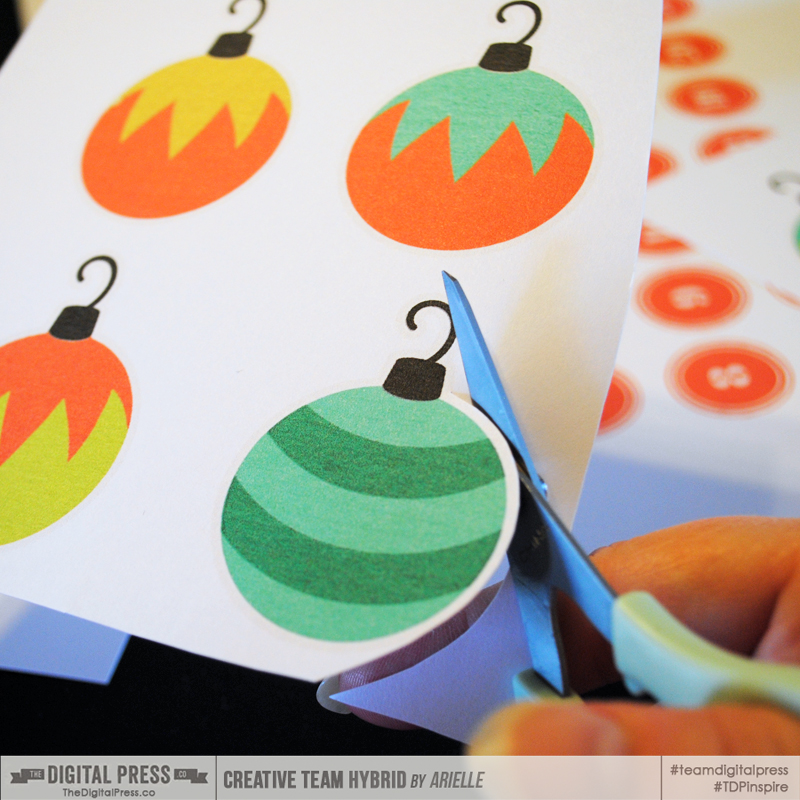
I loved how all the elements in this kit have a white border – I could just make it out once they were printed, and used them as guides as I trimmed them.

Make a Festive Advent Calendar

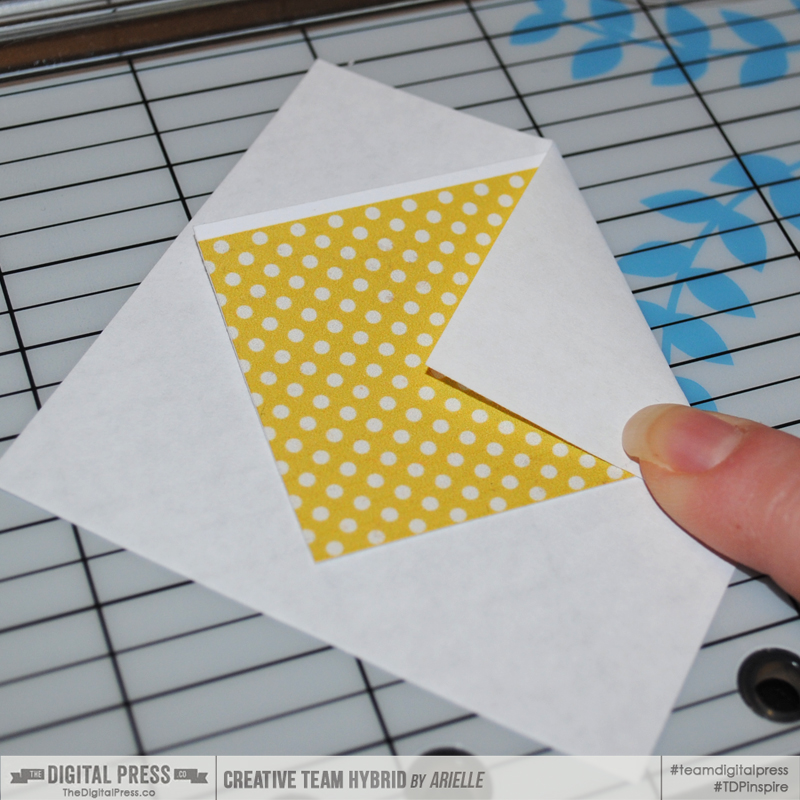
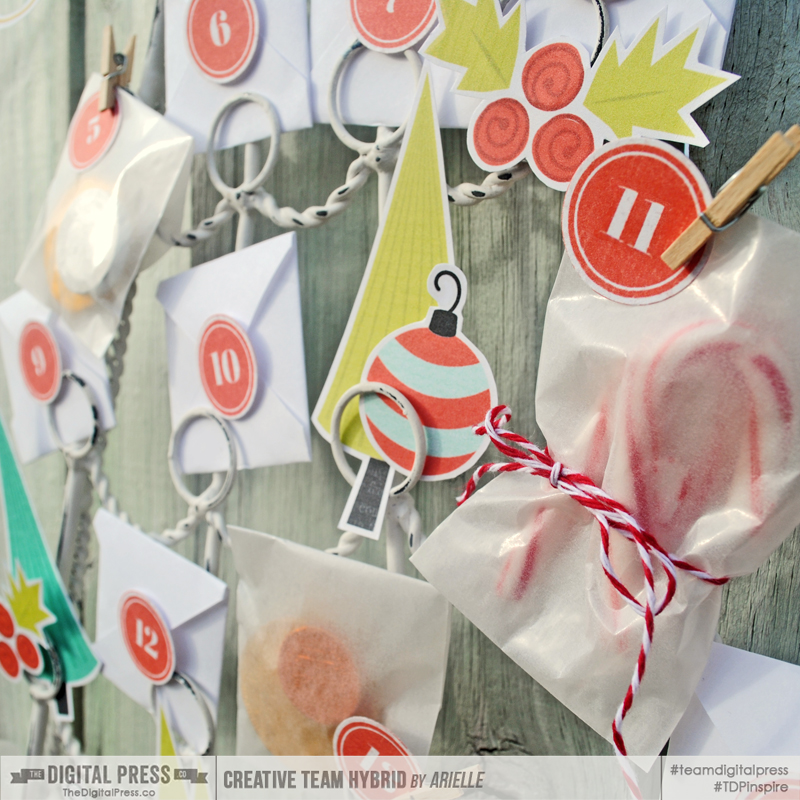
For the little envelopes, I cut plain white paper to 3.25″ square. I used a 2″ inch template of thick cardstock to fold my envelopes. I lined the corners up on the grid of my trimmer, to make it easier to center my template, and taped the bottom flaps down as I went. Then I tucked a little note into each, directing us on something to do for that day (you can find awesome lists on Pinterest to get ideas for your own notes!).

Make a Festive Advent Calendar

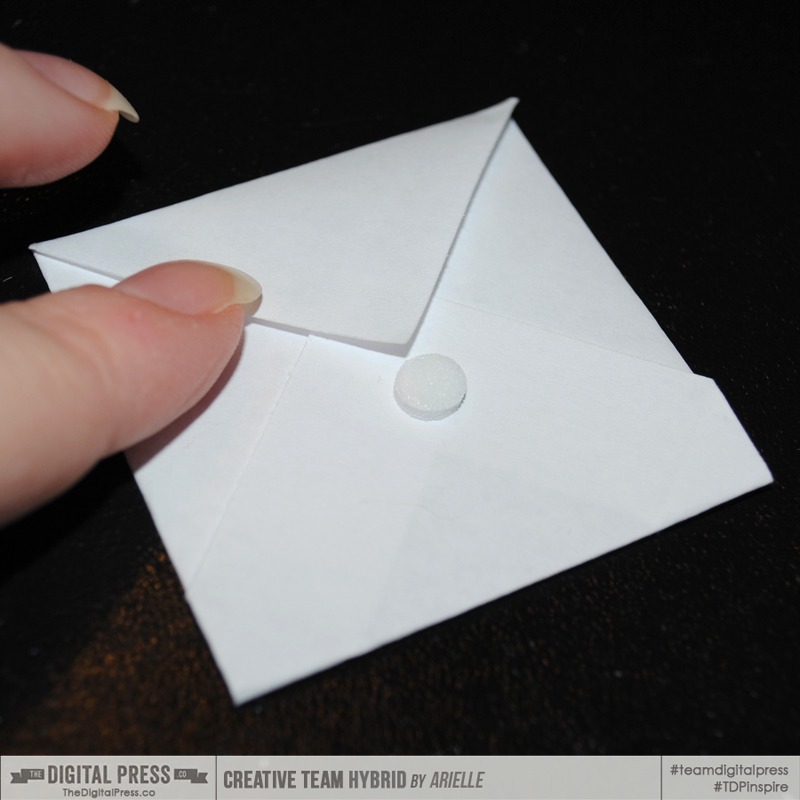
To make the envelopes easier to open, I placed a dimensional glue dot directly under the flap. Later, I adhered the numbered circles onto them, which helped to keep the envelope sealed… but still let it open to easily remove the notes.

Make a Festive Advent Calendar

I also used mini glassine envelopes and filled those with little treats (I only did nine treats, as I didn’t want the calendar to be all about the candy!).

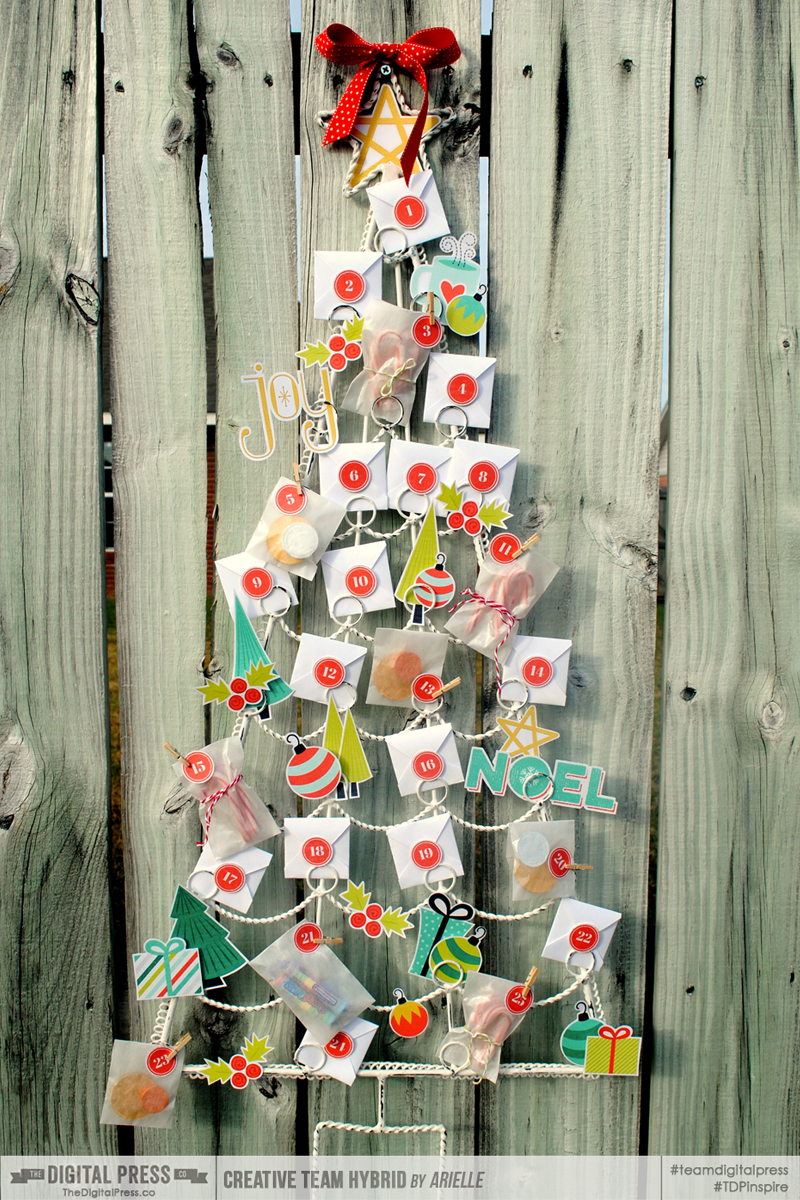
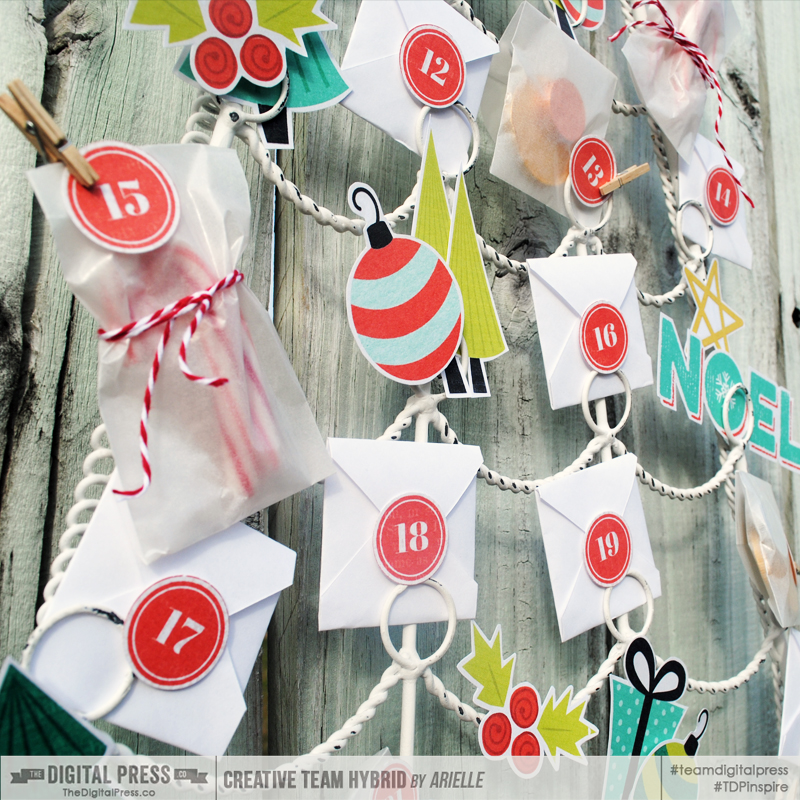
After you have everything trimmed and ready to go, I suggest putting all the envelopes in place on the frame and then sticking on the numbered circles; that way, you’re not shuffling through them to try to find what goes where. Finally, all of the open spots are now ready for the magic touch — the adorable elements!

ahg_hybridadvent7

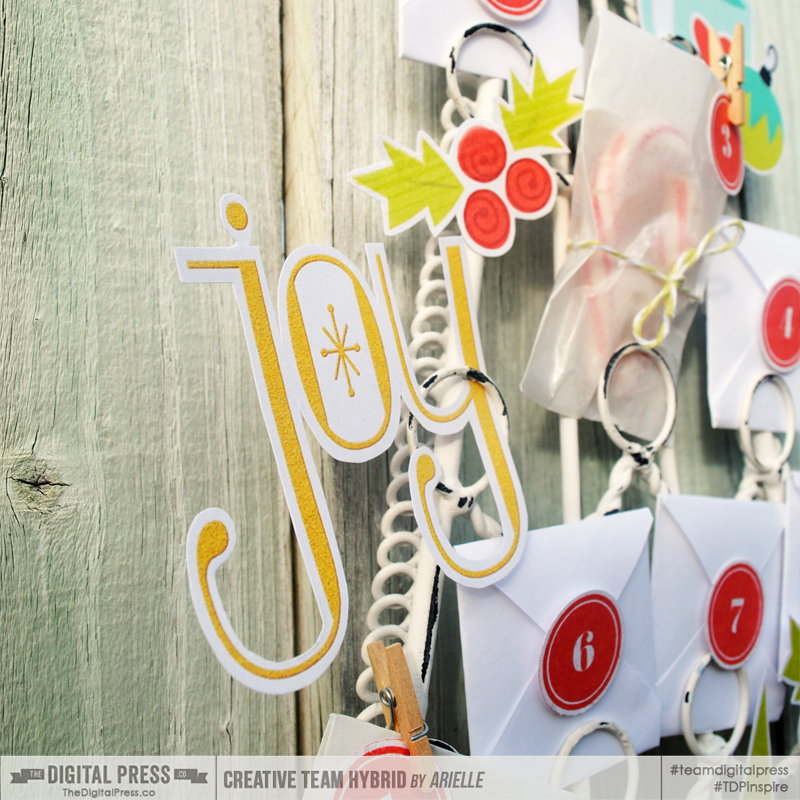
I didn’t want anything adhered TOO permanently, so I mostly tucked elements in or pinned them to the frame with mini clothespins. You could always use twine or ornament hooks, as well.  I am so excited to have something I can customize each year!

Make a Festive Advent Calendar

You can make your calendar as simple or detailed as you like. This one took me about 5 hours total – which is a bit lengthy for me [wink!] –but the finished product made it worth it! I am so excited to be starting this tradtion with my family!

We would LOVE to see your hybrid holiday decor – please share it with us over in the hybrid gallery and our Facebook page. And be sure to come back tomorrow to see the second post in our 12 Days of December series!


Arielle H Gordon About the author  Arielle H Gordon is a wife and mom of two crazy kiddos, ages 5-1/2 & 7. She moved around (a lot!) before returning to settle down in her hometown of Enterprise, Alabama, to marry her sweetheart and start her family. She is an avid crafter — digital, hybrid and otherwise! She LOVES Jesus, family time, camping, gardening, reading cozy mysteries, hot tea, popcorn, and anything on the BBC! This time of year, you’ll find her glued to the Hallmark channel watching every single Christmas movie — even if she’s seen them 5 times each!