Author: The Digital Press

Printouts & Paper Punches

Printouts & Paper Punches


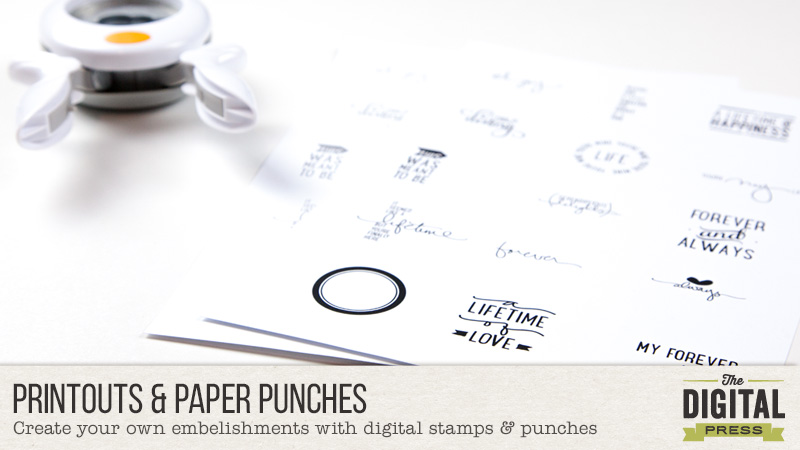
Today I want to share with you one of my favorite ways to use digital stamps on a hybrid or paper layout using paper punches from your stash.


It is much more likely that I will use my digital stamps on a hybrid layout when they are already printed and ready to use. Yes, with pre-printed items you lose a bit of flexibility, but do you know the good news about digital stamps? You can always print them again if you need a different size to fit your project! Of course it rarely ever happens that I actually have to print it again, even though it is always good to know that I COULD.


Printouts & Paper Punches


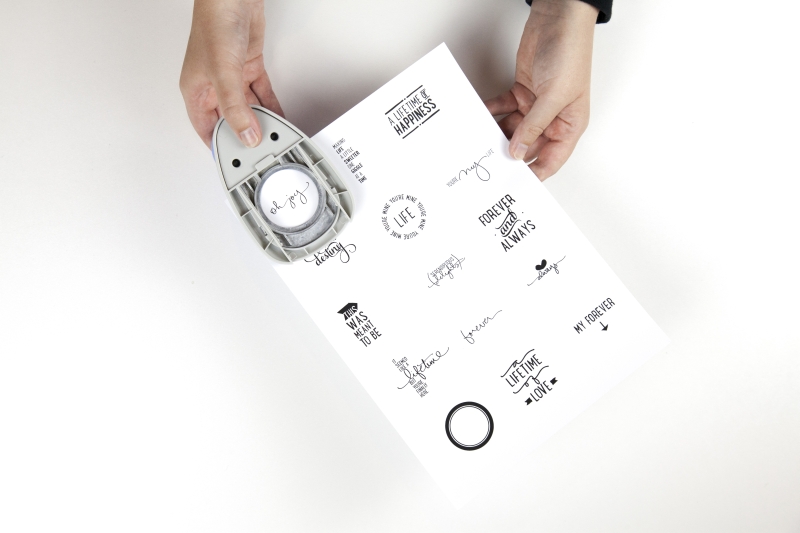
This time I want to show you how not only to get your digital stamps printed, but I also want to encourage you to use you paper punches. For this I add all stamps I like from one set on one A4 (or letter size) page and shrink down all elements at once to either two or one inch, because I know this is the size that will fit most of my punches. I could go ahead and measure them correctly. This takes more time than I want to spent on preparing my prints, so I just see how far I get with this first try. Don’t worry too much about which stamp will fit to which punch and which sizes are needed. If you really have a stamp that’s not fitting like you want, remember that you can always print it again. And most often you will be able to make it work without reprinting.


Printouts & Paper Punches


I like to print in black & grey or if I have a special layout or kit in mind, I might also print some in matching colors. The black ones will be printed twice – one is left black and the other one is to add foil to later on.


Printouts & Paper Punches


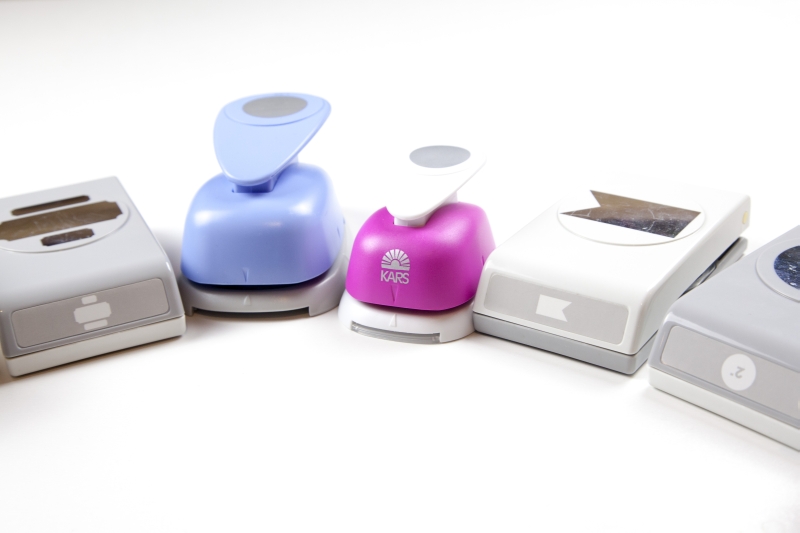
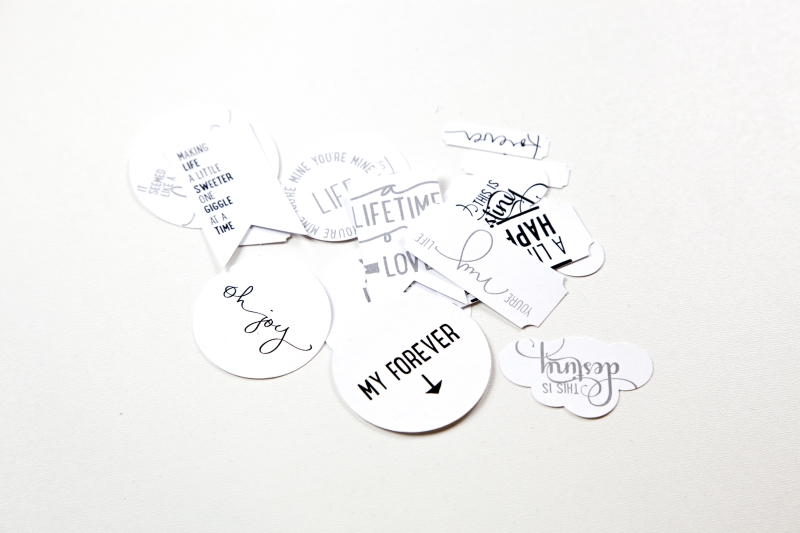
Now comes the fun part: matching your punches to your stamps. There are no rules – just see what looks best for you. If you print multiple times you can also experiment with using different punches with the same stamp.


Printouts & Paper Punches


I would love to see your creations as well, please share yours in our gallery and take part in the corresponding challenge in the forum!


Anika About the Author:  Anika is part of the hybrid team here at thedigitalpress.com. She loves to travel and use the photos her boyfriend takes (thanks for that!) to scrapbook. Digital, paper and hybrid. When she is not scrapping, she is most likely playing a computer game or in a city searching for a geocache.

Savoring the moment

Savor the Moment


Like many people, when I first stumbled across the world of scrapping, I was very much an “event scrapper.” I began by working my way through my photographs chronologically, making pages that mainly focused on the date and place. On a good day, I might also describe what we were doing there in my journaling.

Don’t worry, though… today I’m not going to subject you to my earliest layouts!

As time progressed and I settled more into this new hobby,  I worked out how to add shadows that didn’t look terrible, and went through the phase of painstakingly adding a bit of string curled around some elements… and I eventually decided that the journaling is now the most important part of my layout. As such, I began to change my style of writing.

These days, I’m much more likely to write about what I (or a member of my family, even) was thinking or feeling than about the bare bones of “who, what, where.”

I’d like to show you a layout that I’ve just recently completed, based on a photo I took of my girls on a walk in the countryside near where we live. I used the kit Beautiful Life by River~Rose…

Walking Layout


We go walking most weekends, so I could easily have an album full of similar layouts… but I preferred to pick out a slightly different theme. This time, when I looked at this photo, it came to me that I’m so glad we can still walk together as a family. That was a feeling definitely worth savoring! So that was where I focused my journaling.

Another layout that I’ve done recently is about my husband’s favorite pastime. Again, it’s something that happens all the time — so I’ve chosen to generalize about the activity rather than write about one particular trip to the beach. I used Sahin Design’s beautiful Monochrome Fall collection for this page…

Kiter Layout


As you can see, it’s not always necessary to scrap every instance of an event in our lives, chronologically… but instead, you can record your memories through the capture of generalized ideas, themes, or events. This is a great way to savor the moment now, while recording it for the future.

Don’t forget to head over to the challenge forum to take part in today’s challenge and savor your own special moment!


JudeAbout the Author: Jude is part of the Creative Team at The Digital Press. She lives in the UK with her husband and two fantastic girls. She loves traveling, would be off in her campervan every weekend if she could get away with it, and loves time spent exploring new places and trying new experiences (and photographing them!). She also spends too much time on the computer, and still doesn’t go running as often as she says she’s going to.

Playing with Pocket Templates

Playing with Pocket Templates

Do you love pocket templates and use them all the time? Or do you struggle with them? I personally love project life but I’m not a big fan of straight lines. Every layout that I made with pockets in the past was not obeying to the rules of pockets. Let me show you how I deconstruct pocket templates, sometimes even to a point that they are unrecognizable.

  • Downsizing the template

While I think it’s good that the designers provide templates that use the whole 12×12 layout, I need more visual breathing room on my canvas. It’s rare that I leave it as it is. I downsize the template at least by 10%, most of the times 20% or more, sometimes I add a mat underneath the pockets, to have a framing of the whole. Even when you are using the whole 12×12, rethink this when you want to print your pages. You might need some bleed to provide nothing gets cut off in the printing process. All my layouts you see in this post are sized down.

  • Going out of bounds of the pockets

One thing I seem to be afraid of when playing with pockets are the straight lines. I usually can’t let them rule my layout. I have to break the lines up. Mostly with embellishments on top of it all, leaping over the edges. I tend to make it a more classic layout, applying the rule of thirds or getting more attention to certain parts of the layout. I emphasize the shadows on these embellishments, to make the 3d quality of them stand out more.

Playing with Pocket Templates

Playing with Pocket Templates


  • Changing the shape of the pockets

All pockets are rectangular by nature. Weird, right? There are only little exceptions to this rule. Sometimes a rectangle is broken up to make it two triangles. Still not very organic and still too straight for me. How about replacing one or more of the rectangles with a different shape like a circle or an oval? I tend to do that with frames in that shape. It makes the whole layout softer and it gives a great entry point for the eyes.

Playing with Pocket Templates

Playing with Pocket Templates


  • Tilting the template

Sometimes the tilt does the trick for me. With a little tilt I get a more natural look to the whole. And if I strive for one thing, then it is the natural, real paper look. It may look as if the pockets were photographed on the background paper.

Playing with Pocket Templates

Playing with Pocket Templates


A bigger tilt might give you a whole new look, like this template wasn’t intended for pocket scrapping at all.

Playing with Pocket Templates

Playing with Pocket Templates


  • Use the template for a pieced background and add your own photocluster

From going out of the pockets with embellisments and frames it’s not far to this step. You can even go further by adding more embellishments than I did here. You could also use a second template with a big cluster and plop it onto your pocket template and go from there.

Playing with Pocket Templates

Playing with Pocket Templates


  • Using it for Art Journaling

I remember that once someone asked if I consider myself more towards the pocket scrapping side, the „regular“ scrapping side or the Art Journaling side. As if pocket scrapping and Art Journaling are two very different ends on a spectrum of scrapping. Maybe they are. I personally don’t think so. There are some very reflective pocket pages out there. And some very to the rule Art Journaling pages. And last but not least “regular” pages with a grid or no visible structure. I love being challenged to try something different and always want to make things work, even if at first it seems awkward. I tried a more artsy approach to pockets several times and I love it. Yay for art in rectangles!

Playing with Pocket Templates

Playing with Pocket Templates


That’s it for now. I’m sure there’s much more that you can do with your pocket templates. Do you have more ideas? Feel free to comment below and point me to one of your layouts. And who knows, maybe I will scraplift your idea! Thanks for reading and have a great time while putting new inspiration into practice. Happy scrapping!


AlinaAbout the Author: Alina enjoys sitting in front of her large computer screens too much. Apart from that she loves walking her dog and watching sunsets while being amazed of life in general. She is married to her best friend. Tries to manage the needs of her two cats and her dog and badly fails when they all want their cuddle time at once. Everything else is scrapping, taking photos and currently crafting. Having said that, she needs a bigger craft room.


Tiny Technique for a Boost of Realism!

tiny-technique


I really enjoy creating layouts that are simple… but look as realistic as possible. Today I am going to share with you a very easy technique (just a few simple steps!) to add a dose of realism to your layouts.


1. I want to accent the text on the post-it note with a paint element, but I also want it to look like it really was painted on top of the elements.

1


2. As you see, I had originally placed this paint layer right under the text layer… but it is about to get a makeover!


2


3. You’ll take your paint layer and place it directly above the top element that it is being painted onto. In this case, that is the post-it note. Then you will duplicate your paint layer and place it BELOW the post-it, as well.


3


4. This next part may sound tricky… but it isn’t. You will take the top paint layer and “clip” it to the object underneath it (which, in this case, is the post-it note). For this layer, you are now done! NEXT!


4


5. Next, you will select the object you’ve painted onto (again, for me, it’s the post-it)… and do one of those snazzy “selection” thingies. I do Control+A, and then I double-click the layer (thereby selecting the layer and creating the “marching ants” around it). Then you will Modify > Expand > 2px (or whatever you want… when you see the effect you can decide if you want yours larger or smaller).


5


6. With your “marching ants” still active… select your 2nd/duplicate paint layer (the one that is under your object), and get out your eraser. You will erase inside the selection area.


6


7. You can stop there… but personally, I like to move the paint layer around a bit (in this case, slightly down and to the right). Depending on your lighting angle, you may want to move your paint element a different direction. Totally up to you!


7


8. TADA!  As you can see, the effect may be minimal… but it is one that adds just a tiny dose of realism to a digital layout.


8


Another little tip: if you have multiple layers that your paint will need to be “clipped” to after you duplicate your layers… you can “link” them together. This ensures that if you’d like to move the paint around, each layer moves as one, also.


I hope you enjoyed this tutorial!  Don’t be afraid to give this technique a try!


Leah/Mommyish

 About the Author: Leah is the designer behind Mommyish and owner of The Digital Press. She lives in the beautiful lower Hudson Valley of NY with her husband, her two girls, and her in-laws! She has a love for all things geeky and quirky. In addition to being a graphic designer, she is an avid pianist.

Savor Slowing Down

Savor Slowing Down - Scrap about something that helps you savor slowness

Hi everyone! It’s the start of a new month, and that means a new crop of challenges in the forums here at The Digital Press. Each month we create a series of blog posts and challenges that correspond with one word. This month, we chose the word SAVOR (or SAVOUR if you’re not from the USA like me!).

“Savor” can be interpreted many different ways and we would love to have you join us as we investigate these different aspects through our scrapbooking.

I personally gravitated towards the “Once she stopped rushing through life, she was amazed how much more life she had time for” and “stop the glorification of busy” word art. I was thinking about how this feeling of overwhelm and overcommitment sometimes consumes me. When those times hit, I know I have to reevaluate and adjust. Taking time to savor slowness or the slowing down of a hectic pace is really important!

There have been other times in my life when time was already going slowly (like when I had three children 16 months and younger), and I had to remember to savor and take joy in the little, seemingly mundane moments and tasks that filled my days during that season of life. I’m grateful for the role of memory keeping in my life then as well. I wrote things down and took lots of photos of everyday events so I could savor them, either in the moment or several years later, as I do now.

This is what helps me slow down currently: working in the kitchen, my happy place.

Savor Slowing Down - Scrap about something that helps you savor slowness

So, what about you? Will you take some time to savor slowing down? Is there something you have or do that helps you slow down? Is your life already slow and you’re looking to savor some of those slow moments? I’m hosting a challenge over on the forums at The Digital Press and I hope you will come play along! Check it out at The Drawing Board: Challenges. See you there!


Amy H.About the Author: Amy is a wife and mom to three from Ontario, Canada. She’s always been interested in scrapbooking, but didn’t try digiscrapping until 2008 when she received PSE for her birthday. By then she had 1 year old twins and a baby, so the thought of just playing for 10 minutes, hitting save and walking away with no mess was extremely appealing! She’s been hooked ever since. She loves being the memory keeper in the family, loves taking photos, loves telling the stories. She’s also excited to know that these memories are recorded for her grandchildren to enjoy someday!

Savoring Life

oct-savor-header


Welcome to another new month at The Digital Press!  We are pleased to reveal that our word of the month for October is *drumroll* …SAVOR.

When I think of the word savor, my current “dieting” mind goes straight to YUMMY FALL GOODIES (pumpkin EVERYTHING — spices, apples, warm delicious food…etc)! As I take my stomach out of the equation, however, I realize that we not only savor food… but moments and memories in our lives, as well. October is the perfect month to savor everything — food & drink, the beauty of fall, the warmth of a cup of tea, the moment our children pick an apple off a tree or decorate a pumpkin… perhaps even that moment when your favorite team wins a game!

Here is a bit of inspiration I found on Pinterest:

savor

Inspiration via Pinterest


In the spirit of savoring this memory-keeping hobby and the time that goes into it (and perhaps to achieve a bit of simplification in all of our lives), we have re-worked our challenge system and have decided to unveil and implement it a month early (it was originally going to take place in November to coincide with the site’s first birthday)!  We are so excited to introduce to you our new challenge schedule and point system.  We really think you are going to love it!


All About TDP’s New Challenge System and Schedule

Since the time that challenges were first implemented at TDP after the site opened in November 2014, we’ve followed a Mon-Wed-Fri schedule… in which informational blog posts that highlighted our “word of the month” were attached to challenges found in the forum.

Beginning in October 2015 and beyond, we’ll be following the schedule you see below, instead, which will hopefully “open up some space” for new and fun challenge opportunities — things such as (a) special events like speed scraps (and similar), (b) hybrid challenges that are connected to our hybrid tutorials, and (c) a new opportunity to earn points by posting your TDP creations on social media!

The New Blog/Challenge Schedule

  • Tutorial Tuesday will still be a thing… a weekly event in which a blog post offers up new and fun tips and tricks!
  • Friday will be the day for our weekly “word of the month” post on the blog… and a corresponding challenge will also appear in the forum (each week, completing the challenge will be worth 2 points).
  • Saturday will be home to a bi-weekly (1st and 3rd Sat of each month) hybrid post on the blog… accompanied by a corresponding challenge in the forum (completion of each one will be worth 3 points).
  • Twice a month (dates TBA each month), we’ll host special challenge events… think speed scraps… live chats… etc. (and completion of each will be worth 2 points).
  • …also new — you will be able to earn extra challenge points by posting your gorgeous creations to social media* in October and beyond!

You can read about all of the changes in the new Challenge Info thread!


With that new schedule in place, here is a handy image you can save to your computer, featuring our lineup for October (made by the ever-talented Alina from the TDP creative team, using the brand new store collab Autumn Whimsy that you can purchase for only $4 for the first 4 days of the month)!


Savor - October Challenge Schedule


We look forward to seeing you around TDP throughout the month of October!


Leah/Mommyish

 About the Author: Leah is the designer behind Mommyish, and owner of The Digital Press. She lives in the beautiful lower Hudson Valley of NY with her husband, their two girls, and her in-laws! She has a love for all things geeky and quirky. In addition to being a graphic designer, she is an avid pianist.