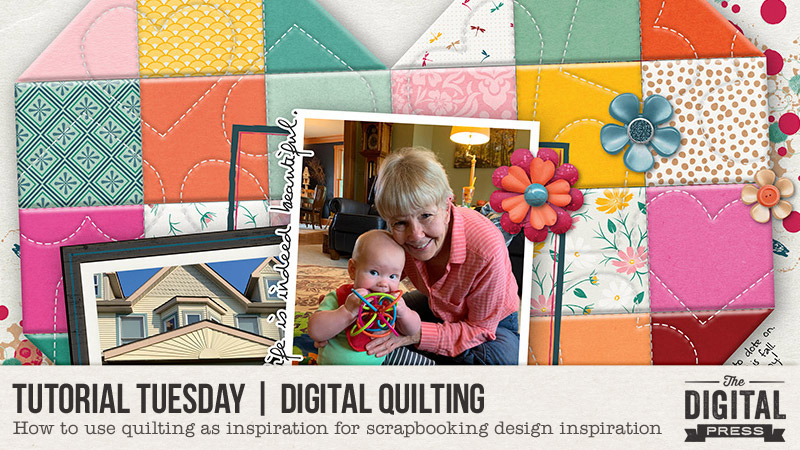
Hi scrappers, and welcome to another edition of our Tutorial Tuesday series here on The Digital Press blog! Today, I’m here to show you how to create a “digital quilt” for your next scrapbook page!
I’m sure I’m not the only scrapper who also enjoys a variety of other crafting methods — right? I mean I love anything having to do with crafting; I love using all kinds of tools and supplies to make all kinds of things from home decor, to gifts, to (of course) memory books. I must have gotten the crafting bug from my mother (pictured above) because she, too, has had her hands in a huge variety of crafting hobbies over the years. And thus, I thought to myself… “mashups are all the rage, why not mashup a couple of my craft hobbies?!”
To do so, I played around in Photoshop for a while and created a “quilt” as the background for my layout. I’ll share what I did here but I’d really love to encourage you all to mashup whatever other crafting hobbies you might have with your digital scrapbooking. There’s so much room for creativity; I’d love to see what others come up with!
OK here goes… the quilting / scrapbook mashup!
Step 1:
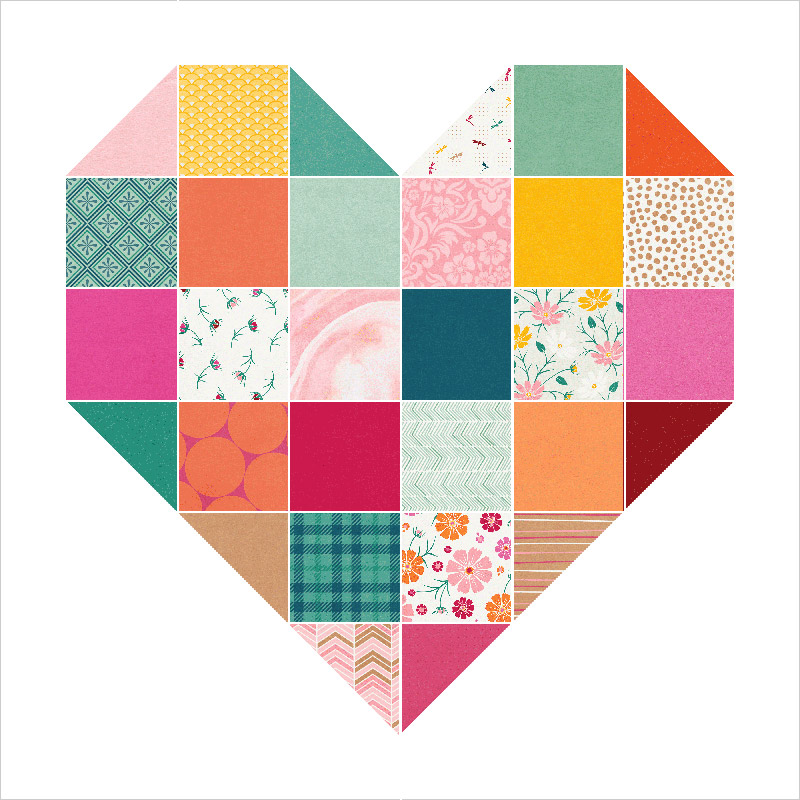
In Photoshop, using various shape tools (squares, triangles, etc.), I created the following pattern to use as masks to help build my quilt…

*TIP* Make sure that each shape is on its own layer so you can use it as an individual clipping mask.
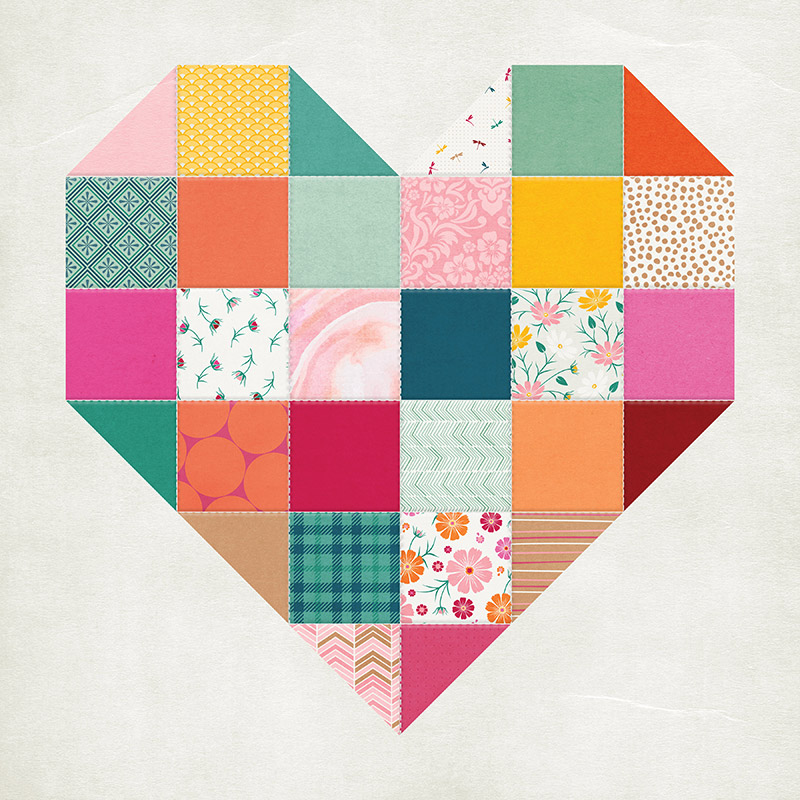
Step 2:
I used each of my shapes as a clipping mask and used a different paper for each shape to create the look of a hodge podge sort of quilt (which is one of my favorites kinds!)…
Step 3:
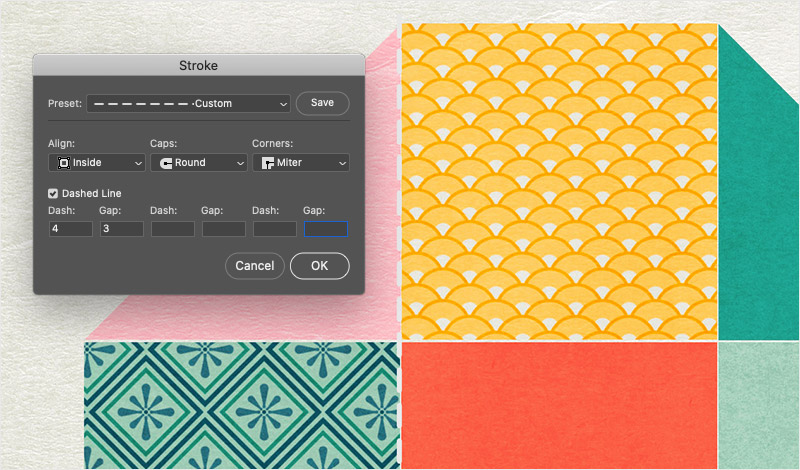
Next, using the line tool, I created “stitching” between each of the shapes using a dashed line. For the stroke, I made sure to change the “Caps” to “Round” (see next image)… and I bumped up the default “Gap” to be 3. In the picture below, you can see my dashed line (in white) between the pink and yellow shapes…
Step 4:
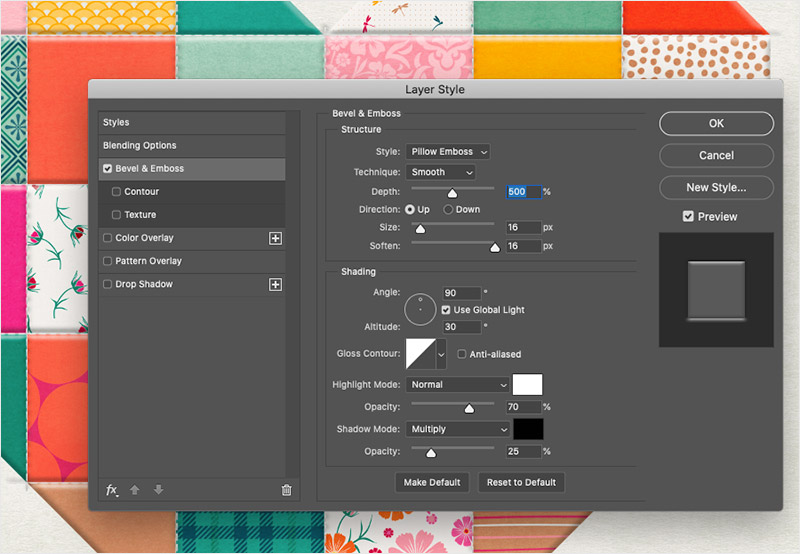
Once I had all my “stitches” added between the shapes (this is where they would be sewn together in quilting) I applied a Bevel & Emboss Layer Style to all layers of stitches. This was to make those dashed lines look more like 3D rounded thread. You can certainly play around with the settings (I did!) but the image below shows the settings that I found to work best for the look I, myself, wanted to achieve…
- Style = Pillow Emboss
- Technique = smooth
- Depth = 500
- Direction = Up
- Size = 16
- Soften = 16
- Angle = 90
- Attitude = 30
- Highlight Mode Opacity = 70
- Shadow Mode Opacity = 25
After that was all said and done, it looked like this…
I found that I didn’t need to do any embossing on the quilt pieces themselves, since the effects I put on the stitches made the whole thing look just about right as it was (or at least how I wanted it to look!).
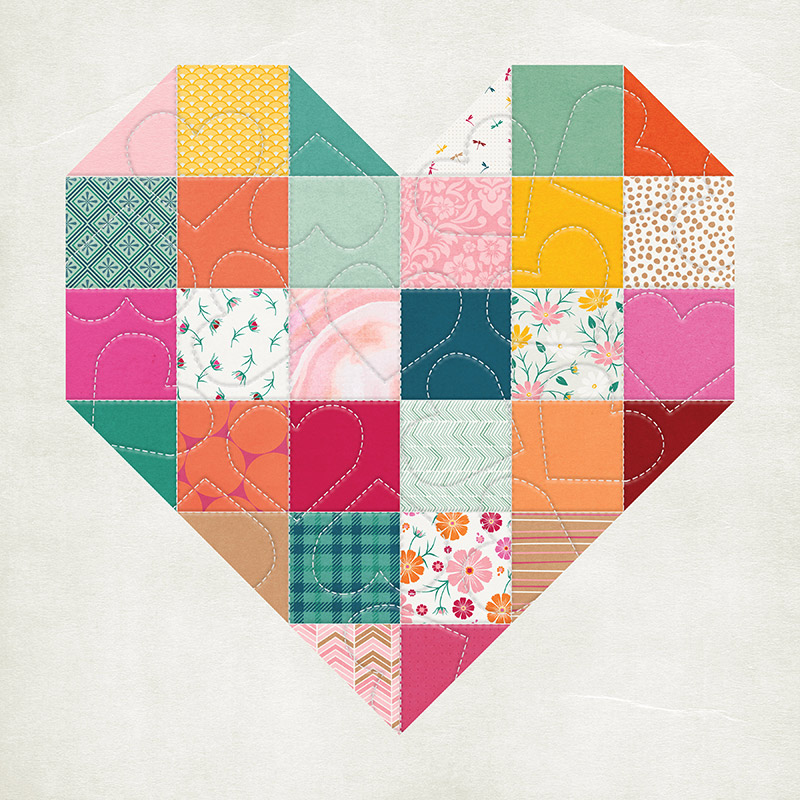
Step 5:
Quilting is not only about sewing pieces of fabric together. Once that’s all done, the quilter will also usually stitch a pattern of some kind — sometimes shapes, sometimes just wavy lines, sometimes hashed lines, etc. – across the entire surface of the quilt to bind it together with the backing and also create more texture and give it a really cool finish. So… that’s what I did here! With the pen tool, I created heart shapes (to go with the overall shape of my quilt) using the same stroke settings as the first stitching I created. It turned out like this…

*Special Note* I did put the stitching on its own layer and then used a clipping mask to “cut off” any stitching that extended beyond the “quilt”.
Step 6:
Next, I applied the same kind of embossing settings to my new hearts stitching to make it all look the same as the stitching between the blocks (to do this, you can just copy what we did in Step 5 for the straight lines)…
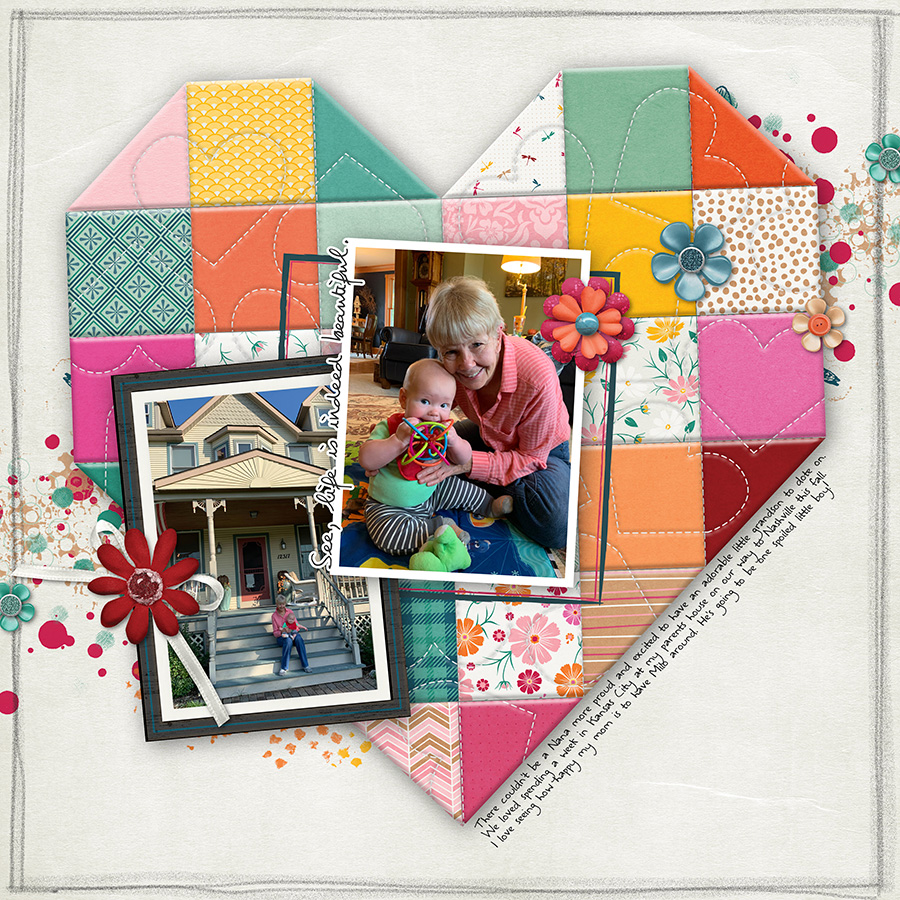
Step 7:
And then… all of a sudden I had a quilted background ready for my layout! All that was left to do after that was to add photos, embellishments, and borders… and I had completed the quilt / scrapbook mashup project! Here’s how the final page turned out…
I hope this inspires some of you to either try the quilting technique or think about how you can mash up your favorite crafting hobbies too! Can’t wait to see what everyone creates! Happy scrapping!
 About the Author Shannon has been completely addicted to digiscrapping since she began in early 2016 (though she’s been a scrapper since 2000). She is a part time web designer but since 2019, she’s now the proud mama of her son and loves to have all kinds of adventures with him and her husband. Her family has currently adopted a digital nomad lifestyle and lives in a different city each month by renting AirBnBs.