Hello, and welcome to another edition of our always-popular Tutorial Tuesday series here on The Digital Press blog!
Today I am here to share with you a reaaaalllly quick and easy way to add some texture to the digital items in your stash (such as those meant to be printable, etc.) that are flat and don’t have any texture.
You may think to yourself, “well, I’m not a designer… I have no idea how to do anything like that!” — and I’m here to show you this quick workaround trick that you can do in less than a minute or two! It’s a really handy trick to have up your sleeve, too, because if you’re anything like me, you sometimes like to mix-&-match different kits/products when you’re working on a project… and it’s often frustrating to be working with digital supplies that are all “texturized” already, and then find something you’d like to incorporate into your project, only to find that it’s flat/textureless, and just doesn’t “look right” when paired with the other items. This tutorial should solve that problem!
Supplies Needed
- any digital item you want to add texture to (pocket card, sticker, tag, etc.)
- one 12″ x 12″ digital paper that has a texture you like
- photo editing software (such as, but not limited to: Photoshop (PS), Photoshop Elements (PSE), photopea.com (free online photo editor), etc.)
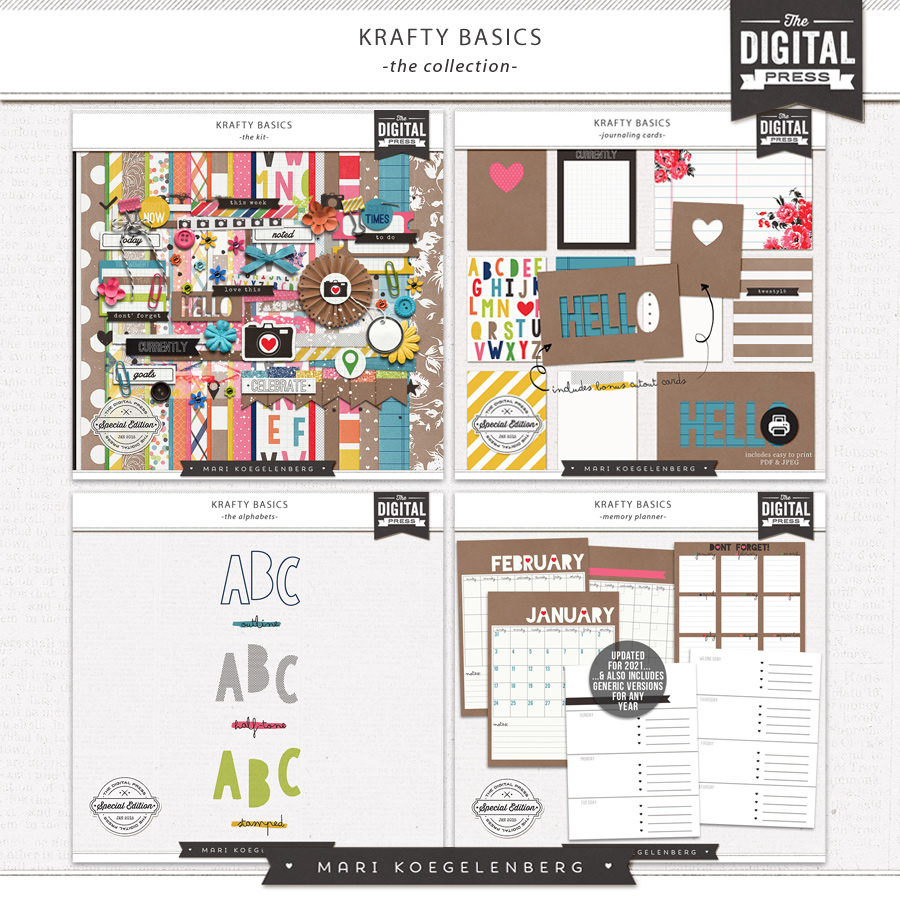
For this tutorial, I’m going to be working with a few of the pocket cards and solid papers found in Mari Koegelenberg’s newly-revamped and re-released Kraft Basics | The Collection (which, coincidentally, is in this week’s Publisher’s Picks sale and is 50% OFF!)…
I’ll also be using Photoshop Elements (PSE) for this tutorial, because it’s probably the most universally-popular/used program in the digital scrapbooking world… but… don’t worry! The processes I will show you should easily translate into other programs (like the full version of Photoshop (PS), photopea.com, and others). They all have pretty universal features.
Instructions
This process is about as simple as it gets, when it comes to the “how-to” of it all!
First, you’ll want to select the item(s) you want to add texture to… and open them up in your photo-editing software. I’ve selected 3 different pocket cards, as shown here…
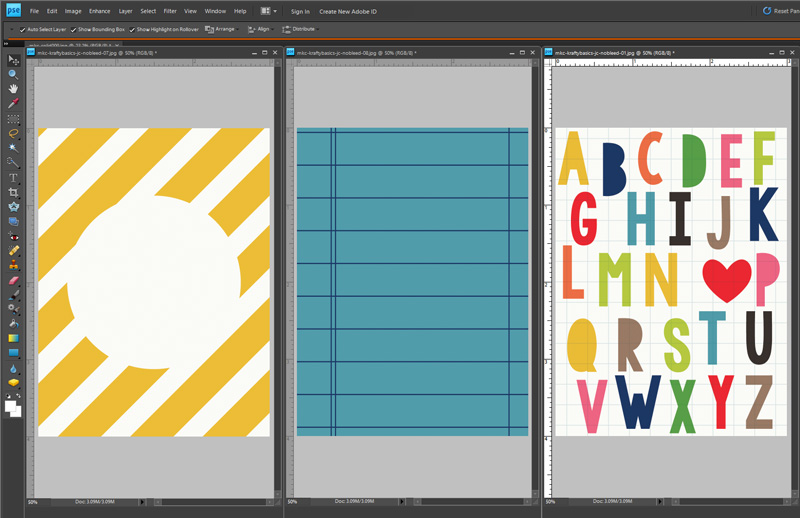
See how each of those cards is created “flat” in order to be print-friendly (i.e. no digital texture applied)?
Well, that’s perfect if we plan on printing the cards and using them on hybrid/physical projects… but if we’re actually going to be using them on a digital page alongside papers and elements that do already have digital texture applied… it becomes a bit strange and mish-mashy (technical term, LOL).
So… we’ll fix that here by adding our own texture!
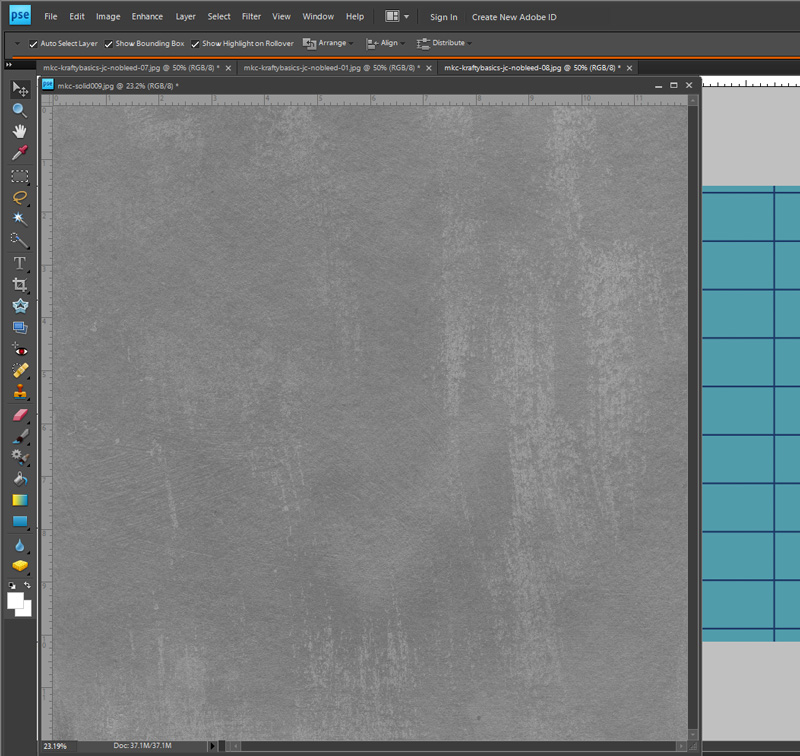
Next, find a solid digital paper that has a texture you like, and open it up in your photo-editing software, as well. I’ve selected this blue-colored solid from Mari’s kit…
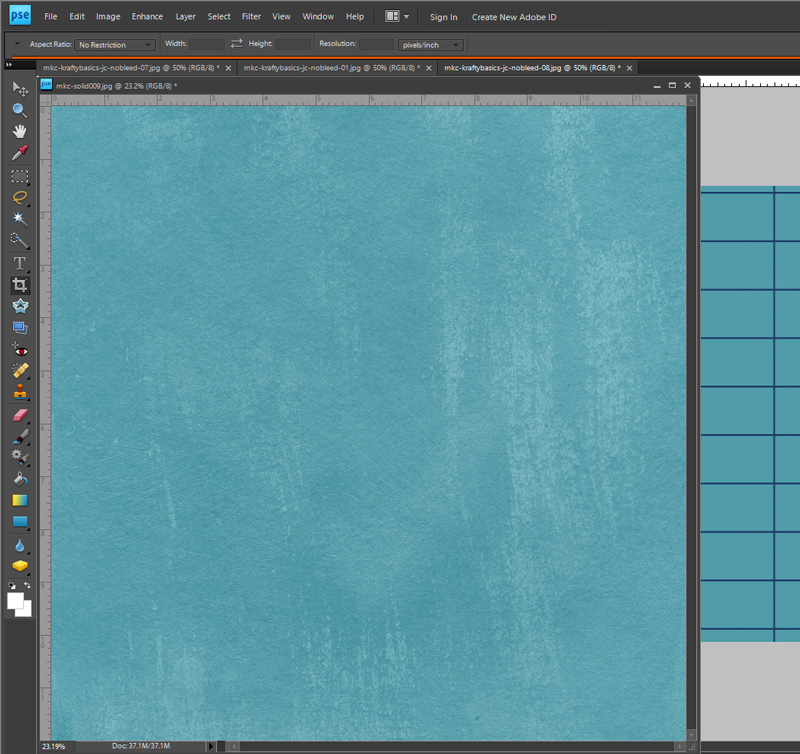
See the awesome weathered “canvass-y” texture on that particular paper? It’s going to be perfect for adding some texture and realism to the pocket cards!
To be able to use it for this purpose, you’ll want to remove the color from the solid paper (i.e. if your solid paper is red… or orange… or blue, like mine — no matter! we’ll fix that here!).
To remove the color, I’m going to use the following menu path (again, I’m working in PSE here for this tutorial… but the commands should be pretty similar in most other programs)… Enhance –> Adjust Color –> Remove Color
…and in doing so, I’m left with the following (the same exact paper — but now it’s in greyscale color):
Next, we’ll drag the paper into the window that contains your item, placing it on top of that item. You’ll be able to see the layer order in your layers palette (see right, in the image below, which shows the paper layer on top of the blue lined pocket card layer)…
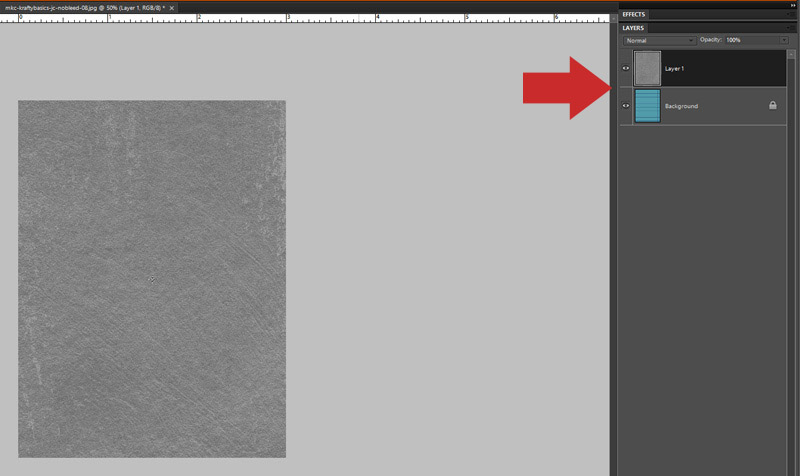
See how the paper has taken the “shape” of the pocket card (3″ x 4″ — instead of its original 12″ x 12″)? Well, the entire paper (all 12″ x 12″ of it) is still there. If you click and drag, you’ll find that you can move the paper around on top of the card.
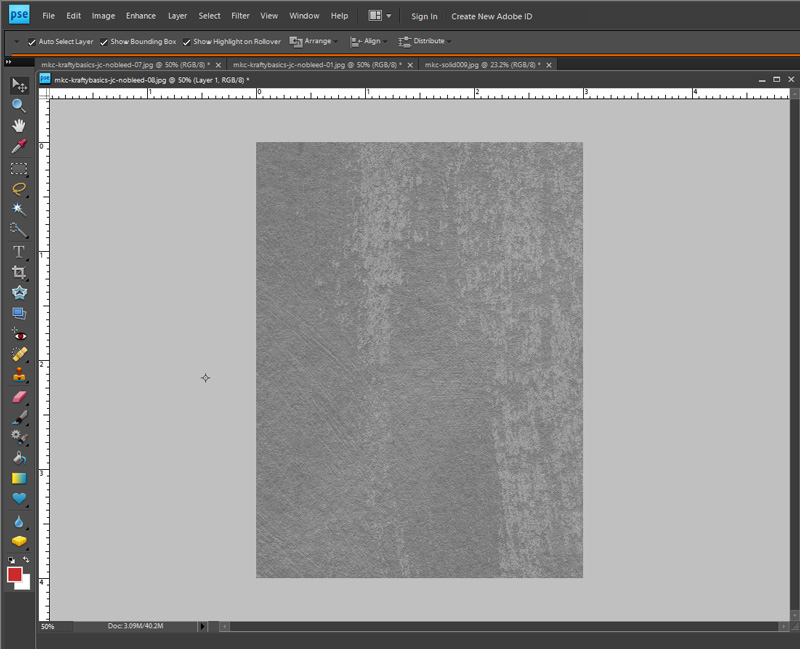
Drag it around until you find texture you really like. I’ve moved it around until I found some of the gorgeous painty brushmarks that will add some character to this card…
Now we’re going to do the final step… which is to use the blending modes in the layers palette to change the greyscale paper into a texture overlay. In PSE, you’ll find this function here (see the arrows)…
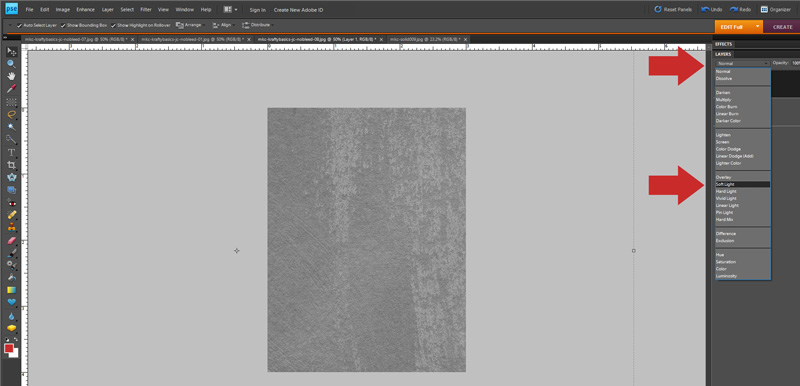
I like the “soft light” overlay mode for this purpose (but you can play around with all of the different options and find one that suits your needs!).
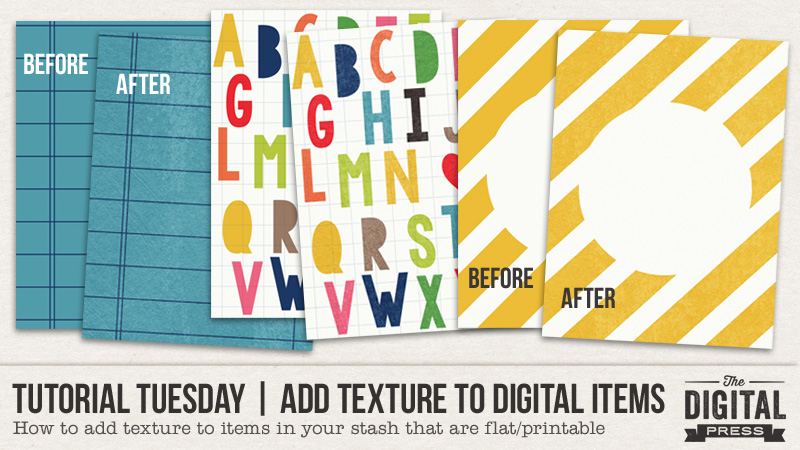
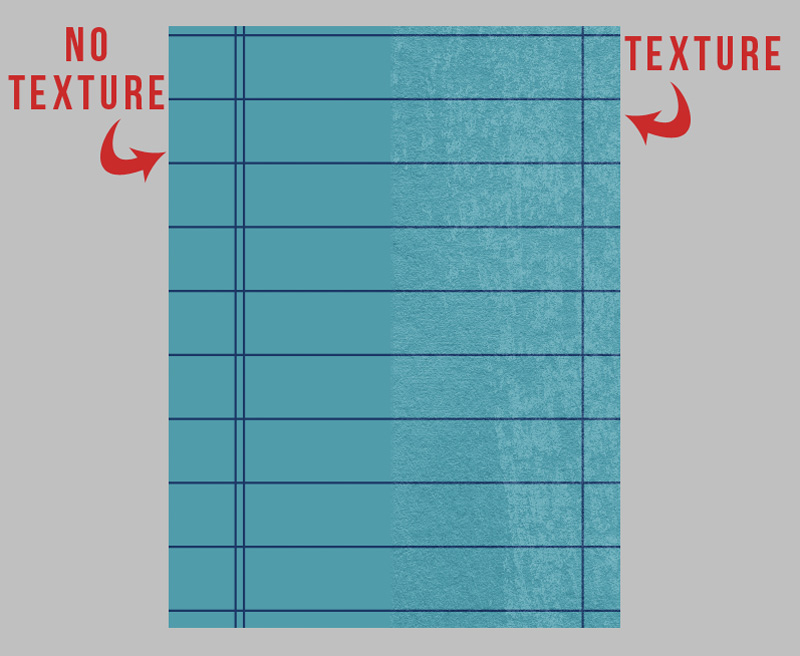
Here’s what happened when I chose “soft light” (note that you can now see the card “through” the paper, which has become a transparent texture overlay; the LEFT side of the card is the “before” and the RIGHT side of the card has some awesome weathered digital texture now)…
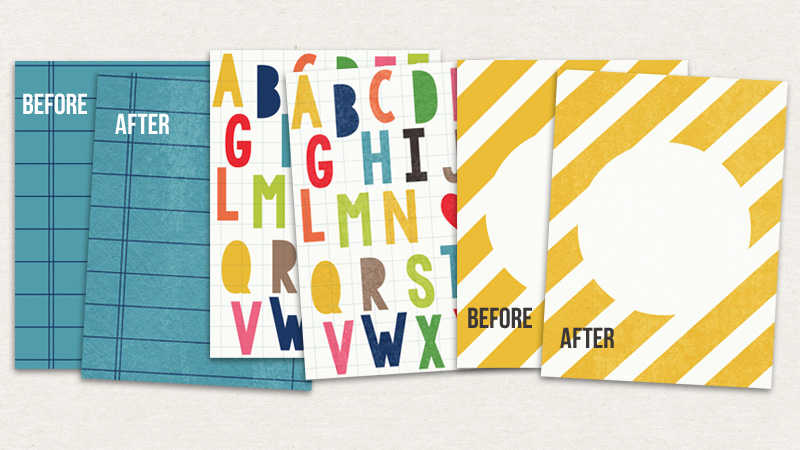
And… that’s it! Wasn’t that easy?! Here’s a look at my 3 newly-textured cards…
Here’s hoping this simple little trick opens up all sorts of new possibilities for you to use some of the items in your digital stash that you might have been avoiding because they didn’t have any texture… and/or allows you to mix-&-match products in your stash that do have texture with the ones that do not (without it looking like a mish-mash of different styles!). It’s just so quick and easy, and helps make your digital supplies more versatile!

About the Author Laura Passage is the owner of The Digital Press, and also the designer behind Wishing Well Creations by Laura Passage (WWC). She works now as a graphic designer in both the digital and paper scrapbooking industries, but previously spent over a decade working as a college soccer coach. She lives in the Pacific Northwest with her husband and two sons (previously affectionately referred to as The Tiny Terrorists, but nowadays they’ve entered the pre-teen phase — so it’s even worse than that!)… and she will rationalize eating coffee ice cream for breakfast to anyone who questions it.
Just found this section on your site from the newsletter and the tutorial sounds good. However, It is difficult to work with instructions that are just online. Is there any possibility that you could offer them as a .pdf file. It is so much easier when you are trying to learn a new process to be able work offline and keep it available for using in the future.
Thanks
Hi Maureen! Yes, I definitely know what you mean. The good news is that it’s pretty simple to print out a copy of a WordPress blog post, so you can create your own paper copy. Simply click on the title of the article you want to print (if you’re scrolling through the blog’s main feed), which opens that one singular post. Then, you can choose the “print” option in your web browser (usually it’s located in a menu at the top right corner). The print dialog box will allow you to choose print settings that format your printed copy the way you like it. Easy-peasy!
Just so you know: I MISS you guys. Your Tuesday tutorials esp. I learned a lot. And I will continue to use the products I purchased for a long, long time – they are timeless. I wish all the best of luck with your present and future endeavours.