Hello everyone! Hope you are recovering well from the DSD celebrations and looking forward to some quiet time now? Well, I certainly am. Its seems like I have been working in overdrive trying to get so much done this past couple of weeks that I must have had my auto-pilot on!
One of my favourite things to do when I feel like I’m scrapping in the same old style is to look around and spot any new techniques other people may have been using. I also look back at my old layouts and style. One of the things that I noticed was how I used to extract a lot of photos either fully or partially and try and add some effect to them.
As a reminder and a refresher for me (bonus!) as well, I decided to share one of my favorite effects with you – the pixelated photo (i.e. creating an effect that will seem like your photo is breaking up). There are many advantages to it – I like to do this with really candid or animated shots so it helps to add even more movement and energy to the expression. Don’t know what I am talking about?… Here’s the what and how.
My steps are all on Photoshop Elements but should be easily reproducible on Photoshop.
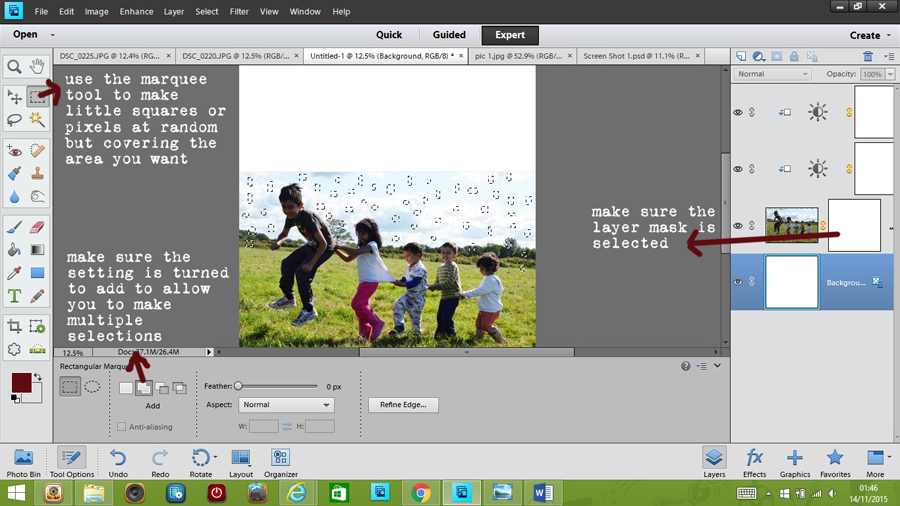
Select a photo you want to work with. These kinds of effect work better with large photos but you can try with smaller formats as well. I selected my photo, placed it on the canvas and processed it a bit (brightness, contrast – the usual). I then added a layer mask (very important to preserve the original image and ensure there aren’t any OOPS moments!).Then selecting this layer mask and using the rectangle marquee tool, I started to draw out various square and rectangular sizes and shapes. You will need to make sure the “add” option is ON within the marquee tool options to allow you to make multiple selections at the same time. I continued to pepper the entire photo with these.
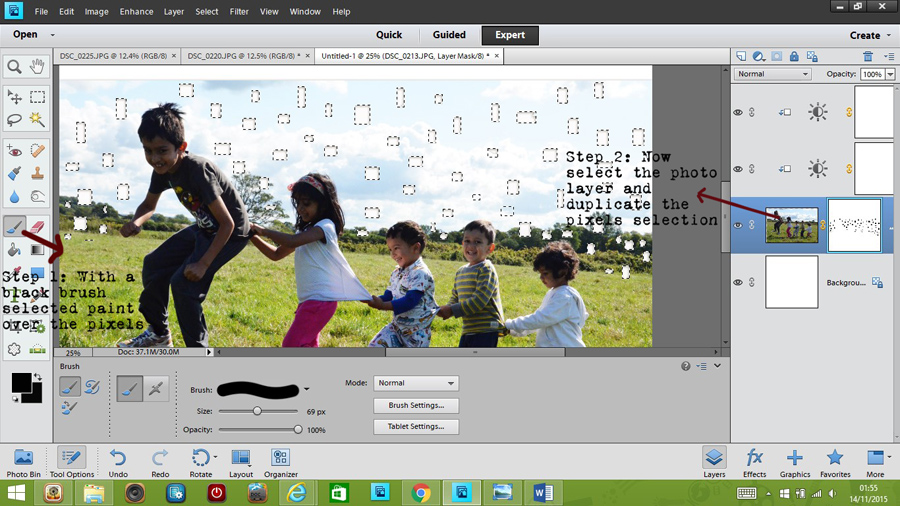
Next we want these selections erased but non-destructively. So I selected a black brush and painted over the selection. We are still working with the layer mask so make sure this is selected.
Now to reveal the actual pixels from the photo, select the photo layer (you should see that the marquee selections are still showing – blinking lines) and duplicate the photo. This will duplicate just those little bits.
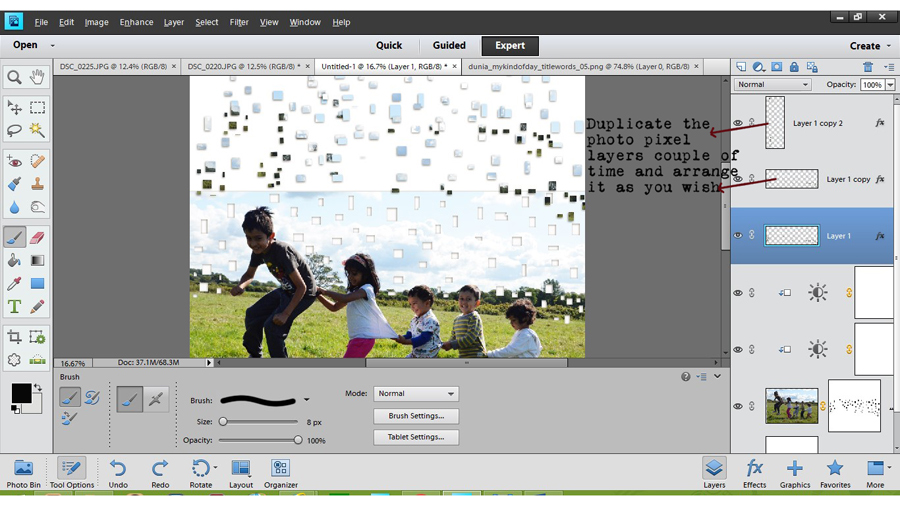
Now move this layer to the top most on your canvas and duplicate it couple of times. Start to position these various layers on the space above and beyond the photo. You can rotate, resize and delete or cut and paste the pixels as you feel. Overall it should give the effect of pixels flowing away from the photo.
Add embellishments and journaling and voila you have a transformed and eye-catching photo!
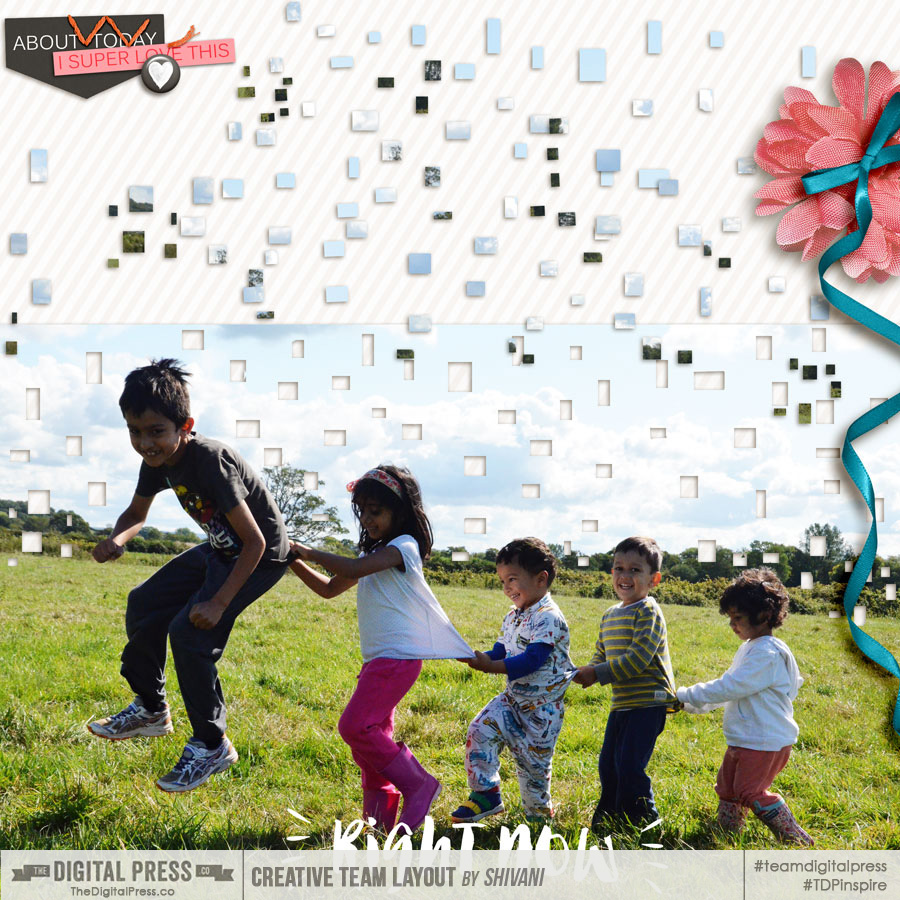 Credits: My kind of day kit by Dunia (our guest designer this month)
There are numerous other possibilities with this technique. I tried another one with a big Title. Here I have used a feather shaped element to select pieces and break them away from the alpha.For added effect, I have also included the actual feather elements in the flowing away shapes.
 Credits: In fine feather alpha by Kim Broadbent, Elements from Blink by Little Lamm and Co.
Hope you liked this effect and found the tutorial useful. Please share any layouts you create using this or any other modification and I would love to see your interpretation.
That’s it from me then. Till next time…
![]()
About the author: Shivani Sohal is a donner of many alter-egos. A finance professional by day in busy London, she morphs into a seemingly normal mum of two in the evenings and weekends. She is constantly found with her fingers in too many pies and juggling the metaphorical balls. That is living on the edge for her; aided by the two ankle biters and a darling hubby who define the warm and mushy for her. She is ferociously dedicated to memory keeping – almost immune to any nay-sayers (or equally disruptive crying children or annoying house fires!!!);keeping her head down and forging ahead at all times.
Hey, I have to try this !!!!!