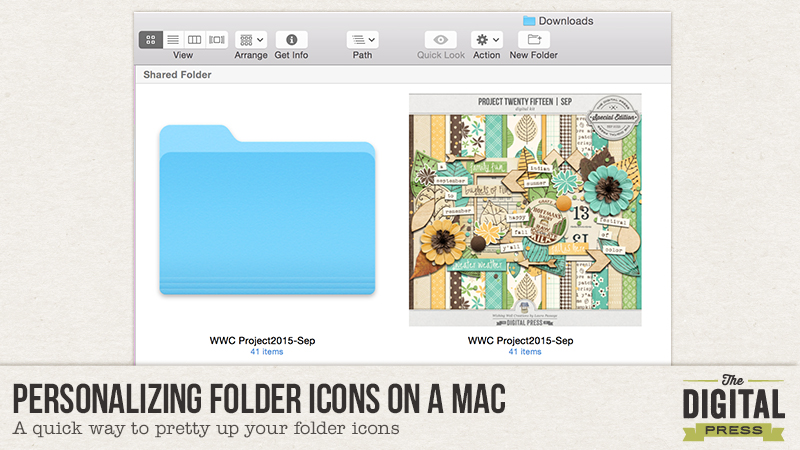
Today I want to show you how to turn generic folder icons on a Mac to a personalized image of your choice. What the heck do I mean? Let me show you:
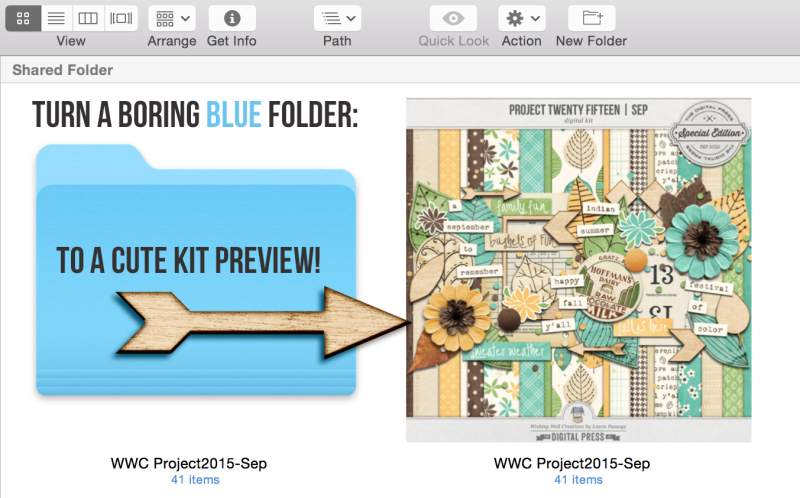
I like to do this for the main folders of digital scrapbook kits. I replace the generic folder icon with an image of the kit preview. It’s super easy to do. Here’s how:
1. Copy the image you wish to use to the clipboard.
I prefer to do this directly from within a Finder window without opening Photoshop. When I’m using a kit preview (you can do this with any image of course):
- Right click on the kit’s preview image provided by the designer (usually a JPG image)
- Choose “Open With”
- Select “Preview.app”
Once the image has opened in a Preview.app window:
- Choose Edit > Select All (or press CMD+A)
- Choose Edit > Copy (or press CMD+C)
At this point the image you copied is in your clipboard. You can now close the preview image. (Click the red X radio button or press CMD+Q.)
2. In a Finder window locate the folder icon that you want to change.
- Right click on the folder icon
- Choose “Get Info” (or press CMD+I)
- Click on the small folder icon in the upper left corner of the Get Info window that just popped up
- Choose Edit > Paste (or press CMD+V)
The folder icon has now been replaced by the image you copied in step 1 and you can close out of the Get Info window. (Click the red X radio button or press CMD+W.)
That’s it. You’ve now personalized a folder icon!
NOTE: If you change your mind and want to go back to the generic blue folder icon, just open up the Get Info window again, click on the small folder icon in the upper left of the window and press delete. Easy peasy, right?!
One more thing! You can also personalize file icons following these steps as well! I find it really useful to personalize my styles files (.asl files). I have a master folder where I keep all of my styles. I like to keep only the .asl file from purchased styles (not the whole folder of stuff that comes with the style). If I didn’t personalize the files, I would have a folder filled with files that look like white folded pieces of paper. I follow the same steps I outlined above and copy the style preview image to the .asl file. Since I do this I can easily find the style I’m looking for and see who the designer is without having to read through for the style I’m looking for. Cool, right?!
BTW … the kit I used in my sample image is Laura Passage’s (aka Wishing Well Creations) gorgeous Project 2015 September Collection!

About the Author: Barbara is a member of the creative team here at The Digital Press. She’s a mom to two teenage kids (her son, the oldest, is a freshman in college and her youngest, a daughter, is in high school). She lives in the midwest with her husband, daughter and their dog Maggie, a cuddly ball of fluff. (This is the first time she has had to say she lives with only one kid. So weird!) In Barbara’s free time she loves to digi scrap, take photos and hang out with her family.