A few years ago, if there was a medal or award for word’s slowest scrapbooker, I, Carrie, probably would have won it. Turtles traveled to island destinations faster than I made a page. My mind would be blown when seasoned scrapbookers told me they only spent 30 minutes to an hour on a page without a template. I spent a solid two years learning to make a page in 45 minutes or less and, now, I’m going to save you those two years by sharing how to make quick decisions based on line and flow. There will be a challenge at the end of this post!
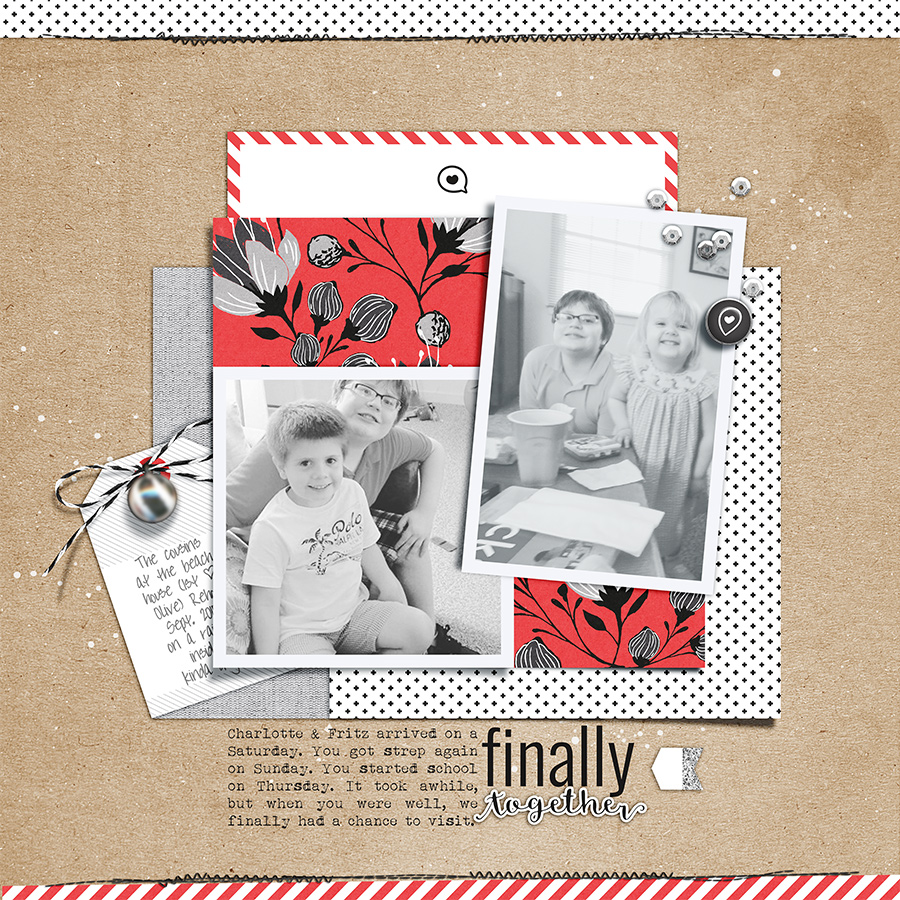
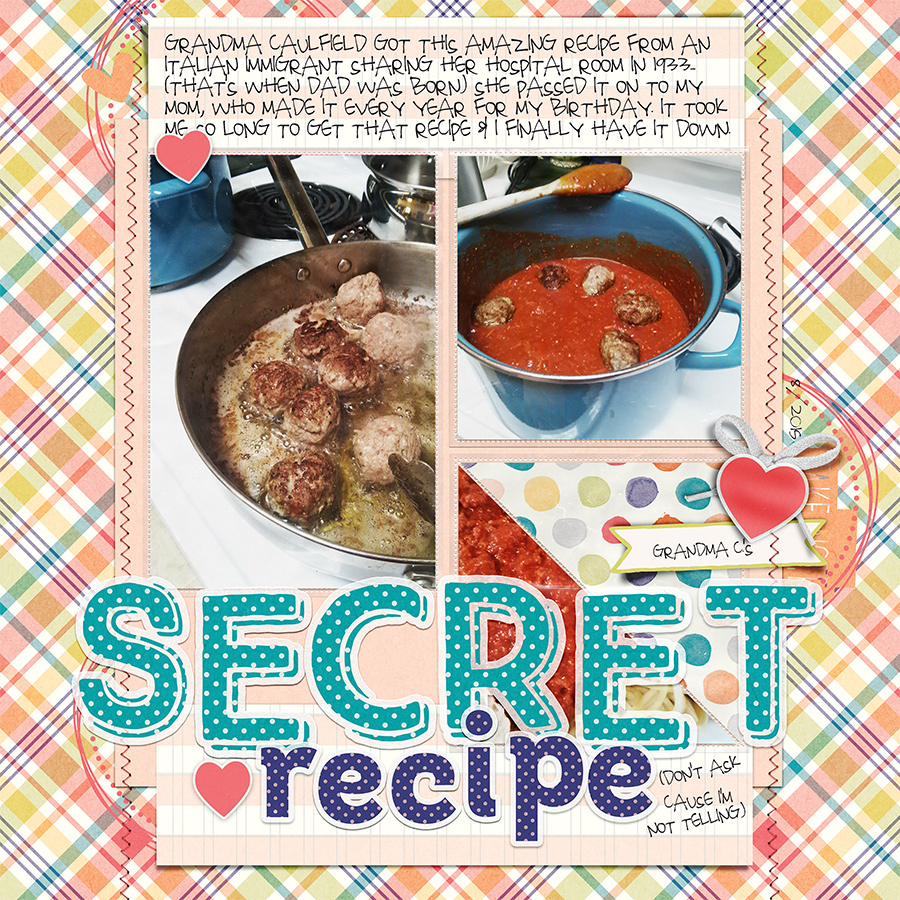
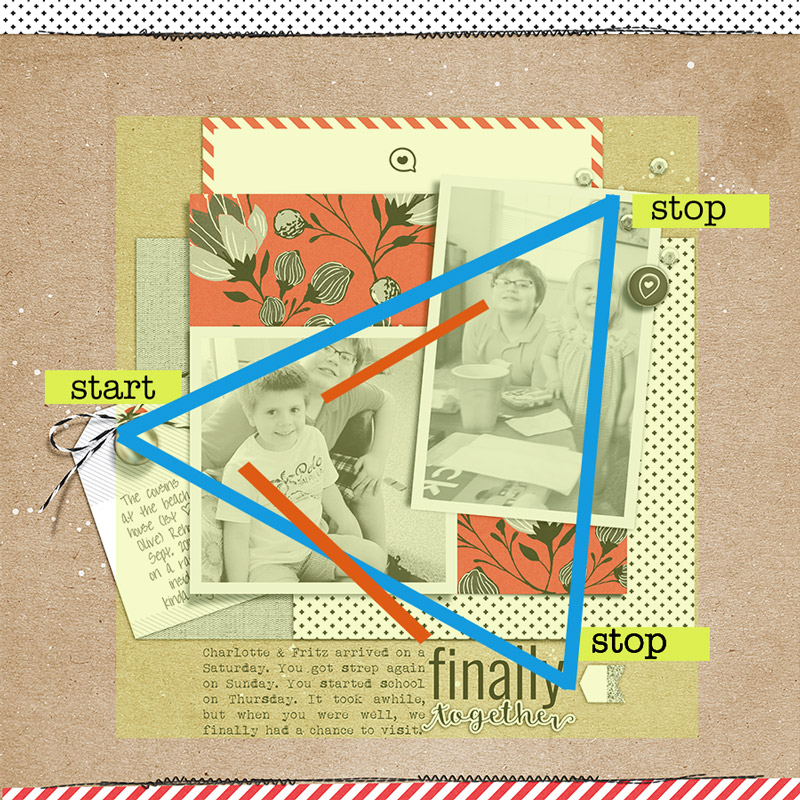
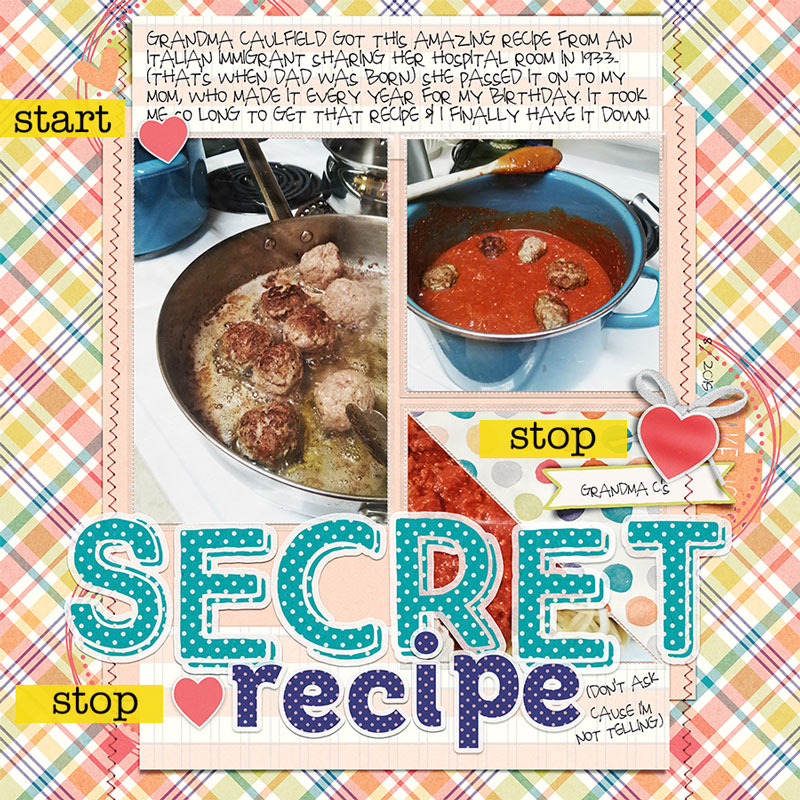
I did, in fact, time both of the example pages used in this post. Secret Recipe, made with Plastic Pocket Templates #2 Mommyish and Brilliant- Papers & Elements by Danielle Engerbretson took a full 45 minutes. Finally Together, made with Sahin Designs’ Monochrome Fall Bundle was completed in 37 minutes and 15 seconds. A 45 minute or less scrapbooking session not only adds to my library of memories, it keeps me sane and happy. I can scrap with my morning coffee before getting to work and with my cup of tea before bed. I can start and end my day with a dose of scrappy creativity and so can you! You’re about to become a smarter, faster, more strategic scrapbooker…
Before you even open Photoshop, the first steps to moving your process forward involves very simple planning. I always know ahead of time:
- what product I’m using
- what photos I’m using
- what story I’m telling
- the shape of my page design
You can make these decisions ahead of time, eliminating choices you have to make once you start scrapping. Aside from the photo processing, you can come up with the rest while you’re doing the dinner dishes or while you’re taking a shower. Easy, peasy.
Helpful Hints:
- Limit the amount of product you use and use product you know works for you.
- Process your photos ahead of time.
- Be familiar with some basic composition (or page design) shapes.
Just in case you aren’t familiar with basic composition shapes, I’ll give you a crash course now. When starting your process, pick one of these shapes. If you’re using a template, be aware of the template shape; This will help you the next time you create your own page design. If you know this, feel free to skip this part, but feel welcome to compliment on my awesome vector skills.
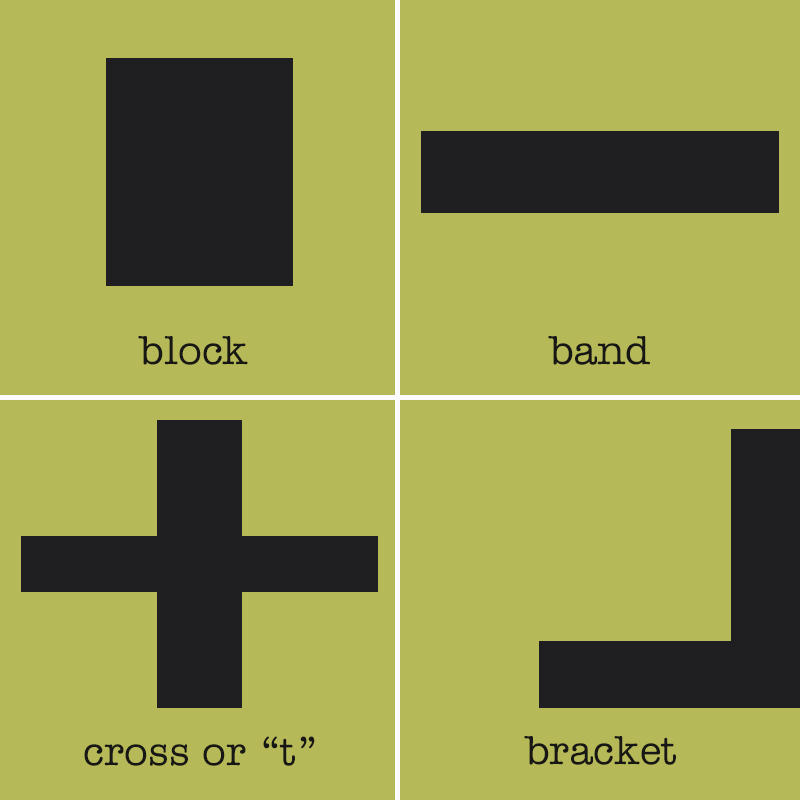
A block can be rectangle, square or grid. A circle would a variation on a block design.
A band is a design runs across the page, usually surrounded by generous white space.
A cross is made up of two bands that intersect centrally to create a lower case “t”, upper case “T”. Variations include rotating the “t” to creating an “x” or adding more lines to create a burst or star shape.
A bracket consists of a horizontal and vertical lines that meet at a right angle, creating an “L” shape. Variations include any sort of bracket or bookends, such as “[” or “{“.
(You can certainly use your creative genius to ramp up the basic composition shapes)
Okay, so now your…
- Photos are processed
- Your product is picked
- You know what story your telling
- You selected a basic composition shape (I use a block in the example pages)
…and you haven’t even starting putting things on the page. You, my lovely, are way ahead of the game! You’re ready to open a new canvas.
Keeping your page design shape in mind, place your photos on your canvas. Yes, before you even put on your background paper. No, I’m not crazy. There is an actual strategy for deciding where to place your photos, whether your using one photo or five hundred (which, you probably don’t want that many on a page, but ya never know!).
It’s all about the lines in your photo and where they are going. For people, you normally want your subject looking into the page. Our brains will naturally follow a persons line of sight. If your cutie pie kids’ eyes are looking off the page, the viewer’s eyes will go off the page. If those cutie pies are looking at the nearest photo or embellishment cluster, that’s where the viewer’s eye will go. Also take into consideration body positions: Where are the shoulders going? How are the arms directed? Is the torso leaning in or out of the composition? The lines in the photo will tell you how to position the photos within the shape of your page design.
On this page eyes of the kids are kinda all over the place in these photos, but the shoulders and torsos in the photo on the left point to the photo on the right. The torsos of the kiddos on the right are turned more towards the left than right.
For photos without people, you still want to let the lines in the photo dictate placement. Notice on this page that the pan on the left leads to the pot on the right. The spoon on the right leads back to the pan on the left.
Flow is the way the eye moves across your page. The lines on your page and the flow of your page go hand-in-hand. By positioning your photos based on line, you’ve already begun creating the flow of your page. (yay, you!)
Now that your photos are in the right spot, add in your background paper. Add in other papers to fill out the shape of your page design and think about where to put a title and journaling. Add in the journaling and title before embellishing (trust me on this one).
It’s time to embellish, so how do you know where to put all the pretty goodies? The lines of our photos within the shape of our page design will tell us where embellishments need to place to create strong flow. The embellishments areas create stops along your page. They tell the viewer what’s important to notice and help the eye decide where to move next.
There are three areas you usually want to the viewer to stop on your page: The start position (grabs the eye and leads it into the rest of the page), the photos, and the title and/or journaling. The focal point should always have the biggest, most visually interesting embellishing.
On this page, the embellished tag doubles as both a lead in to the page and establishes the focal point. The rest of the embellishing creates lines through the photos… notice that the lines fall through or next the kiddo heads and the embellishing is smaller and less dramatic.
There are a lot of bold, potentially owhelming elements on this page, but I’ve used the embellishing to control the flow and establish my huge title as the focal point. Notice how the embellishing points also work with the shape of the design and the lines in the photos.
If you understand how line and flow work together, you can decide where to put everything quickly. It’s choice that slows down our process and it’s choices we are simplifying with this process. To add to the awesome, when you understand how to use line and flow, it’s going to be hard to make a page you don’t like. It’s a total win. Now that you have these new, mad skillz…
For the challenge, you’ll follow this recipe:
- Grab a timer (or use an app or use Google’s timer) and put 45 minutes on the clock.
- Have your photos processed
- Select the product you like to use (if you want to use multiple designers, this month’s Special Edition or Store Collab allow you that versatility and it’ll all go nicely together)
- Pick your design shape (and stick with it!)
- Open your canvas and place your photos
- Add in background paper and additional papers to fill out your shape
- Add your title and/or journaling
- Embellish your page in three important areas– putting the most dramatic embellishing near the focal point
You can stop the clock as needed, for instance, if you need refresh your drink, answer the phone or use the restroom. Just remember to hit start when you come back to your page.
Share your page in the challenge thread HERE and tell us what composition shape you used (if you used a template, let us know what the shape it has) and how long it took you put the page together. (if you took longer than 45 minutes, no worries, I still love you.
 About the Author: Carrie lives in coastal Delaware with her husband, teenage son and 5 cats. She produces and hosts The Digiscrap Geek podcast where she gets to talk to amazing people about her favorite topic. Carrie creates for The Digital Press, Just Jaimee, Get It Scrapped and is a Be Photo Wise contributor. In her spare time, you may find her kicking but on Call of Duty, herding cats, star gazing or whipping up magic in the kitchen.