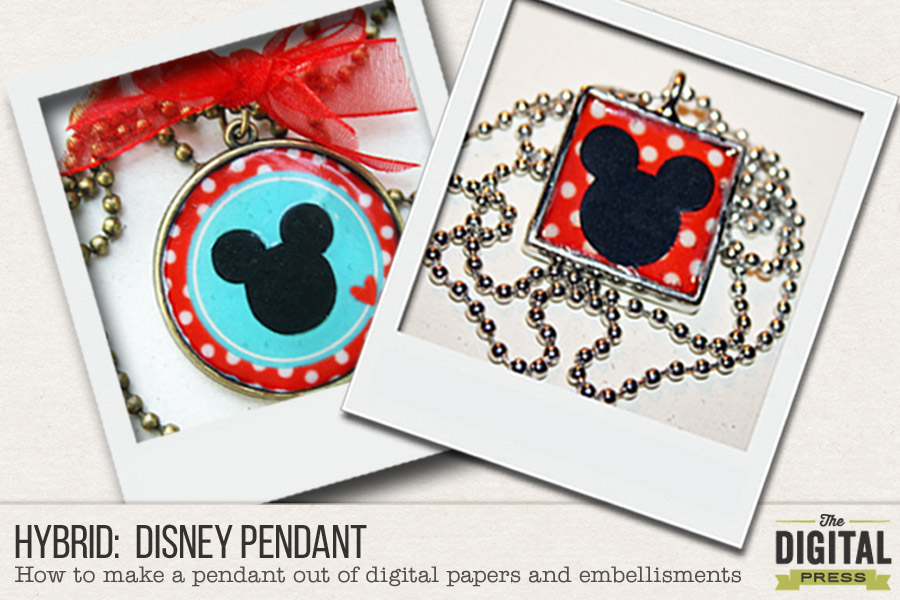
Hello all you Disney goers. Whether you have gone on that dream vacation or getting ready to go, this pendant will be perfect for wearing during your vacation (if you haven’t gone yet) or to wear as a keepsake to remember all those fun times. I have always wanted to take my boys to Disney, but it just never happened. Now that they are grown men, maybe one day I will have some grand kiddos to take. I plan to take them and then use these wonderful Disney kits to scrap all the great memories.
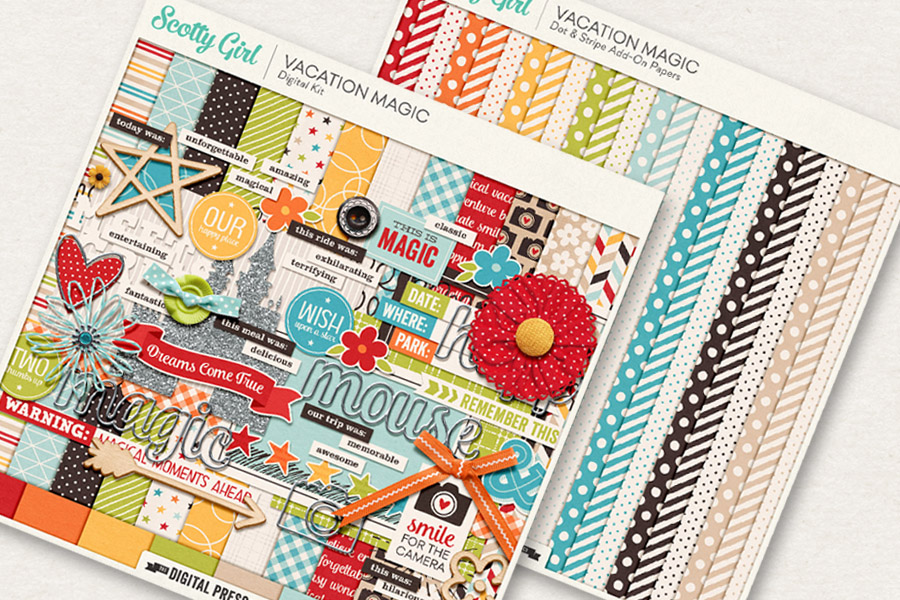
This is a great project to use all those scraps you have laying around. God knows I have a lot of those, but for now I will use the Disney themed kit, Vacation Magic by using Scotty Girl Design. This is a super easy project that you can create for friends and family for any occasion.
So let’s get started on the tutorial. Here is a list of supplies you will need for this project.
- Punches and/or scissors
- Printed background papers and embellishments
- Pendants (I bought mine at Hobby Lobby)
- 3D Crystal Lacquer (I bought mine at Hobby Lobby – there is also a Mod Podge lacquer)
- Mickey heads (I designed these in Silhouette Studio v3 but it’s easy enough that you can simply draw and cut out)

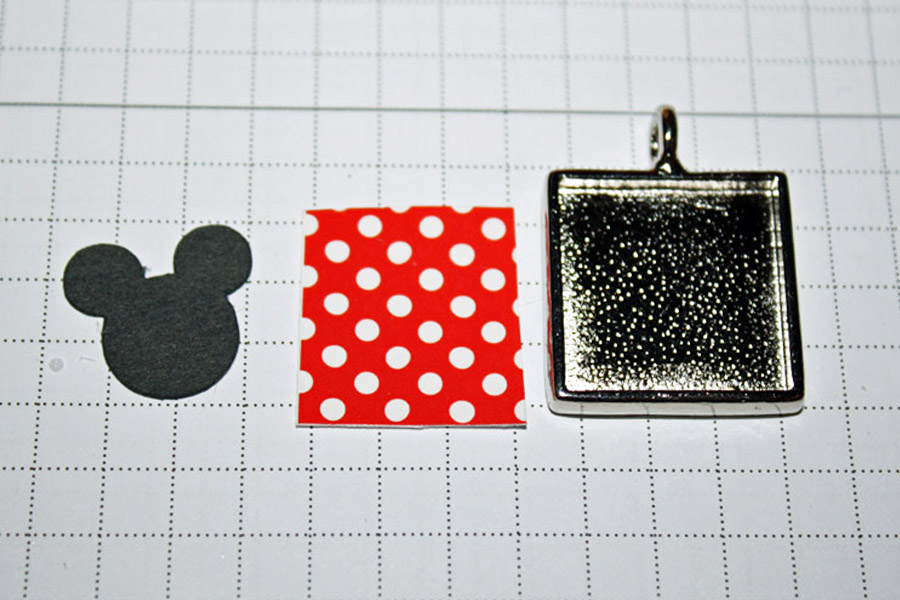
STEP 1: Cut or punch pieces you want to use for your pendant. I didn’t have a square punch so I cut the size I needed with a pair of scissors. For Mickey, I used my Silhouette Cameo to design & cut. I will show you how to do that below.
Steps for making Mickey with the Silhouette.
Draw out the circles using the circle tool on the side menu.
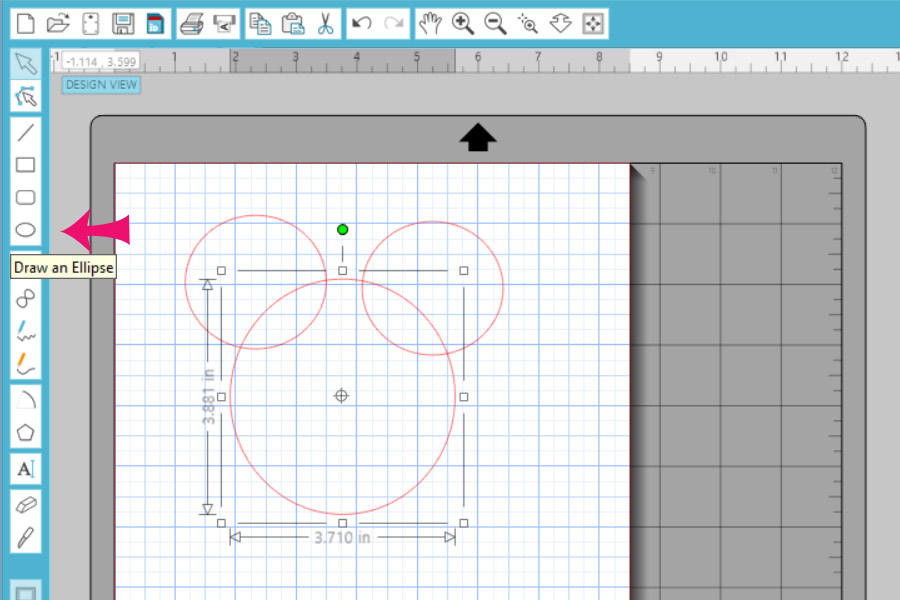
Now drag your bounding box around all three circles.
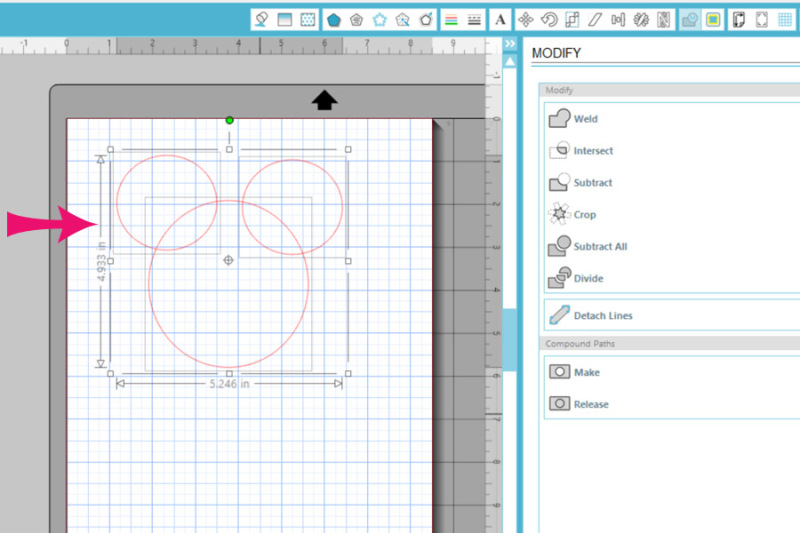
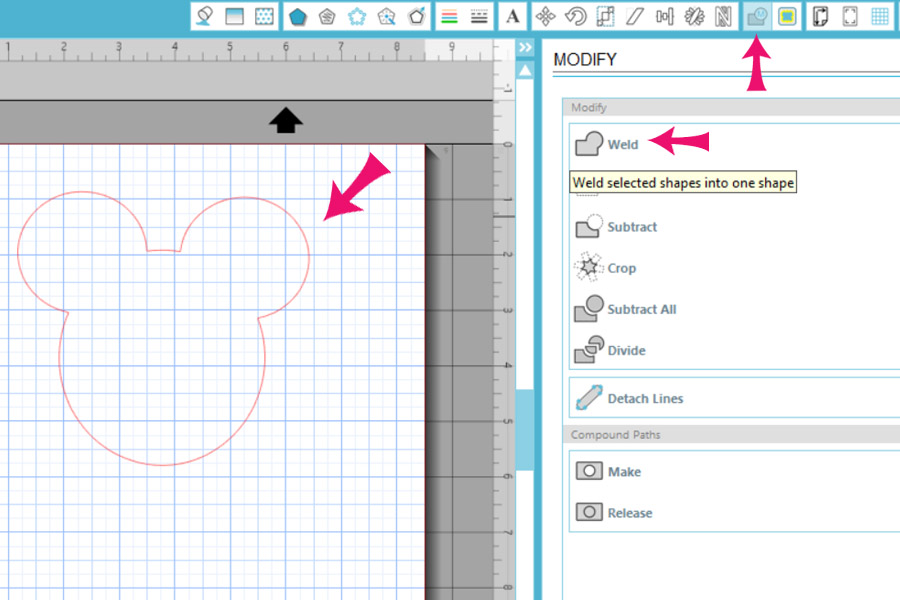
Finally, select the WELD icon at the top right of the page. It opens the welding options where you will select weld.
Viola, there ya have…..Mickey!!
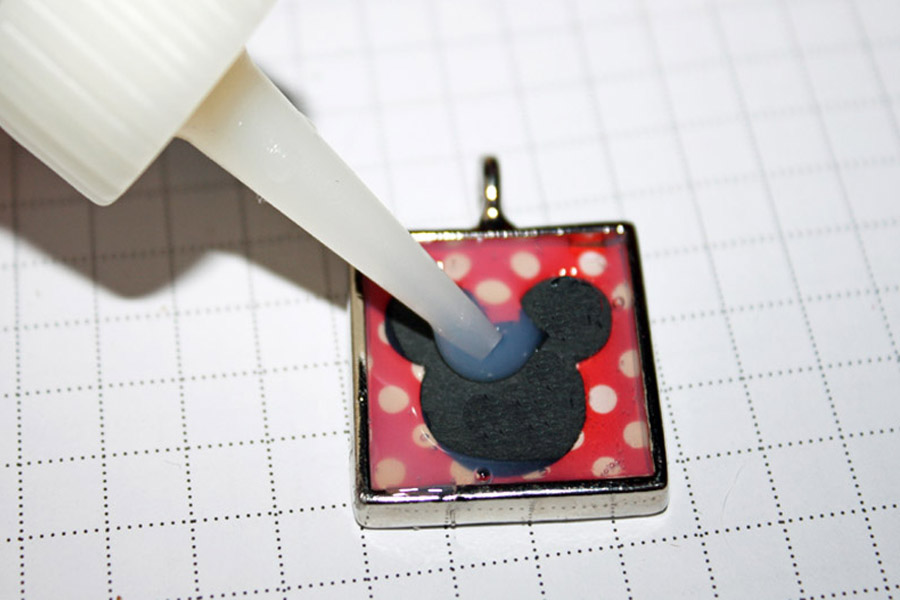
STEP 2: Once you lay the pieces in your pendant you will add the crystal lacquer.
With one pendant, I added two thin layers and the other I filled to the rim of the pendant and they both turned out the same. You may get some tiny air bubbles, to get rid of those simply use a sewing needle to pop them. Set aside on a flat surface for at least 12 hours to dry.
That is it….Your done!! Wasn’t that easy? Now get to work on those pendants, you have 5 months until Christmas!!
About the Author:  Tanya is a part of the Hybrid team here at The Digital Press. She has been hybrid crafting for at least 10 years now. She loves creating and sharing those creations with you. Her all time favorite tool is her Silhouette Cameo. She says with the Cameo the sky is the limit. Tanya has been married for 26 years and has two sons, Chris, 23 and Chance 19. She also enjoys crocheting, photography and wood working.