What’s the one thing I miss when it comes to paper crafting? Embossing. It doesn’t matter if it’s dry embossed or heat embossed, both techniques are just pure joy. Guess what? I’ve mastered digital dry embossing and I’m here to share just how easy it is to create this look.
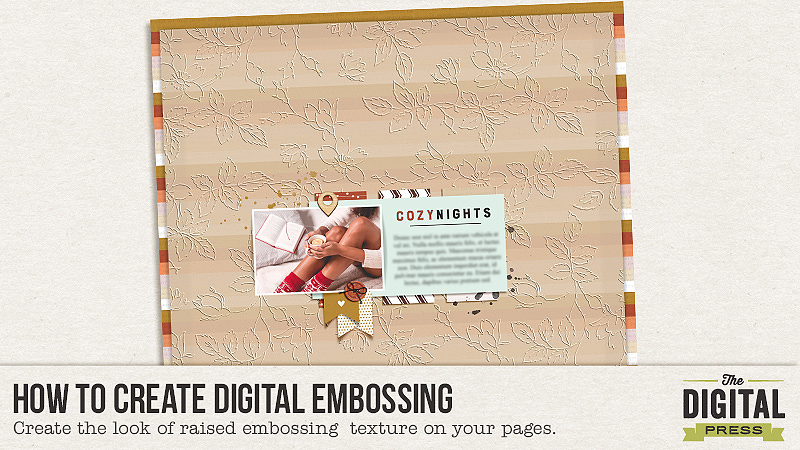
I created this page using the Fireside Kit by Sahin Designs. This kit is a nod to sitting by an open fire, draped in a fleece blanket with a warm cup of cocoa, milk, coffee or tea, enjoying a good book. The colors in this kit are rich, warm earth tones.
So, without further adieu, let’s move on to the tutorial.
How To Create Digital Embossing:
Step 1: Open a patterned paper in Photoshop. It’s best to choose a paper with high contrasting designs and colors but this technique can work with almost anything.
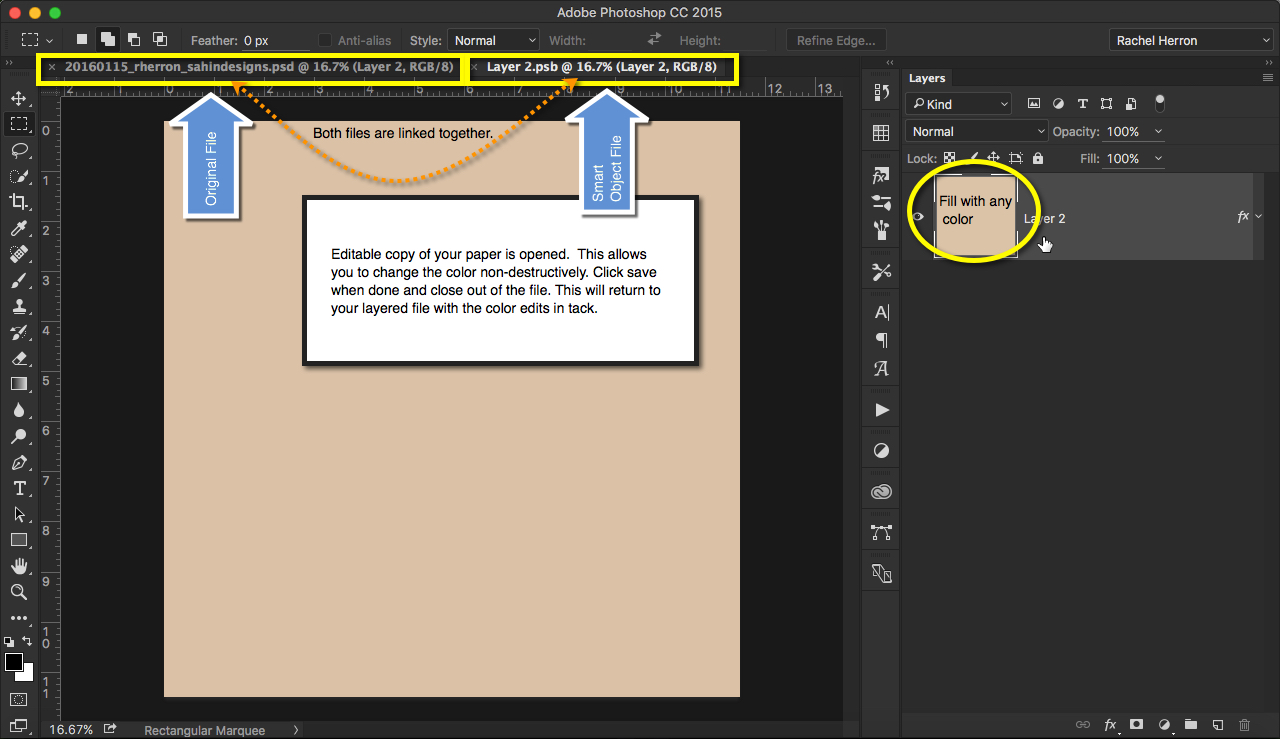
Step 2: Go to File, Save As to change the paper from a .jpg extension to a .psd file extension. Note: You should rename the paper so that you do not override the original.
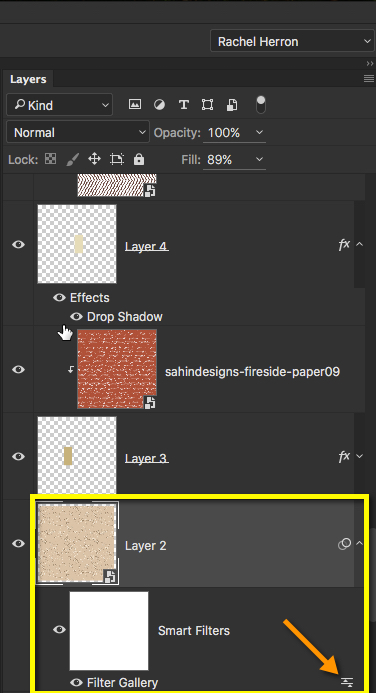
Step 3: In your new working document (not the .psd you just created), select the paper layer you want to emboss into a smart object. You can find this under Filter, Convert for Smart Filters (this is an important step – don’t skip this).

Step 4: With your paper layer still selected in the Layers panel, go to the Filter menu then scroll down to select Filter Gallery. Under the list options choose the Texture folder then select Texturizer.
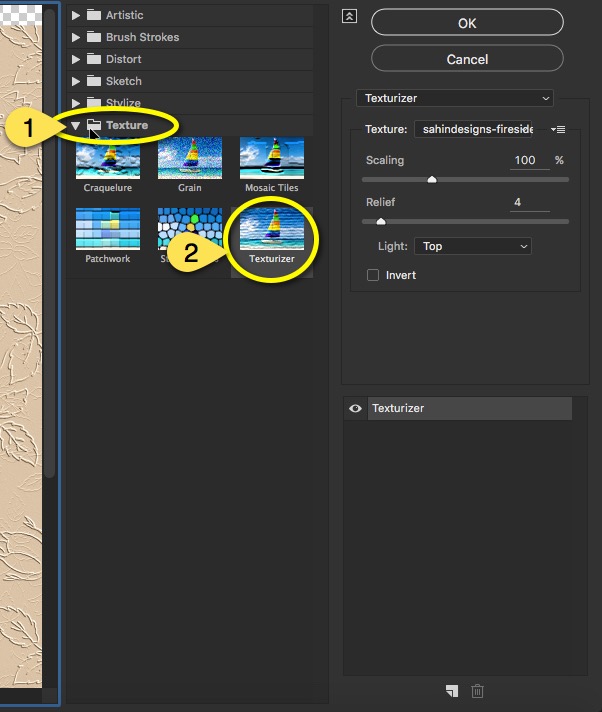
Step 5: Time to play with the Texturizer settings.
- First you will need to load the pattern paper that you saved as a .psd file by using the drop down menu.
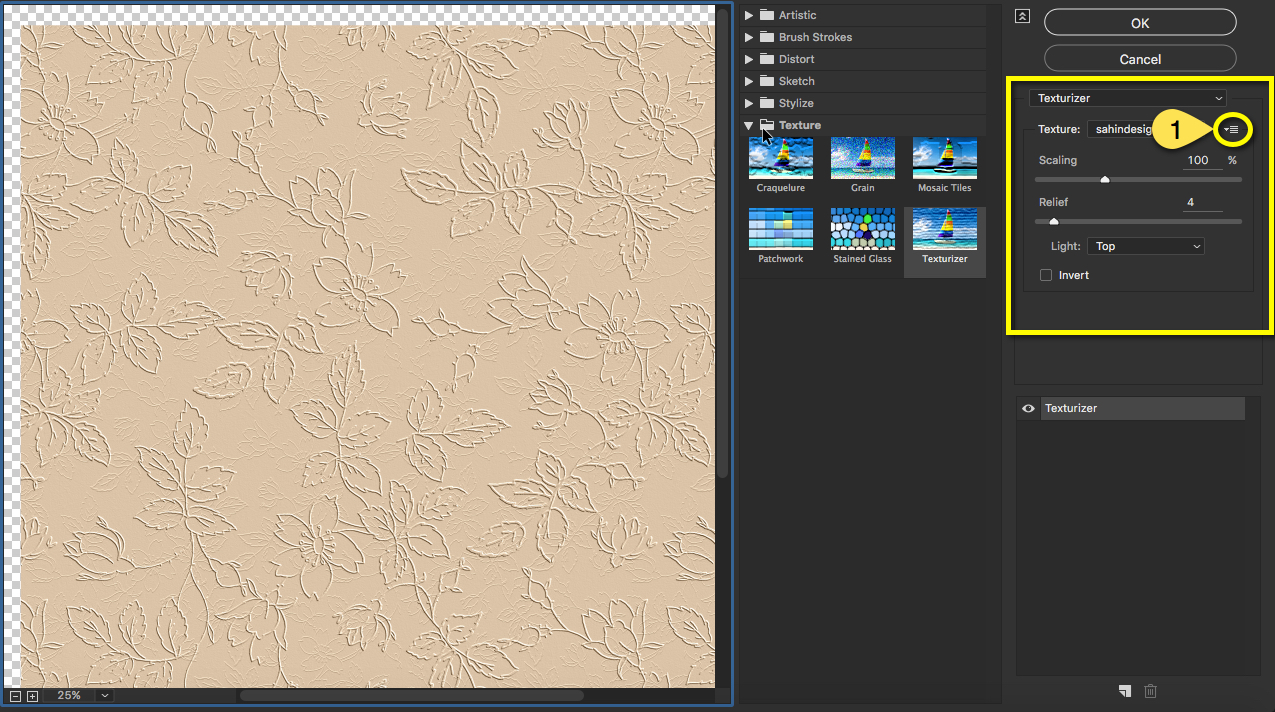
- The two main settings are the Scale and Relief option. The scale reduces or enlarges the pattern. For my page I chose a scale of 200%. The relief determines how deep the embossed impression looks on the page. For my page I chose a scale of 20. These settings will be different for you depending on the pattern you’ve chosen. When you’re done, click OK.
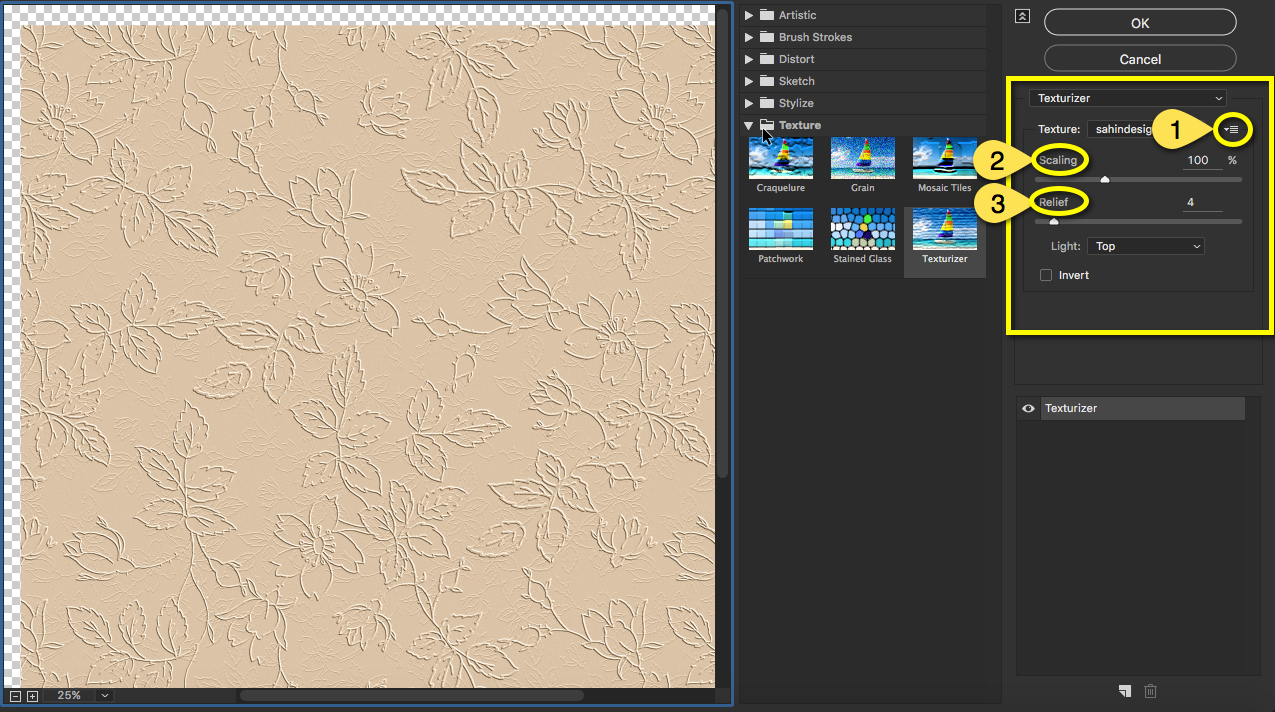
After returning back to your layout you will notice in the Layers panel a new layer named Smart Filters. If you don’t like the look of the embossing, double-click the Smart Filters again and you are right back in an editable state allowing you to change the scale and relief sliders until you get your pattern to look perfect.
Finishing Touches: After the raised embossing pattern is as I like it on the page, I then moved onto re-coloring the paper. With the eyedropper tool, I selected a warm rusted red from the striped pattern paper. Then, I double-clicked the Smart Object icon in the Layers panel that belongs to the embossed paper layer. This opens an editable copy of the layer where I then filled it with the warm rust color. This results in a warm, rust colored paper with a seamless embossed pattern all throughout. Perfection!
We’re almost done…stay with me!
Next I wanted to be able to see the beautiful striped pattern beneath the embossed paper so I reduced the Fill/Opacity and added a drop shadow to create the look of a vellum paper. Brilliant, beautiful, bold and striking! Yup – she’s a beauty!
I couldn’t be any happier with the end result.


About the author: Rachel works at a law firm by day and loves to create digitally using Photoshop in her spare time at night. She is a busy mom of two girls and a wife who lives in the greater Philadelphia region. She has a passion for storytelling and likes to use techniques to recreate the look of paper.
This is great Rachel. I love this effect and I believe I asked you to share the technique for it earlier. Thanks for turning it into a tutorial. I’ll definitely try it.
Wonderful, Shivani! I can’t wait to see how your page turns out. Any questions let me know.
Wow. This is so cool. Thanks for sharing this. I’m going to have to check out PSE and see if I can do it there.
Just tried this and it works wonderfully! Thank you 🙂