The History Panel is an often overlooked tool in your Photoshop arsenal. But used to it’s potential, it is quite a handy ally. Let’s take a closer look at how it can help you.
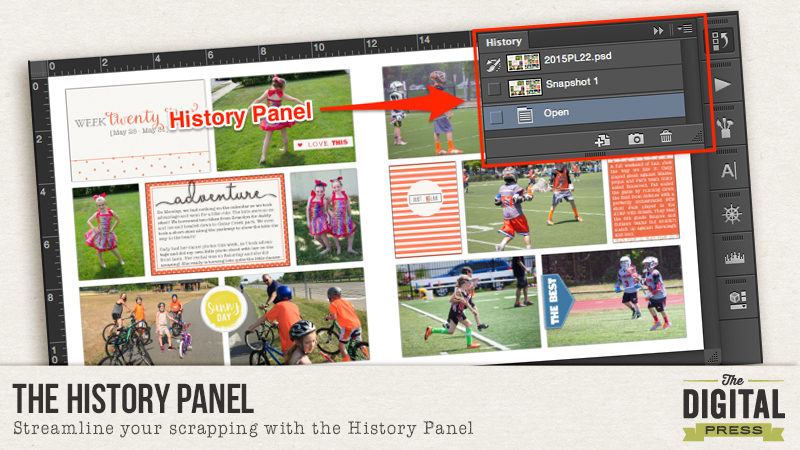
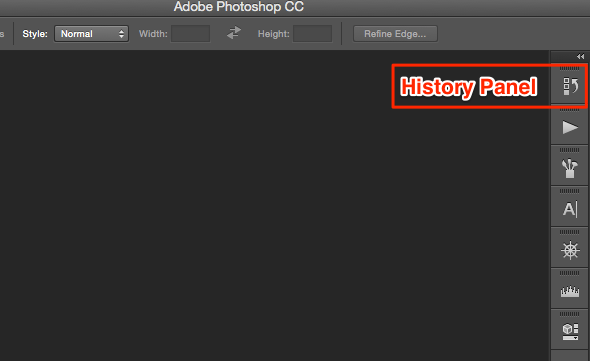
You can find the History Panel on the right side of your workspace where the tool icons are located. The History Panel icon looks like 3 small boxes stacked on top of each other with a swooping arrow next to it.
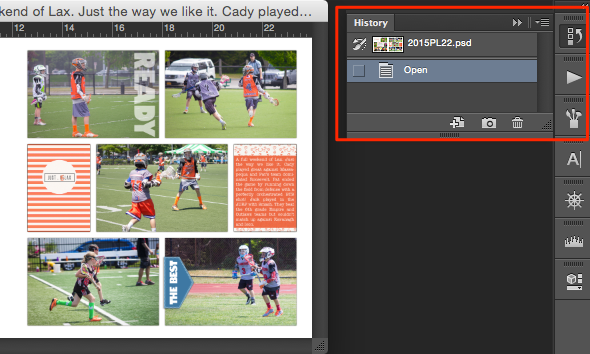
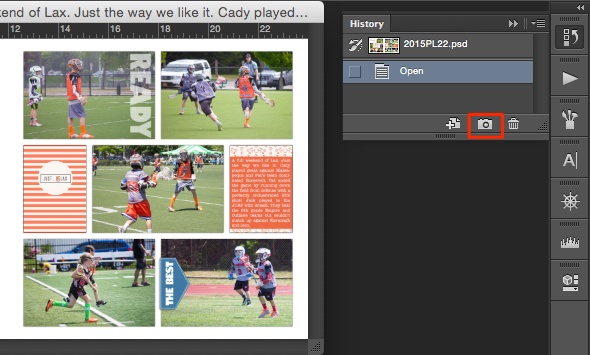
When you click on it, a panel flies out showing you the last twenty “states” or steps you performed on your layout. In the example below I had only opened the layout, so there is only one state showing. However, if I had worked on this layout a bit, everything I had done would have been recorded and would be listed in the area I have marked below.
The number of states it shows you can be customized. You can change this under Preferences. Photoshop > Preferences > Performance.
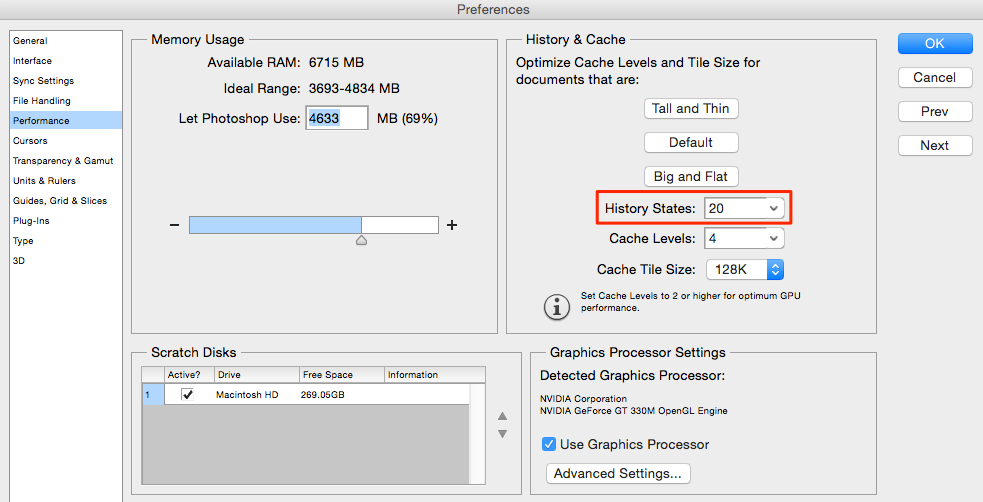
Clicking on the down arrow, brings up a slider that you can adjust all the way up to 1,000! However, keep in mind that keeping that many states will bog down Photoshop’s memory, so you want to keep that number as low as possible, while still being useful to you.
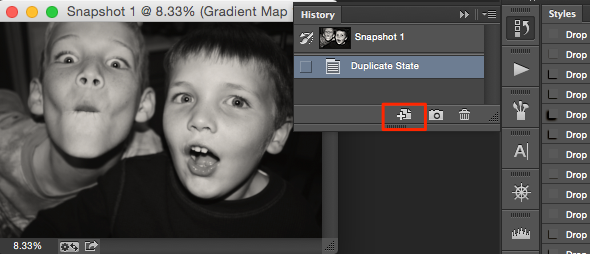
Instead of bogging down your memory by holding onto multiple states, a better practice would be to make use of Snapshots. This is where I find the history panel to be most useful. When I am close to completion on a layout, but would like to move some things around or try some different papers or a different title effect, I take a snapshot. Taking a snapshot allows you make a copy of any state of the image you are working on. You can take a snapshot by clicking on the camera icon at the bottom of the history panel.
Once you make a snapshot, you can make whatever changes you would like to make to your layout and then compare it to the snapshot you took to decide which version of your layout you like better. If you decide you like the original snapshot better, you can just click on it in the history panel and save it or continue working on it from there.
If you take several snapshots during the course of creating your layout, it’s a good idea to customize their names. By default, Photoshop names them, “Snapshot 1,” “Snapshot 2,” etc. To rename it, just double click on the name and enter your custom name.
There may be times when you want to create a new document from an image state. For example, if you were working on a photo and wanted to show the before and after, that would be a great time to create a new document from the image state.
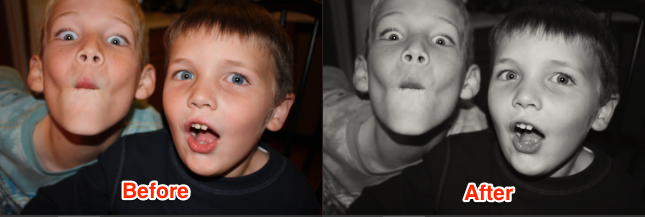
In my example above, I opened my image. Then, I made some adjustments to it to convert it to black and white. Next, I took a snapshot of it and then dragged it onto the create new document icon seen below. This allowed me to place the two images side by side very easily to create the before and after diptych above.
I find the History Panel most useful whenever I am trying to correct an image using the clone or healing brush tools. Inevitably, whenever I am performing this type of task, I always seem to reach a point where I overdo it. As a result, I have trained myself to take snapshots along the way. This way, if I get to a point where it starts to look too artificial, I can just go back to my most recent snapshot and try again.
And finally, for those of you that create process videos, snapshots are a MUST! Prior to recording, I create a series of snapshots showing each of my steps along the way. For example I will open my layout. (There is no need to take a snapshot because by default, Photoshop always keeps a snapshot of the first state of the document.) Next, I will hide the items that “finished off” my page, like paper strips around the edges or confetti and then I will take a snapshot. Next, I may hide my journaling and then take a snapshot. Then I may hide my title and take a snapshot. You get the idea.
Once I have all of my snapshots and they have been renamed for easy reference, I am able to begin recording my process, showing where the page started and discussing in stages what was added on top of what to create my page without having to recreate it from scratch. It makes the process really smooth.
So there you have it — the History Panel in all its glory. So now you know how I use it to make my pretties. How about you? How do you use it?
![]()
About the Author: Jen is a member of the Pocket Team at The Digital Press. Having scrapped digitally for many years, she has come to embrace the simplicity of Pocket Scrapping since it fits more easily into her busy lifestyle of shuttling her three children from field to field. When she is not on the computer, you will find her working out or really doing anything else she can besides cooking, cleaning and doing laundry.