Category: Inspiration

Listen to Your Children

Listen to Your Kids


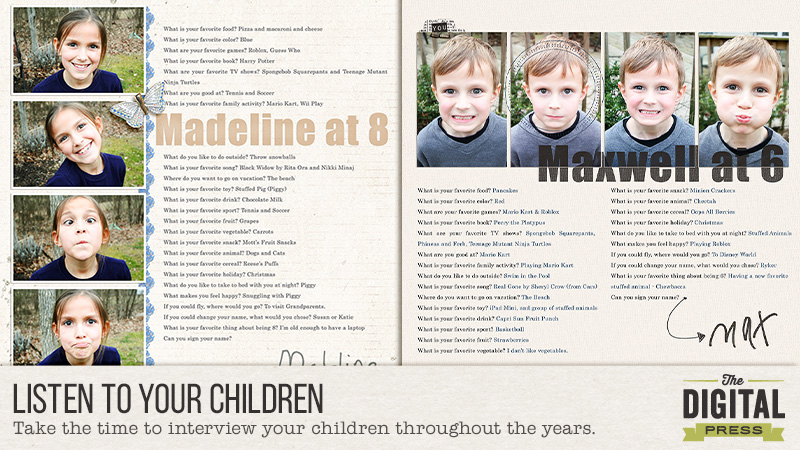
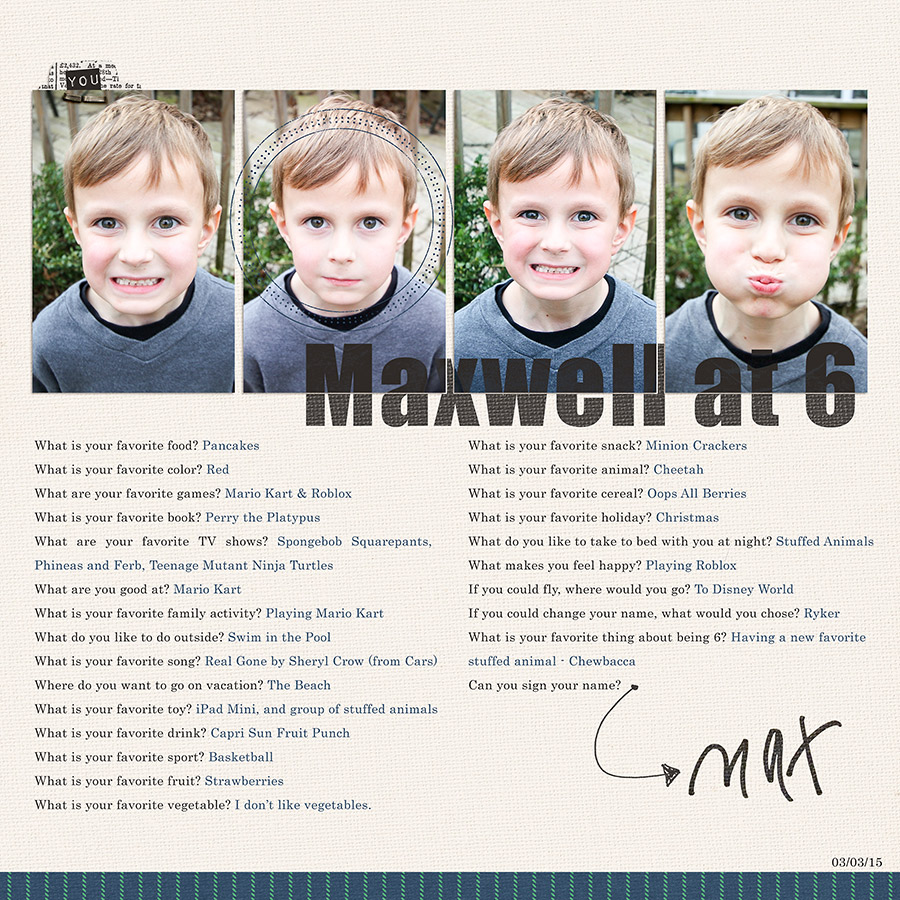
Kids say the cutest things. They also change their minds very quickly regarding things that they like in their lives. In the past I have scrapped interviews I have given my children and love to look back on those and read all about what was important to them at those times in their lives.


5 Favorites at 5


Favorites at 3


The above are just a couple of examples of such interview pages. My how things have changed with my kiddos, while some have stayed the same.


This is not just limited to kids. Why not interview your spouse or another family member and capture a moment in time with them? I have, in the past, done just this thing and scrapped a conversation I had with my husband regarding his perspective on how we met. I love it!


So, what can you ask? Of course, there are the basics – colors, foods, books, toys, etc. You may choose to use the same questions year after year or the limit the questions as I have above to the number that corresponds with their age. There is no specific way this must be done – you are limited only by your information.


Recently, I decided I was going to start asking more questions of my children. I have also decided that I am going to stick with these same questions going forward because I feel like it covers most everything. The fact is, as long as I am capturing these little looks into their lives, I am accomplishing something amazing.


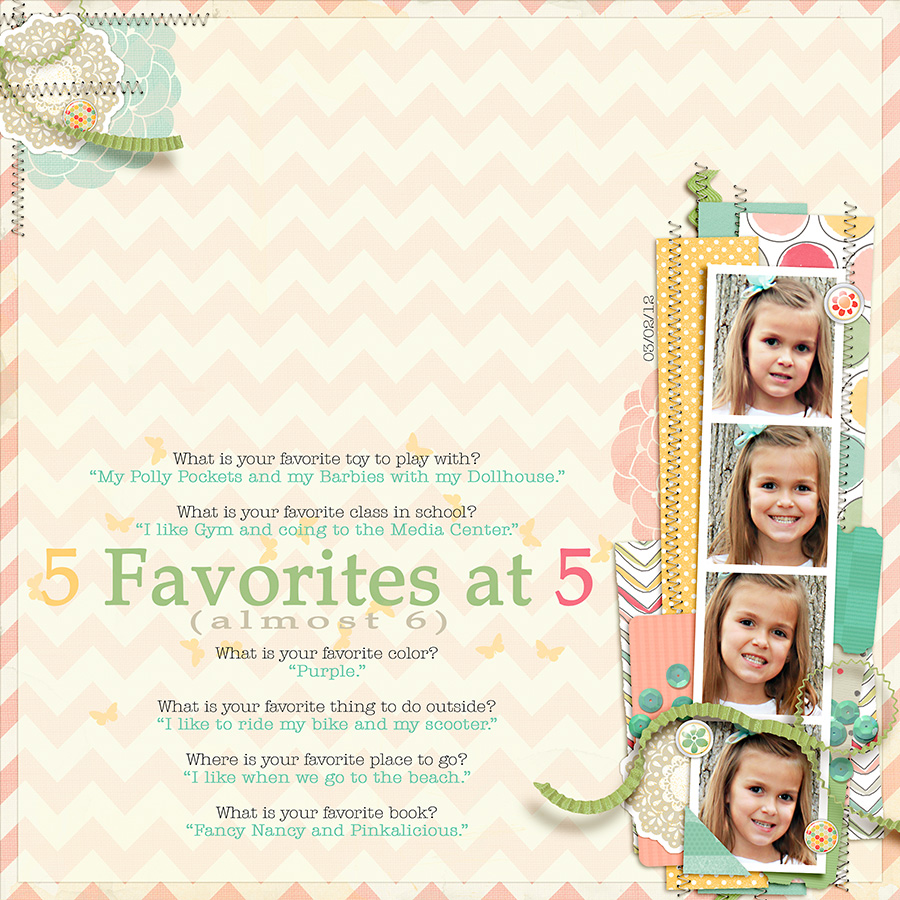
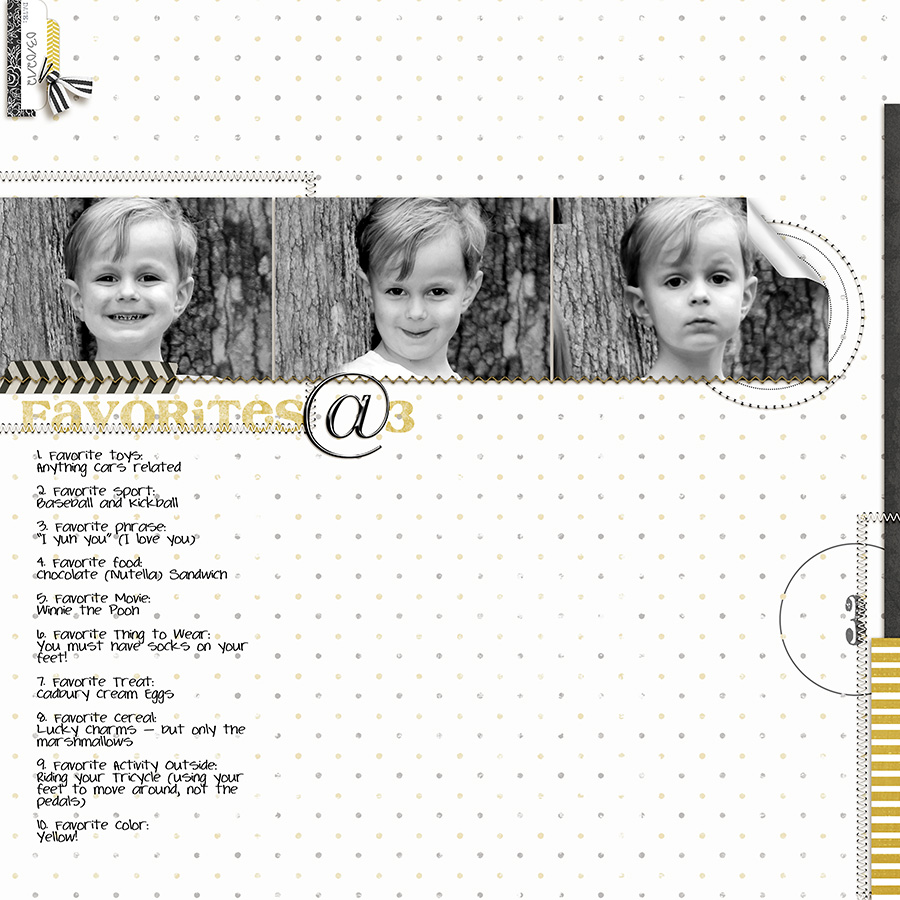
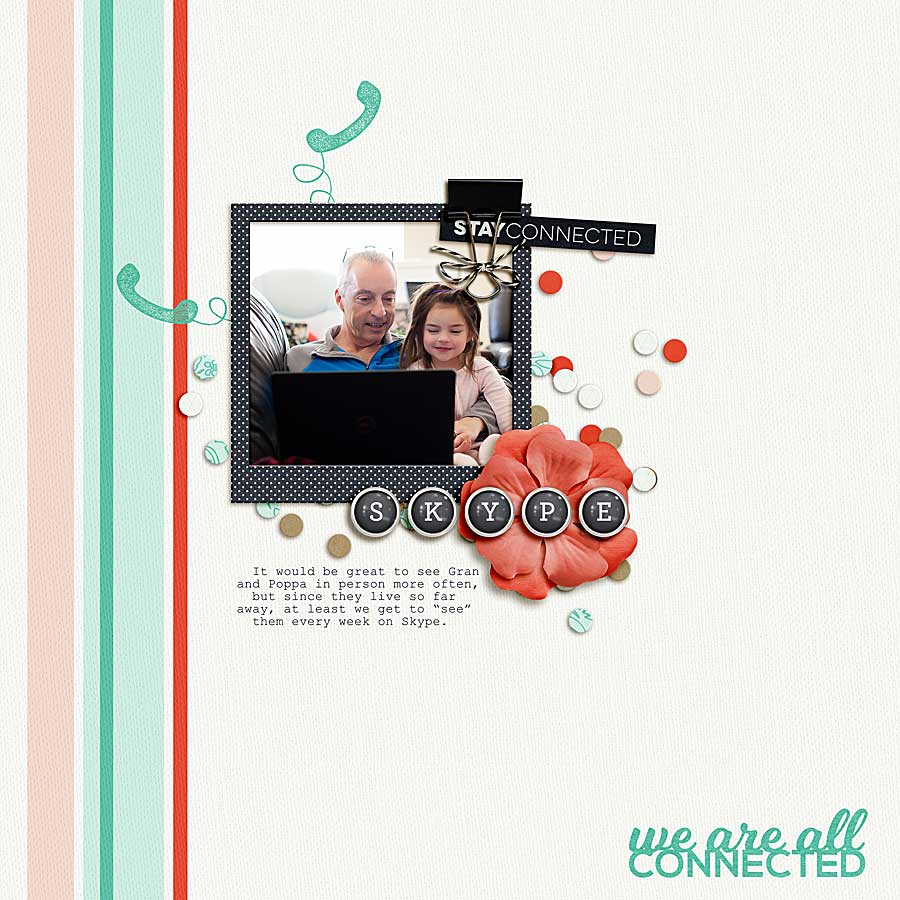
Here are recent pages where I did this.


Maxwell at 6

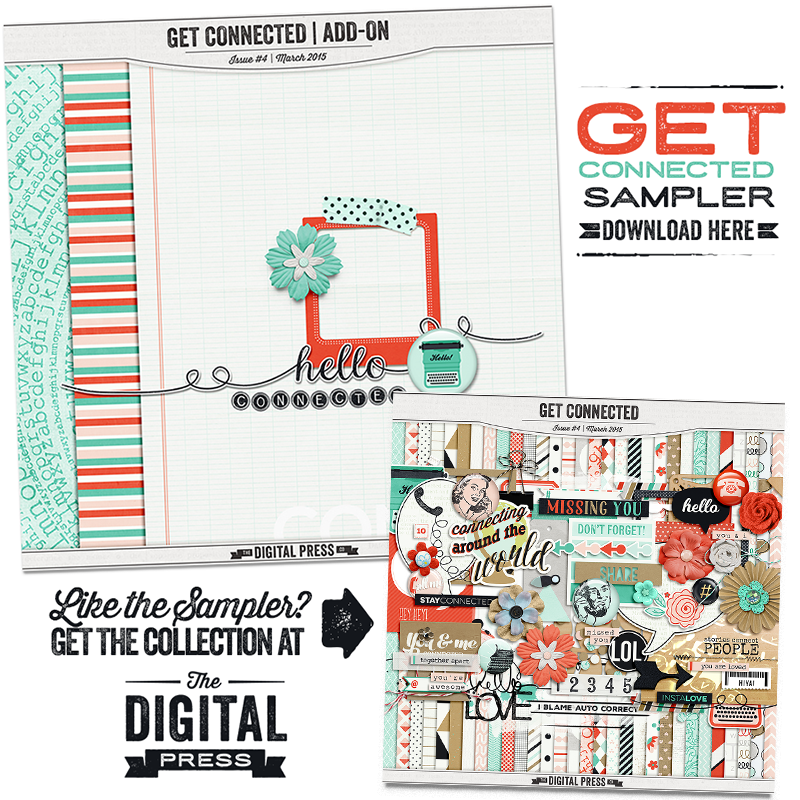
Materials used: All Boy Kit by Dawn by Design


Madeline at 8

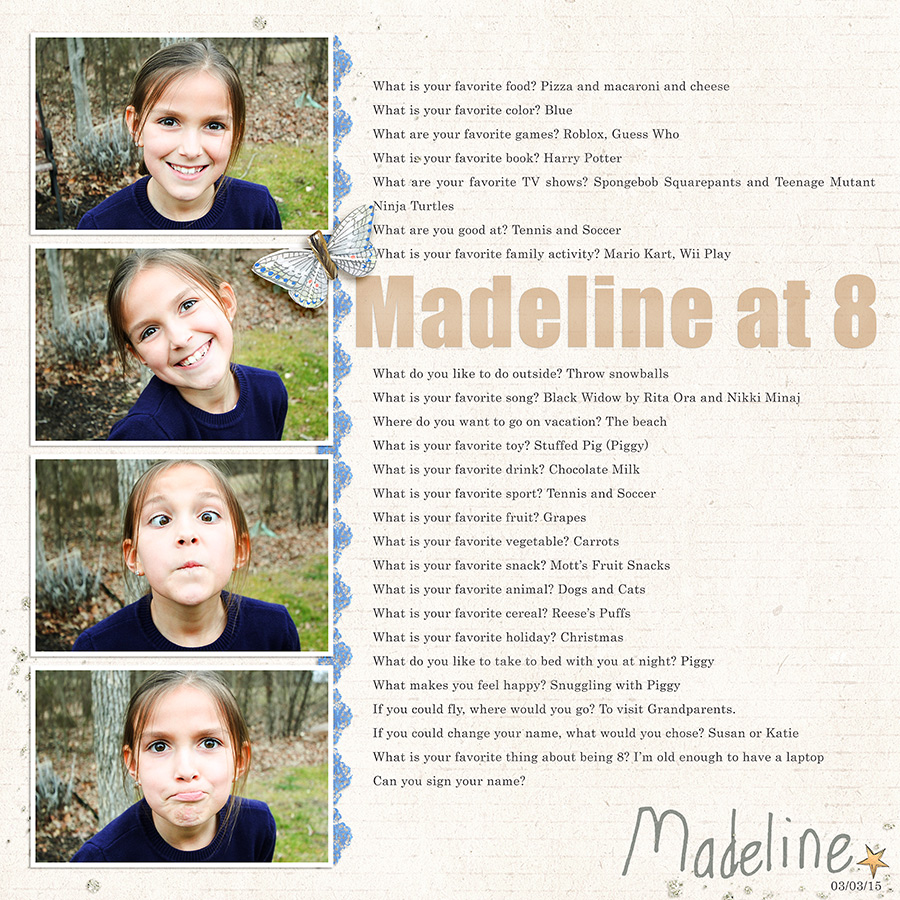
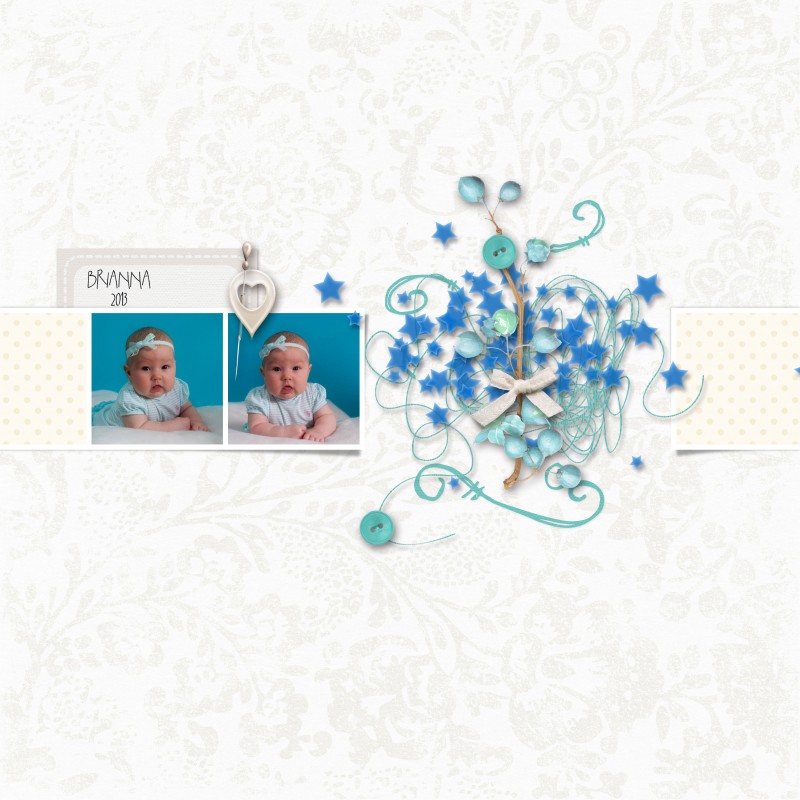
Materials used: Pretend Kit by Creashens 


What are you waiting for? Go out there and start interviewing people and documenting it. In fact, if you join us in the forum, we have a challenge all about this. You can find it here: March 4: Listen to Your Children


About the Author: Rachel Alles is on the Creative Team here at The Digital Press.  She is fortunate to share her life with her loving husband, Doug, and two blessings: Madeline and Maxwell.  The three of them are her main source of inspiration for her pocket and traditional style pages.  When she’s not scrapping, she enjoys anything Disney related, learning more about photography (and attempting to turn the dial off Auto) and dabbling in home decor projects.

Listen to your Inner Artist

blog_header


It is good to occasionally step out of your comfort zone and do something different on your layouts, right? Today, I’m going to show you how you can easily turn a photo into a pencil sketch in Photoshop and an idea on how to use the finished sketch on a layout.

First, open the photo you want to work with – mine is my favorite selfie (it was a fantastic hair day!). Then, duplicate the photo into a new layer. I like to use Ctrl-J (cmd-J on a Mac).

2

Change the blending mode for the duplicated layer to Color Dodge.

Blending Mode

Your photo will look a bit washed out, like this:

4

With the duplicated layer still selected in the Layers panel, we want to invert the image (Ctrl/cmd-I). Your photo will now look really strange.

5

We are now going to blur the layer, which produces the pencil lines. Using Gaussian Blur (from the top menu choose Filter, Blur, then Gaussian Blur). Play with the blur settings a bit until the fake pencil lines on your photo look the way you want. I used a setting of 37.4, but your results may vary widely.

6

Now, we need to convert the layer to black and white. In the layers panel, choose the half-filled/half empty circle icon at the bottom (Create new fill or adjustment layer) and choose Hue/Saturation. In the panel, turn the saturation down to -100.

7

Your photo will now look similar to this:

8

I think this might look good as a drawn-in background on a layout. I flattened the image and copied it over to my background paper (lighter-colored and plain backgrounds seem to work best).  I used a gradient fill as a clipping mask behind my photo, and then the eraser tool (brush mode, 5% flow) to blend the edges on the clipped layer to get the photo to blend into the background seamlessly. I use a low flow on the eraser brush because it’s harder to mess it up when you are only erasing 5% for each brush pass.  😉

9

10

My photo, blended into the background, looks like this:

11

I added some journaling and embellishments, and I’m done!

Almost 39

Credits:
A Day in the Life:  Solids
by Sugarplum Paperie
A Day in the Life:  Essentials by Sugarplum Paperie
Hello, I Love You by The Digital Press Designers

Kacy About the Author:  Kacy is an Environmental Engineer living in Arizona with a elderly, cranky, pudgy, but insanely cute calico kitty.  She enjoys scrapbooking, crocheting, dancing awkwardly to electronic dance music, Grumpy Cat, Scottish accents, drag queens, cupcakes, bacon,  Stephen King books, smirking, very crude inside jokes, and men in kilts.

Listen to someone’s story and get connected

I recently completed a family history project and had so many letters that ancestors had written and family members have kept. I started to think about how many letters I’ve actually written in the last year and the answer is ZERO!  The days of writing long letters to send to loved ones on the other side of the world are long gone and have been replaced with emails, texts and quick chats.  It’s important to stay connected, to listen to the stories of those we care about, no matter how we do it.  I may not write pages of handwritten text, but I’m great at sending off quick emails, texts and Facebook messages.

My husband’s family is spread all over the world and it’s the best feeling to be able to Skype with them. We also have friends from coast to coast on every continent.  Skype offers so much more than just a telephone call or a written piece. To actually be able to see our friends and family in real time gives us the feeling that they aren’t so far away after all.

This month’s Shop Collaboration is themed towards listening to our loved ones and staying connected. The challenge is to make a new layout using the March Shop Collab- Get Connected. The full kit is on sale until March 4 for $4, and don’t forget to hop on over to our Facebook page for a sample.

get-connected-4


facebook-sampler-ad

Now, for the rules…

  1. Pages must be created using 100% TDP Products and loaded in the gallery no later than midnight EST on March 31st, 2015.
  2. Please link your gallery listing in this challenge’s thread
  3. Link your comment in this thread in the monthly challenge tracker thread. You can find it here: March Tracking Thread
  4. Have fun!!!

Here is my LO of Mike and Claire on Skype with Mike’s family in England.

03.01.15-connected

FarrahAbout the Author:  Farrah Jobling is a member of the Creative Team here at The Digital Press.  She lives in Denver with her amazing family, Mike, Nicholas (8), Claire (5) and Hope (7 mo puppy).  She works from home as a photographer and enjoys scrapping her personal photos.

Listen to Your Creative Voice this March

Welcome to March. Spring is on the horizon now! The thought of spring always makes me feel more alive…

Our word for this month is “listen,” one little word that can mean so many things…

listen to your creative voice :: the digital press

via Pinterest: (1) (2) (3) (4) (5)

We have gathered even more inspiration for you here on Pinterest: Listen to Your Creative Voice

Here at The Digital Press, we are going to be talking about listening to your own creative voice and listening to the stories of those around you. We are story-tellers and memory-keepers… as scrapbookers, we are listeners. But don’t be afraid to shake off your fears as you create the types of pages that make YOU happy. Make sure that you are always following your own creative voice and staying true to your heart as well.

We have some amazing and inspirational posts coming your way right here on the blog. You will also find new challenges on the forums to spark your creativity and help you to make pages you really love!

You’ll find all the details of our challenge system laid out for you here: Everything You Need to Know about Challenges

Our new month of challenges starts tomorrow. We hope you’ll join us then!


Nicole About the Author: Nicole Seitler is a designer here at The Digital Press, creating kits under the name Sugarplum Paperie. In her free time, she loves to to work on her Project Life album, knit or craft with her kids. But she doesn’t have much free time, since she’s also a stay-at-home homeschoolin’ momma of four. Her life may be a little crazy, but she wouldn’t want it any other way!

Pursue Your Happiness Color

PursueYourHappinessColor

When I look out my window right now all I see is White. I have to say I love winter, but there are some days I would love to see some more bright blue skies. I should take a walk through a stand of pine trees and pursue the color green from the needles.

Do you have a favorite color? Does it change depending on what time of year it is? I know mine sure does. My Happiness color right now is Blue. In the spring I love all those pretty pastel colors. Summer, hot pink calls to me. And in the Fall all those beautiful earthy oranges. Christmas season is all on its own and I’m the traditional girl of the bright red.

PursueYourHappinessColor

This room is a great example of using a monotone color scheme to any layout or card you create.  See how dark blue the chairs and cabinets are, and how they pop against the white of the lower part of the wall! Then they placed a wallpaper on top that uses a pattern of many different shades of blue.  Use this concept for the project.

PursueYourHappinessColor

The hues used in this photograph are a great example for you to go by. See how the top color is white. Then they have added different colors of green going from the softest to the very darkest of the hunter green on the bottom of the scale.

Maybe you are using your photograph as your jumping off point for your color. In my layout I have these photos of my grand niece (isn’t she adorable!) she is wearing blue and the background is also blue.

So for my layout I picked a white background but also used white pattern for my squares of paper too, then used elements ranging from white to a royal blue,  baby blue and decided to add a blue/green tint to make it have more depth.

PursueYourHappinessColor

But sometimes the easiest way to add the color you want to a layout is to just convert your photograph to black and white. Or maybe you want to add color to your layout by using your color with papers, and all white elements. It is all up to you. Just remember for this challenge you need to use a white background and then a monotone color scheme. As long as your colors used on your layout are all within one color family your are good to go, and have fun playing with this design feature. This is a great way to compliment your photographs. And most of the time that is what we should remember. Showcasing our photographs!

a couple of quotes to ponder:

Expand your vision. Often we have blinders on. We’re concerned with just getting uptown or downtown. If I expand my vision by even 10 degrees, I notice new details, new color harmonies.  by Cindy Coleman

I wonder if any element of interior design is more personal than color? Nothing can more quicly reveal aspect of personality and character than the choice – or absence – of color.

by Van Day Truex
People have often said to me, “But you don’t use much color.” This is not so at all. I build a simple background – usually of white or of a very light shade – for the use of color.

by Michael Taylor

So come and play! You can find the Pursue Your Happiness Color challenge  HERE


Barbara About the Author: I started paper scrapbooking in 2001, then in 2009ish I had an online friend who dared me to give digital a try. Wow! life changing in my busy day of being a stay at home mom to six children. In my free time I also love to visit antique malls for treasures, reading, meeting friends for tea and then my woman’s bible study group is a highlight of my week.


Hybrid Pockets Made Easy

Hybrid Pockets Made Easy

I never loved traditional paper scrapbooking. Mostly for all the same reasons you usually hear about why someone fell in love with digital; no mess, not spending an arm & a leg on supplies or tools, and the speed at which you can finish layouts! After several years of creating strictly digital pages I realized I had nothing to show for it. I had only printed a handful of layouts. I also found that I was only recording the big moments such as birthdays, holidays, and happy events. The snapshots, out-takes, and less than happy moments weren’t included and that was a big problem for me because I wasn’t being authentic in my memory keeping. I knew I had to make a change.

After taking a moment to assess where I was and where I wanted to be I decided that the best thing for me was to start printing at home. I also decided to jump on the pocket scrapbooking bandwagon because it felt like a great fit that would allow me to include pictures that I might not want to devote a whole 12×12 layout to, but were still important parts of my family’s daily real life.

When I set out to create my first hybrid pocket page I spent way too much time trying to get going. I really wasn’t sure where to start, but after a bit of trial & error over the course of several attempts I finally found a workflow that made hybrid easy for me. Today I’m sharing my process for making quick, but beautiful, hybrid pocket pages.

Step 1: Start With Your Layout

I find it’s easiest to create a template which matches the pocket page layout you’ll be using. For my example layout I’m creating for my 6×8” album and the pages are two 4×6” spots on the left and four 3×4” spots on the right. Create the appropriately sized boxes and arrange them in the correct places. These will be your clipping masks for creating your cards.

Hybrid Pockets Made Easy

Step 2: Add pre-made cards or papers & embellish

I like to treat each card as a mini layout. I look through the cards that come with the digital kit I’m using and drag them onto my layout. Sometimes I’ll also fill a space with a patterned paper. Then I look for frames in the kit that will work with the pictures I’m using. Once I’ve laid out where I’ll be putting my pictures I work on embellishing each card with some of the kit’s elements.

Hybrid Pockets Made Easy

Step 3: Add Photos and Text

Now I edit & add my pictures to the cards. Finish things off with some text and I’m almost ready to print.

Hybrid Pockets Made Easy

Step 4: Merge & Print

Once all the individual cards are ready it’s time to merge the layers. I hold down CTRL while clicking on each layer that I used for one of my cards. When they are all selected I hit CTRL+E to merge the selected layers. After I’ve merged all the cards I then create a new document sized to the print dimensions. I almost always print on 4×6” photo paper because it let’s me get away with the least amount of cutting. At this point I select & drag each card into my new document. The 3×4” cards fit 2 to a page nicely. Set your printer settings and print. I go down the layers list hiding the cards as I print them.

Tip: You only need to do the printer settings on the first print job. After that you can choose File>Print One Copy to bypass the print dialogue box!

Hybrid Pockets Made Easy

Step 5: Cut & Put Cards in Pockets

Cut your 2-Up 3×4” cards in half and pop it all into your pockets. All done!

Hybrid Pockets Made Easy
Real Life in Pockets | I Love You Harder by Mommyish and Just Jaimee


Hybrid style scrapbooking can be overwhelming at the start, but the instant gratification of having something tangible in your hands right away makes it well worth the effort in my book! I hope I’ve inspired you to give hybrid and/or pocket scrapbooking a try. I’d love to help you overcome any hurdles to hybrid that you’re facing. Leave a comment if you have a question or comment!


Amber About the Author: Amber Funk enjoys a vast assortment of interests such as scrapbooking, photography, getting crafty with her Silhouette Cameo, reading, and playing video games. She is a Wife and Mother of 2 living in Northern California and blogs her crafty adventures at http://perfectly-fabulous.com/