Tutorial Tuesday | Hybrid Pocket Letter

pocketletters
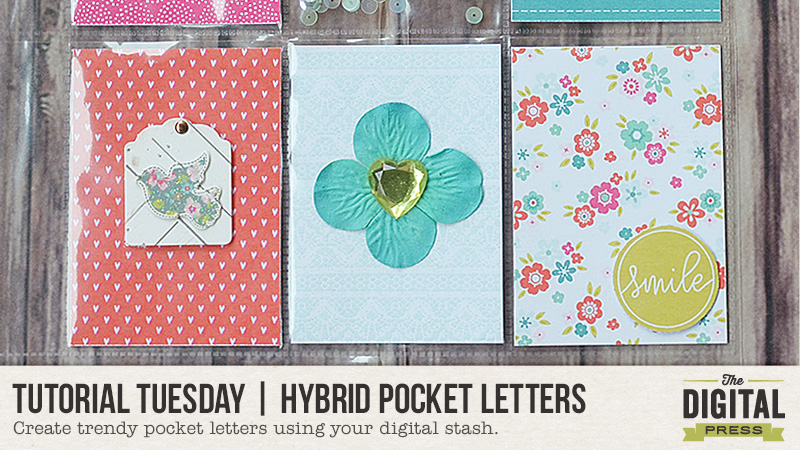
Hi everyone! Indah here today with a tutorial for creating a trendy pocket letter that I have seen all over the internet.

What is a pocket letter? Pocket letters are penpal letters in pocket format… using pocket scrapping supplies. Basically, you fill all of the pockets of a page protector (most commonly used for this is likely the 9-pocket size), and send it to your penpal! Too fun. 🙂

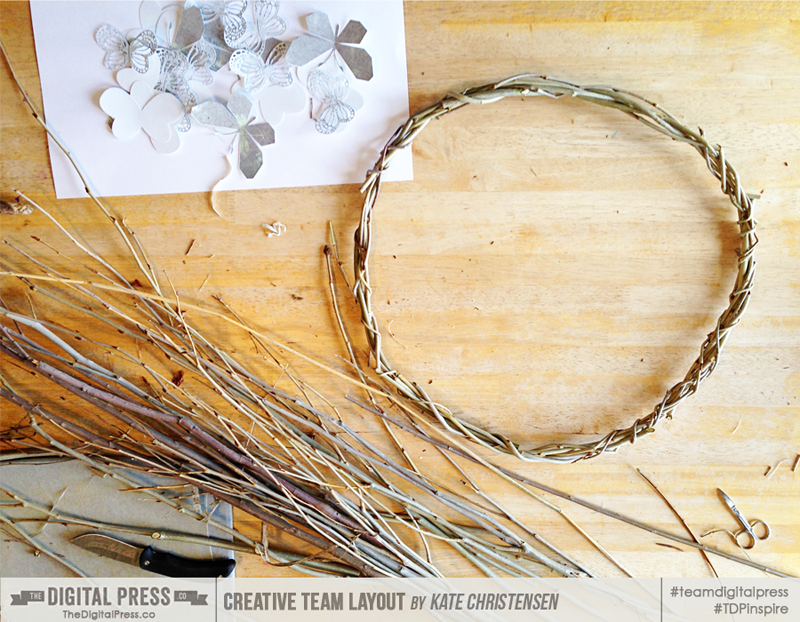
I have made one as an example using my digital scrapbooking supply stash — it’s so easy and fun! All you need, apart from your digi supplies, is a pocket sleeve. I couldn’t find a standalone pocket sleeve, so I tore one up from a pocket sleeve album. My samples shown here were all made using the digital collection As You Wish designed by Scotty Girl Design.

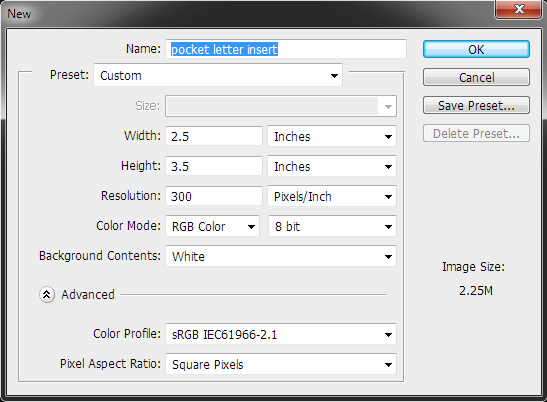
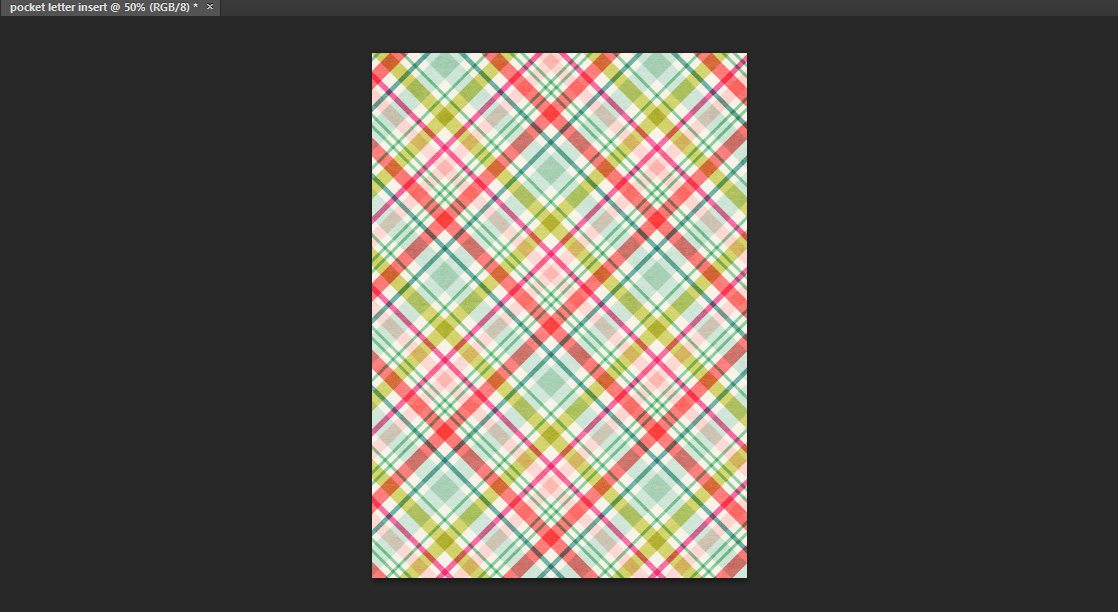
The first step is to print out your digital papers. This can be done with your digital imaging software by resizing or creating a document sized to fit your pockets (mine were printed/cut at 2.5″ x 3.5″ for my 9-pocket page).

Tutorial Tuesday | Hybrid Pocket Letters

Tutorial Tuesday | Hybrid Pocket Letters

You can also use your digital pocket cards — just re-size accordingly. Often, this means cutting off part of the card slightly… but it’s still doable.

Tutorial Tuesday | Hybrid Pocket Letters

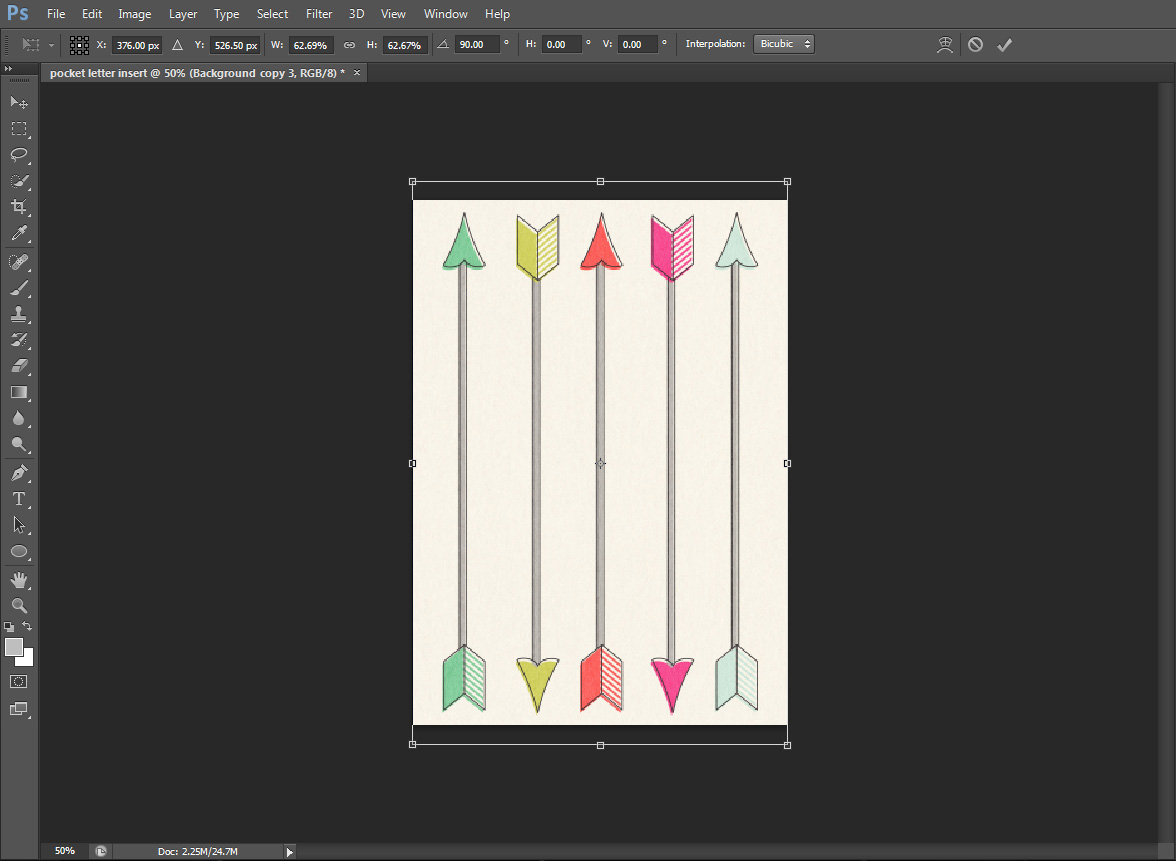
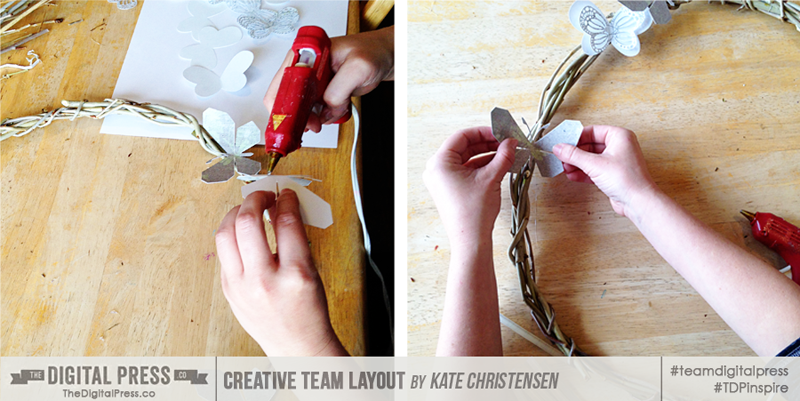
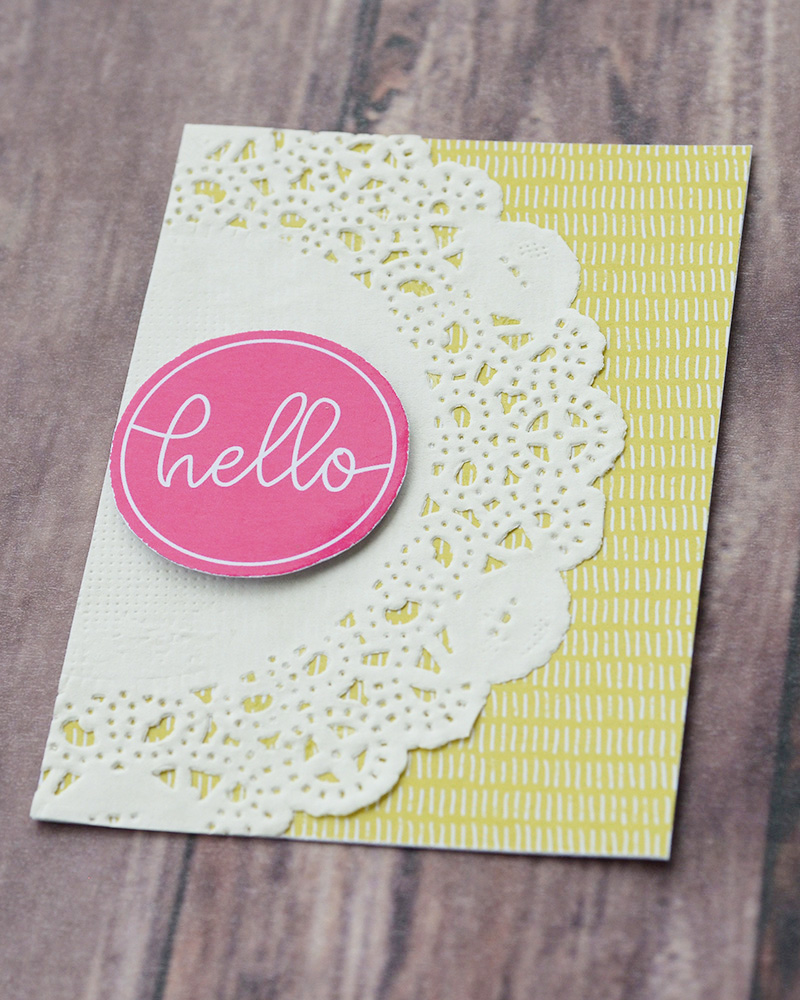
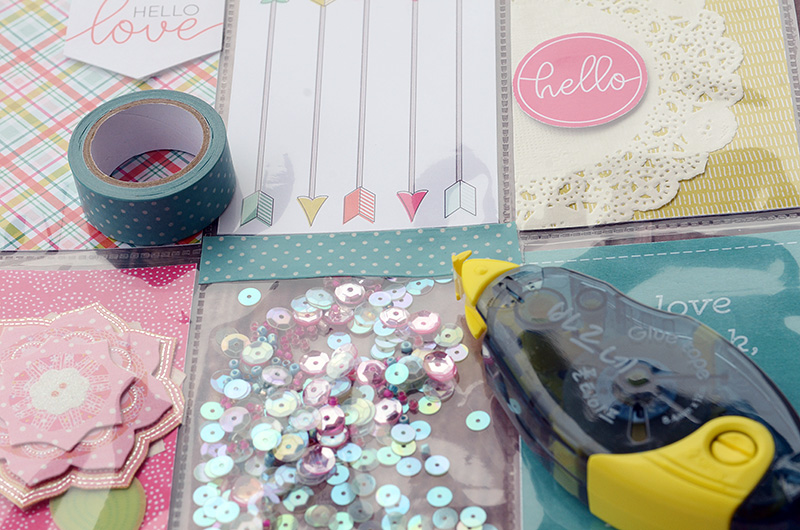
Next, print out your digital embellishments and start putting together your pocket letter inserts…

Tutorial Tuesday | Hybrid Pocket Letters

I used a combination of sequins and seed beads in the center space of my pocket letter. To secure this, I first sealed it with clear tape… followed by a strip of adhesive… before putting on a strip of washi tape to cover up the other adhesive steps and also act as decoration.

Tutorial Tuesday | Hybrid Pocket Letters

Tutorial Tuesday | Hybrid Pocket Letters

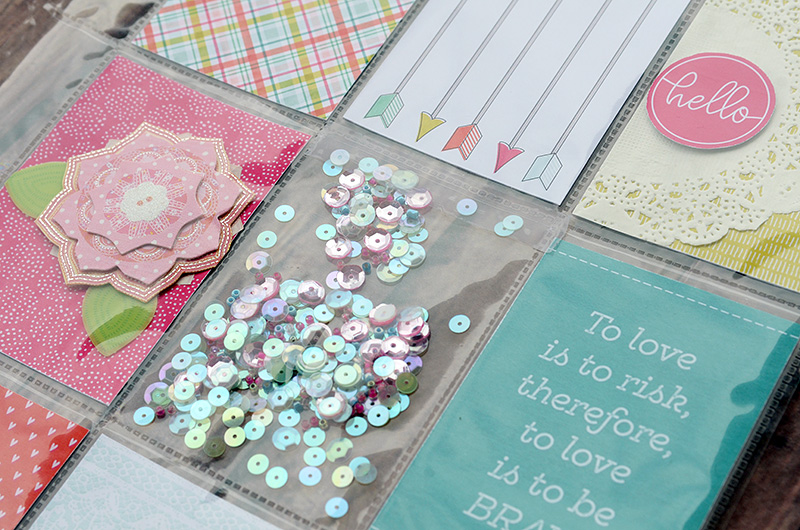
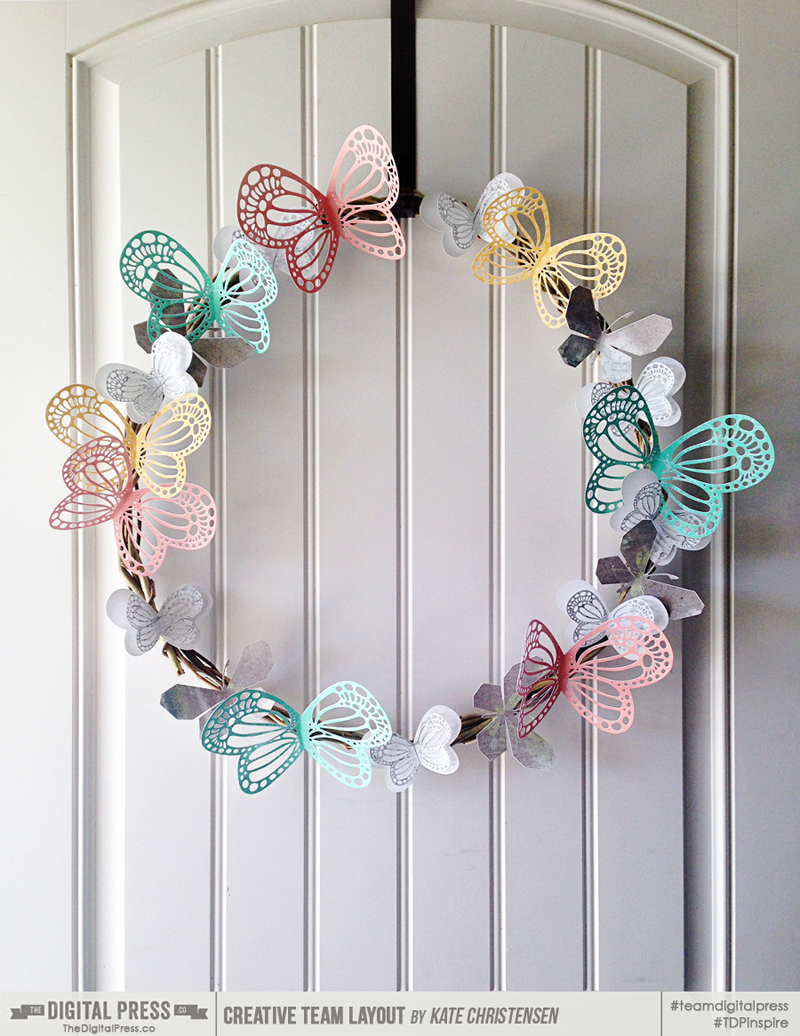
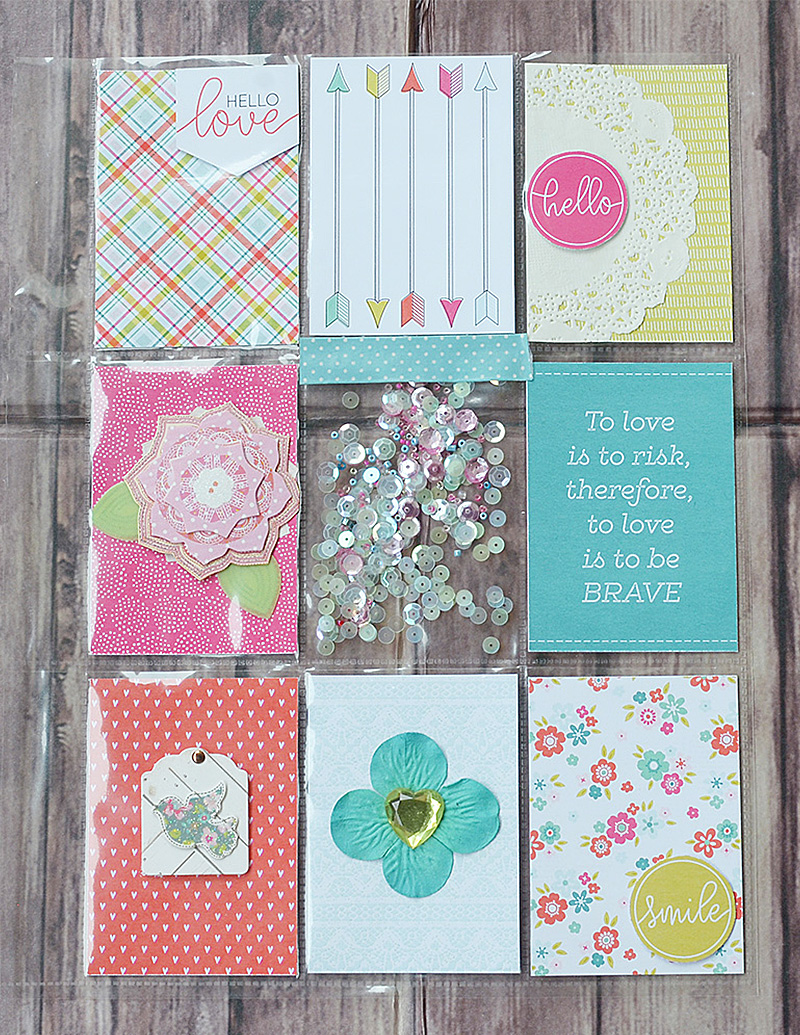
Here is my completed project.

Tutorial Tuesday | Hybrid Pocket Letter

Easy right? Now it’s your turn to do one, too! Give it a try… and don’t forget to upload your creations to our gallery!


IndahAbout the Author  Indah is on the creative team here at The Digital Press.  She has been a hybrid crafter for over 8 years, and loves making cards and paper crafts. She also loves collecting stamps and stickers.

Accomplishments: In Review

In Review: Accomplishments

I confess, I hate making “In Review” pages!  While I like the idea of summing up my year in one layout, it is just not feasible for me.  So much happens in our family during the course of any given year, that remembering it all and then paring it down to a few events just completely overwhelms me. The few pages I have tried in the past were frankly pathetic.

So this year I decided to do some preemptive thinking. If I change the time table from a whole year in review to something smaller it might be more doable. For instance, a month in review, a week in review, or on a crazy week, simply a weekend in review is easier for me to sort through and summarize.  If you look at life on that scale it really is not all that different from a Project 52 or Project 12. That is much more manageable to my frazzled mommy brain. Then come the end of the year, I can just pull information from those layouts, or put all those pages into an “in review” mini book, or simply include them as is in my main yearly album. The possibilities are almost endless.

I decided to do an “In Review” page for each month this year.  Since our word for April is Accomplish, I decided to use that idea to further narrow down my  “in review” thoughts for March. After thinking those two thoughts through for a bit I found that the rest of this layout came together really easily for me.

In Review: Accomplishements

credits: Talkative Templates by Scotty Girl Designs, Hello March by Anita Designs

Some of these accomplishments for March are huge, and others are just little everyday things that would go missed in a yearly round up, but it really sums up our March and I like that.

But more importantly, I am happy to finally be able to utilize an idea that has always been hard for me.

If you are a pocket scrapper, “In Review” pages are even easier.  There are so many great kits and cards already available to create “In Review” layouts. Check out the Pocket Scrapping Section at the store HERE.

If you are interested making some of your own ” in review” page(s) head on over to the Challenge Forums and check out the Challenge I have for you.


Erin 1
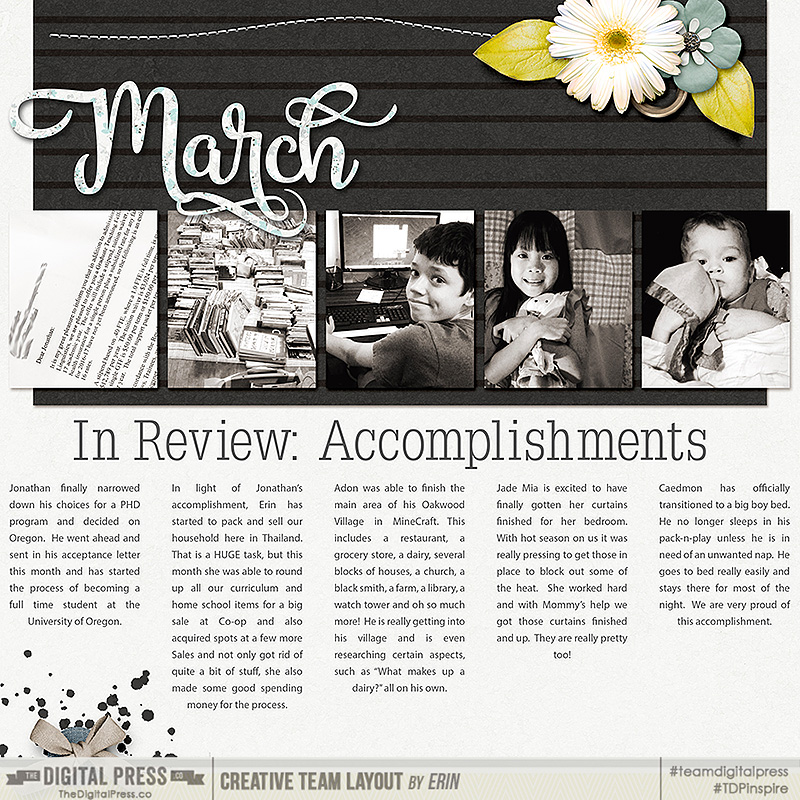
About the Author: Erin is a work from home mom of three living in Thailand. She loves playing with her kids and anything artsy. She can often be found knee deep in toys with paint on her face. She is slowly learning the meaning of living an authentic life, and enjoying every minute of the adventure.

Tutorial Tuesday | How to Create Actions in PS or PSE (Video)

Create Actions in PS and PSE

I don’t know about you, but my time to scrap is sometimes limited. When I’m busy with work, family and life in general, I want to optimize my scrapping time and I prefer to spend it actually scrapping than doing repetitive tasks like resizing layouts (LOs), retouching photos, etc.

In Photoshop (PS) and Photoshop Elements (PSE), there is an amazing tool to help with that: actions. If I’m correct, something similar exists in Paint Shop Pro (scripts) and maybe even in Gimp (macros?).

What is an action? It’s a record of various steps from a process that you can then play and replay whenever you need the exact same process. Let’s use the example of saving your LOs for TDP’s gallery. To do so, you first need to resize your LO to 900 pix wide. Then, you might add some sharpening and maybe some color enhancements to make it pop. Finally, you’ll need to save for web in the file of your choice, at a maximum size of 350kb. Rather than doing all those steps “by hand” for each of your TDP LOs, why not create an action that will automatically perform those tasks just as you like them?

How do you create an action? I’ll show you the process in PS CS6 but it works the same way in other versions of PS or in PSE (ETA: unfortunately you can only load and edit actions in PSE, not create you own! Sorry about my mistake!).

  1. Think about the steps of your process to know in advance what you’ll need to record and in what order. You can correct the mistakes done while recording your action, but it’s easier if you don’t record them in the first place! Don’t forget to think if you want to duplicate the file to start with (so that you don’t risk overwriting the original one), to close the file once you are done, where you want to save it, etc.
  2. Open your actions panel by using Alt+F9 or in the menus: Window -> Actions
  3. Create a new actions folder (by clicking on the folder icon in the actions panel) for your homemade actions and name it. You’ll get addicted, trust me, and you’ll create more and more actions to simplify your life, so get ready to store them all in one place!
  4. Create a new action and name it. It will automatically start recording, as the red dot indicates. All you do now will be recorded in this new action. If you don’t want to start recording right now, just click on the square to stop recording, the red dot will turn gray again.
  5. Perform all the tasks you defined in step one, in the correct order. The action will record everything you did and you will be able to see each step as a new line in the action panel.
  6. Once you’re done, press the square to stop recording. Your action is now ready to be played over and over again and to make you save some precious scrapping time! Woo hoo! Don’t forget to save your actions’ folder as it would be too bad to lose them!

Here’s a video showing how I recorded my “resize and save for TDP” action (Click on the image below to view in YouTube.):

Create Actions in PS and PSE

Let us know if you’re interested to learn more about actions, I’d be happy to do a follow-up post on how to personalize and tweak them further!


ChloéAbout the author  Chloé is in charge of PR and communication for her small town by day, is a digiscrapper “by night” and a photographer whenever the light is beautiful. She lives with her man and fur-babies in a small town of Alsace (in the northeast of France), where she loves to read, watch good TV shows (TWD being her absolute favorite), and just hang out with her friends — no matter if they are close by, online, or away in her Swiss hometown

Hybrid How-To | Butterfly Wreath

Hybrid: Butterfly Wreath

Did everyone pick up the March 2016 Collaboration kit, Fly Away? It comes with a beautiful butterfly cut file that I knew I wanted to use as soon as I saw it. I thought it would make a great wreath for my front door. It’s a super easy project, too… so let’s dive in!

Supplies Needed

  • Digital Kit of your choice (I used the new TDP collab Fly Away)
  • Cutting Machine
  • Cardstock
  • Wreath of your choice
  • Hot Glue Gun & Gluesticks

Instructions

The first thing I did was cut the butterflies. I wanted them in a variety of colors and sizes. I primarily used the cut file for my butterflies… but I also pulled in a butterfly element from the main kit and clipped paper to it.

Hybrid: Butterfly Wreath


This is how I do wreaths at my house. I use young Willow or River Birch branches and twist them around each other (tucking in the ends) until I have a sturdy, circular wreath. I find that twist ties really help to secure the first layer. It’s super easy (but you can also buy ready-made wreaths at your local craft store).


Hybrid: Butterfly Wreath


After that was done, I started attaching the butterflies with hot glue. I didn’t think too hard about placement; I basically just spread out the larger butterflies first, and then went from there.


Hybrid: Butterfly Wreath


The whole project took an afternoon and I just love how it looks on my front door!


Hybrid: Butterfly Wreath

Ready to try out your own wreath?  Join us in the forum for a fun challenge to make your own Spring wreath!
(*NOTE* this post was originally published in 2016 and the challenge is no longer active)


KateAbout the Author: Kate is on the hybrid team here at The Digital Press. She lives on the Utah/Colorado border with her husband, 5 kids, 10 chickens, and a dog named Gracie. She’s a city-born girl who found she’s really a country girl at heart. She can be found outside, barefoot, and probably in her garden.

Accomplish: Learning Something New

Hey there, scrappers! As we say goodbye to winter and welcome spring, it is the perfect time to learn something new!

I love learning about new techniques and tools that will help me in my scrapping journey, and this time of year seems like the perfect time to break out of my scrapping rut and try something new. So, I decided to peruse The Digital Press Blog for some new ideas.

If you haven’t checked out any of the site’s amazing Tutorial Tuesday posts in a while, you are missing out! There are some really fantastic posts with techniques from color editing, to photography, to hybrid projects, and more. I am blown away by the awesome ideas shared in these posts. So, I decided to highlight a few fabulous tutorials that you might be able to incorporate into your next project or layout.


Photography Tips

First, if you’re hoping to improve your photography skills now that the weather is nicer and you can get outside with your camera… TDP creative team members Farrah and Chloe have both shared great tutorials recently.

Check out…

Here’s an image I created using Farrah’s color tutorial….

I don’t usually use selective color with my photos, but I am working on a layout about my son Will’s favorite stuffed animal. I love this photo because it captures how he is always carrying “Raffi” (his giraffe) around, however, the colors and background were quite distracting. By using selective color, I was able to eliminate the conflicting colors and put the focus on his favorite toy.


Scrapping Techniques

If learning a new scrapping technique is on your to-do list, The Digital Press Blog has you covered with a few really great recent articles by team members Pallavi and Biancka.

Check out…


Hybrid How-To’s

Finally, The Digital Press blog is also overflowing with hybrid goodness. A lot of us digital scrappers get nervous when we see/hear the word “hybrid” because it looks… well, just so complicated and difficult! But some of these recent articles really simplify the process and make it seem like an attainable goal for anyone!

Check out…

  • Alina’s recent post Prettify Your Pantry, in which she uses hybrid techniques to organize and beautify her pantry while up-cycling containers that she already had laying around the house!
  • Tanya shared some adorable mini Easter baskets in her tutorial. I think these would be really cute as party favors, too, decorated with festive paper and embellishments!


With all these amazing ideas and tutorials on the blog, you are sure to find something new to learn!

And to give you an incentive to give one of them a try… I am hosting a challenge over in the The Digital Press Forum, in which you can use one of our fabulous Tutorial Tuesday posts to create your own project. I hope you will come check it out, play along, and earn some TDP challenge points! Happy learning and happy scrapping!


Katie

About the Author  Katie is a member of the creative team here at The Digital Press. She lives in central Florida with her husband and their four sweet-but-crazy boys. When she’s not dodging Nerf bullets or trying to dig out from under a never-ending pile of laundry, she enjoys photography, cooking, going to Disney World with her family… and, of course, digital scrapbooking.

Accomplish Something

Accomplish Something

Happy April!  No tricks on this April Fool’s Day – just fun inspiration, challenges, and tutorials coming up this month.  Our word of the month here at TDP is ACCOMPLISH.  I always think of Spring as the start of something fresh – starting with a Spring cleaning of my home and decluttering what we no longer enjoy and need.  Of course, I also take that cleaning frenzy and apply it to my EHDs by cleaning out older digi supplies, making room for the oodles of new goodies the TDP Designers are sure to create.  To me, this is a sense of ACCOMPLISHED and always makes me feel like I am ready to tackle something more exciting and new.  What about you?  What makes you feel like you have ACCOMPLISHED something?

Browsing around the web, I found some fun inspiration images to kick-start your thoughts about the word ACCOMPLISH

Accomplish Something

[ sources 1, 2, 3, 4, 5, 6, 7, 8, 9 ]

Each month, we like to encourage you to step out of the box with regard to our challenges. Below, you will find the list of upcoming challenges for the month of February — each of which focus on our theme of ACCOMPLISH. For more information about our challenge system, please read this information post in the TDP forum.

The handy image you see above can be saved to your computer for reference throughout the month, as it features our schedule for March. 🙂 It was made by the ever-talented Alina from TDP’s creative team, using the brand new store collab, Hello, Beautiful Daywhich was released today and can be purchased for just $4.00 for the first 4 days of the month!

We cannot wait to see how you implement our Word of the Month into your daily lives and memory-keeping!


About the Author  Rachel Alles is on the creative team here at The Digital Press. She is fortunate to share her life with her loving husband, Doug, and her two blessings: Madeline and Maxwell. The three of them are her main source of inspiration for her pocket and traditional style pages. When she’s not scrapping, she enjoys anything Disney-related, learning more about photography (and attempting to turn the dial off “Auto”), and dabbling in home decor projects.