Author: The Digital Press

Making Layers Off Your Styles

blogtemplate

Heidi here with a quick tip when using your styles. Today we are going to use our shadows style to give them a little dimension. Have you ever looked at a layout and saw the shadow for an item going in different directions not just the typical 120 degrees? Do you wonder how it was done? Well, I am going to walk you through a simple way to achieve that.

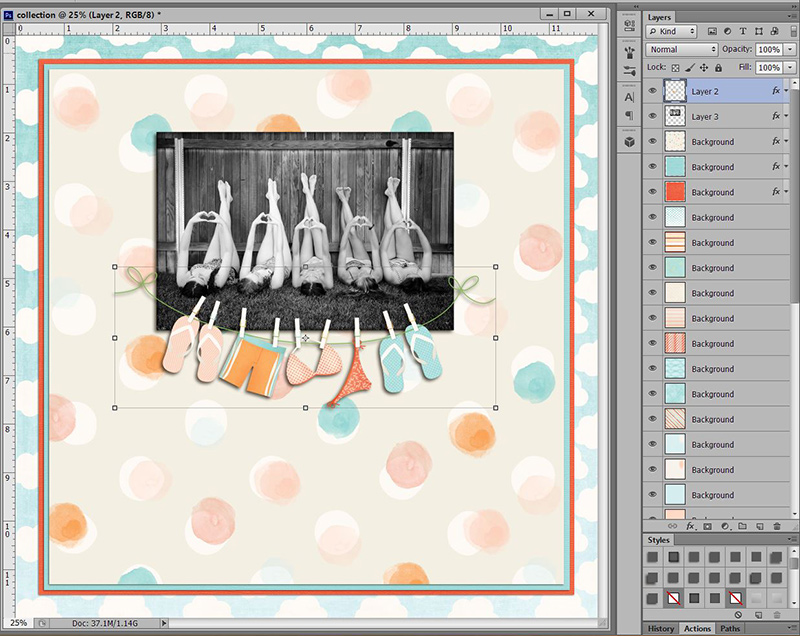
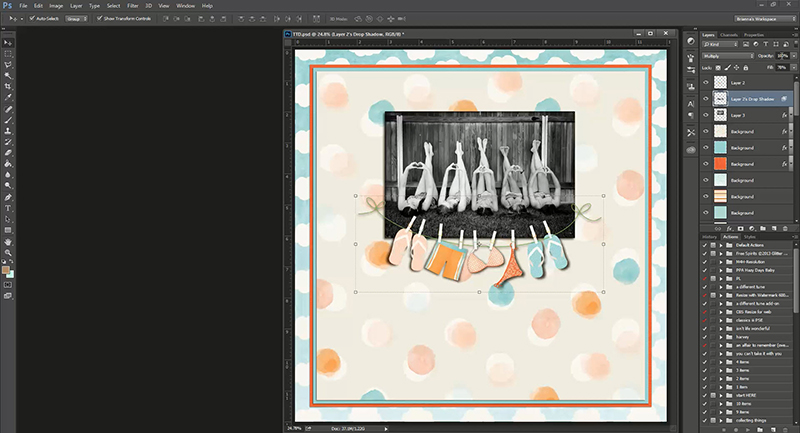
First thing you want to do is add your shadow style to your layer. I added the shadow to the banner. Notice that the entire banner’s shadow is going 45 degrees…as the style tells it to.

step-1a


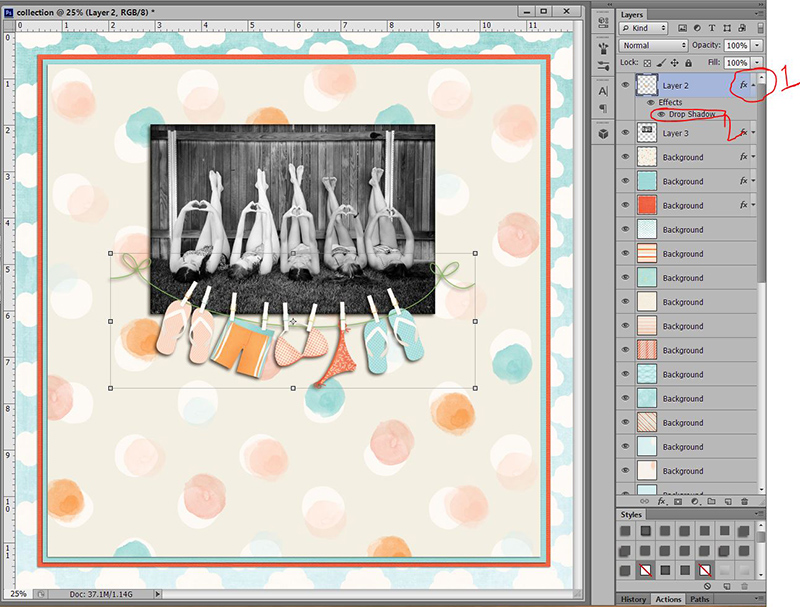
Next, you are going to make your shadow show by clicking on the arrow next to the “fx” (#1). If you have applied any other styles to your item, they will show up here. I have only applied a shadow style. Place your mouse over “drop shadow” and right click (#2).

step-2a

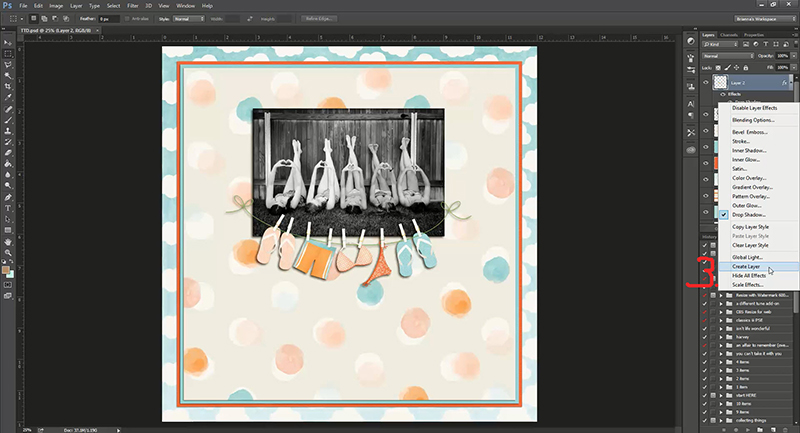
You will see a long list of things you can choose from … go down to the bottom and click “create layer” (#3).

Step-3a

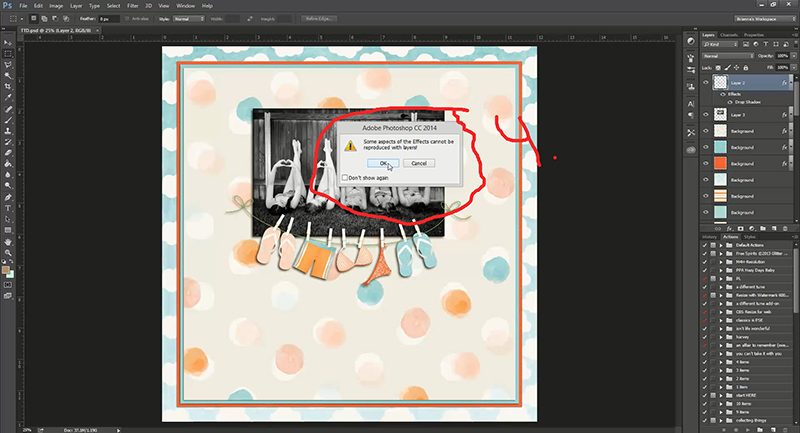
You will probably get a pop up box asking if you are sure you want to do this, click ok.

Step-4a

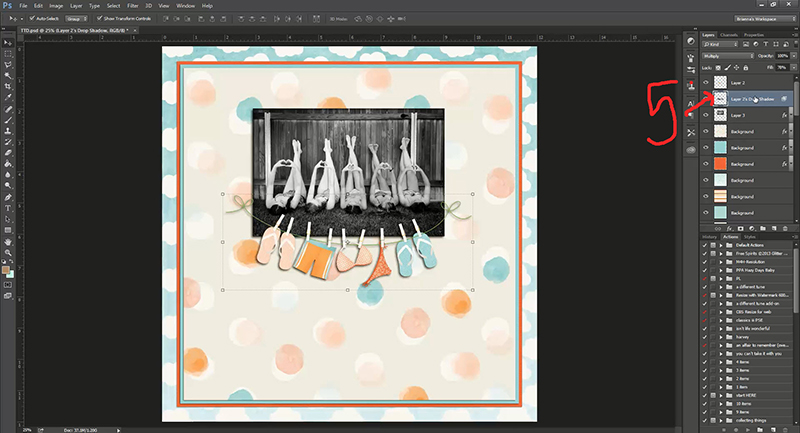
Look in your layers, do you see how your shadow is now a separate layer? It is no longer a style.

Step-5a

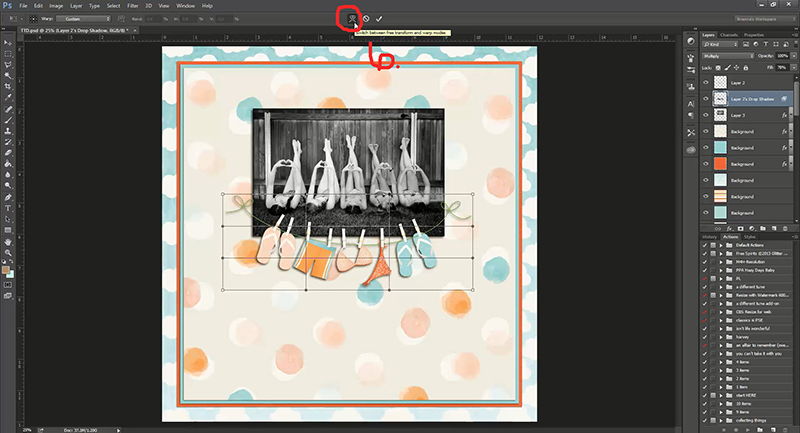
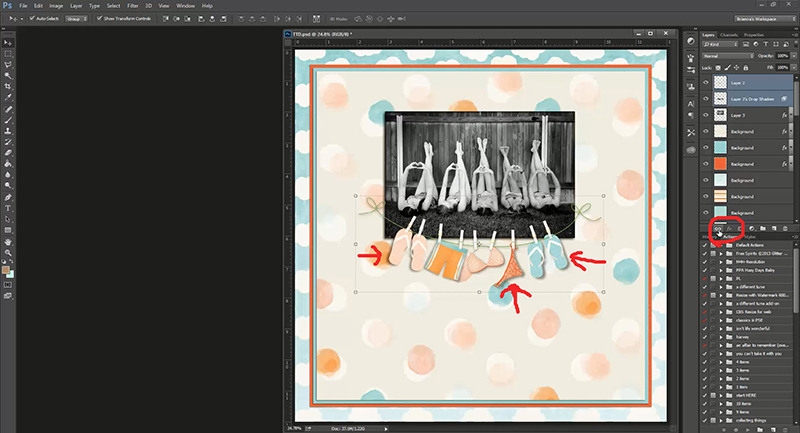
Make sure your shadow layer is highlighted (it should automatically already be highlighted when you created a layer.) and hit “control t”. Look up at the top of photoshop and you will see 3 “buttons” pop up. You want to select the one I have circled #6 Free transform/warp control.

Step-6a

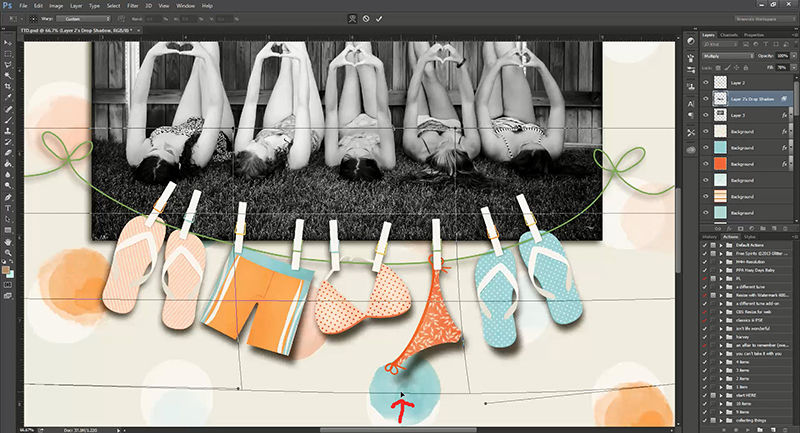
Notice how the banner has a grid over it? That grid will allow you to move specific parts of your shadow. See my small red arrow at the bottom of the picture? That is where I placed my mouse and slightly pulled the shadow down. See how the bikini bottom shadow is now going the opposite direction I originally put it? Remember, my shadow style was 45 degrees … I just pulled the shadow layer -45, or down and to the right. But also notice that it moves the WHOLE shadow. The closer you are to where the mouse is located when I move my layer, the more the shadow will move. The farther away you are from the mouse, the less the shadow layer will move. Notice how the left blue flip flop’s shadow is a little bigger than the right? That is because the left flip flop is closer to where my mouse is moving the shadow layer.

Step-7a

Now it is just a matter of playing with the layer. It will take practice!!! Even while creating the shadow for this layer, it took me a couple of tries. If you really mess up, go back to the top and hit the circle with the line through it. It won’t save what you have done and put your shadow layer back to it’s original state. Hit “control t” again and start fresh. A little movement goes a long way. My main focus was the bikini bottom. Once I got that looking how I wanted (the shadow going the opposite direction of the pink flip flops), I went through and adjusted the other items. The bikini top was really off, so I had to carefully adjust that, go back and adjust the bikini bottom and so on.

Step-8a

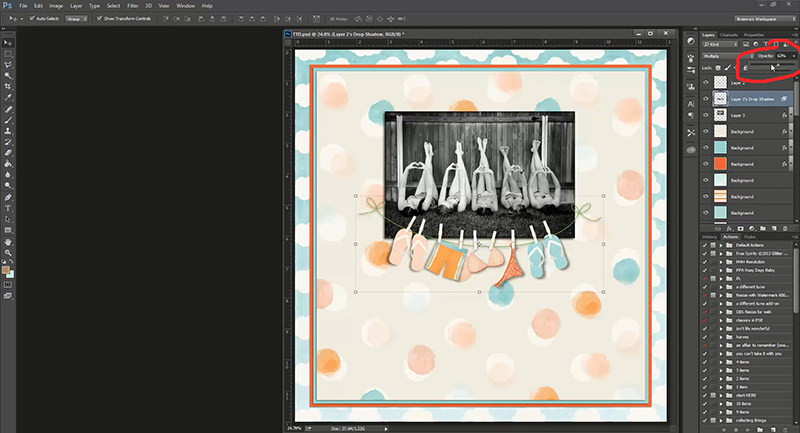
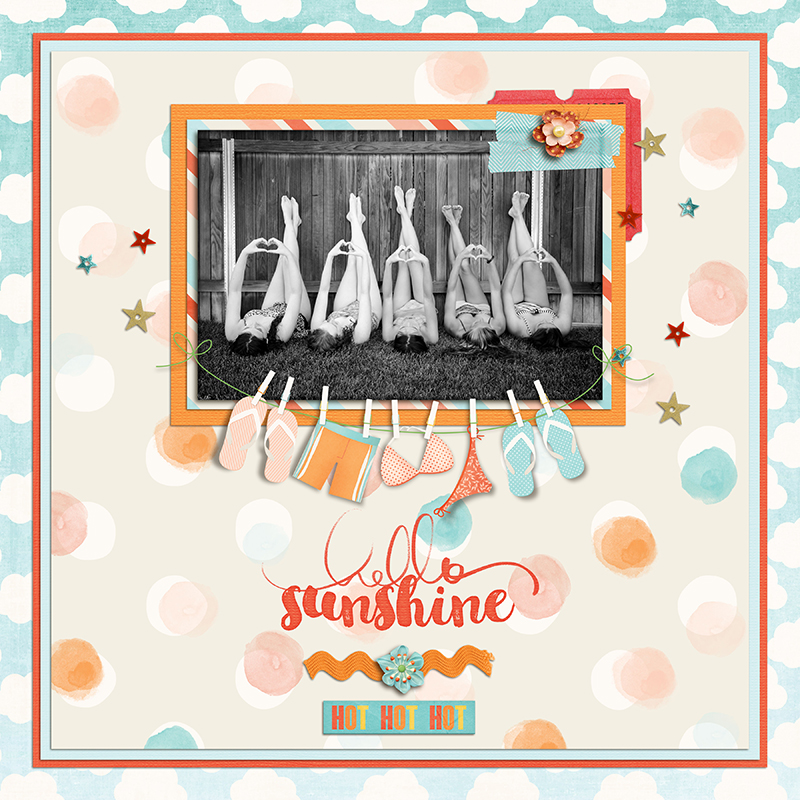
This was my finished product. Now looking at this, I really don’t like how harsh my shadow is. So making sure my shadow layer is still highlighted, I went up to my opacity and turned it down until I liked the softened look.

Step-9a

Once you like what you have done with you shadow, highlight the layers of both the object and the shadow of the object (my banner and my banner’s shadow).

Step-10a

Find your link button (circled in red below) and click it. This is a really important step!! If for some reason you need to move your banner, your shadow will move with it. If you don’t link it, then just your banner will move and the shadow will stay behind. Also, make sure you do not put anything in-between your item layer and your shadow layer. I do not like to merge my layers in case I need to go back and tweek my shadow once I have finished my layout. If I do need to tweek my shadow, you will need to un-link the layers. Otherwise, your transform button won’t work.

Step-11a

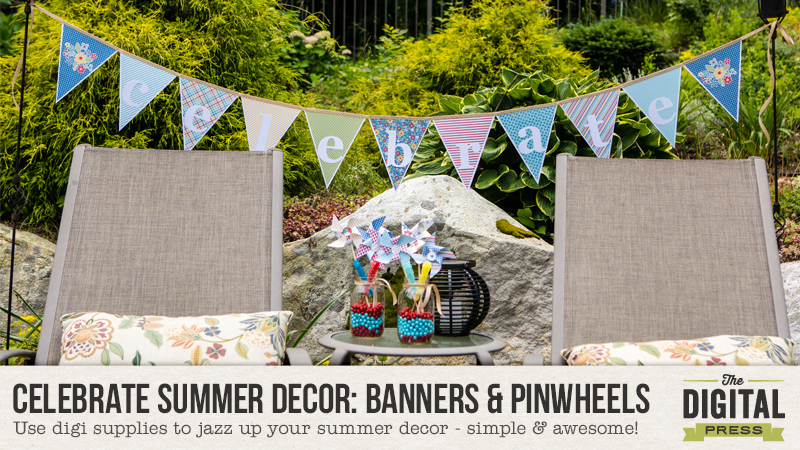
Notice the direction of the shadow of the pink flip flops and the blue flip flops? The are going opposite directions … you can’t achieve that with just using a shadow style. You now have a banner that is a little more realistic … like it is blowing in the wind. 🙂 You can use this method to pull your paper shadow out a little bit to make the paper look bumpy or crinkled, make a corner of a banner rolled up, etc. Use your imagination!

Hello Sunshine

Let’s see you try this tutorial … join us in the forum!


ct-photo100

About the Author: Heidi has been scrapping for 17 years. Her passions include dark chocolate, photography of her family and reading Christian fiction. When not doing one of these activities, she can be found working at an elementary school library or enjoying being a SAHM.

July’s Month of Tutorials


July's Month of Tutorials

We interrupt your regularly scheduled month of challenges to bring you instead a month of Tutorials!  That’s right, to coincide with Summer School, our Creative Team has a full month of biweekly tutorials just for you posted on Tuesdays and Thursdays throughout the month of July.

Below are the list of upcoming tutorials scheduled this month:

July's Month of Tutorials

This gorgeous tutorial schedule was created by creative team member Alina, using the brand new store collab Christmas in July that you can purchase for only $4 for the first 4 days of the month!

July's Month of Tutorials

Missed any of the Summer School fun?  No worries – you can jump in anytime in our Summer School forum.

July's Month of Tutorials

Enjoy your month of scrapping tutorials and fun!  We’ll see you next month for our return of challenges!


About the Author: Rachel Alles is on the Creative Team here at The Digital Press.  She is fortunate to share her life with her loving husband, Doug, and two blessings: Madeline and Maxwell.  The three of them are her main source of inspiration for her pocket and traditional style pages.  When she’s not scrapping, she enjoys anything Disney related, learning more about photography (and attempting to turn the dial off Auto) and dabbling in home decor projects.

Tutorial Tuesday – Quick Organization

Tutorial Tuesday : Quick Organization


For the first few years I digi-scrapped, I spent lots and lots of time organizing my digital supplies. As soon as I downloaded a kit, it would go into a “To Be Organized” folder. There it would sit, until I had the time to sort through the folder and tag each item with color, theme, type of element, etc. It got to the point that my “To Be Organized” folder was getting way more attention than the photos I wanted to scrap!

Feeling frustrated, I took a hard look at how I scrapbook. I realized that I am mostly a kit scrapbooker, and rarely look to other kits for supplies except for a few regularly used favorites. So, I decided to overhaul my organization strategy. Now, when I unzip a new kit, I tag the kit preview. I have a keyword set up that is called “Kit Preview” and than always gets checked. Then, I add any keywords that would apply to that kit. So, if it is a birthday theme, it would get a “Birthday” keyword. Boyish kits get a “Boy” keyword; camping kits get “Camping” and “Outdoors.” Some kit previews have multiple keywords and some only have one.

The only other items I keyword are paints/ink sets, large paper packs that I use frequently (solids/kraft/neutral colors), and templates. I tag these because I use them often and don’t want to have to go searching for them each time I want to use them. I also have a “Favorites” keyword for my absolute most used items that I want to be able to access quickly.

Now, when I am ready to scrap and want a kit based on a certain theme, I can just find the keyword I’m looking for. This system keeps all my supplies organized without taking more than a few clicks for each kit I unzip! I don’t stress about staying “caught up” with my tagging/keywording like I used to when I tried to organize each element and paper. If you are a kit scrapper, too, it might be worth giving it a try to see if it works for you!

KatieAbout the Author: Katie is a member of the Creative Team here at The Digital Press. She lives in Central Florida with her husband and their four sweet but crazy boys. When she’s not dodging Nerf bullets or trying to dig out from under the never ending pile of laundry, she enjoys photography, cooking, going to Disney World with her family, and, of course, digital scrapbooking.

Celebrate with music

JuneBlogTopperMusic
Have you ever noticed that music is part of every Celebration event in our lives!? Well for me it is. I love music! When it is our Birthday we sing the birthday song. When we rock a newborn baby we will sing to them. You know how long it took me to research and find just the perfect song to play when I danced with my son at his wedding?! The words had to be just perfect along with the music that went with the words that speak our heart song.

I have used music always in my layouts, to get the feel, the Tempo (fast-happiness, excitement, anger, slow-sadness, serenity.) the Mode (Major tonality:happiness, joy, Minor tonality: sadness.) Melody (Complementing harmonies: happiness, relaxation, serenity. Clashing harmonies: excitement, anger, unpleasantness.) Rhythm (Smooth/consistent rhythm: happiness, peace. Rough/irregular rhythm: amusement, uneasiness. Varied rhythm: joy.)
You can use the lyrics/word in a song to tell your story!

I have created this layout of my daughter’s 18th birthday using the song ‘Celebration’ by Kool & The Gang. Here are the lyrics.
Yahoo! This is your celebration
Celebrate good times, come on! (Let’s celebrate)
There’s a party goin’ on right here
A celebration to last throughout the years
So bring your good times, and your laughter too
We gonna celebrate your party with you
Come on now
Celebration
Let’s all celebrate and have a good time
Celebration
We gonna celebrate and have a good time
It’s time to come together
It’s up to you, what’s your pleasure
Everyone around the world
Come on!
Yahoo! It’s a celebration
Yahoo!
(stop here)
Celebrate good times, come on!
It’s a celebration
Celebrate good times, come on!
Let’s celebrate
We’re gonna have a good time tonight
Let’s celebrate, it’s all right
We’re gonna have a good time tonight
Let’s celebrate, it’s all right
Baby
We’re gonna have a good time tonight (Celebration)
Let’s celebrate, it’s all right
We’re gonna have a good time tonight (Celebration)
Let’s celebrate, it’s all right
Yahoo!
Yahoo!
Celebrate good times, come on! (Let’s celebrate)
Celebrate good times, come on!
It’s a celebration!
Celebrate good times, come on! (Let’s celebrate)
Come on and celebrate, good times, tonight (Celebrate good times, come on!)
‘Cause everything’s gonna be all right
Let’s celebrate (Celebrate good times, come on)
(Let’s celebrate)

TDP-JuneCelebrate800
As you see I’ve used the lyrics for my journaling and then also the title. I’d love for you to join me in a challenge to use this song as part of your layout! Come see me here.

BarbaraAbout the Author: I started paper scrapbooking in 2001, then in 2009ish I had an online friend who dared me to give digital a try. Wow! life changing in my busy day of being a stay at home mom to six children. In my free time I also love to visit antique malls for treasures, reading, meeting friends for tea and then my woman’s bible study group is a highlight of my week.

Celebrate Summer Decor: Banners & Pinwheels You Can Make!

Celebrate Summer Decor: Banners & Pinwheels You Can Make

I LOVE summer time – the warm weather, the days of freedom, the lush landscape and summer blossoms and the bright colors all around. Ahh! Such an incredible time of year! Since I love it so much, I love having fun with my outdoor decor for celebrating all of the summer events – the last day of school, summer birthdays, Independence Day, BBQs, and just celebrating life and happiness. I have a particular fondness for banners and love to hang them outside. As a DIY kind of person, I make my own. This month’s Special Edition at The Digital Press was absolutely PERFECT for the vision I had for my summer banner. The colors, the elements, the joy of it all was right up my alley and I wasted no time getting to work on creating my summer banner and pinwheels (because what is summer decor without some colorful pinwheels?!). This is the project in progress….oh the goodness that is to come! 🙂

Celebrate Summer Decor: Banners & Pinwheels You Can Make

There are so many awesome things to choose from in the June Special Edition, but I limited myself to just a few to make it easy on me. I used Scotty Girl Designs Pocket Essentials flair and patterned papers as well as Kelleigh Ratzlaff Design’s Celebrate Summer kit. Since the Special Edition is a coordinated collection from all of the designers at The Digital Press, everything looks wonderful together!

To create this project, I first printed out the patterned papers and flairs on my printer and then used my Silhouette Cameo to cut out the flag shapes for the banner and the letters for my word to go on the banners – CELEBRATE. I also used the cameo to cut out the squares and cut lines for the pinwheels, however all of these things are easy enough to do by hand if you don’t have a cutting machine. A little tape runner for the banner, some hot glue for the pinwheels, and in less than a couple of hours the entire project was complete.

Celebrate Summer Decor: Banners & Pinwheels You Can Make

The celebrate banner and pinwheels are all set up and ready for some summer festivities!

Celebrate Summer Decor: Banners & Pinwheels You Can Make

A hot glue gun is a great tool for quickly getting the pinwheel corners to adhere to the center of the pinwheel. A craft dowel works well for the pinwheel stick. Fair warning: while fun for a display and kids to drool over, wasps and bees flock to the rock candy sticks!

Celebrate Summer Decor: Banners & Pinwheels You Can Make

The ribbon was easily applied with a tape runner and is really sturdy at keeping the banner together. I layered the patterned papers on solid white cardstock to add contrast and weight to the banner so it hangs better and will last.

Celebrate Summer Decor: Banners & Pinwheels You Can Make

I love the way it looks outside so I would say this project was a total success! Now it is time to sit back, relax, and celebrate all of the good things in life! 🙂
Lori


About the Author: Lori Pereyra is a member of the Creative Team here at The Digital Press. She is a stay at home mom to 4 children and loves capturing life…the good, the not so good, & the perfectly imperfect… and documents it all through photos, paper & pixels. She feels this is modern scrapbooking at it’s best!

Celebrate You! Scrap what you like about yourself

Celebrate You! Scrap what you like about yourself

I scrapbook to tell our stories & leave our legacy. Part of that legacy is letting generations to come know who we are – even me. So while I am not the most comfortable doing so, here is a page about what I like about me. I like that I am adventurous but also love a good lazy afternoon. I like that I am friendly & kind. I like that I am real & supportive. I like that I am silly & stern.

What do you like about yourself? Have you scrapped about it yet? If not, what are you waiting for?

TDP KL BLOG JUNE2015 Celebrate You

And now come over to the forums to join us in the challenge!!

Materials Used:
Bloom and Grow by Mari Koegelenberg & Mommyish Kit and Journaling Cards
Champagne Gold Alphabet by by Wildheart Designs
Stitched Grid Templates Vol 1 by Scotty Girl Designs

Krista 
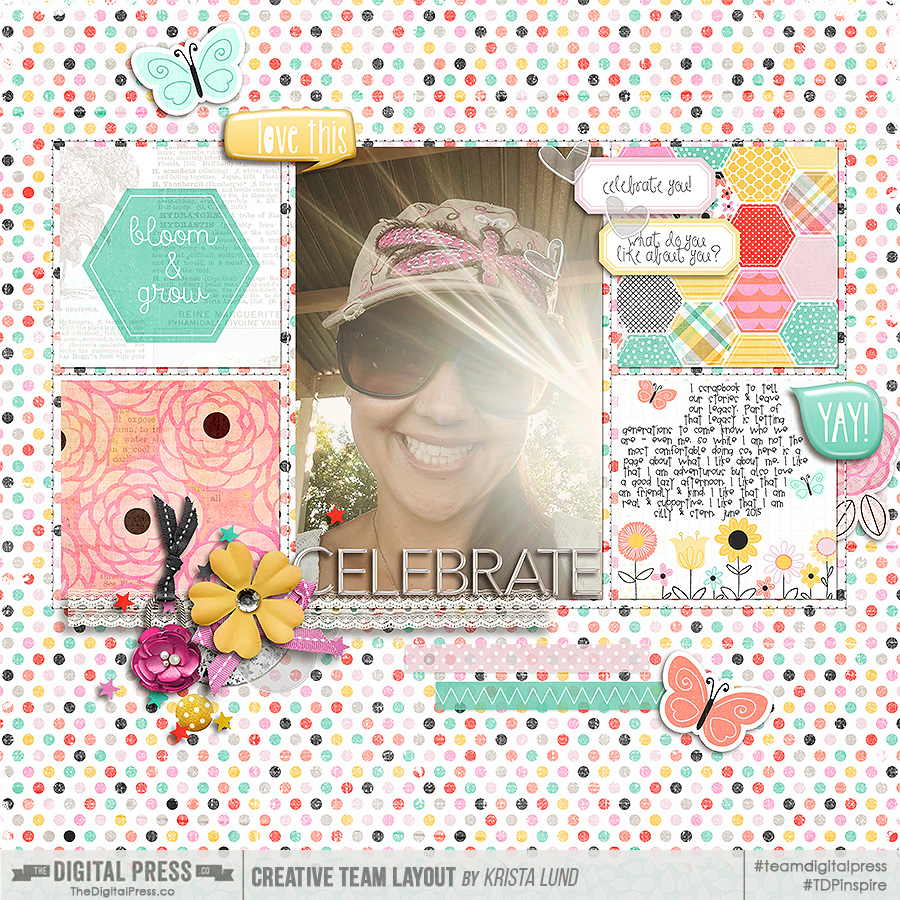
About the Author: Krista Lund is a mom of 3, married to her High School Sweetheart living in SF Bay Area. Some of her favorite things are brownies, chips n dip, taking pictures and documenting her family’s story.