Today is my 20th wedding anniversary. It should be a day of celebration, joy and remembrance. But it is not. You see, on June 2nd my husband told me he wanted a divorce. My world crashed. Unfortunately, I am sure many of you know exactly what I am talking about. You have been there and done that. And if you don’t know what I am talking about, I pray you never do. These last couple of months have been the worst months of my life. It is especially hard because of my kids. Don’t hurt my kids. But there is nothing I can do to shelter them from this except to move forward through it.
I made up my mind that I would not let this process ruin me. It would not ruin my integrity. It would not change the core of who I am. I am a Christian and I have a very strong faith in the Lord. I have had to make choices each day, sometimes each second, to live the way the Bible says I should live. Not because of “rules”. But because God knows what is best for my soul and mind. I have had to turn to friends. I have had to ask for help. I have to trust day by day that God is taking care of my girls and me. It is the only thing that has gotten me through these last couple of months.
I know not everyone believes like I do. But you believe in something right? What gets you through the negative things that happen in your life? How have you walked through the fire and come out on the other side? Are you walking through it now? In the past? Do you see something coming that you know will rock your world? How are you going to wake up every morning? This is my challenge. Scrap the negative. But don’t scrap it in a negative way. Talk about how you are going to move forward. How are you going to or how did you get from the horrible situation to a better day? Maybe like me, you are walking through it as you read this. Prophesize about the positive. About what you want to happen. What will happen. Speak “life” in your layout even though you are or were surrounded by “death”. Move forward in your layout. Don’t get stuck in the now. Don’t get stuck in the past. Move forward.
Here is the layout I created with the kit Limitless by Karla Dudley and Amanda Yi:
I can’t wait to see your success stories of moving forward in our challenge forum!
About the Author: Heidi has been scrapping for 17 years. Her passions include dark chocolate, photography of her family and reading Christian fiction. When not doing one of these activities, she can be found working at an elementary school library or enjoying being a mom.
When we scrap, we can use frames to highlight our photos. We can also choose to show our photos partially or discreetly by blending them. Today we would like to share with you three very easy ways to blend them. Follow the step-by-step tutorial and after that you can experience them one by one 😉
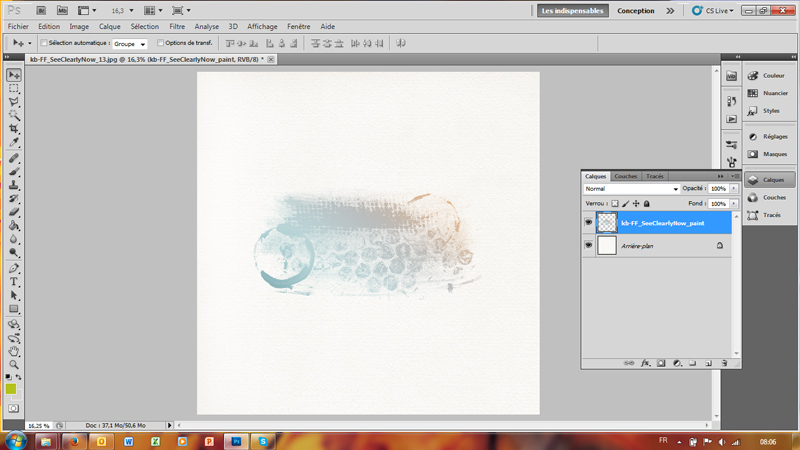
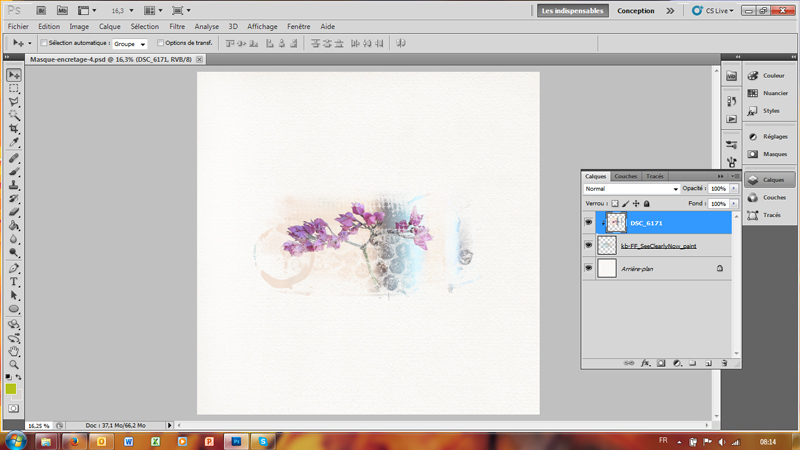
First way : Use Clipping Mask
Choose your background paper. Then add a pretty paint brush or an overlay. It is better to choose one with great patterns.
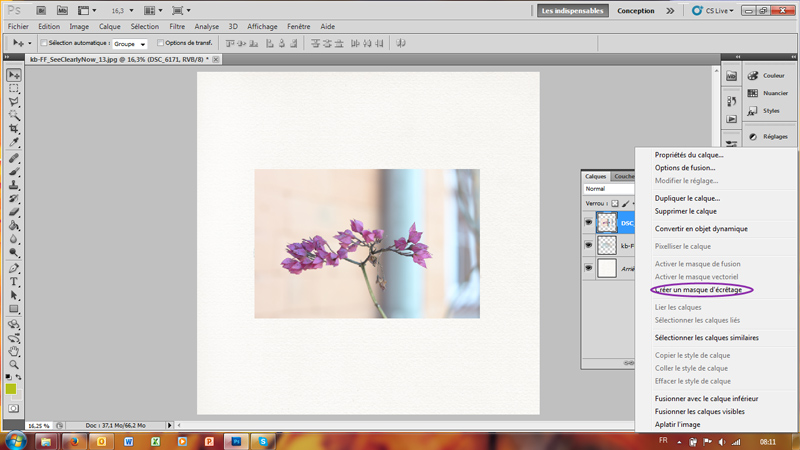
Now add your photo and create a clipping mask on the brush.
Your photo will immediately take the form of your brush. Mine looks like this.
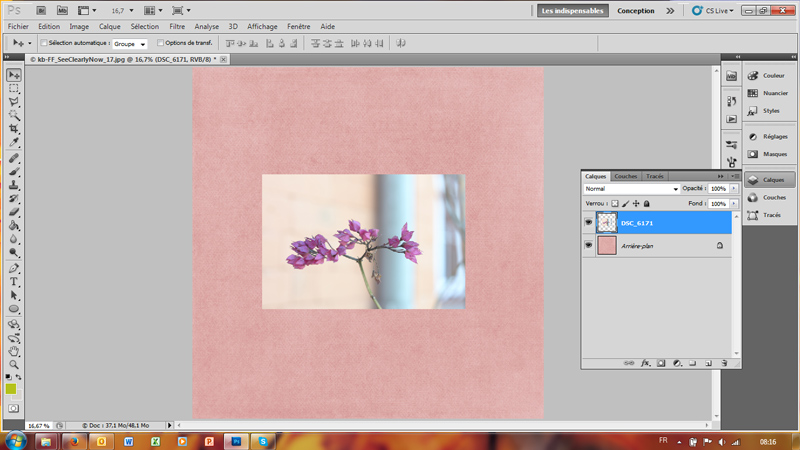
Second way : Use Layer Mask
Choose your background paper and add your photo.
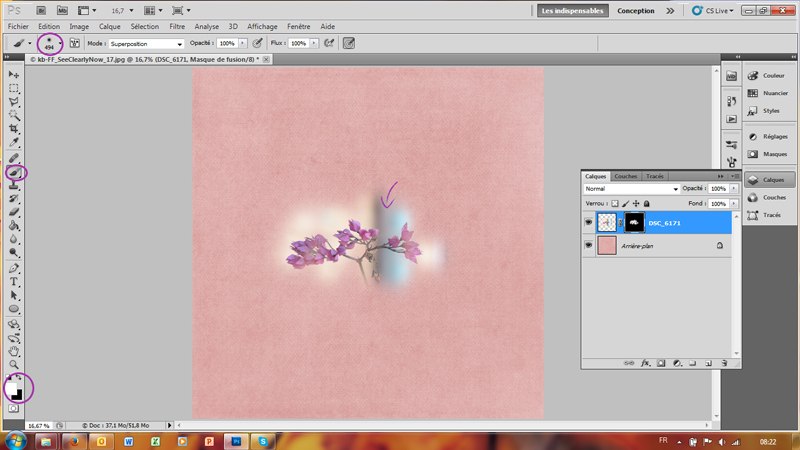
Add a layer mask on your photo. Use black on the layer mask to hide areas of your photo. Your photo will begin to disappear 🙂 Don’t worry.
Then use a soft brush to paint white on to the shape to reveal parts of the photo. You will see the photo little by little. You will have something like this :
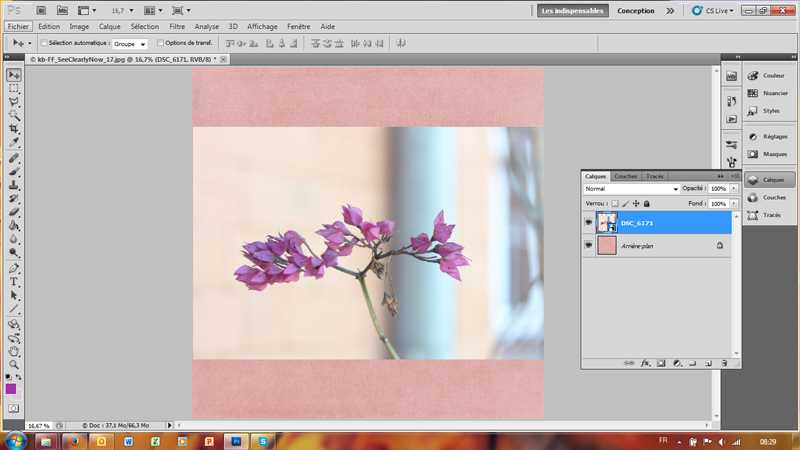
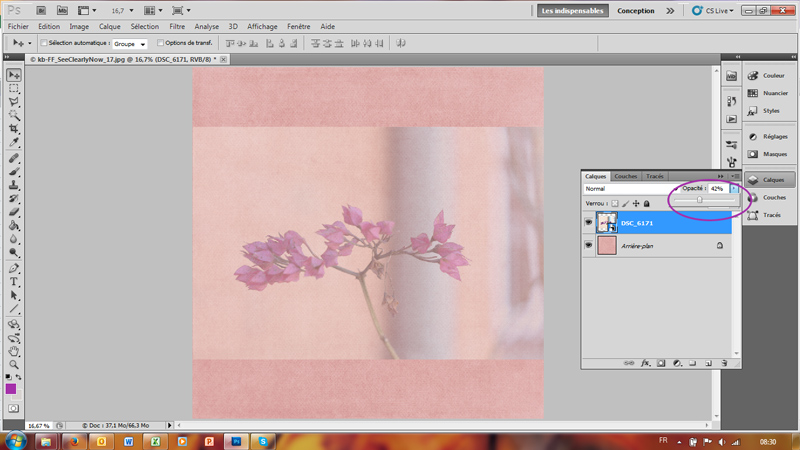
Third way : Play with Opacity
Choose your background paper and your photo.
Change the opacity of your photo layer. I put mine on 42% but it depends on the clarity of your photo and the background color.
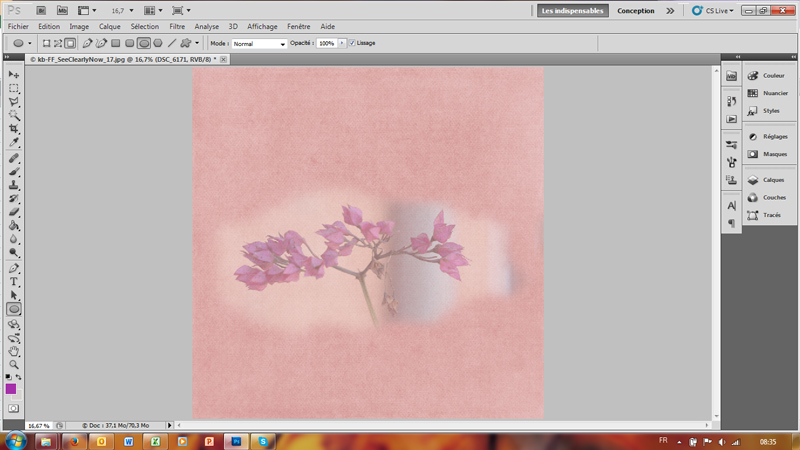
This time use an eraser tool – a soft edge is better.
The final result can be like this.
Now you can go and play. Don’t forget to show us how you deal with blending process by sharing your page in the gallery 😉
About the Author : Bao is a Creative Team member at The Digital Press. She has been a Digiscrapper for about ten years now. She joined The Digital Press in March and enjoys being active on the site. Her style tends to be clean & simple. Most of the time she scraps her family’s photos. She loves, however, to scrap other subjects such as flowers, nature, the environment, foods … She says hello to all of you from her big island named Madagascar, and feels blessed to live there.
Kennedy started kindergarten this year. It made me recall all of my memories of that first venture into school and all of the fun things we did. I remember losing a tooth in an ice cream cone at school, dressing up as a clown with red frosting on my nose for the school circus, helping with a centennial mosaic, and other things. During my kindergarten year, since it was the centennial celebration, we also created a time capsule as a school. Each student got to bring something small to put inside. For some reason, I have an image of creating a little doll inside of a sardine can and saying it was baby Jesus, which is funny because we didn’t go to church as a family, and we never had sardines. So I could be completely confused about the whole thing.
Anyway, it also got me thinking about how fast things are changing. With the leaps in technology, things seem/feel totally different than they did even five years ago. We communicate differently. We listen to music in new ways. Entertainment is constantly moving in new directions whether it is tv, streaming videos, books, and/or other activities. What we eat and drink seems to constantly shift. And our storage of memories evolves on a regular basis. It is the perfect time to document these things and create a little project for the future.
Creating a letter to the future you, or creating a time capsule for the future, is a great way to capture the essence of NOW and also to imagine what things will be like 20 or 30 years into the future. I’ve seen examples of people creating time capsules for their children to be opened on significant future birthdays, couples creating anniversary time capsules, families gathering up items and doing this as a fun project to do together, and of course you can do it for just you as well. There are millions of ways to do it.
A letter is certainly easier to store/transport/save, but a time capsule could definitely have its advantages. The tactile experience of digging through the items stored inside is a fun thing to think about. Either way, you will want to create a way to store your message to the future. You could also create a scrap page or mini album to set aside for the future.
The first thing would be to decide on what your project will entail and who will be involved.
Next, select a container. If you want to keep a letter safe, create it on archival paper that won’t break down easily. The same for any envelope. Keep it somewhere that it won’t get damp or dirty. Add a date to be opened on the outside of any envelope. You could always send the text of the letter to your email address and save that in a folder as well. For a mini album or scrap page, decide how and where you will keep it for the future. If you are going the time capsule route, find a sturdy container that is easily stored and will keep items safe and dry. One family used an old suitcase as a container (genius!), and another used empty paint cans that you can get at home improvement stores and decorate as you wish (so clever). Burying your time capsule might sound like a fun idea, but you would have to ensure that the container would withstand elements, and that you would be able to find it easily.
Decide what to include. If you are writing a letter, talk about what is going on in your typical daily routine. Include information about prices, current events, what your hopes/dreams are for the future, predictions you have, etc. Include pictures, lists of favorites, drawings, handprints, clothing sizes, etc. If you create a time capsule, you can include all of those things and more (based on the size of your capsule). Be creative and have some fun with it.
There are all sorts of printables you can find on line to fill out and include in your “fast forward” project. And of course you can dip into your own personal well of creativity and come up with fun things on your own.
There is an organization called the International Time Capsule Society. If you are so inclined, you can even register your time capsule with them by filling out a form online here. (It is really pretty elaborate.)
Hopefully these ideas got you thinking and wanting to communicate with the future.
Your challenge is waiting in the forum.
About the Author: Kimberlee is a lover not a fighter; a stay-at-home gran, a poet, and a lifelong learner. She grooves on saturated colors, Tuesday dance parties, optimism, glitter and sunshine. She colors outside the lines. She is a dreamer. She is a collector of moments. She is all about the story. Kimberlee completed her MFA in Creative Writing and is just finished her M.Ed. in Instructional Design.
We all have different plans for our weekend, different chores and different ideas of how we want to spend the time. How you spend your weekend now might be quite different than how you spent them last year, or many years ago, and probably will be quite different in years to come. Taking candid shots over the weekend can be fun. I carry a small mirrorless camera with me but also use my camera phone often too. All of the photos I took for my three sample pages were taken with my camera phone. Journaling isn’t required but sure makes the pages more interesting if you document how you spend your weekend. You might think that your weekend isn’t interesting enough to scrap about but, believe me, it is. What you do, where you go, how you spend your time, these change over time and it’s fun to look back on pages that document it.
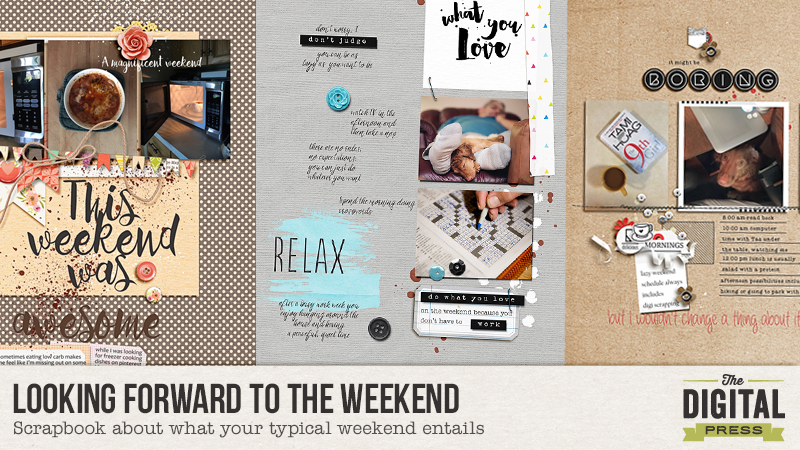
This page is about food, how I discovered a new and simple recipe that I love. After spending most of Saturday preparing and cooking some freezer meals, I made this recipe I found on Pinterest. If I want to try a new recipe I usually wait until the weekend to try it out, when I have more time, as I work Monday-Friday. Food is a great topic for a page; you can scrap about what you ate, where you shopped, maybe a recipe you tried out. The possibilities are endless.
Maybe you might want to document not only your own weekend plans but the plans of your family and/or friends. This page documents how my husband likes to spend his weekend. He drives a lot during the week and on the weekend he is happy to sit back and relax. This page about what he likes to do on the weekend shows how different our weekends are. Mine are usually much busier and I get outdoors a lot more than he does. So this page reminds me of how different our plans can be.
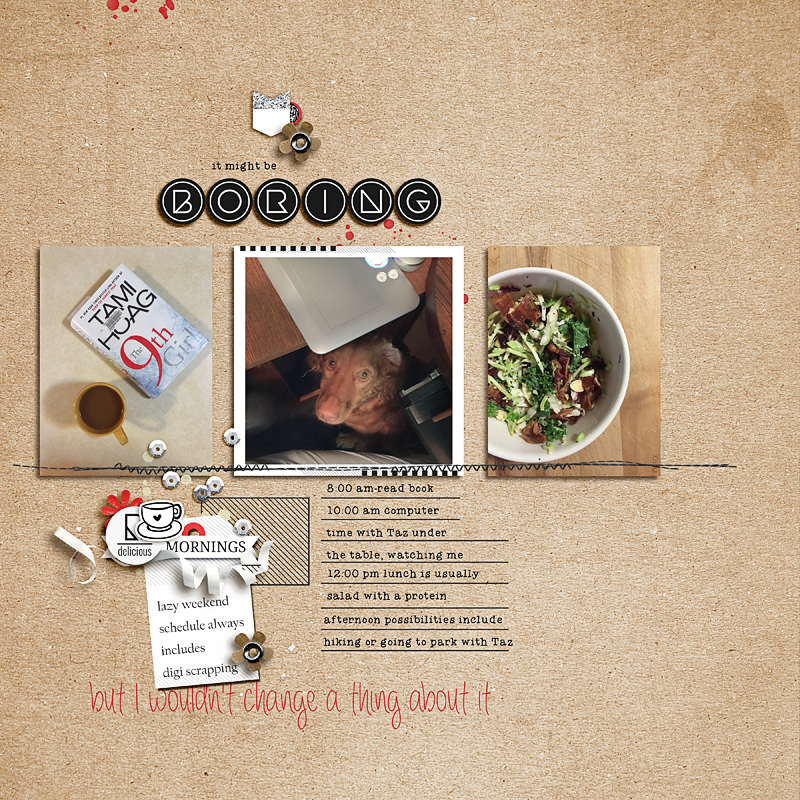
You don’t have to scrap about how you spend your whole weekend; try scrapping a page about part of your day, maybe just the morning, like I did for this page. I scrapped about how I usually spend my Saturday and Sunday mornings. It is my favorite time of the weekend, as I get to relax, have some “me” time and know that I still have lots of time to get all the mundane chores and errands done before Monday, when my work week starts.
I hope that I have inspired you to scrap about your weekend. Head over to the challenge forum to check out this month’s challenges; one of them will be my challenge to scrap about your weekend. I hope you participate and have fun!
About The Author: Rae is a member of The Digital Press CT team. She lives on the west coast of BC, Canada with her husband and Labradoodle, Taz. Digital scrapbooking and photography are her passion. Along with landscape, nature and architectural photography, she enjoys snapping candid photos of her daily life.
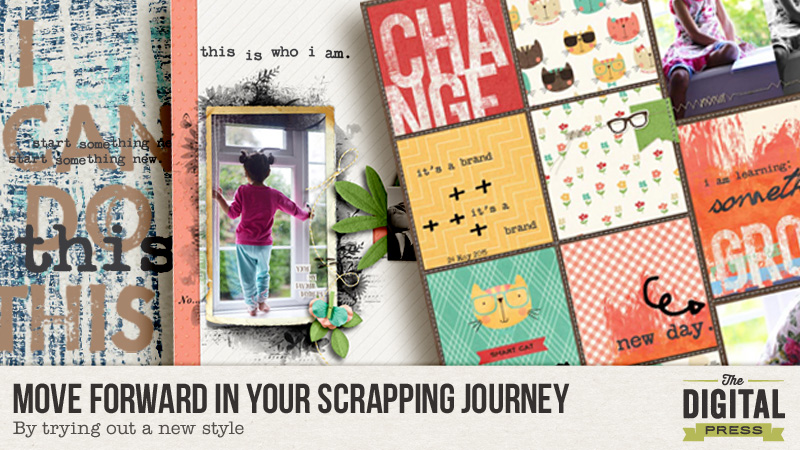
As you all know, this month is all about change – moving forward, trying something new. For most of us, change is a double edged sword – we like the idea but do we REALLY like it?!!!! It depends…you may say. And yes, you are right!!! We are sometimes so set in our little ways (without even realising it) that it is difficult to change.
And that extends to all forms of creativity.So, how do the creative people stay creative? – this is what I find myself asking all the time. When we face a block how do we get unstuck? In our scrapping community,a number of ideas and tips have been shared in the past: scrap-lifting, getting inspiration from Pintrest, building mood boards, looking to other forms of media etc.
I want to talk about something similar today- your style. Each one of us has a scrapping style we are comfortable with and turn to again and again. We may challenge ourselves to try something new from time to time but like a homing pigeon we return to that one style – our comfort zone! I am no different. I am a cautiously-messy scrapper!!!(yeah I just coined that!) but the one style I adore is double page spreads. If I have good pictures I love to put them big, really big!!! and spread them across the canvas.
So I challenged myself to try something new. Something that I wasn’t comfortable with and the answer came quickly – Art Journalling!!! Don’t get me wrong. I love the artful masterpieces I see in the gallery and constantly gasp at the deep thoughts behind them. But to actually try it?… welll…that takes a bit of courage. LOL! I had to push myself.
And taking small steps along the way helped. I want to share the results of my experiment with you here. Tell me what you think!!!
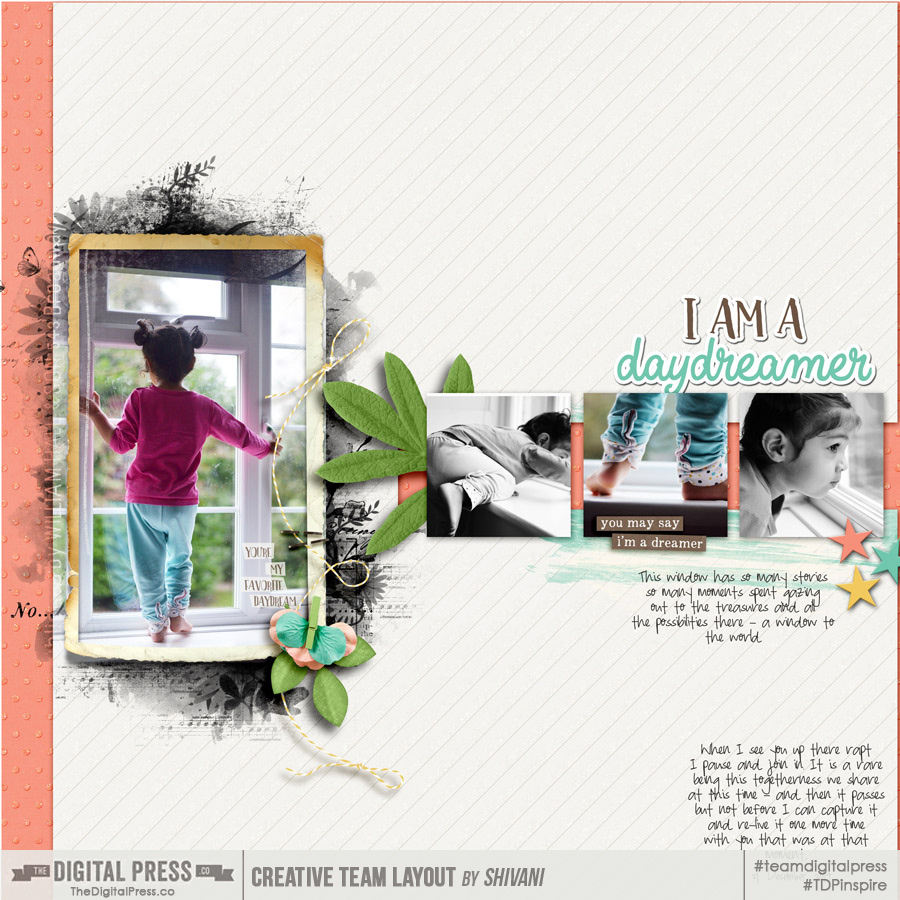
My first example is a split layout with the left part a bit AJ style but I stuck with the clean cut lines for the rest of the layout.What I like about this is that the first photo sets the scene for my layout and gives it that dreamy quality and the rest leaves it free for me to put my photos and do the embellishing (cautious – remember!!!). Best of both worlds, would you say?
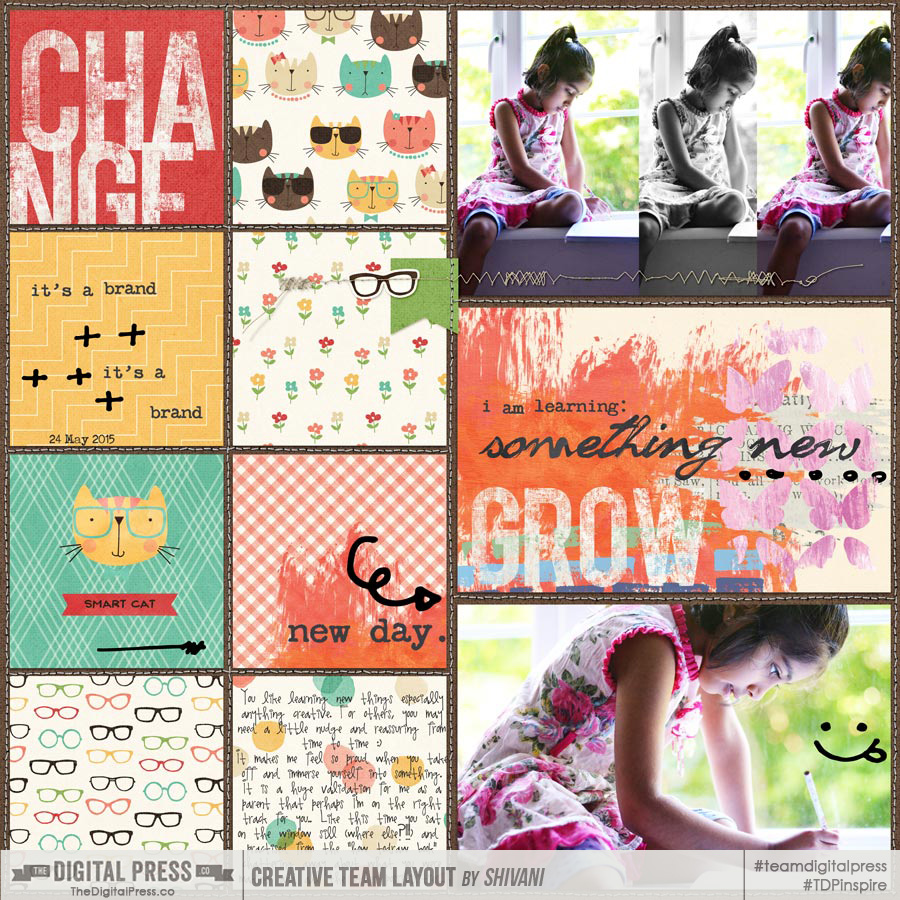
Emboldened by this little detour of an adventure I tried Pocket Art Journalling. A term that I have been hearing quite often recently. So what is it really? As I understand it, it is confining the AJ to just a pocket or a few (depends on you entirely!) within a traditional pocket page. And I liked the idea enough to try it! So have a look. I have used a regular kit and regular papers and elements but for that one pocket of messy creativity!
So that’s it really. I am not sure, objectively, how these have turned out. You can tell me of course! But I feel a little happy and invigorated by having tried it – the process of it all. That is the most important thing about making effort – it always makes you feel good no matter what the results. Hopefully, this will inspire you to take that step outside your zone and scrap something in a new, different style. I can’t wait to see your daring adventures!!!
About the author: Shivani Sohal is a donner of many alter-egos. A finance professional by day in busy London, she morphs into a seemingly normal mum of two in the evenings and weekends. She is constantly found with her fingers in too many pies and juggling the metaphorical balls. That is living on the edge for her; aided by the two ankle biters and a darling hubby who define the warm and mushy for her. She is ferociously dedicated to memory keeping – almost immune to any nay-sayers (or equally disruptive crying children or annoying house fires!!!);keeping her head down and forging ahead at all times.
Now that you know how to get your photos off your camera, let’s talk about how to manage them in a timely manner using Lightroom.
I use Lightroom CC to organize and edit my photos. Lightroom is an extremely powerful tool for doing both. As a Mac user, I have used both iPhoto and Aperture in the past and while I have loved them both for different reasons, I just couldn’t resist the pull of Lightroom because everybody else was doing it! Yes, (bowing head in shame) I followed the crowd. Why, you ask? Because whenever I asked someone how they got their photos looking so good, the answer was always Lightroom. Whenever I saw beautifully processed photos, the answer was always a Lightroom preset. So, I decided to check it out. And while the interface is not nearly as pretty as Apple products, I was not disappointed in its functionality. While my photos definitely look better, I am still no expert in editing in Lightroom. I have, however, come up with an organizing workflow which is definitely worth mentioning. And which is the subject of this post. So let’s get started.
Last month I talked about getting your photos off your camera and into Lightroom. If you missed that post, you can find it here. Once your photos are in Lightroom, there are a number of resources at your fingertips to help you get and stay organized: Rating, Keyboarding and Tagging People.
Ratings
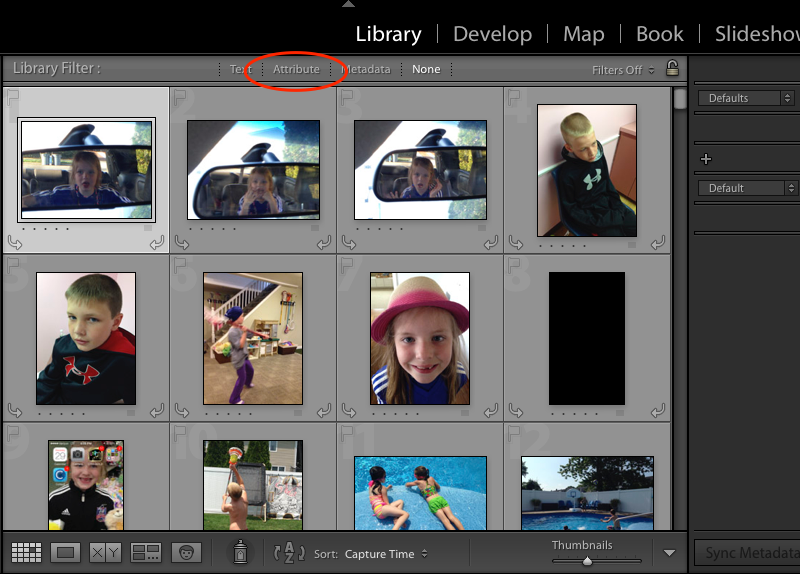
While many people rate their photos using a number of different methods, I keep mine VERY simple. I only use a 5 star rating (I don’t use 1-4 stars at all.) to tag photos that I LOVE and know that I want to scrap one day. These photos are super special photos. They are either beautiful photos with great composition or they evoke a special emotion or relationship that I want to document. So, as I upload my photos to Lightroom, I look at them quickly and if they pull at me, I press the number 5 on my keyboard. That’s it. Then, when I am looking for a photo to scrap, I use Lightroom’s filter system to filter out my 5-star photos and choose one to scrap.
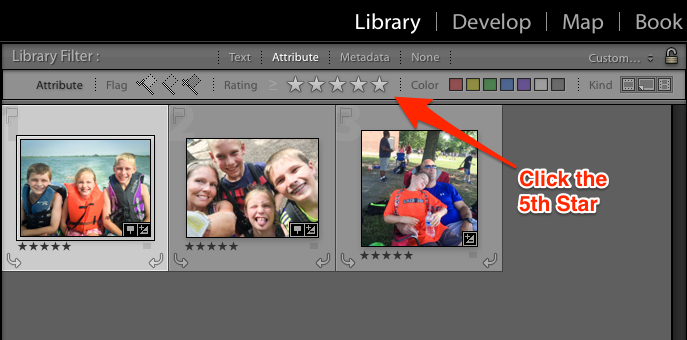
In the Library panel, click on attribute:
Then, click on the 5th Star:
That’s it! Now you will see all of your photos that have a 5-star rating. Pick the photo you want to scrap and scrap away!
Keywords
The next order of business is Keywording. Keywording is very personal, so how you want to keyword is completely up to you. However, I will share with you a few things I have learned about how I search for photos.
I often search by subject to match a Kit’s theme such as travel, bike riding, garden, etc.
I often search by event such as birthdays or holidays.
I often search by grade for school assignments or yearbook requests.
I often search by sport for layouts or because my children are requesting it for school assignments.
I often search by name (but I will discuss this in the next section).
So, here is what I do. Once I upload my photos, I quickly go through them. Because I do upload pretty regularly, (I have to because I shoot in raw which takes up a lot of space on my SD card.) it’s a fairly painless process. Most photos are from the same event and therefore would have the same keywords.
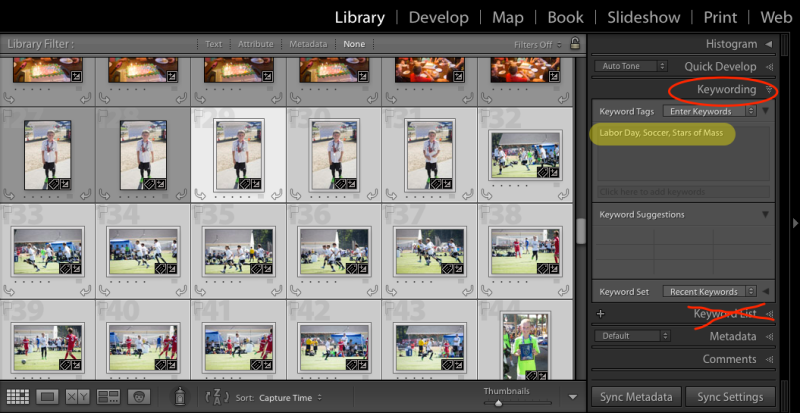
I click on the first photo and shift click and command (Mac) or control (PC) click on the other photos until all of the photos from the same event are highlighted. Then, I type the keywords that they all have in common in the Keywording panel (not the Keyword List). The keyword list is an option where you can just check the boxes next to any existing keywords that you have in order to apply them once you have already created them. However, I prefer to type them in. Especially since it auto populates as you type to finish the keyword for you if you have already created it.
In the example below, they are all photos of both of my sons, playing soccer, at the Stars of Massachusetts Soccer Tournament on Labor Day Weekend. Therefore, those are the keywords I used.
Next, I will weed through those photos and select the ones that are of each of my sons’ teams and keyword them with the team name. Then I will go through the rest of them. I created a video to show you just how quick the process is. You can watch it below:
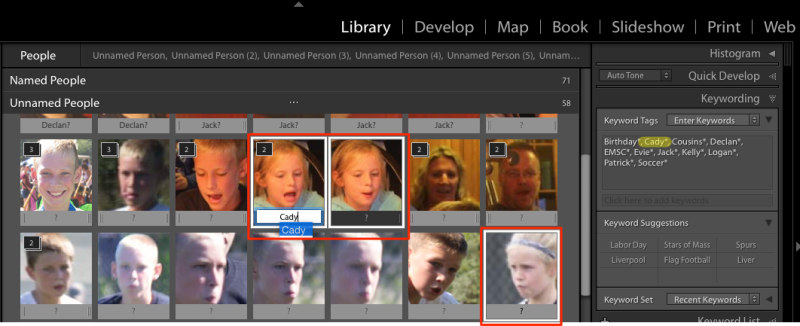
People
Now, I mentioned before that Lightroom now has the ability to tag People using Facial Recognition and I have to tell you, it’s pretty good. However, if you set it to work on large groups of photos, you could be there for a while. But, if you use it on a select group of photos, say, photos you just uploaded, it is a pretty painless process. Once you identify a person in your photo, Lightroom keywords the photo with that person’s name. So in the video above, I didn’t need to keyword the photos with my children’s names. Instead, it makes more sense to tag them using the people tag. This is because the more you use it, the better it gets at identifying people, making it easy to search for photos with specific people in it.
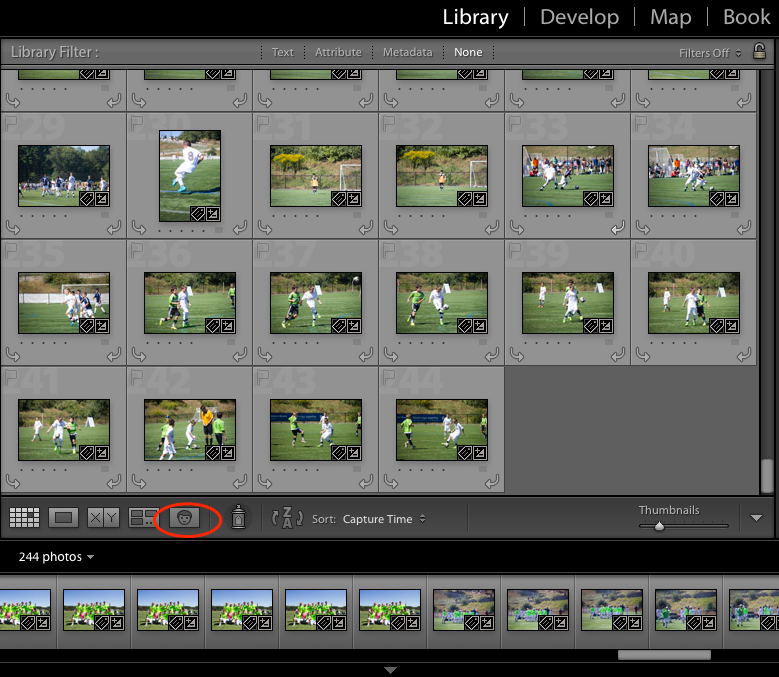
It’s pretty easy to use. In the Library module, all you do is click on the face tab on the bottom toolbar or you can press “O” on your keyboard.
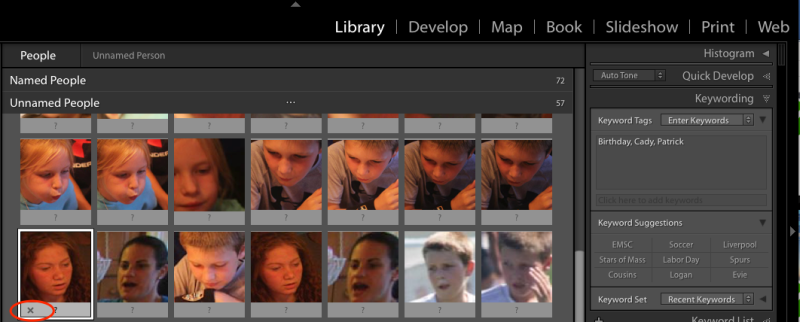
Lightroom will bring up a bunch of faces for you to identify. In the photos I used for the demonstration, there are a lot of faces I do not need to tag. So, the first thing I did was to get rid of all of those faces by highlighting them and clicking on the “X.”
Next, I highlighted all of the photos of one person and type their name into the box below one of the photos which tags them all at once. These tags are then automatically added to the Keywords field of the photos metadata.
One caveat, once you start tagging people, Lightroom begins to think it’s pretty smart and starts grouping photos into stacks that it thinks are all the same person. While it is pretty good, it does sometimes make mistakes. So, you can choose to change it after the fact, or you can unstack a group of photos to make sure they are all correct before you ok Lightroom’s work. To do this, click on the stack icon at the top left corner which will spread them all out and then you can approve them all individually. Personally, I think it is easier to delete one wrong one after the fact than it is to approve them all individually.
Below is another video. This one shows you how easy it is to tag People.
I hope I’ve inspired you to tag and organize your photos as soon as you upload them. If you have any questions, feel free to ask them below and I’d be happy to help in any way I can.
Cheers!
About the Author: Jen is a member of the Pocket Team at The Digital Press. Having scrapped digitally for many years, she has come to embrace the simplicity of Pocket Scrapping since it fits more easily into her busy lifestyle of shuttling her three children from field to field. When she is not on the computer, you will find her working out or really doing anything else she can besides cooking, cleaning and doing laundry.


 We all have different plans for our weekend, different chores and different ideas of how we want to spend the time. How you spend your weekend now might be quite different than how you spent them last year, or many years ago, and probably will be quite different in years to come. Taking candid shots over the weekend can be fun. I carry a small mirrorless camera with me but also use my camera phone often too. All of the photos I took for my three sample pages were taken with my camera phone. Journaling isn’t required but sure makes the pages more interesting if you document how you spend your weekend. You might think that your weekend isn’t interesting enough to scrap about but, believe me, it is. What you do, where you go, how you spend your time, these change over time and it’s fun to look back on pages that document it.
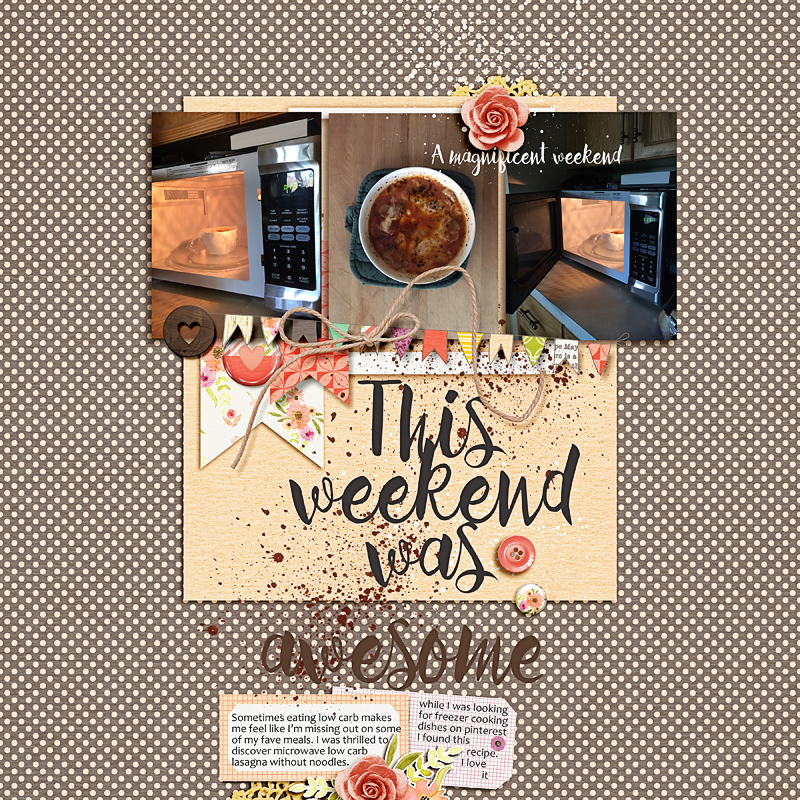 Maybe you might want to document not only your own weekend plans but the plans of your family and/or friends. This page documents how my husband likes to spend his weekend. He drives a lot during the week and on the weekend he is happy to sit back and relax. This page about what he likes to do on the weekend shows how different our weekends are. Mine are usually much busier and I get outdoors a lot more than he does. So this page reminds me of how different our plans can be.
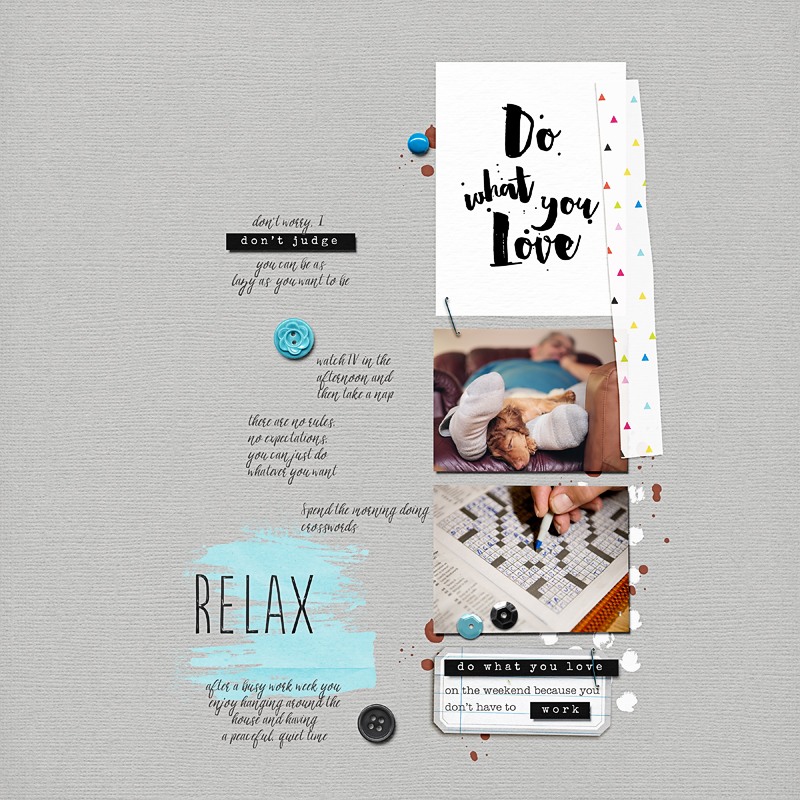
 About The Author: Rae is a member of The Digital Press CT team. She lives on the west coast of BC, Canada with her husband and Labradoodle, Taz. Digital scrapbooking and photography are her passion. Along with landscape, nature and architectural photography, she enjoys snapping candid photos of her daily life.