
Now that you know how to get your photos off your camera, let’s talk about how to manage them in a timely manner using Lightroom.
I use Lightroom CC to organize and edit my photos. Lightroom is an extremely powerful tool for doing both. As a Mac user, I have used both iPhoto and Aperture in the past and while I have loved them both for different reasons, I just couldn’t resist the pull of Lightroom because everybody else was doing it! Yes, (bowing head in shame) I followed the crowd. Why, you ask? Because whenever I asked someone how they got their photos looking so good, the answer was always Lightroom. Whenever I saw beautifully processed photos, the answer was always a Lightroom preset. So, I decided to check it out. And while the interface is not nearly as pretty as Apple products, I was not disappointed in its functionality. While my photos definitely look better, I am still no expert in editing in Lightroom. I have, however, come up with an organizing workflow which is definitely worth mentioning. And which is the subject of this post. So let’s get started.
Last month I talked about getting your photos off your camera and into Lightroom. If you missed that post, you can find it here. Once your photos are in Lightroom, there are a number of resources at your fingertips to help you get and stay organized: Rating, Keyboarding and Tagging People.
Ratings
While many people rate their photos using a number of different methods, I keep mine VERY simple. I only use a 5 star rating (I don’t use 1-4 stars at all.) to tag photos that I LOVE and know that I want to scrap one day. These photos are super special photos. They are either beautiful photos with great composition or they evoke a special emotion or relationship that I want to document. So, as I upload my photos to Lightroom, I look at them quickly and if they pull at me, I press the number 5 on my keyboard. That’s it. Then, when I am looking for a photo to scrap, I use Lightroom’s filter system to filter out my 5-star photos and choose one to scrap.
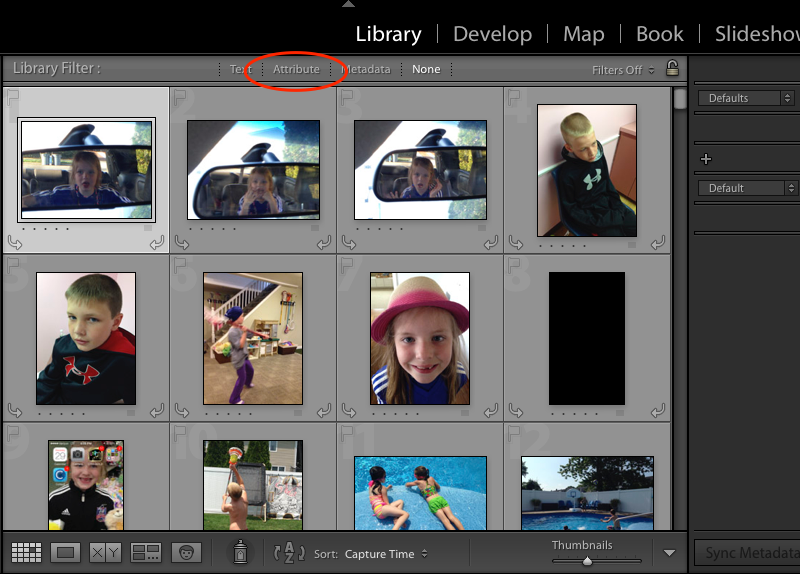
In the Library panel, click on attribute:
Then, click on the 5th Star:
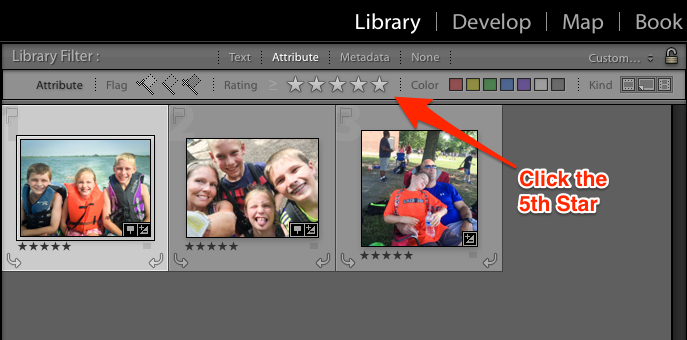
That’s it! Now you will see all of your photos that have a 5-star rating. Pick the photo you want to scrap and scrap away!
Keywords
The next order of business is Keywording. Keywording is very personal, so how you want to keyword is completely up to you. However, I will share with you a few things I have learned about how I search for photos.
- I often search by subject to match a Kit’s theme such as travel, bike riding, garden, etc.
- I often search by event such as birthdays or holidays.
- I often search by grade for school assignments or yearbook requests.
- I often search by sport for layouts or because my children are requesting it for school assignments.
- I often search by name (but I will discuss this in the next section).
So, here is what I do. Once I upload my photos, I quickly go through them. Because I do upload pretty regularly, (I have to because I shoot in raw which takes up a lot of space on my SD card.) it’s a fairly painless process. Most photos are from the same event and therefore would have the same keywords.
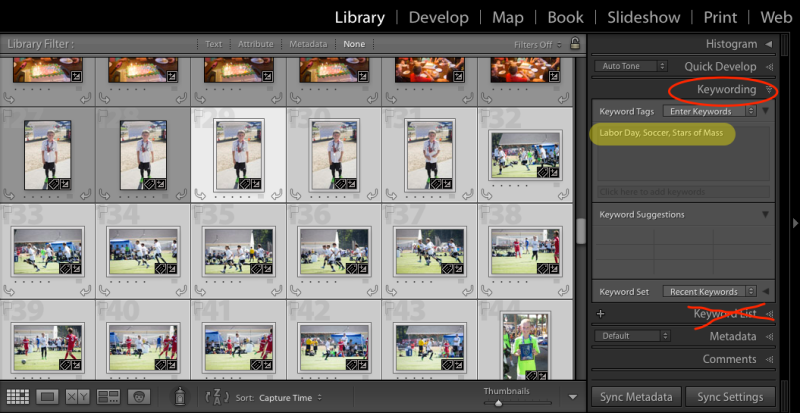
I click on the first photo and shift click and command (Mac) or control (PC) click on the other photos until all of the photos from the same event are highlighted. Then, I type the keywords that they all have in common in the Keywording panel (not the Keyword List). The keyword list is an option where you can just check the boxes next to any existing keywords that you have in order to apply them once you have already created them. However, I prefer to type them in. Especially since it auto populates as you type to finish the keyword for you if you have already created it.
In the example below, they are all photos of both of my sons, playing soccer, at the Stars of Massachusetts Soccer Tournament on Labor Day Weekend. Therefore, those are the keywords I used.
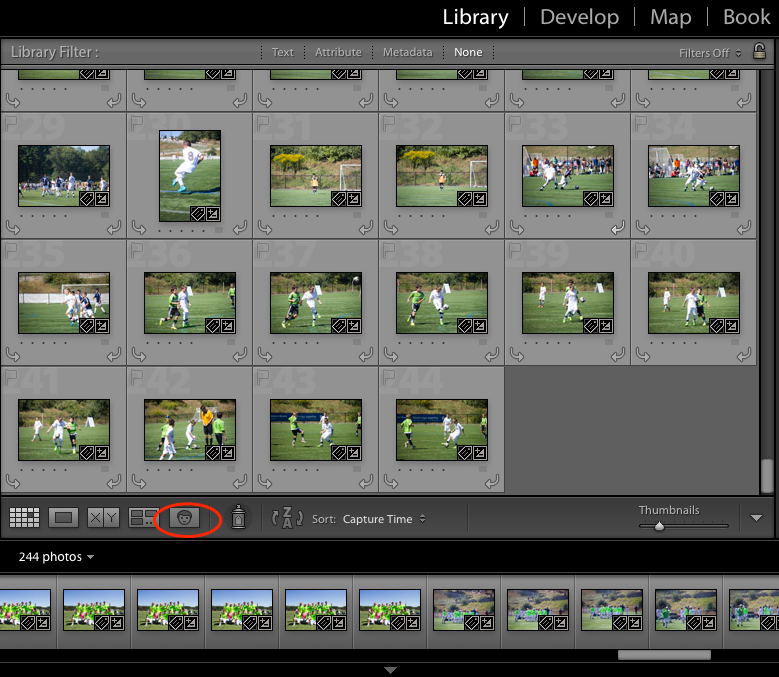
Next, I will weed through those photos and select the ones that are of each of my sons’ teams and keyword them with the team name. Then I will go through the rest of them. I created a video to show you just how quick the process is. You can watch it below:
People
Now, I mentioned before that Lightroom now has the ability to tag People using Facial Recognition and I have to tell you, it’s pretty good. However, if you set it to work on large groups of photos, you could be there for a while. But, if you use it on a select group of photos, say, photos you just uploaded, it is a pretty painless process. Once you identify a person in your photo, Lightroom keywords the photo with that person’s name. So in the video above, I didn’t need to keyword the photos with my children’s names. Instead, it makes more sense to tag them using the people tag. This is because the more you use it, the better it gets at identifying people, making it easy to search for photos with specific people in it.
It’s pretty easy to use. In the Library module, all you do is click on the face tab on the bottom toolbar or you can press “O” on your keyboard.
Lightroom will bring up a bunch of faces for you to identify. In the photos I used for the demonstration, there are a lot of faces I do not need to tag. So, the first thing I did was to get rid of all of those faces by highlighting them and clicking on the “X.”
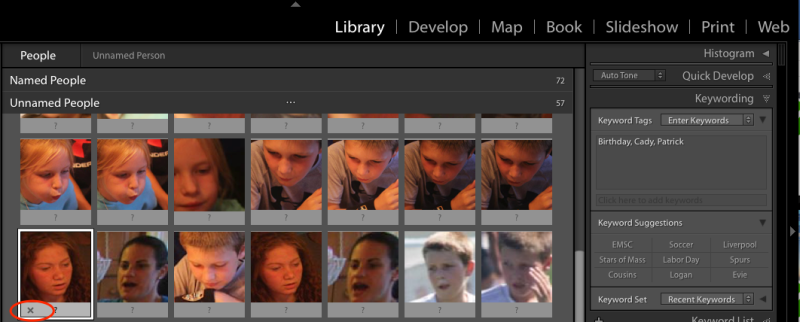
Next, I highlighted all of the photos of one person and type their name into the box below one of the photos which tags them all at once. These tags are then automatically added to the Keywords field of the photos metadata.
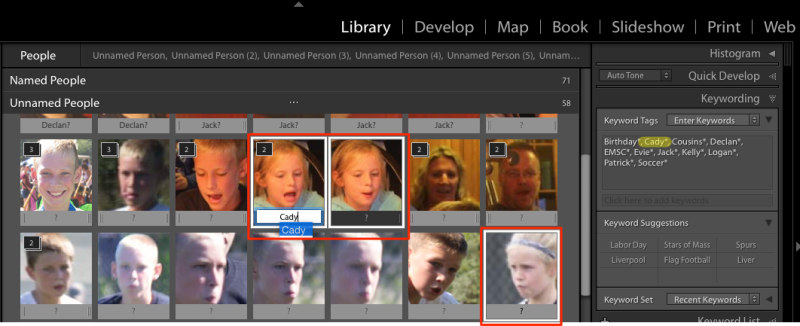
One caveat, once you start tagging people, Lightroom begins to think it’s pretty smart and starts grouping photos into stacks that it thinks are all the same person. While it is pretty good, it does sometimes make mistakes. So, you can choose to change it after the fact, or you can unstack a group of photos to make sure they are all correct before you ok Lightroom’s work. To do this, click on the stack icon at the top left corner which will spread them all out and then you can approve them all individually. Personally, I think it is easier to delete one wrong one after the fact than it is to approve them all individually.
Below is another video. This one shows you how easy it is to tag People.
I hope I’ve inspired you to tag and organize your photos as soon as you upload them. If you have any questions, feel free to ask them below and I’d be happy to help in any way I can.
Cheers!
![]()
About the Author: Jen is a member of the Pocket Team at The Digital Press. Having scrapped digitally for many years, she has come to embrace the simplicity of Pocket Scrapping since it fits more easily into her busy lifestyle of shuttling her three children from field to field. When she is not on the computer, you will find her working out or really doing anything else she can besides cooking, cleaning and doing laundry.