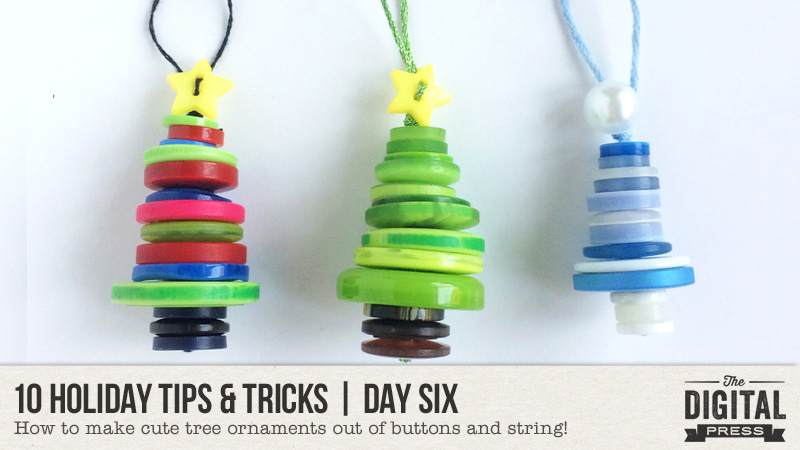
Happy holidays, everyone, and welcome to Day Six of our annual 10 Holiday Tips & Tricks series here on The Digital Press blog! I hope you are having a great time this festive season with all the preparations you need to make, all the films you want to see, the friends and loved ones you want to spend time with, the gifts you want to make or buy, and especially all the food you love to eat!
Today I’m here to share a fun holiday project — making cute little ornaments out of buttons! It’s an idea I saw a while ago, and have been wanting to try… and I found that it is really a quick little project (took me about 10 minutes at most?)… and it could be a fun craft project to do with children or grandchildren, as well as just for yourself.
When I saw this idea last year, I even bought a big bag of buttons in all different shades of green in last year’s New Years sale (with this project in mind)… and then… when it became time to use them for this, well — that big bag of buttons could not be found! Argh! Don’t you hate it when that happens?! Instead, I found a bag of various buttons in a craft shop, and all was well in the world again. 🙂
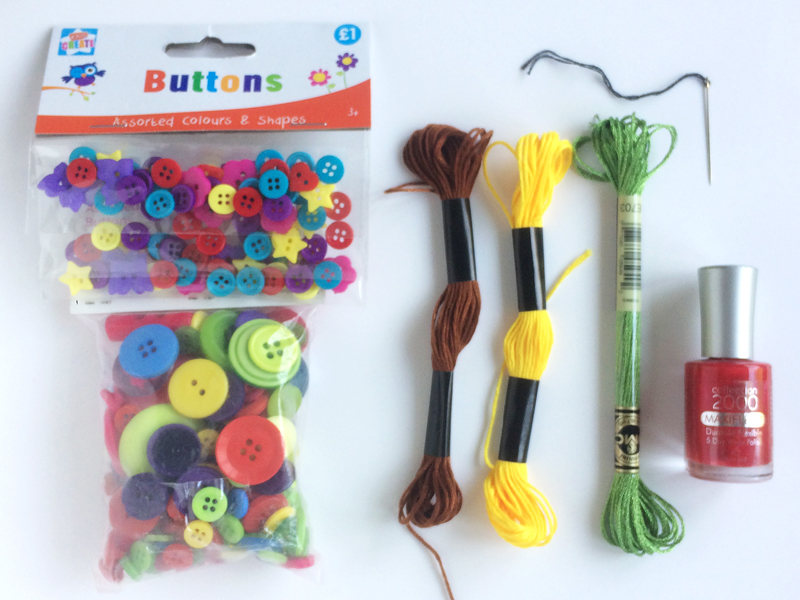
Supplies needed to make your button trees:
- Buttons, of course! (*NOTE* each tree is made of three sections, so you will need 3 or 4 brown buttons for the tree trunk, and about 10 buttons of different sizes and ideally differing shades of whatever color you would like your tree to be, and finally a star button or “tree topper” button. I found a pack of buttons that included some yellow stars, in our local £1 shop… but you can get them at many craft stores)
- String (I used embroidery silks, but any kind of string or thread would be fine)
- Either a needle or some nail varnish (make sure that the needle will fit through the smallest hole, which I discovered may not be on the smallest button!)
How to assemble your trees:
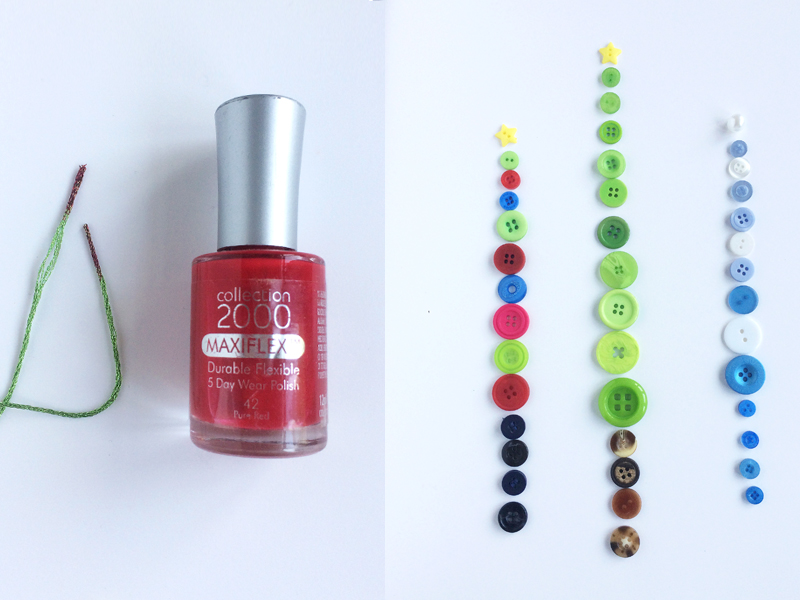
1. Thread your needle, but do not knot the end of the string (OR… if you are not planning to use a needle, paint a little nail varnish on the tip of your string, which will make the fibers of the string stick together, stiffening the end so it doesn’t fray, and making it easier for you to pass it through the button holes).
2. Start with the smallest button and work your way down to the largest, running the string through one hole of each button. I laid my buttons out in order (as shown here) before beginning to put them onto the string…
3. Once you have strung all the green buttons, add the brown tree trunk buttons onto the string.
4. After all the buttons have been strung through one hole, go through the opposite hole and start to pass the string back up to the top of the tree.
5. At the top of the tree, make sure that you have a good couple of inches on both ends of the string, and then make a tight knot to hold all the brown and green buttons together.
6. Now add your yellow star or tree topper button.
7. Finally make loop with the string, so that you can hang this button tree onto your Christmas tree. I tried to be clever and make the loop so that the know would sit behind the star button, and not be seen. One last tip – if you are planning to hang these ornaments on your Christmas tree, you might want to make your loops a little larger than mine (they are on my tree, but we had to carefully select nice slim branches to hang them on!).
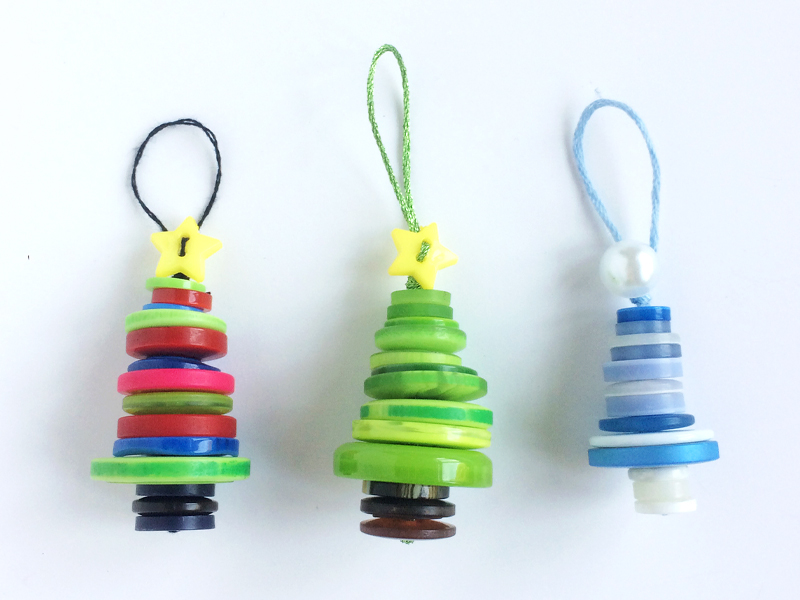
And with that, you are done! As you can see, I tried making a green tree, and rainbow-colored tree, and a frosty blue & white tree — and I love them all! I think they make sweet little tree decorations, or they would also look cute attached to gift tags on gifts. I hope you might have a little fun with this idea too!
If you’re thinking of giving this project a try… head over to The Digital Press’s challenge forum and get the details about how you can earn challenge points for December 2018 at TDP if you try any of our “Holiday Tips & Tricks” throughout the month as they appear here in this blog series! Also, we’d love to see any photos of your holiday projects using TDP goodies in the gallery this month, so link us up after you’re finished creating and uploading! 🙂
Happy crafting and Merry Christmas!
 About the Author Corrin is a member of the creative team here at The Digital Press. She is a fan of the Big Bang Theory and a lover of cozy pajamas or flip flops when the sun finally shines! She lives in the breezy South of England with her husband and 4 crazy kids, who regularly discover & plunder her secret chocolate stashes, and hopes that maybe this will be the year she reaches the bottom of the laundry pile!