Category: Photography Tips

Tutorial Tuesday | PART 4: The Exposure Triangle

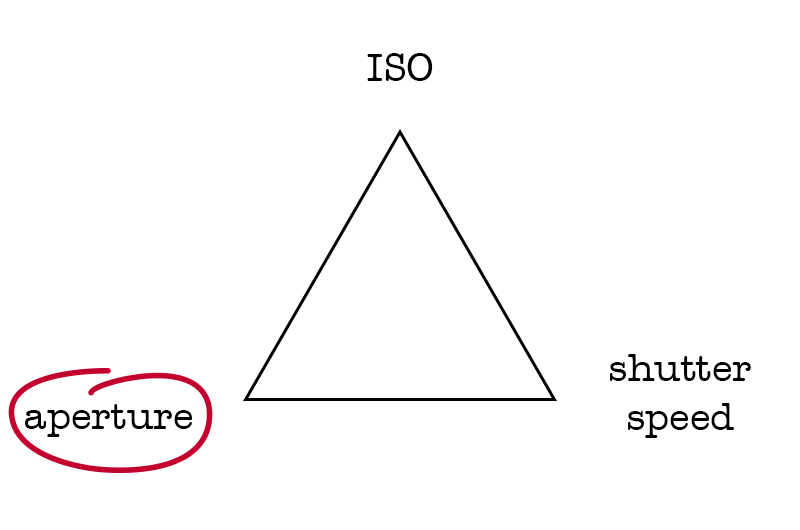
Welcome another edition of our Tutorial Tuesday series here on The Digital Press blog! This is Part 4 of our 4-part photography series all about the exposure triangle. If you’ve happened to have missed this series throughout the past few weeks and you need a recap, you can find the other parts of this series HERE –> PART 1  — PART 2PART 3. To refresh your memory, in the first post we introduced the idea that photography exposure depends on three settings: ISO, aperture, and shutter speed… and then we’ve been exploring each of those in the subsequent editions of the series (ISO in PART 2, and aperture in PART 3).

That means that today we’ll be focusing on the final setting of the exposure triangle — shutter speed.
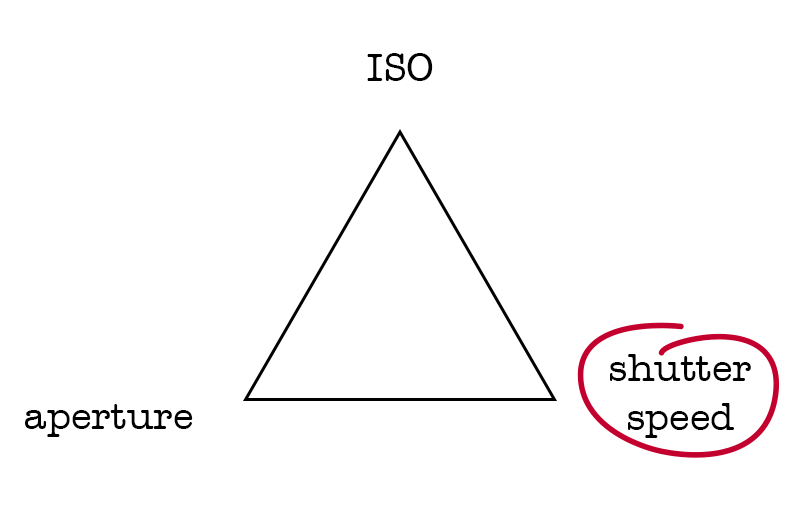
Shutter speed is the time when the “hole” that lets the light come into the camera and hit the sensor remains open. The longer it remains open, the more light gets in, the shorter it remains open, the less light gets in.

As I mentioned in PART 1 of this series, every setting of the exposure triangle has a “side effect.” In other words, each setting has consequences for the exposure… but also on something else in the photo, as well. The shutter speed impacts the way movement will be captured in the camera. Shutter speed indicates how long the action of taking the picture will last. If you photograph a car going from point A to point B with a fast shutter speed, you will freeze the movement because you will take the image instantly. If you use a slow shutter speed, the car will be blurred because the image will be taken while it’s starting on point A, and while it’s 5 feet away from point A, and another 5 feet away, etc.

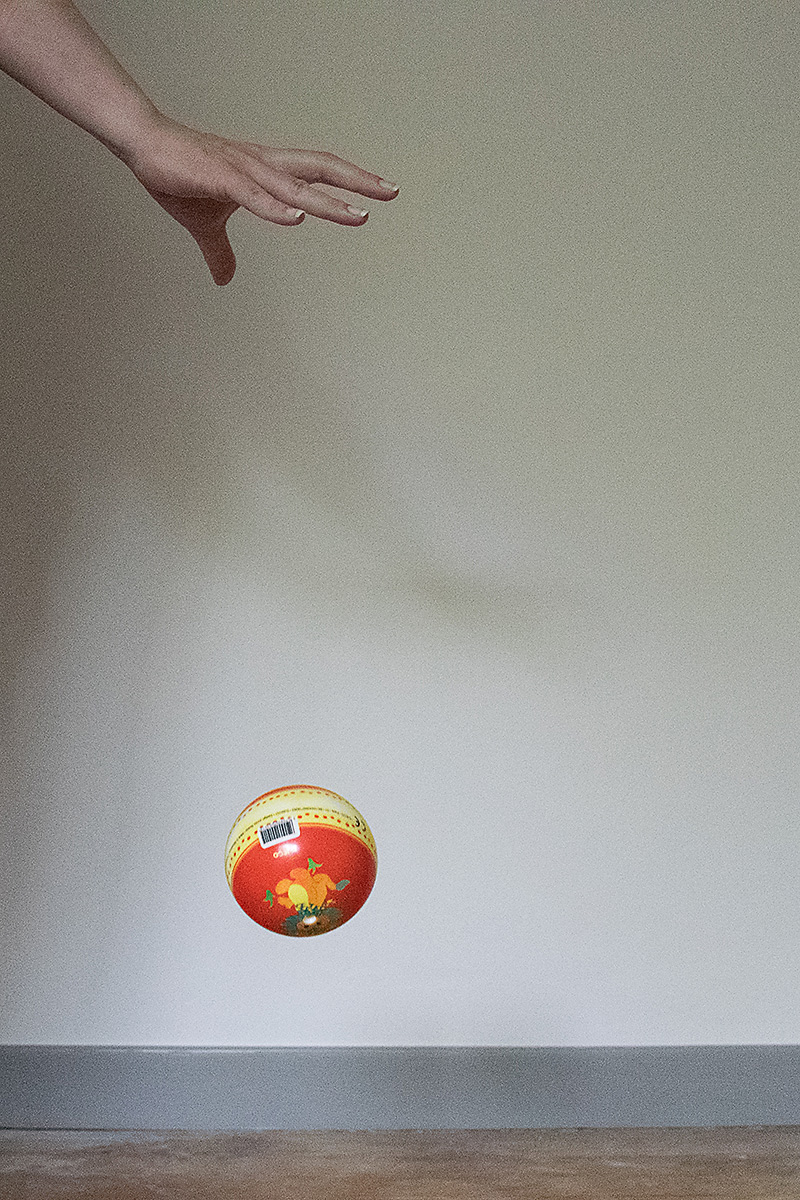
In this first photo I used a fast shutter speed (1/500th of a second) to freeze the movement. The ball looks like it’s floating in the air. You may have noticed that my ISO was pretty high because I had very little light in the room… thus causing some noise (as we saw in PART 1).
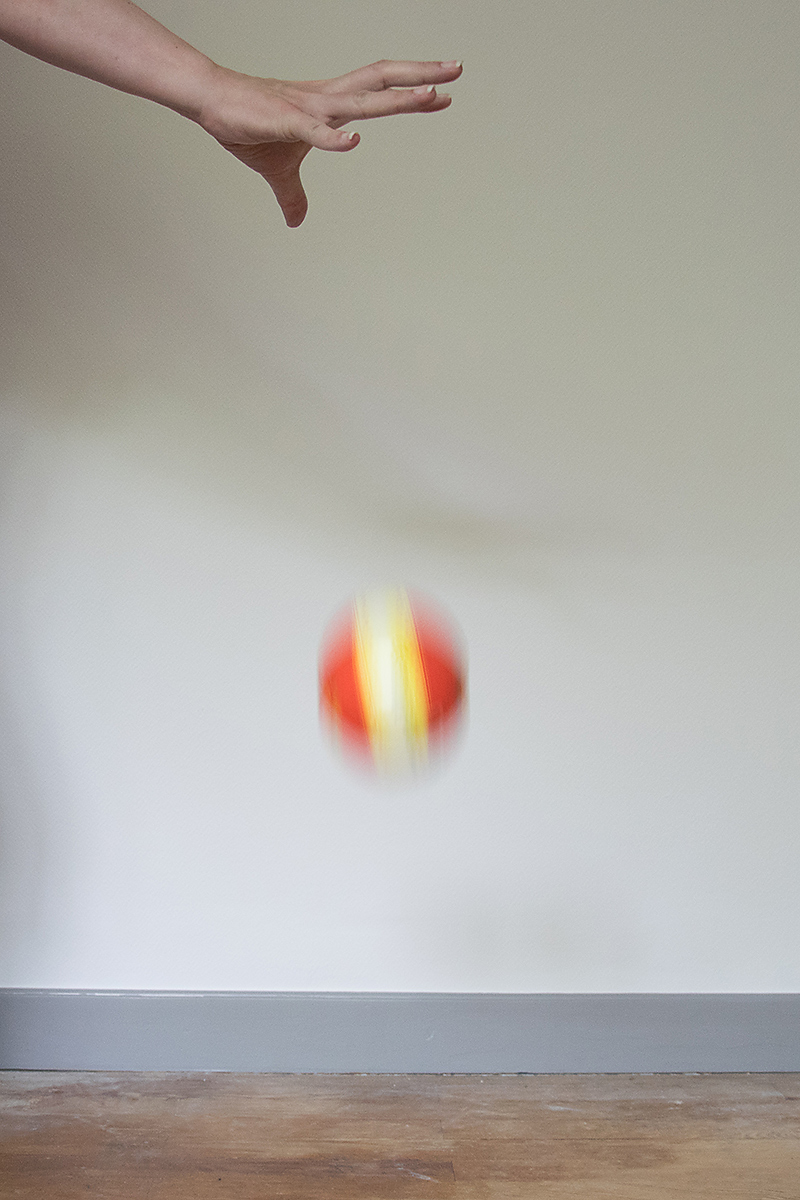
In this second image, I chose a medium shutter speed (1/50th of a second) to show some movement, but the ball is still recognizable.
In this last image, I chose a slow shutter speed (0.6 second) and the ball is so blurry it’s not as recognizable anymore. My hand is blurry as well, even though the only movement I did was to open it to release the ball.
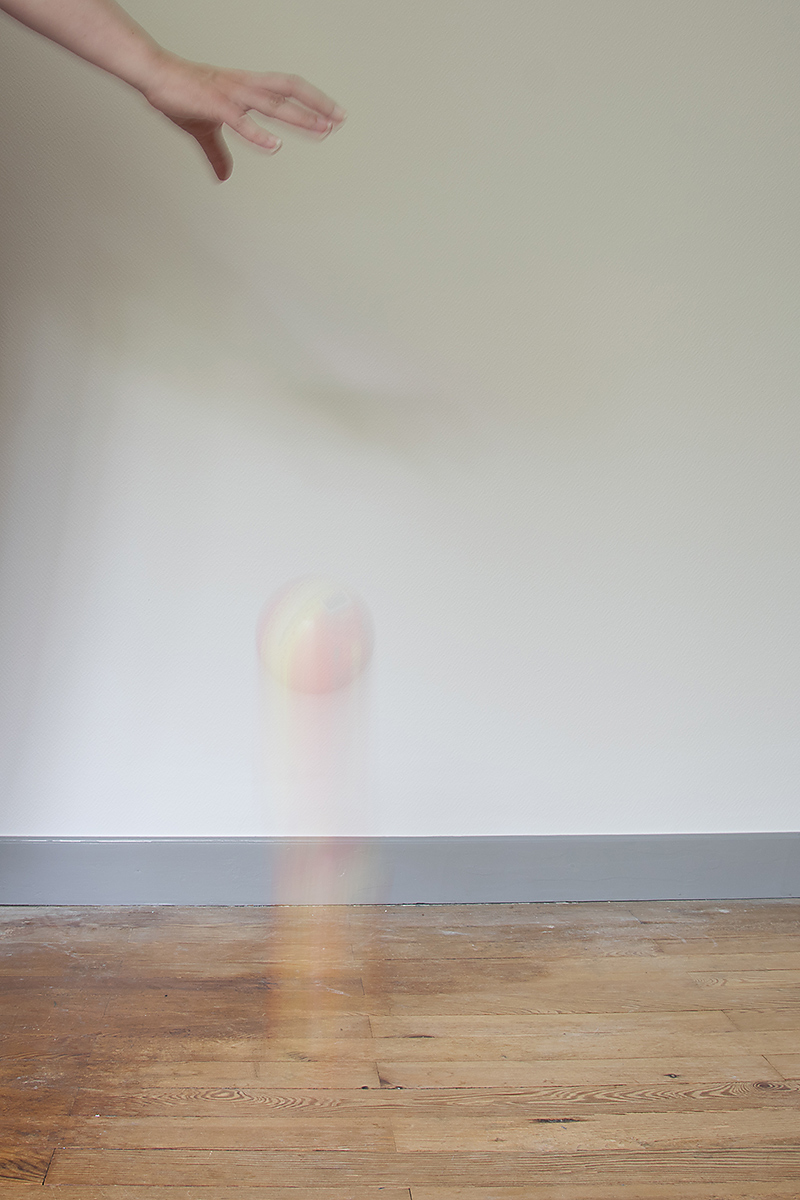
As you can see, one second may seem like a very short time in our regular life, but for our camera it’s considered to be a very slow shutter speed. Whether a shutter speed is slow and will create blur… or fast enough to freeze the movement… will also widely depend on your subject. For instance, you will need a much faster shutter speed to capture a sharp photo of a moving car than of someone walking.

In PART 2 and PART 3 of this series I said that ISO is a setting you can set on “auto” if you are just starting to shoot manually, because ISO doesn’t have much impact on the “creative” part of taking a photograph, but that it’s best if you decide on the aperture. Shutter speed is another setting that can drastically change the outcome so it’s important that YOU decide what it will be.

For example, you might want to freeze the movement and hence use a fast shutter speed.
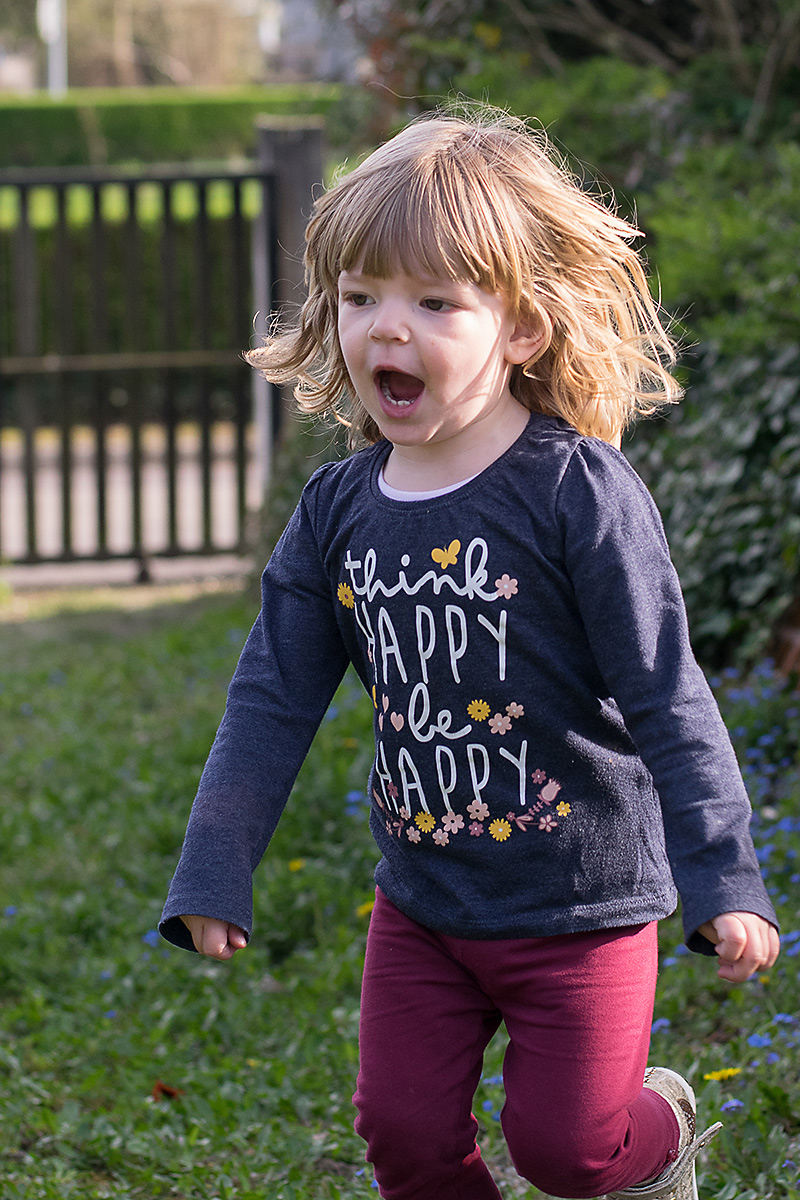
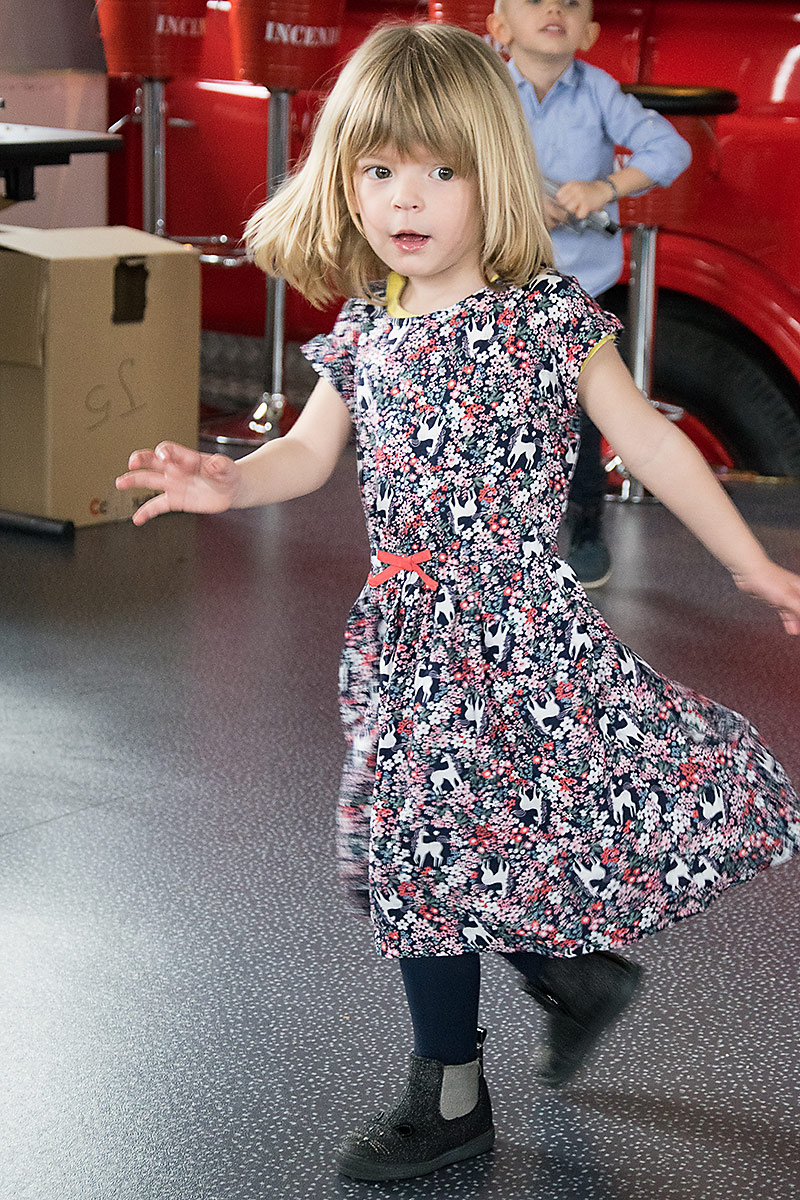
Having a tiny bit of blur gives a sense of movement, like here with the foot, the dress and the hair:
On the contrary, you might want to purposefully create some blur to show movement, like I did here on those bikes from the Tour de France:
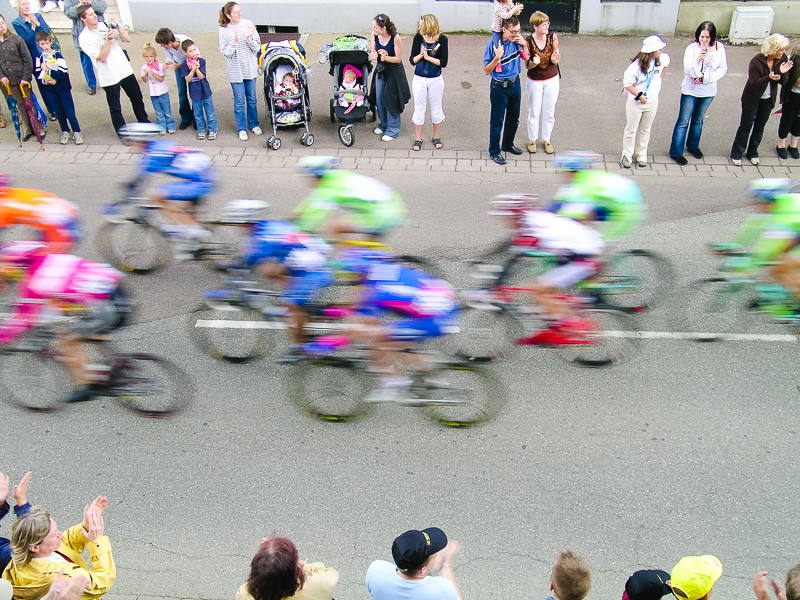
As you can notice, the shutter speed I chose was fast enough to freeze the people standing on the side of the road but too slow for the fast moving riders. I could have done the “opposite” effect called panning: by following the riders with my camera, they would be sharp while the environment would be blurry. Both options give a sense of movement for a dynamic image.

Slow shutter speed is also amazing to photograph moving lights, like fair attractions at night or those fireworks:
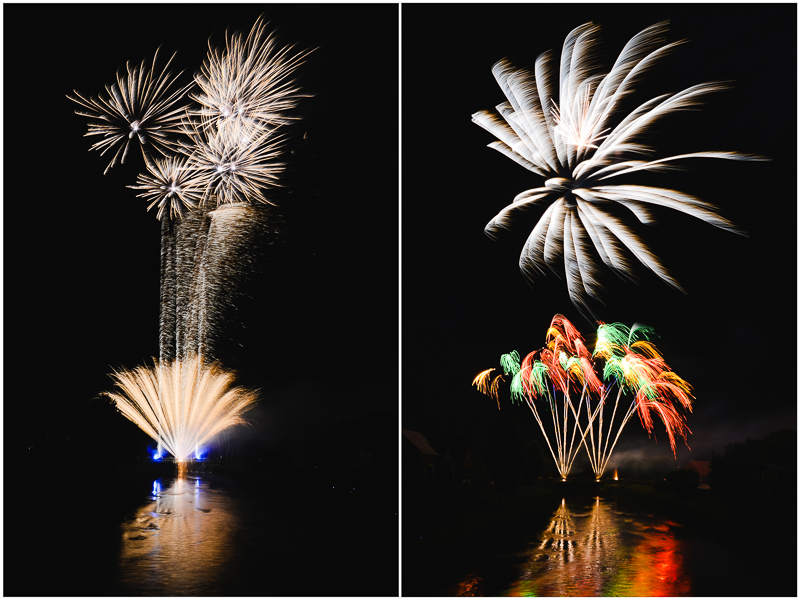
Be careful with slow shutter speed, though, as you can create unwanted blur. It can be caused by your subject moving too fast for your shutter speed (but in an unintentional way, unlike the examples above) or by your own movements while holding the camera. To avoid “camera shake”, the rule of thumb is to never go below 1/Xth of a second, X being the focal length of your lens. For example if you have an 18-105 zoom, never go below 1/100th of a second. With a 50 mm lens, you can go to 1/50th of a second. Below that, you will have to be very careful and ideally use something sturdy to support your camera (a tripod, a fence, a car) or for you to lean on (a wall).

Now, how do you change shutter speed? If you’re not comfortable using the manual mode of your camera (where you choose all the settings), you can use the speed priority mode: you decide on the shutter speed and the camera picks the other settings in order to have a correct exposure. This “semi-automatic” mode is often represented by the letter S (Nikon) or Tv (Canon) and it gives good results in most situations. It is a good way to experiment with shutter speed without having multiple settings to worry about and it is a great way to start learning about shooting manual.

This is the last post in this series about the exposure triangle! I hope you learned a few things about this very important concept of photography… and that you will also have fun experimenting with the settings! I cannot wait to see the photos you capture (scrapped beautifully and posted in The Digital Press gallery)!


ChloéAbout the author  Chloé is in charge of PR and communication for her small town by day, a digiscrapper “by night,” and a photographer whenever the light is beautiful. She recently became a very happy mom to an adorable little boy.

Tutorial Tuesday | Photography with Artificial Light

Hello, and welcome to another edition of our Tutorial Tuesday series here on The Digital Press blog! Today I’ll be sharing ways to use many under-utilized artificial light sources around your home in order to snap memorable photos and document your life.

Why does the light source matter?

Back in March, I shared a post here on the blog containing tips for using window lighting for capturing photos, and today I’m back to talk about the similar use of artificial light. What’s the difference, and why does it matter? Well, several reasons:

  • Always know your light source, and avoid mixing them
  • Size of light source matters (in general, artificial light sources are smaller than what you’re likely used to working with, and this requires a bit more planning and arrangement to get the photo you want because of how dramatic the shadows are likely to be; more on that later!)
  • Overhead lights don’t count. I only use overhead lights if it’s absolutely unavoidable, as the shadows are often not flattering (or non-existent) and lend themselves better to snapshots and not photographs.

If you have a DSLR camera, I recommend pulling it out to try these ideas. Be prepared to use your highest ISO settings on you DSLR. This tutorial by Chloe is a great intro (or refresher!) on setting exposure. You may be able to get similar results with a cell phone camera… if you can put it into manual exposure mode.

The subtle art behind indoor photography is revealing little bits of light to tell your story, so be prepared for lots of shadow.

Now, let’s jump in!

Computer Monitor — Rim Lighting Effect

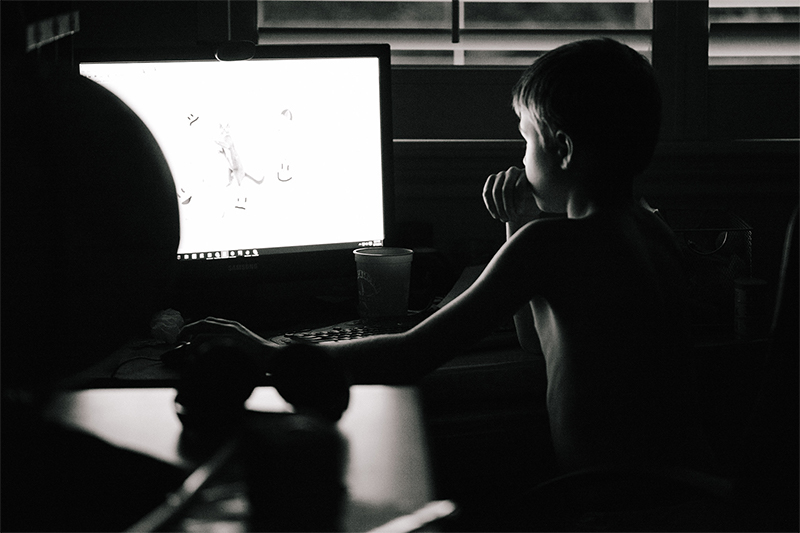
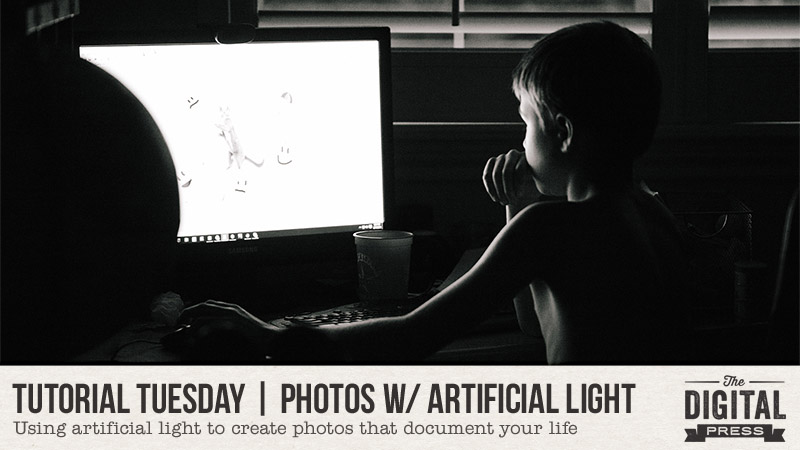
My son would live in front of his computer if I let him, so capturing images of him at his desk is important to documenting who he is right now. My goal here was to capture him as I see him… with his face lit up by the screen of his monitor. The very bright light from the monitor quickly fades away and leaves much of this image in shadow, but the way the light frames his face and arm is called “rim lighting”.

To try this yourself: Use your DSLR in manual exposure mode, then set exposure for the brightest spots on the skin of your subject (here I exposed off the skin on his cheekbone). Be sure to eliminate all other light sources or you won’t get that rim lighting effect! Rim lighting is meant to be bright light and dark shadow with little gray in between.

Computer Monitor — as Direct Light Source

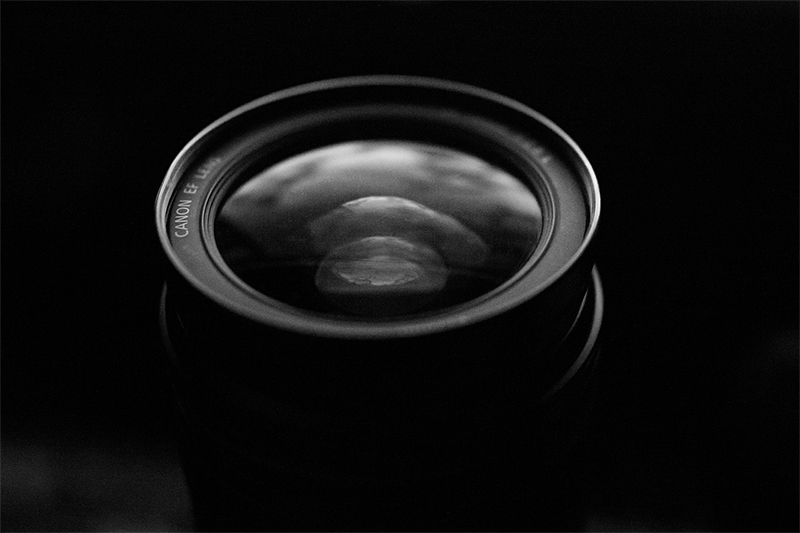
Direct Light is light that goes from the source straight to your subject.  In the lens example above, I simply placed the lens on my desk about 6 inches away from the monitor. I love the way the light reaches down into the layers of glass within the lens, and highlights the repeated circles. Notice that the light “falls off” so quickly that it doesn’t even extend down the full length of the lens! This is perfect for helping me hide all the other junk on my desktop that I didn’t need in my image. 🙂

To try this yourself: Use your DSLR in manual exposure mode, then set exposure for the brightest spots on the object you are photographing. Be sure to eliminate all other light sources in the room so you capture all that wonderful shadow! This would work well for a favorite pen, a steamy cup of coffee, or anything else that is slightly reflective!

Laptop — as Portable Light

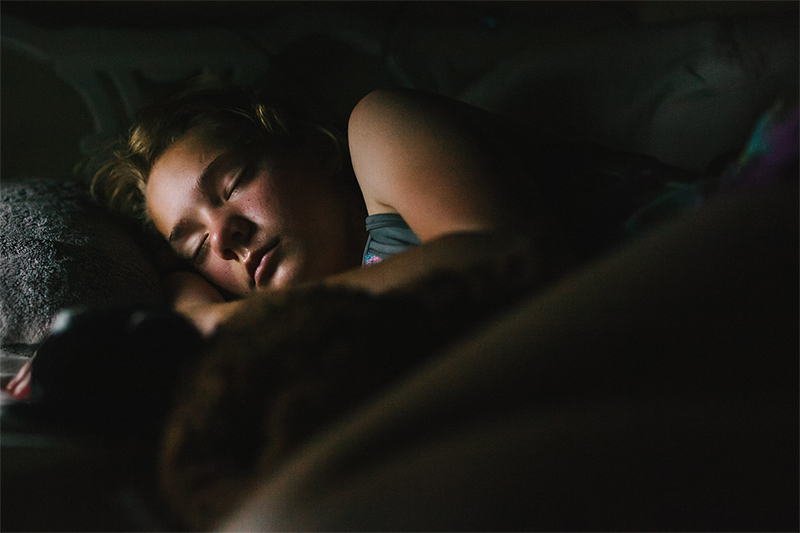
I really wanted a picture of my oldest sleeping. Her room was lacking a suitable light source, however — so enter the laptop as a portable light! I positioned my laptop on it’s side on her night stand, pretty close to her face and just out of sight to the left in this image.  I found that putting it on it’s side allowed the light to project straight out, vs. the downward angle of a laptop screen when it’s upright and in use. (also note, my sweet sleeping angel called me a creepy stalker when she saw this! LOL).

To become a creepy stalker yourself: Use your DSLR in manual exposure mode, then focus and set exposure for the brightest spots on the skin of your subject. As always, be sure to eliminate all other light sources in the room so you capture all that wonderful shadow! You could also use a laptop on a subject fully awake too, but where’s the fun in that?!

Book Light — as Indirect Light

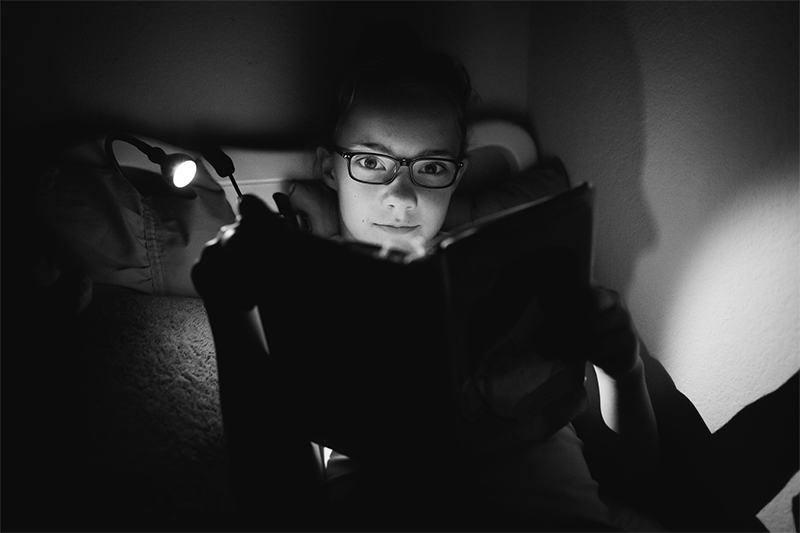
This is one of the easiest techniques! See that tiny book light on the left of the image, above? That’s the only light source in this whole image! Since the white paper of a book is a perfect reflector, the light bounces off the pages right back onto my subject’s face. The light would be way too harsh if I simply pointed it straight at her face, so using the book to distribute the light back into her face was the perfect solution.

To try this yourself: Grab a book light and make your kid read for 5 minutes. Position the light down onto the book, play with the angle of the book to get the most flattering light on your subject. Eliminate all other light sources. Use your DSLR in manual exposure mode, then set exposure for the brightest spots on the skin of your subject.

Cell Phones and Tablets

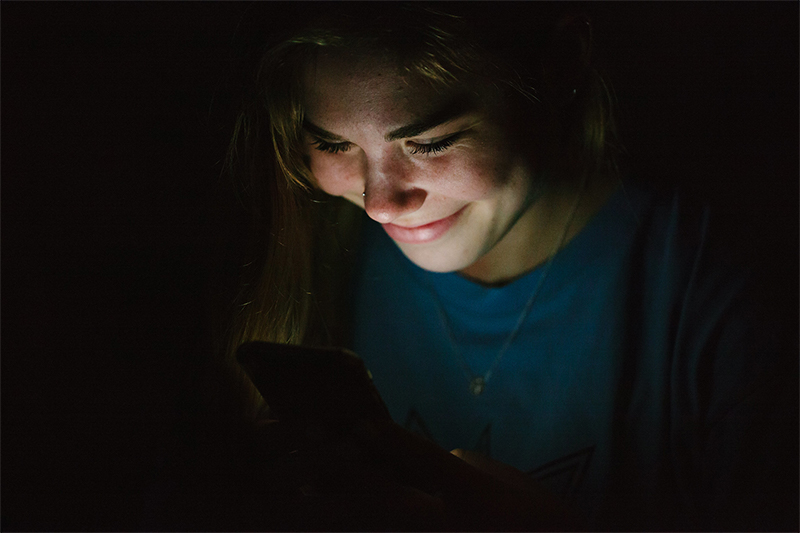
This is another SUPER easy technique! I had my niece hold the phone a little closer to her face than normal, set exposure off the skin on her cheekbones, focused on her eyelashes, and clicked. So easy! She was even sitting on my daughter’s bed, in the middle of her messy bedroom, and you wouldn’t even know it!

Black and White is Your Friend

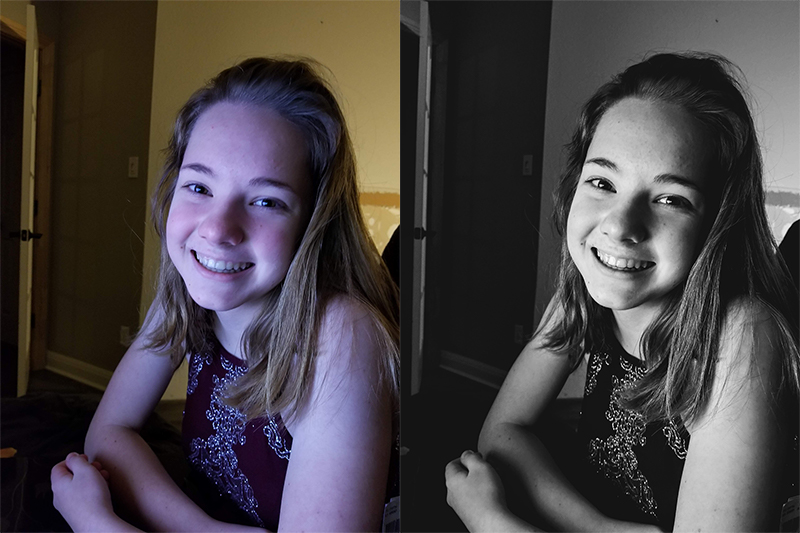
I snapped this purple-skinned image with my cell phone one night after my teen spontaneously joined me while I was scrapbooking. Sure, i could use Photoshop to edit the skin tones… but I’m WAY too lazy for that! One click on a black and white preset — and voila — a beautiful black and white snapshot I’m perfectly happy with, allowing me to remember that moment forever — on a scrapbook page, of course!

[ Layout created using “Our Story” by KimB Designs ]

Don’t be afraid to convert to black and white. Many photos with low lighting tend to look awesome in black and white, which further accentuates the play of light and shadow. Give it a try, yourself!

Thanks for joining us today on the blog! I hope all of these ideas encourage you to try capturing images around your home using all those underappreciated sources of light! And don’t forget you could try many other light sources, as well — like fridge lighting, candles, televisions, etc.!


About the Author  Beckie is a creative team member at The Digital Press who lives near Austin, Texas. In addition to scrapping and photography, she enjoys spending time with her family, reading, and ignoring household chores. 
Tutorial Tuesday | PART 3: The Exposure Triangle

Welcome another edition of our Tutorial Tuesday series here on The Digital Press blog! This is Part 3 of our 4-part photography series all about the exposure triangle. If you happened to miss it a couple of weeks ago and need a recap, you can find Part 1 HERE and Part 2 HERE. To refresh your memory, in the first post we introduced the idea that photography exposure depends on three settings: ISO, aperture, and shutter speed. and we explored ISO in part 2.

Today we’ll be focusing on the aperture setting in the exposure triangle.

Aperture is the size of the “hole” that lets the light come into the camera and hit the sensor. As we saw in the first post, it’s expressed as a fraction. An aperture of f/2, for example, means that the “hole” equals the focal length of the lens divided by 2. As it is a fraction, a big aperture number will mean a small “hole” and hence less light coming in, and a small aperture number will mean a big “hole” and hence more light coming in. Photographers often say they shoot “wide open” (small aperture number) or “closed down” (big aperture number)

As I mentioned in Part 1 of this series, every setting of the exposure triangle has a “side effect.” In other words, each setting has consequences on the exposure but also on something else in the picture. The aperture impacts the depth of field of the photograph. Depth of field is the “slice” of the image that is sharp, in focus, when everything in front of it and behind it is blurry. How shallow or deep the depth of field will be depends on the aperture. Other factors, such as the lens and the distance, also come into play but that’s a topic for another blog post. For now, let’s focus on how aperture influence depth of field!

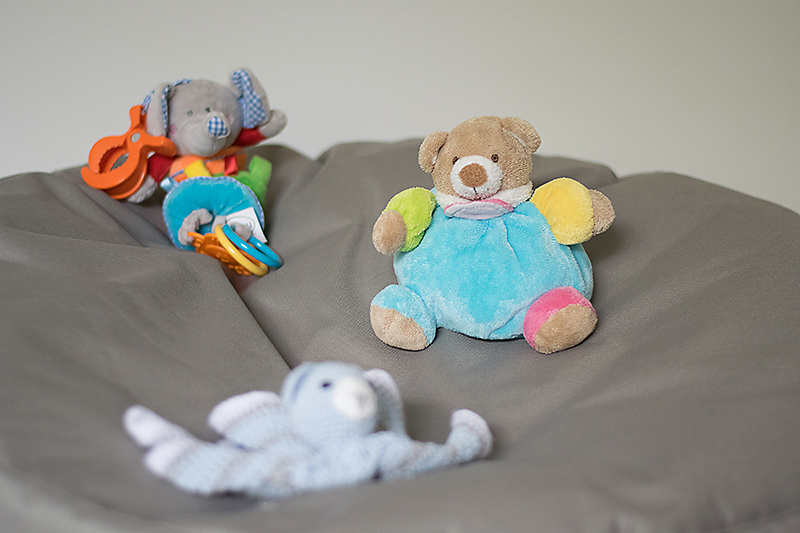
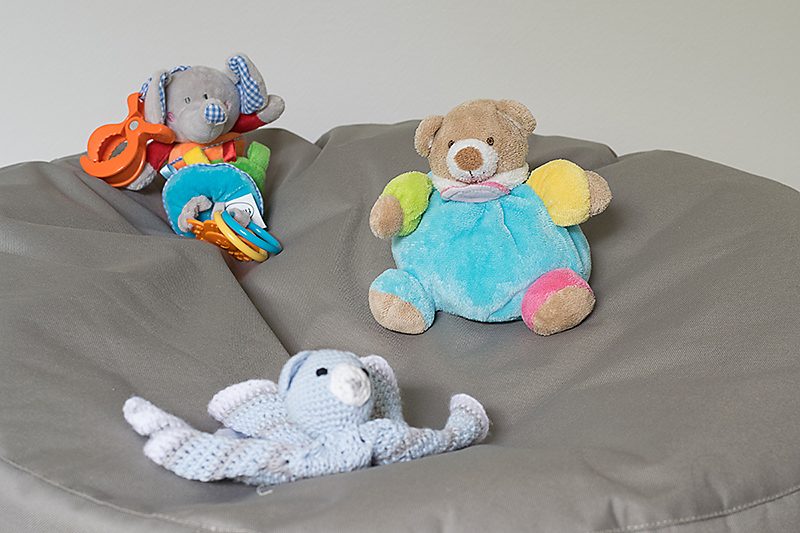
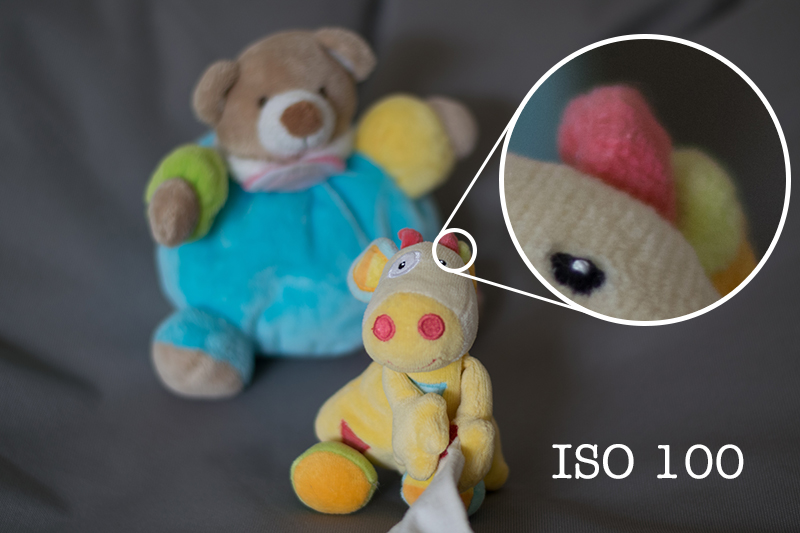
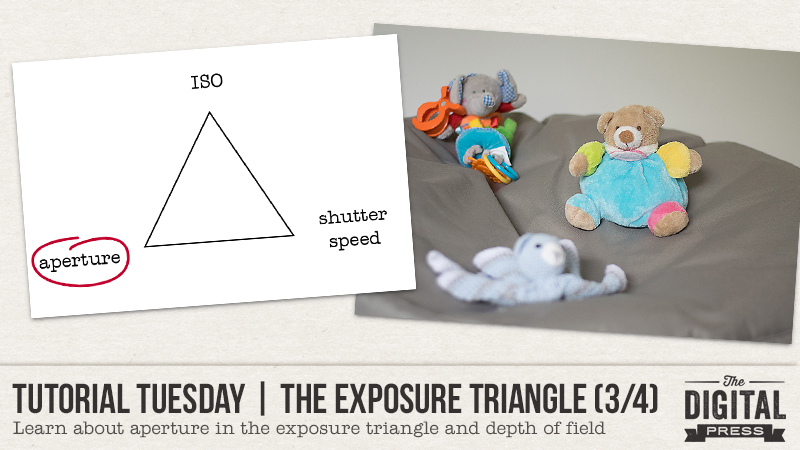
In the three next photos, I only changed my settings but didn’t move the camera or the toys. First, let’s start with a big aperture (small f/number, f/1.8 in that case). It will allow a lot of light in and will create a shallow depth of field: the “slice” of sharpness will be very small. For example, here the toys are situated one behind the other and only the one I focused on (the teddy bear on the right) is sharp. The blue bear on the front is further away from the toy I focused on than the elephant in the back, that’s why it’s more blurry than the elephant.

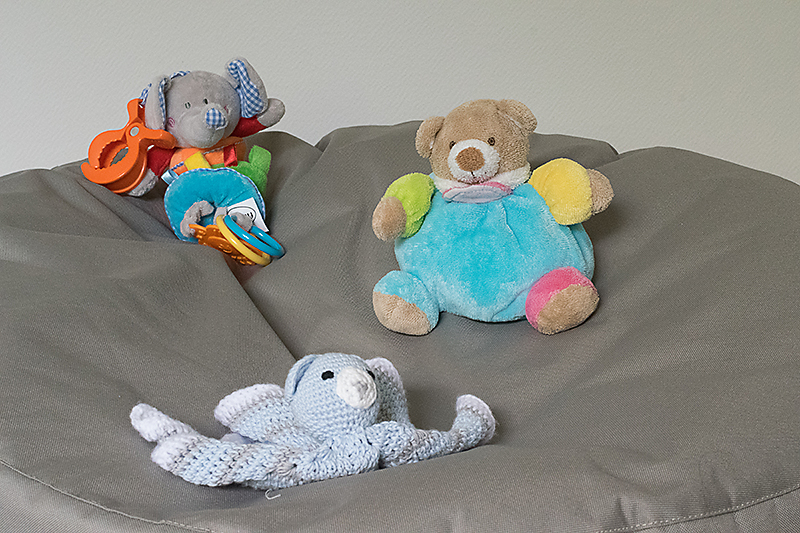
On this second image, I picked a “medium” aperture (f/6.3) and the subject (still the same teddy bear) is still sharp while the other two are sharper, but still blurry.

A small aperture (big f/number, f/16 in my example) will allow very little light and will create a deep depth of field: a lot of the image will be in focus. As you can see here, all three toys are sharp.

See the difference?

In the part 2 of this serie I said that ISO is a setting you can set on “auto” if you are just starting to shoot manually. That is because ISO doesn’t have much impact on the “creative” part of taking a photograph. Aperture, on the contrary, with its impact on depth of field, can totally change the image so it’s important that YOU decide which aperture to use. Do you want to blur the background of your subject? Do you want to create bokeh (this beautiful artistic blur)? Pick a wide aperture.

Do you want to have a very sharp image, where all of it is in focus, for example for a landscape photo? Do you want to create sunbursts? Pick a closed down aperture.

If you’re not comfortable using the manual mode of your camera (where you choose all the settings), you can use the aperture priority mode: you decide on the aperture and the camera picks the other settings in order to have a correct exposure. This “semi-automatic” mode is often represented by the letter A (Nikon) or Av (Canon) and it gives good results in most situations. It is a good way to experiment with aperture without having multiple settings to worry about and it is a great way to start learning about shooting manual.

In two weeks we will end this serie with shutter speed. See you soon!


ChloéAbout the author  Chloé is in charge of PR and communication for her small town by day, a digiscrapper “by night,” and a photographer whenever the light is beautiful. She recently became a very happy mom to an adorable little boy and is enjoying the last days of her maternity leave.

Tutorial Tuesday | PART 2: The Exposure Triangle

Welcome another edition of our Tutorial Tuesday series here on The Digital Press blog! This is Part 2 of our 4-part photography series all about the exposure triangle. If you happened to miss it a couple of weeks ago and need a recap, you can find Part 1 HERE. To refresh your memory, in that first post we introduced the idea that photography exposure depends on three settings: ISO, aperture, and shutter speed.

Today we’ll be focusing on that first variable — the ISO setting in the exposure triangle.

ISO is the sensitivity of the sensor. A high ISO means that the sensor of the camera is more sensitive to light, that it will “capture” every bit of light available, so to speak. More light is let in when you choose a high ISO number; conversely, less light is allowed in whenever you choose a lower ISO number.

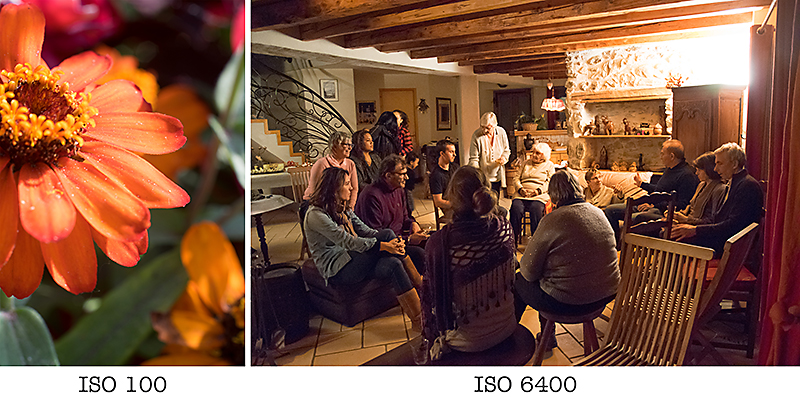
What does this mean when you’re taking photographs? Well, for example… on a bright, sunny day outside you can choose a lower ISO (usually 100; sometimes 50) on most cameras. The opposite is true when you are indoors taking a photo in a room with very little light (at night, for example… or in a room with a tiny window and no lamp on). In that scenario, you would need to choose a much higher ISO (6400 or higher, etc.).

Here’s a look at a couple of outdoor/indoor photos, and the corresponding ISO used to capture the image…

As I mentioned in Part 1 of this series, every setting of the exposure triangle has a “side effect.” In other words, each setting has consequences on the exposure but also on something else in the picture. The side effect of ISO is noise. In the film days, it was called “grain” because the sensitivity of the film corresponded to the size of the grains of salt (the less sensitive the film, the smaller the grains and the cleaner and smoother the image appeared). With digital cameras we use the word noise to express the same thing as the film-age term “grain.”

Here are two examples of the noise that appears on images with a very low ISO and a very high ISO. As you can see, high ISO = more light allowed in but more noise; low ISO equals less light allowed in (so I had to adjust the other settings of the triangle), but less noise…

See the difference?

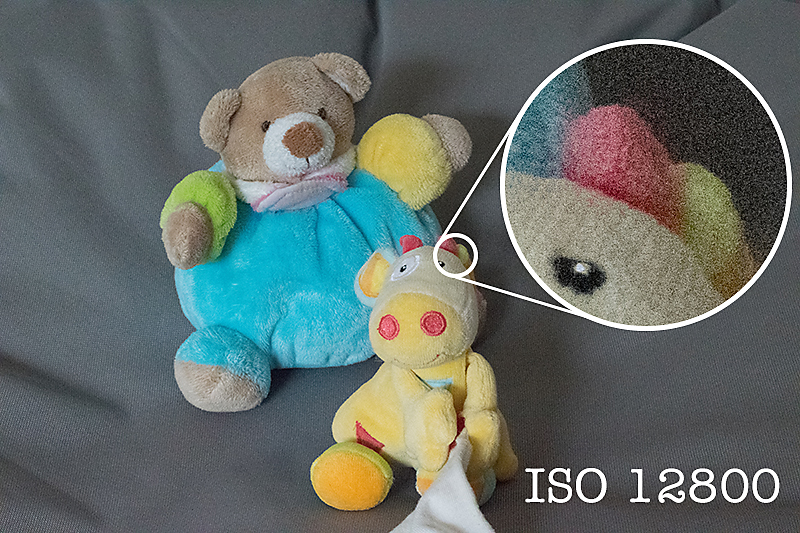
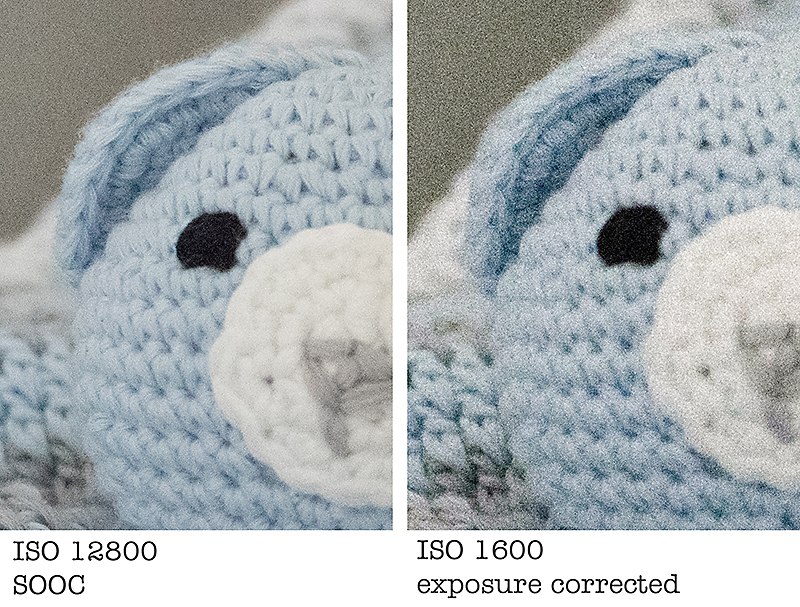
Even if grain was part of the charms of film photography, oftentimes digital noise is considered to be a bad thing. It can be distracting when it’s too strong, and it can create color artifacts. One way to avoid “bad” noise is to correctly expose the image in the first place, even if that means upping the ISO (noise will be better on an image correctly exposed with an ISO of 12800 than on an image with an ISO of 3200 that needs to be brightened in post-processing.

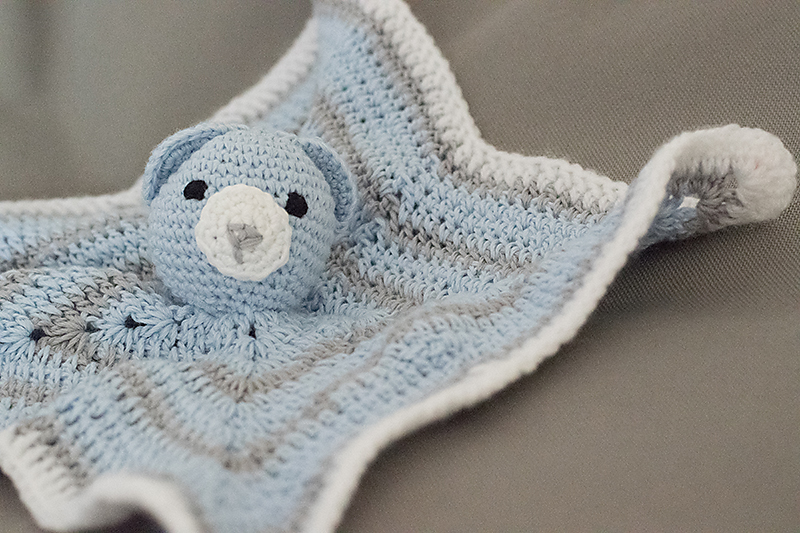
Here is another example that illustrates this idea…

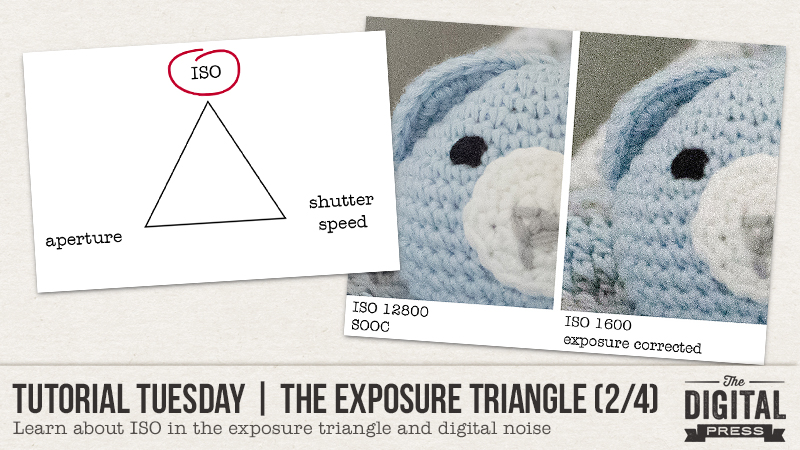
First, the SOOC (straight out of camera, no post-processing) image at ISO 12800:

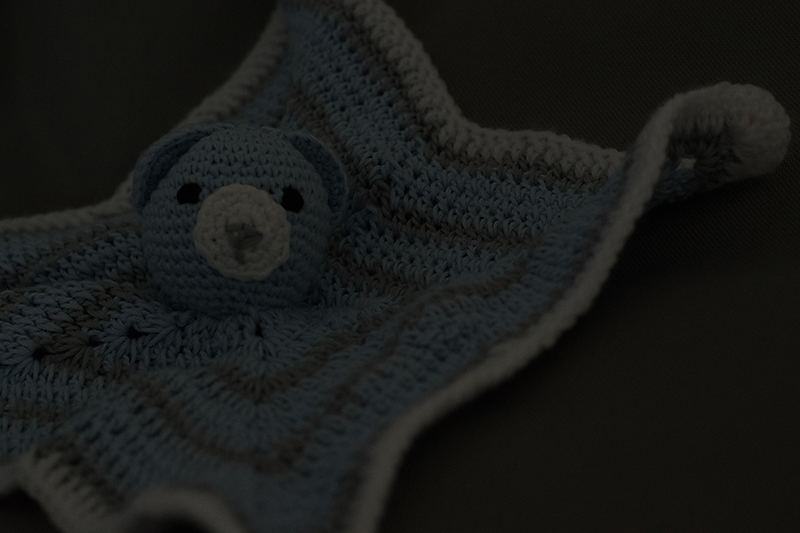
And next, the SOOC image at a much lower ISO of 1600, with all other settings remaining the same (hence the severe underexposure):

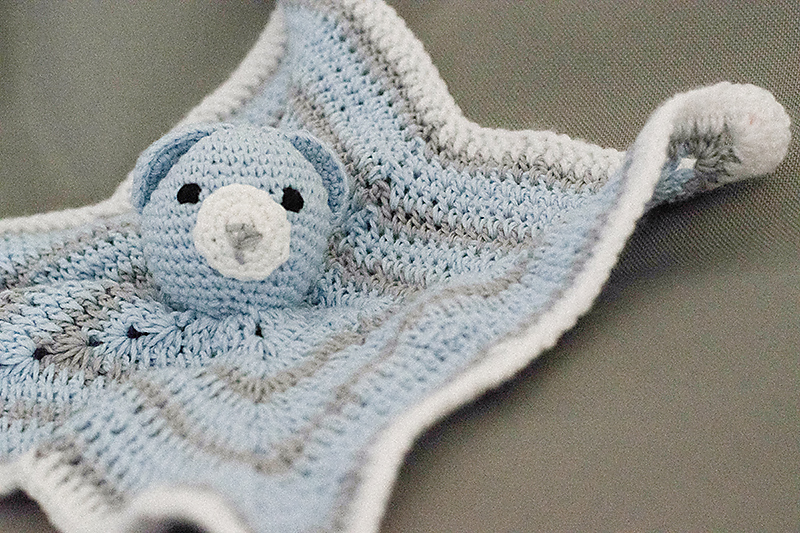
And finally, the second image… but with its exposure corrected in post-processing:

You can already see in the full image that the noise is much worse in the last picture (corrected) than it was in the first of the series, up above… even though the ISO is much lower. It’s even worse if you zoom in:

Moral of the story: it’s typically much better, in order to avoid bad noise, to take a picture with a high ISO but a good exposure… than it is to take an underexposed picture with a low ISO that requires brightening it in post-processing.

There are so many different cameras on which you can choose the ISO (even some smartphones!) that I will advise you to read the manual or do an online search on how to change the ISO on your own gear.

*TIP* If you are just starting to learn to shoot manually (where you, rather than than the camera, pick the settings)… ISO is a setting you can set on “auto” and let your camera take care of,,, so that you can focus on aperture and shutter speed. Once you get the hang of those, you can then start adjusting the ISO yourself.

We will explore those other two variables (aperture and shutter speed) in the next two parts of this series (coming in June, every other week). See you soon!


ChloéAbout the author  Chloé is in charge of PR and communication for her small town by day, a digiscrapper “by night,” and a photographer whenever the light is beautiful. She recently became a very happy mom to an adorable little boy and is enjoying the last days of her maternity leave.

Tutorial Tuesday | PART 1: The Exposure Triangle

Hello, and welcome to another edition of our Tutorial Tuesday series here on The Digital Press blog! This week, we’re beginning a really awesome 4-part series that will run every other week for the next couple of months to help you with your photography!

As scrapbookers, you may have read photography tutorials in the past (including the great ones we have here on The Digital Press blog)… and in doing so, you may have seen the term “exposure triangle.” That’s the concept we’ll explore with this 4-part tutorial that will, I hope, help you better understand the notion and use it in your own photography!

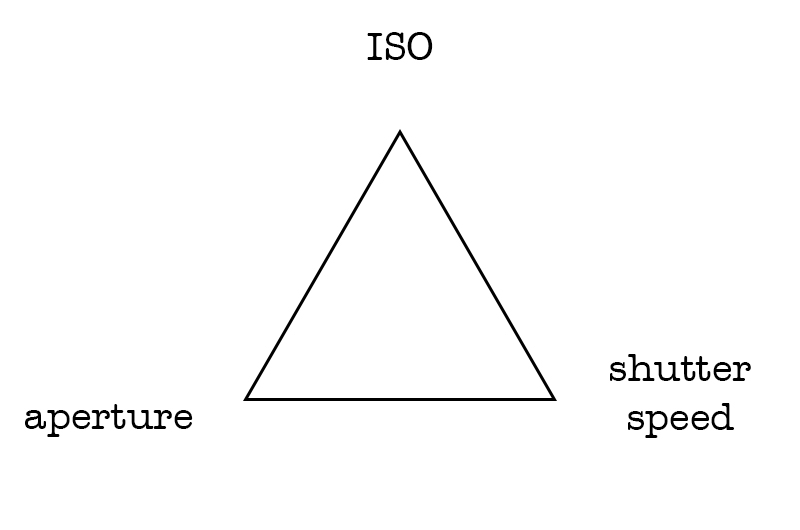
First of all, let’s see what happens in the camera when we take a picture. Basically a “hole” opens to let the light come in and hit the sensor that will capture it. Exposure is the amount of light in a photograph. An OVERexposed picture is too bright (details are lost in the highlights, the brighter areas of the image) and an UNDERexposed picture is too dark (details are lost in the shadows). To expose a picture, three settings come into play, that’s the famous “exposure triangle”. Those three settings are ISO, aperture and shutter speed. 

ISO is the sensitivity of the sensor. In the film days, each film had a set sensitivity, but today we can change it on most cameras. A high ISO means that the sensor will take more light in, a lower ISO means it will take less light in. ISO go usually from 100, sometimes 50, up to 12800 or more.

Aperture is the size of the “hole” that opens in the lens to let the light come it and hit the sensor. Let me get math-y for a minute here. This number is expressed as a fraction: f/2 for example. It means that the diameter of the hole equals the focal length of the lens (f) divided by the aperture numbre (2 in my example). That’s the reason behind the fact that the SMALLER the number, the BIGGER the aperture (the hole) and hence the MORE light entering. With a 50mm, for example, an aperture of f/2 will give a 25mm (50/2) diameter of the hole, when an aperture of f/10 will give a 5mm diameter (50/10). So, in short: big number = small aperture = small hole = less light in, small number = big aperture = big hole = more light in.

Shutter speed is for how long the “hole” remains open and let the light in. On my camera, it can go from 30 seconds to 1/4000th of a second. The longer it remains open, the more light goes in.

Here is a simple analogy: if taking a picture is like filling a bucket with water. ISO is the size of the bucket (that is meant to hold more or less water), aperture is how much water comes out of the faucet (is it wide open or is it just dripping?) and shutter speed is how long the faucet remains open.

We talk about the exposure TRIANGLE because all three setting are dependent on each other. If you let less light in through one setting, you will have to let more light in with another one (or both) in order to have a properly exposed photo. Let’s see some examples.
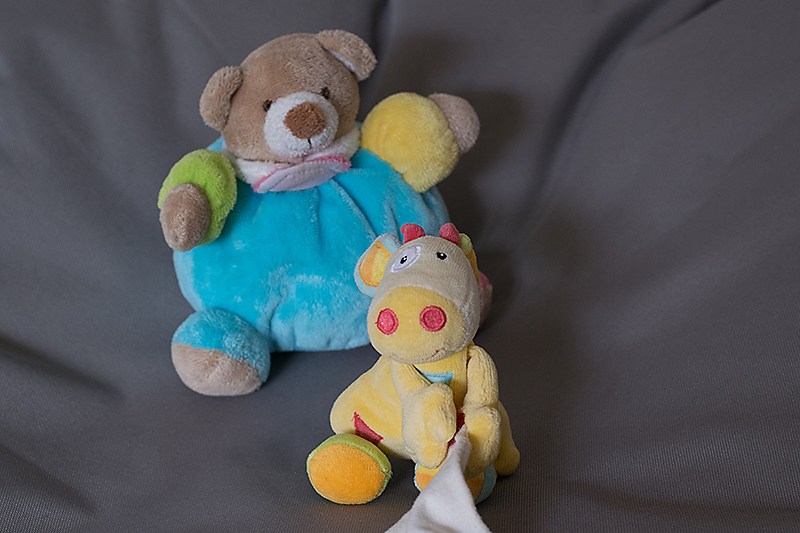
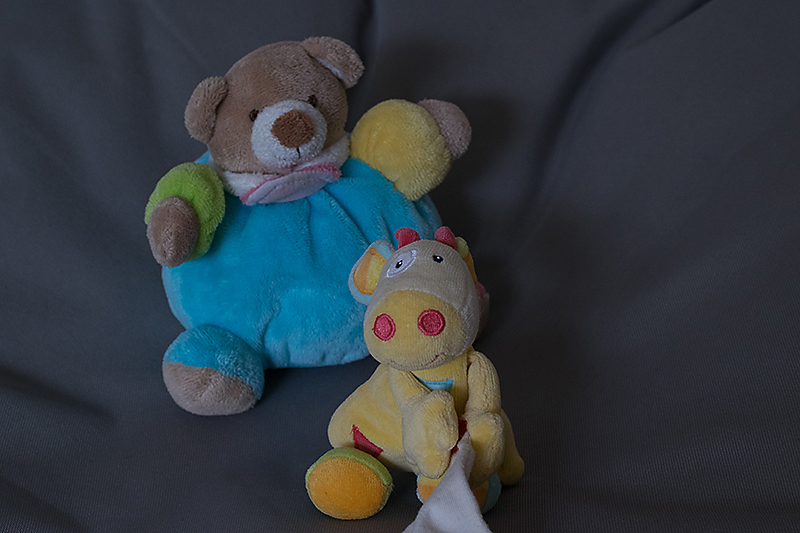
First, here is a photo where each setting is “average”. It is correctly exposed (even if totally boring, I admit, but at least those subjects are easy to work with! LOL).

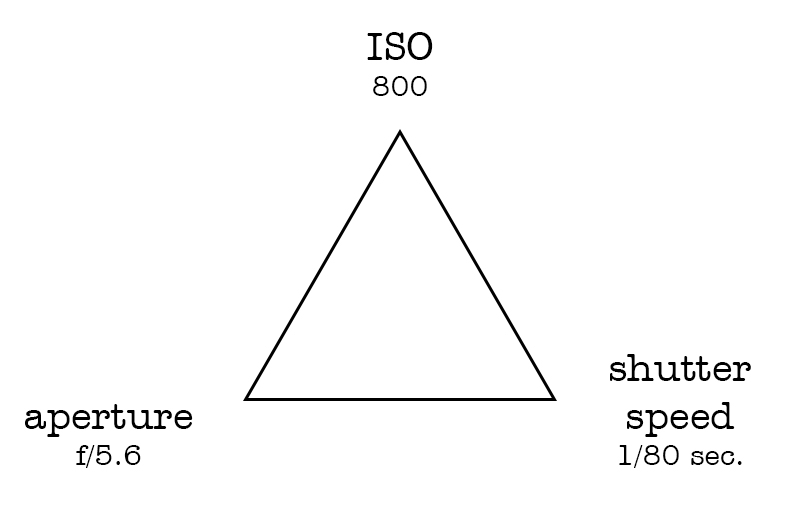
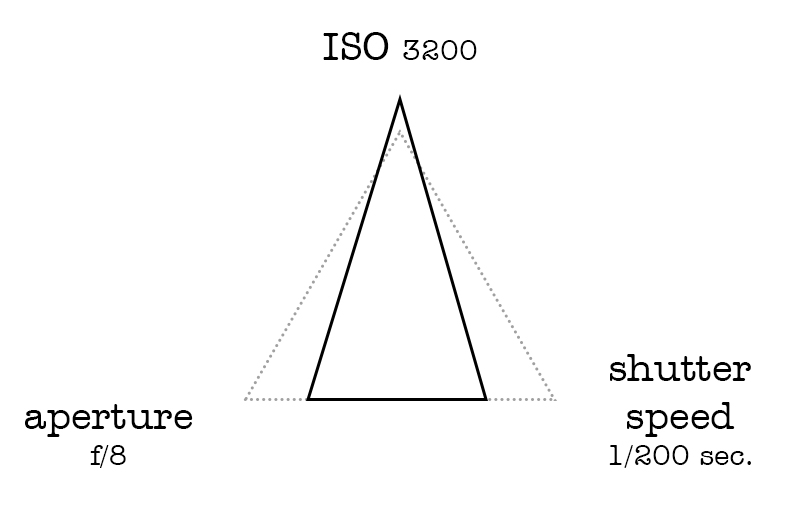
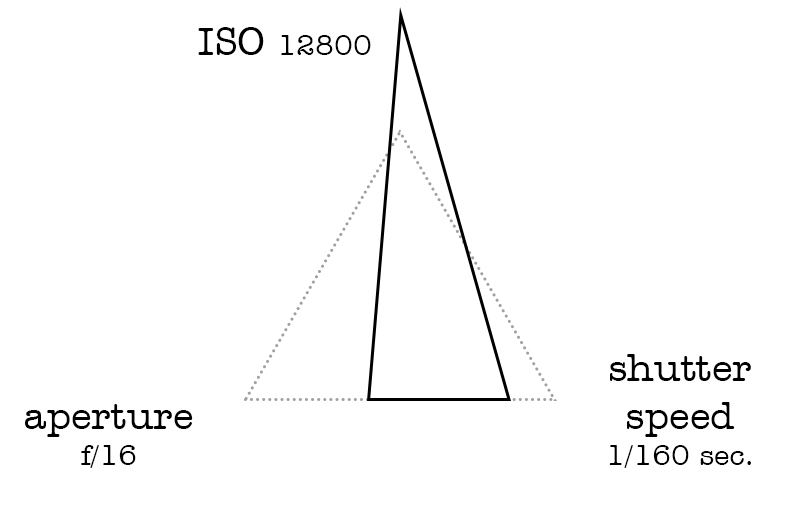
Here is a representation of the exposure triangle for this image with each setting:

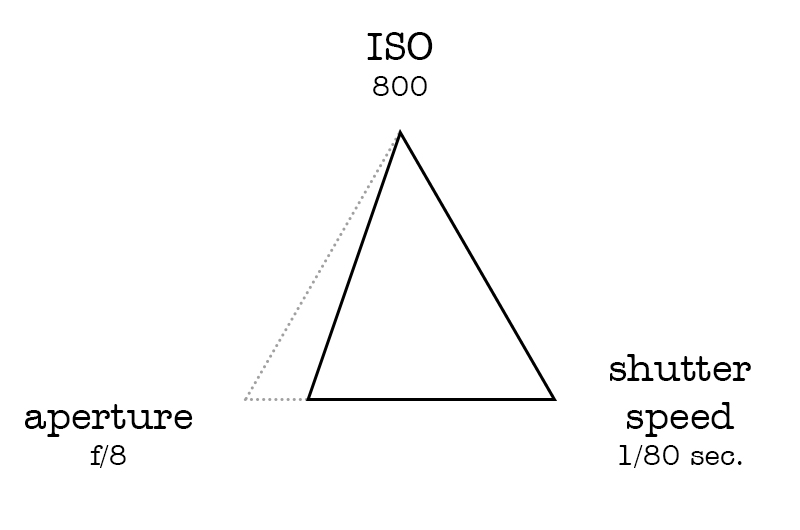
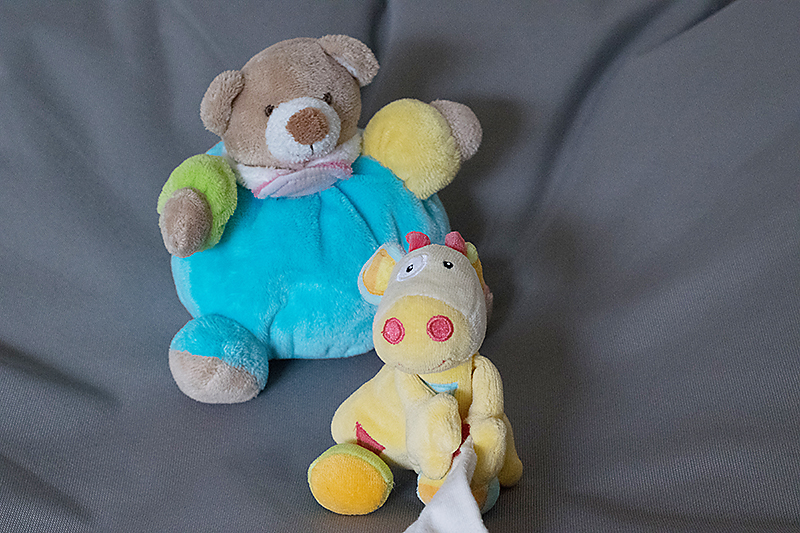
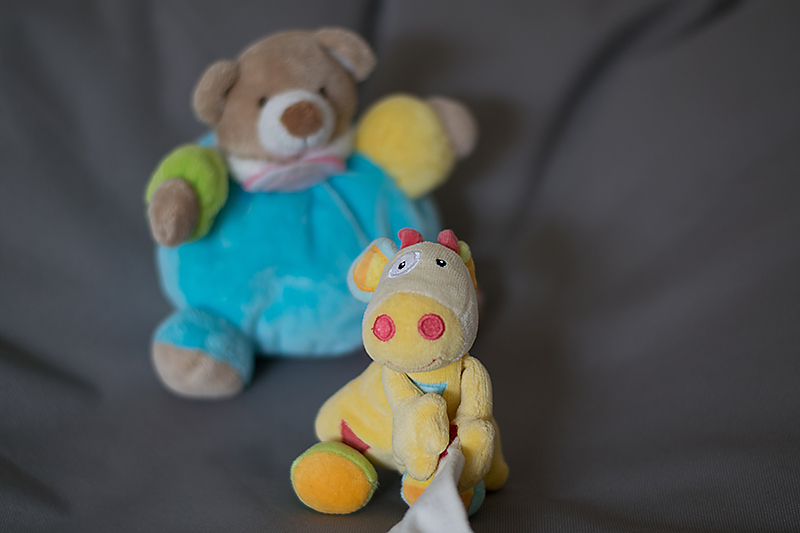
As I said before, if you change only ONE of the setting, the photo become under or overexposed. In this second image I decreased the aperture (increased the number) and as a consequence the image is underexposed, much darker than the first one. To have a properly exposed image, I should have let more light in through either a longer shutter speed, a higher ISO, or both.

The different combinations of those three setting can be almost infinite while the result remains very similar. Here are three other examples, each followed by the settings.

First, I kept the aperture at f/8 (like in the previous photo) but I bumped the ISO (more light) and decreased the shutter speed (less light) so that the image would be properly exposed.

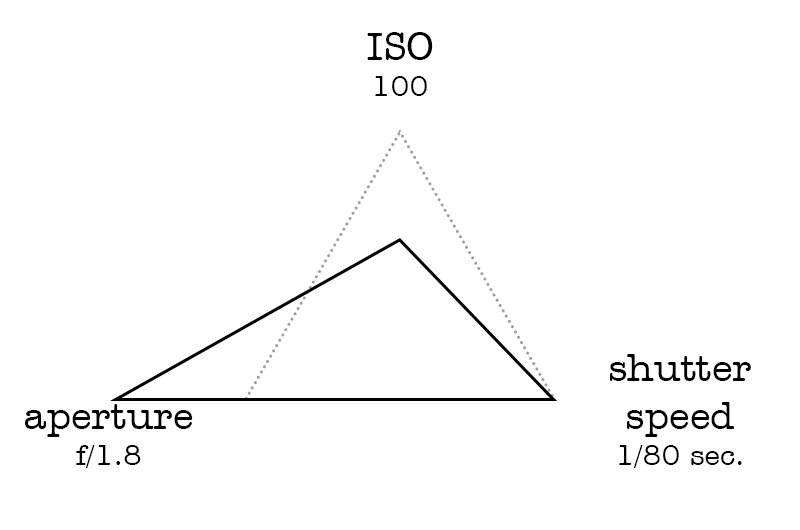
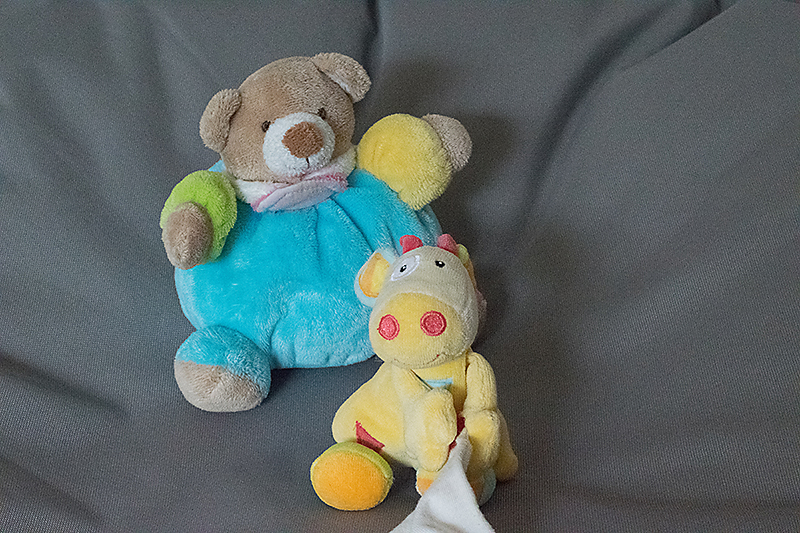
Then I chose to use the lowest ISO possible (less light) and hence I used the widest aperture possible on my lens (much more light) and the “average” shutter speed we had in the first photo.

Last but not least, I chose the highest ISO possible on my camera (much more light) and the smallest aperture on my lens (way less light).

If you observe carefully the images above you can see that changing the settings doesn’t only influence the exposure, it also has other consequences. Each setting has a “side effect” that we will explore in the next posts in this series, as well as how to choose and change our settings depending on the results we are looking for.

In the meantime, I hope the overall concept of “exposure triangle” is clearer to you. Don’t hesitate to ask (here in the comments or in the forums) if you have any questions! I’ll be back in 2 weeks with PART 2 of this series.


ChloéAbout the author  Chloé is in charge of PR and communication for her small town by day, is a digiscrapper “by night,” and a photographer whenever the light is beautiful. She recently became a very happy mom to an adorable little boy and is enjoying the last weeks of her maternity leave.

Tutorial Tuesday | Photo Adjustments

Have you ever taken a picture, thought it was great, and then realized that there are shadows across someone’s face? The moment has gone, and while you love the photo, you wish you could see the individual features, the eyes, nose, mouth, etc., more clearly. Well, with the wonders of photo editing software, and a light hand, you can bring shadowed features into the limelight again. Let me show you how.

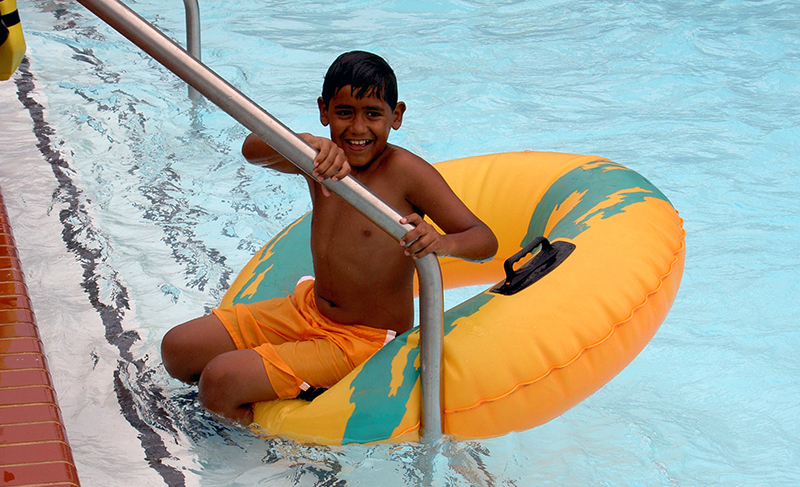
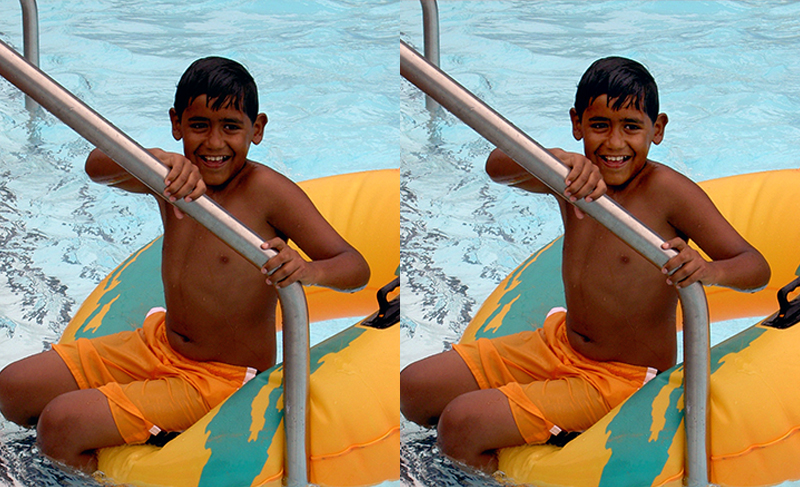
Here’s a photo of my son from, wow, a long time ago, at a local water park. He was having such a great time going up and down the large slides with the inner tube. It was tough to get a photo (he was so quick!), so I took what I could get. However, the more I look at this, the more I’d love to see his face in better light.  Yes, he has a good tan and is olive-skinned, but still …

I tried using Curves and Levels adjustments (I’m using Photoshop, and these can be found under the menu Image > Adjustments), but by increasing the mid-tones, it simply “blew out” the water, brightening what was already a lighter component of the picture – and the result looked unnatural.

I did, however, come up with a compromise that I really liked.

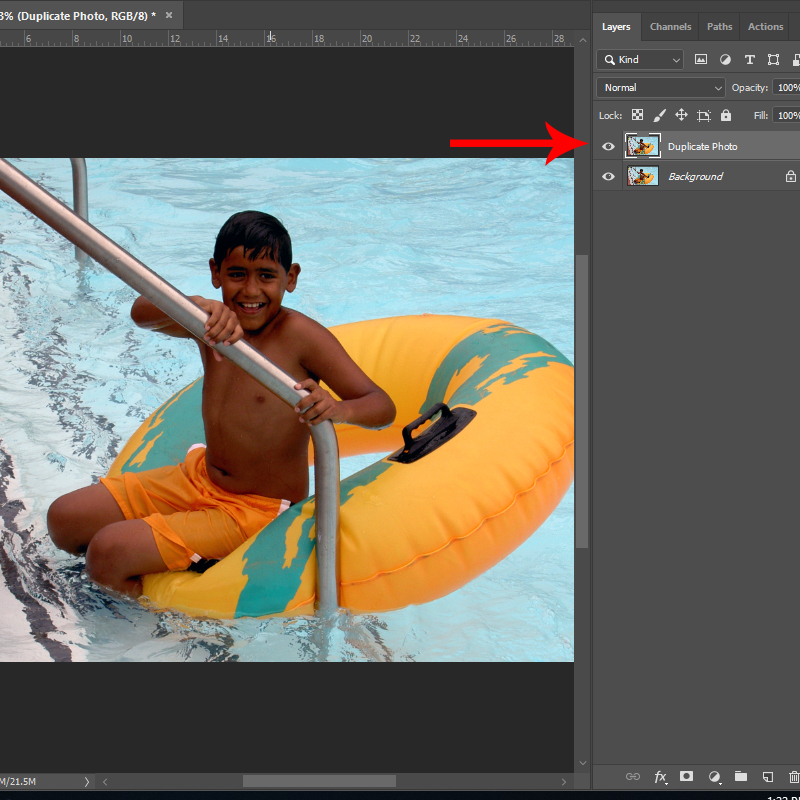
Step 1: Create a duplicate layer of your photo. (This is especially important as you will want to retain the integrity of the original picture.) You can do this quickly using short-cut keys Control-J, or using the menu option, Layer > Duplicate Layer.

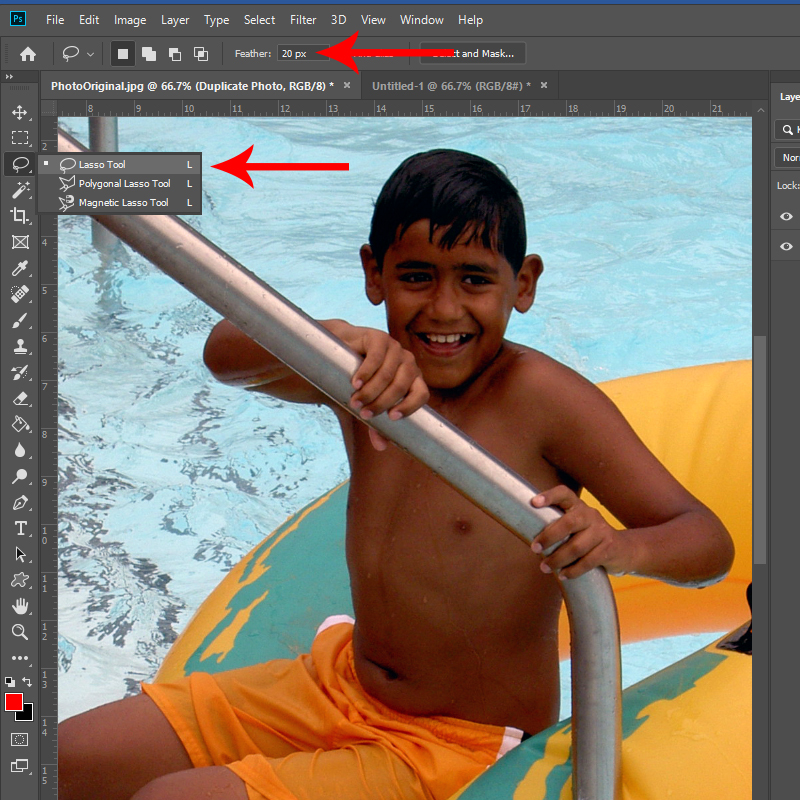
Step 2: With the duplicate layer active, select the Lasso Tool from your toolbox. Set a ‘feather’ of 20-25 pixels. You will want a soft edge on the lassoed selection to ensure it blends with the rest of the photo.

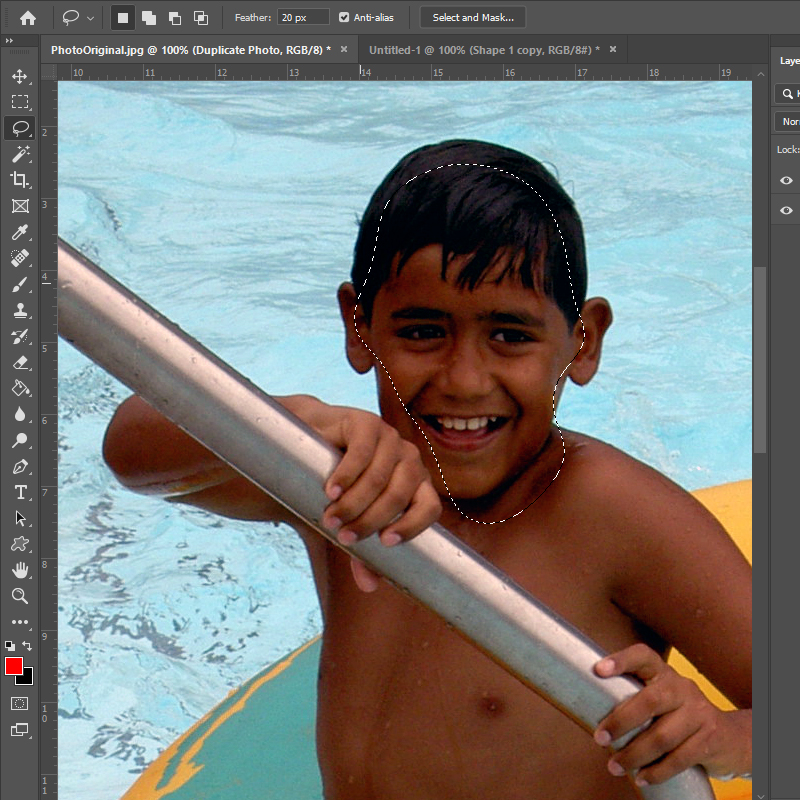
Step 3: Using the Lasso Tool, outline the section you’d like to lighten. You do not need to go right around the exact edge of the shape – remember you have a feathered edge. In fact, I’d recommend deliberately going inside the edge to allow for the feathering or ‘bleed’ to help blend the changed section with the original. It certainly does not need to be an exact science here.

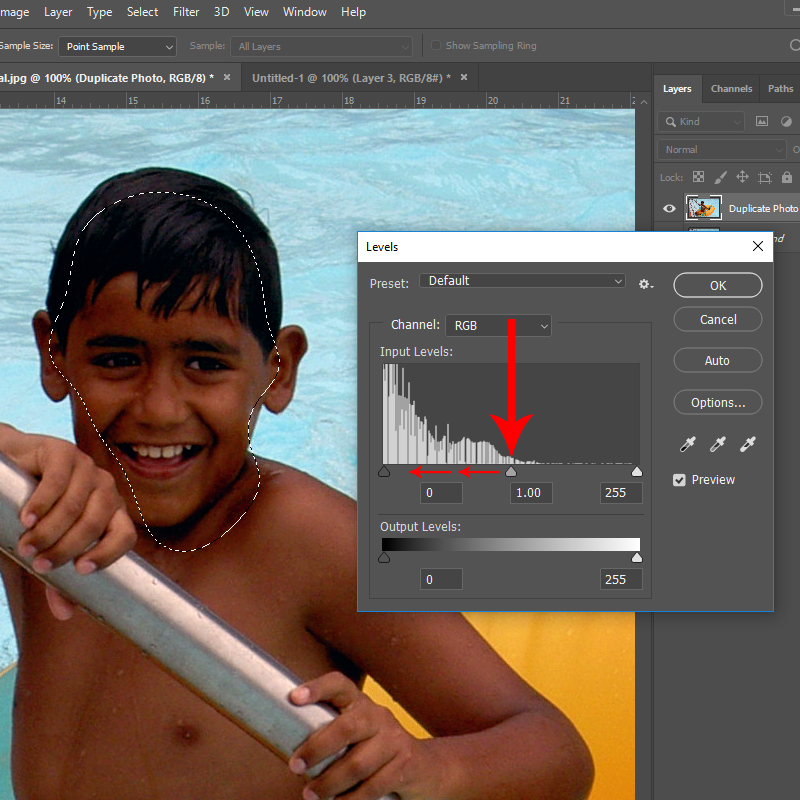
Step 4: Open the Levels adjustments (Image > Adjustments > Levels) and slowly move the middle slider, the one that controls the mid-range levels to the left (left increases the light, right adds dark tones). A very light hand is all that’s needed. If you are too heavy-handed, the result will not look natural.

(The shortcut Control-D will remove your selection after you’ve applied the tonal adjustment.)

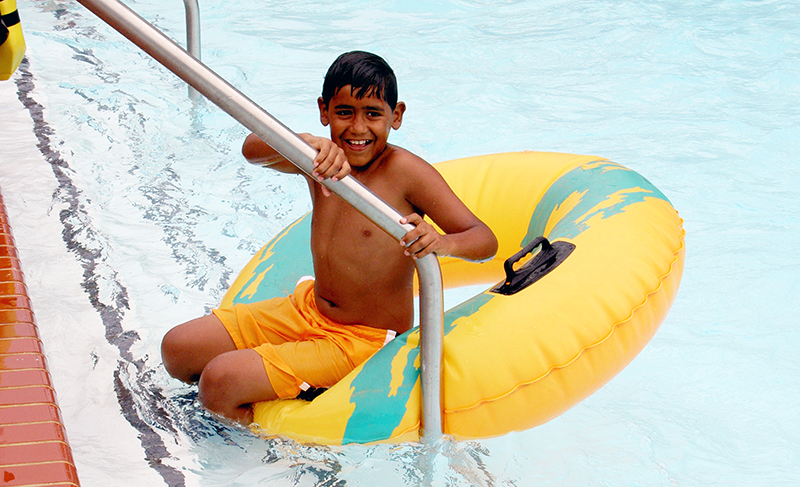
The resulting change is subtle, but that’s exactly what you want! Here’s my ‘corrected’ photo:

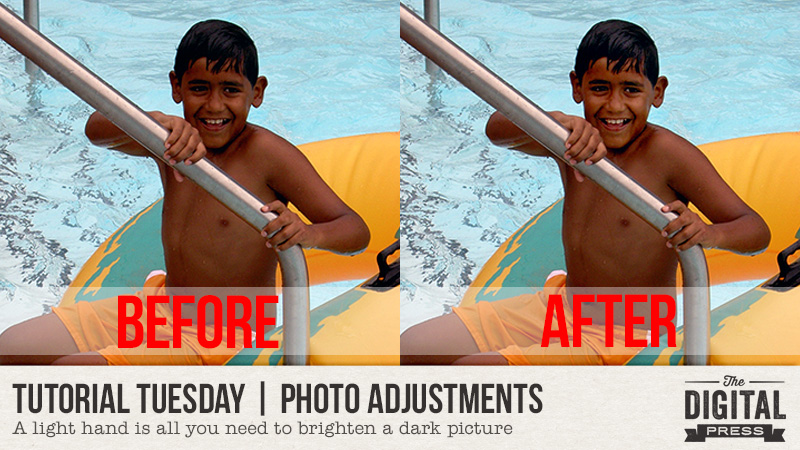
It’s might be hard to see the difference, but the facial features now stand out a little better. There are more highlights in my son’s hair, too, and overall, the face just looks brighter. Here’s a side-by-side for an easier comparison:

Have photos of loved ones wearing baseball caps that cast shadows? Maybe just bad lighting and, as the situation I found myself in, you’re just trying to get any picture that you can. In just a few minutes, you can salvage photos that you might otherwise skim over. But remember, a light hand is all that’s needed; it’s easy to go too far with this technique.


About the Author Kat Hansen is a creative team member here at The Digital Press. A HR Manager in the real estate industry by day, she loves the opportunity to spend a few hours each evening being creative. Vacation memories feature pretty heavily in Kat’s scrapbooking pages, as well as her health and fitness journey. Kat has quite the sense of humor (she “blames” her father for this), which she incorporates into her journaling and memory-keeping.