
Hello there! Dunia here (of Dunia Designs)… excited to be bringing you Day Five of the 2018 edition of our always-popular 10 Holiday Tips & Tricks series here on The Digital Press blog!
I hope you’ve been having an amazing December so far! I’m here today to show you a really fun project I just completed in the past week or two — how to use your digital scrapbooking papers to create your own custom wrapping paper! This is just way too cool. 🙂
SUPPLIES NEEDED:
- digital paper(s) of your choice
- photo editing software (I used Photoshop CC; most photo-editing programs will work, however)
- computer with internet access (to enable you to upload your image to a printing company; I used Overnight Prints)
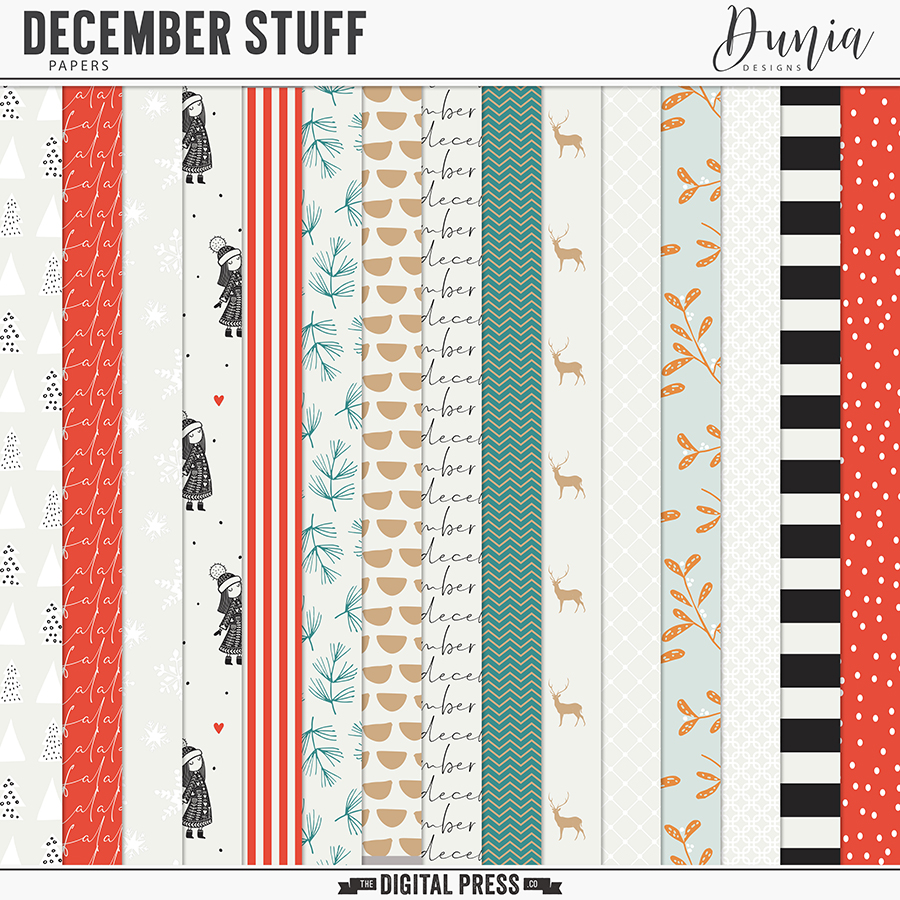
Here’s a look at the digital papers I chose to use, from one of my most recently-designed collections — December Stuff…
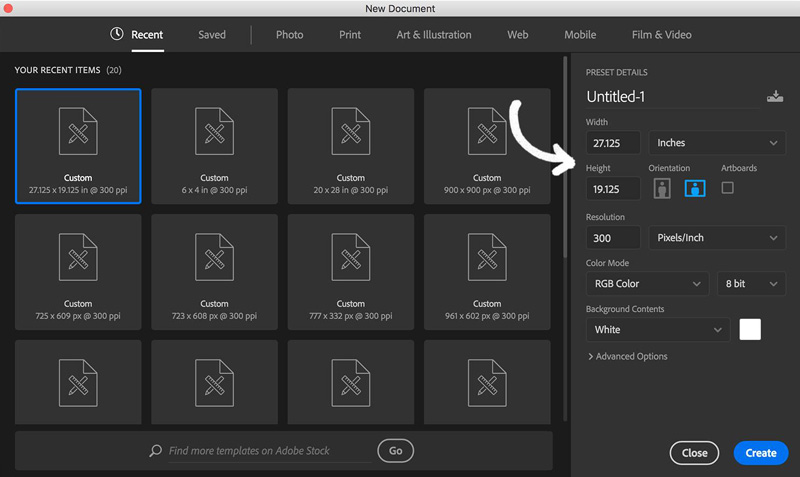
First, you’ll want to choose the paper/pattern you want to use… and then open it up in your photo editing software in order to prepare your digital image.
Based on the specifications of the wrapping paper printing company I worked with (Overnight Prints), I created a custom-sized canvas that was 27.125″w x 19.125″h.
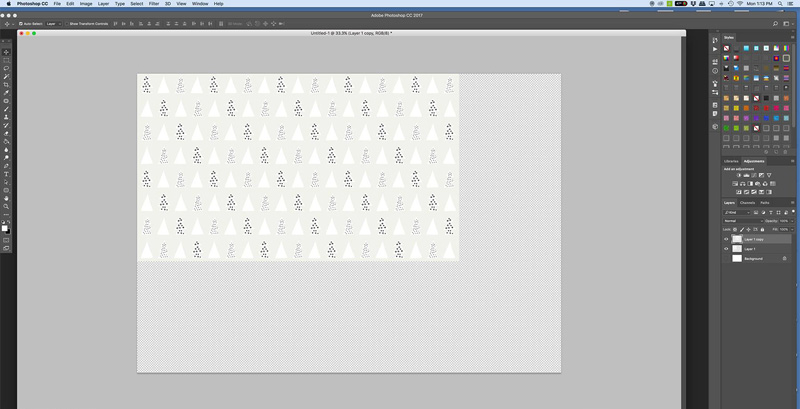
Then, I dragged my 12″ x 12″ paper onto the canvas area I’d just created. As you can see below, a 12″ x 12″ paper won’t fill the entire 27.125″ x 19.125″ space. So I duplicated it, and lined the 2 copies up with each other, side by side…
I continued duplicating the papers, arranging them so they lined up with each other (appearing to be seamless), until I had filled the entire space…
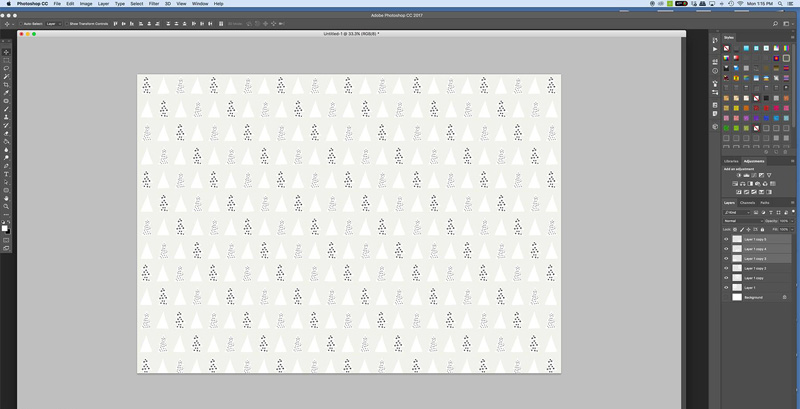
*NOTE* You’ll find that some digital papers are “cleaner” (i.e. less distressing or texture… especially around the edges), and others are more distressed/textured. Pay attention to the edges where the duplicated paper copies meet, and you may find that you need to crop or erase the heavily-distressed edges so the pattern you create ends up appearing to be more seamless.
Once I had my entire canvas area filled, and the papers arranged in a way that looked good to me… I saved the image as a JPEG (.jpg file). Then I followed the instructions on the web site of the printing company (again, I used Overnight Prints) and uploaded my image / placed my order.
The wrapping paper was shipped to me in single sheets that were sized at 28″ x 20″ with a small border. As of the date of this post, the finished wrapping paper sheets from Overnight Prints were available for less than $2.00 a sheet (anywhere from $1.36-$1.74/sheet)… making it a relatively cost-efficient way to add a tiny bit of customization to your holiday wrapping!
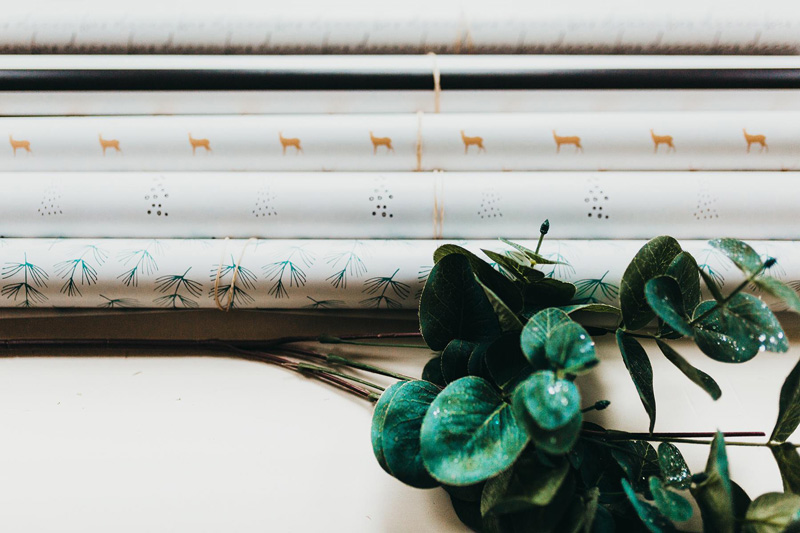
Here’s a look at the finished product that I received in the mail, rolled into individual rolls…
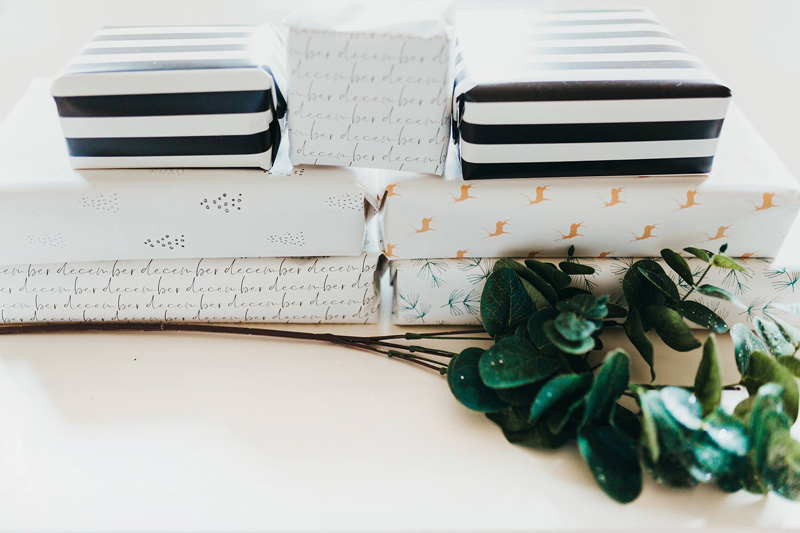
And here’s a look at a few packages I wrapped in these fun & unique custom wrapping papers…
Isn’t that so cool?! Just think of the possibilities; I already have so many fun ideas for papers in the future, for all sorts of events… from Christmas, to birthdays, and more!
If you’re thinking of trying this project… head over to The Digital Press’s challenge forum and get the details about how you can earn challenge points for December 2018 at TDP if you try any of our “Holiday Tips & Tricks” throughout the month as they appear here in this blog series! Additionally, we’d love to see any photos of your December/holiday projects using TDP goodies in the gallery this month, so link us up after you’re finished creating and uploading! 🙂

About the Author Dunia Acauan is the designer behind Dunia Designs at The Digital Press. Originally from Brazil, she currently lives in Ann Arbor, Michigan with her husband and three children… and is a talented and accomplished photographer, in addition to running her own graphic design business.