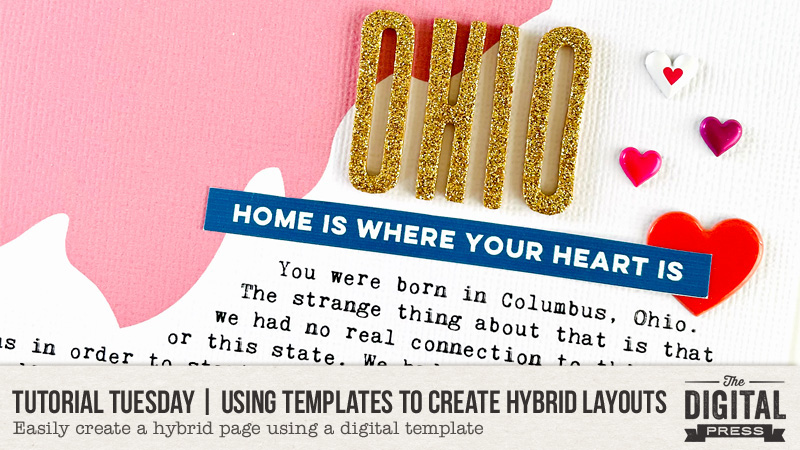
Hello, and Happy New Year! As you may know, the blog took a nice long break in 2020–because, well, 2020–but we’re back, baby! I get the honor of kicking off the first Tutorial Tuesday of the year. I have a fun and easy hybrid project (using a digital template) to share with you today!
I am mainly a pocket page scrapbooker. Once I discovered that style of scrapping, I fell head-over-heels in love with it. Creating 12 x 12 layouts always intimidated me, and pocket pages were the solution to that problem!
And while I do love pocket scrapbooking, I’ve also been working on creating a personal album for each of my kids. For that, I’ve been working on 8 1/2 x 11 pages for these albums. My four kiddos were each born in a different state (and we aren’t even in the military!). With that in mind, one of the stories that I want to tell in each of their albums is a story about where they were each born.
I found these State Templates by WM[squared] Designs in the shop and instantly I had my vision for what I wanted to do…
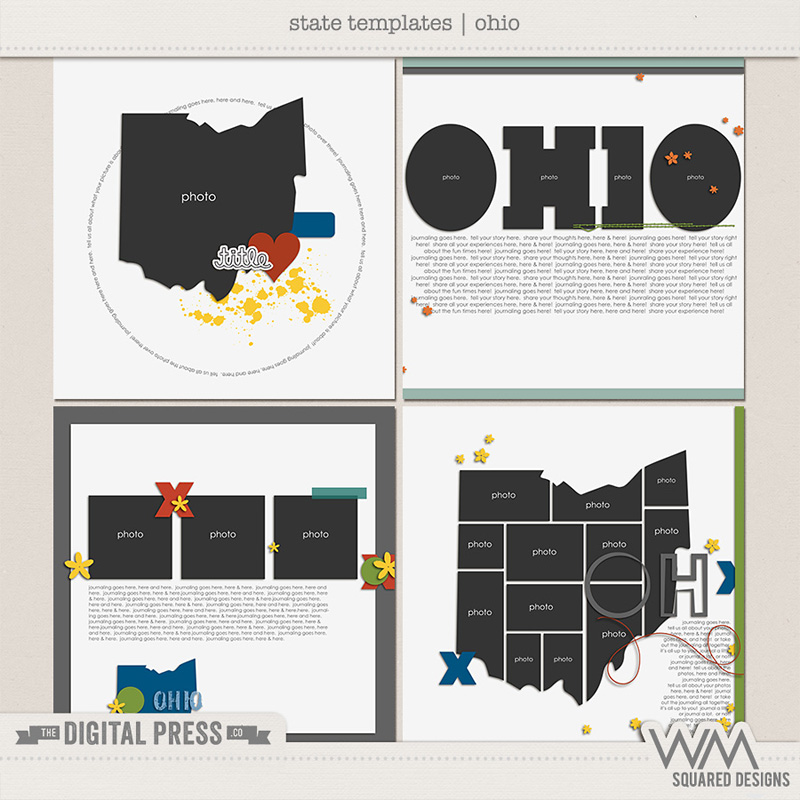
I picked the first template (upper-left on the preview) as the one I wanted to turn into a page for my daughter. I’ve used digital templates as the inspiration for hybrid layouts before, but I don’t think I’ve ever done it in this way — where I actually printed part of the template on to my page!
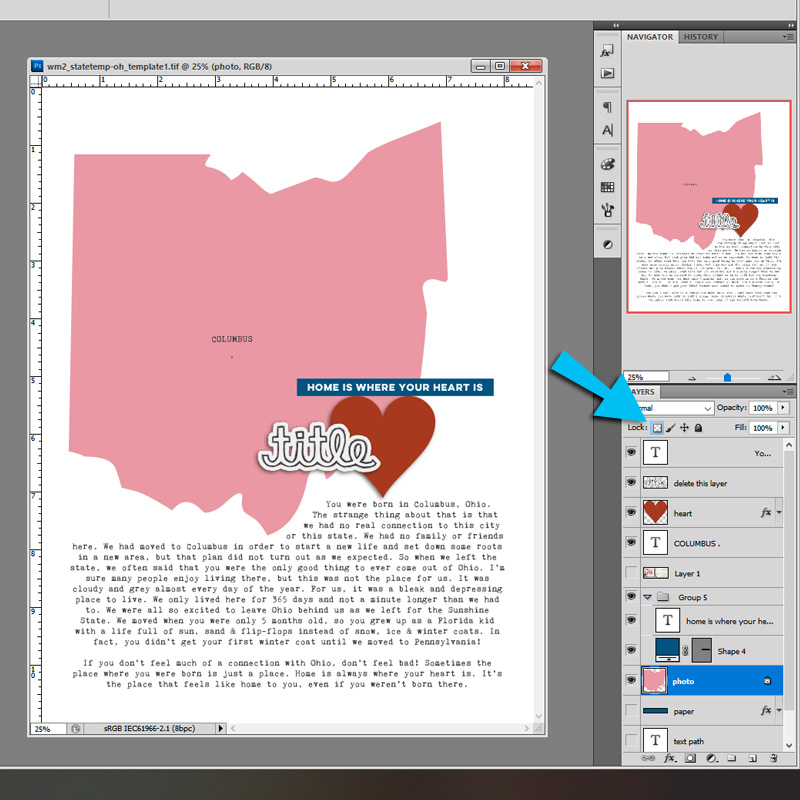
Opening up the file in Photoshop, the changes I made were pretty basic.
[ side note: please don’t laugh at my old version of Photoshop; I will probably be “CS5 forever!” because, darn it, I already paid for it and it works great. LOL! ]
First, I turned the label into a little word art strip and added my journaling. I also changed the silhouette of Ohio to pink.
Here’s one of my FAVORITE tips of all time. I like to lock the pixels on a layer to easily change the color of an item without creating weird jagged edges! The option to lock pixels is usually found in the Layers window here (see blue arrow on the right side):
There are a few different ways you can change the color of a shape, a stamp, or a piece of word art. Here are few that I use often:
- Lock the pixels.
- Fill a new layer with color. Clip it to the shape.
- In the “FX” tab in the Layers window, choose Color Overlay.
All of these methods will color the shape AND its transparent edges — that’s the important part.
Once I was ready, I printed out my page on some white textured cardstock, along with the word art strip (on a separate sheet of paper). Then I simply added letter stickers, hearts and a star for the capital, using the template as the inspiration for my layout.
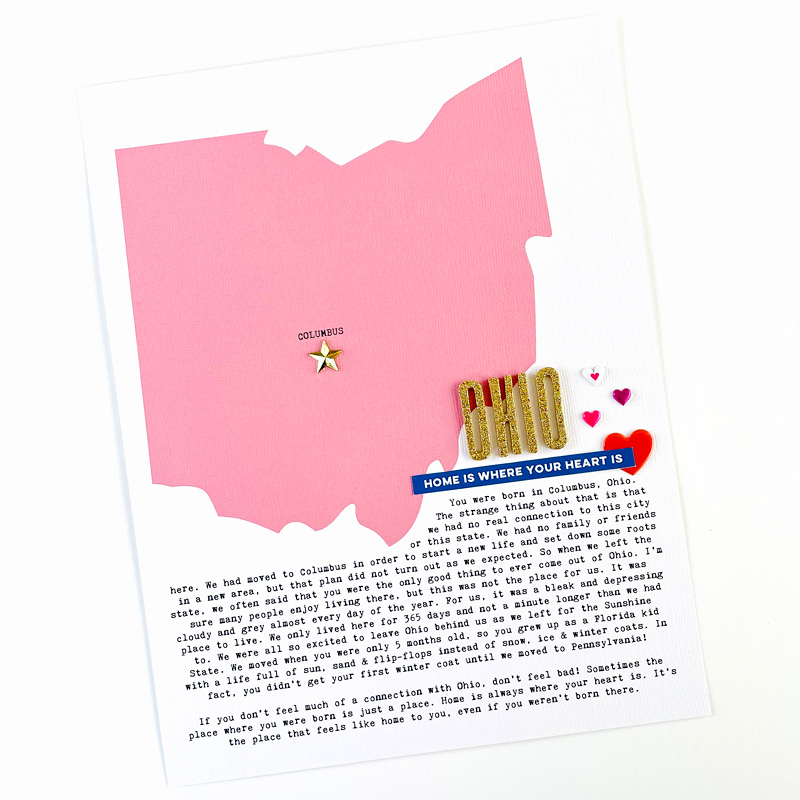
The textured cardstock adds a lot of interest! Here’s a close up look…
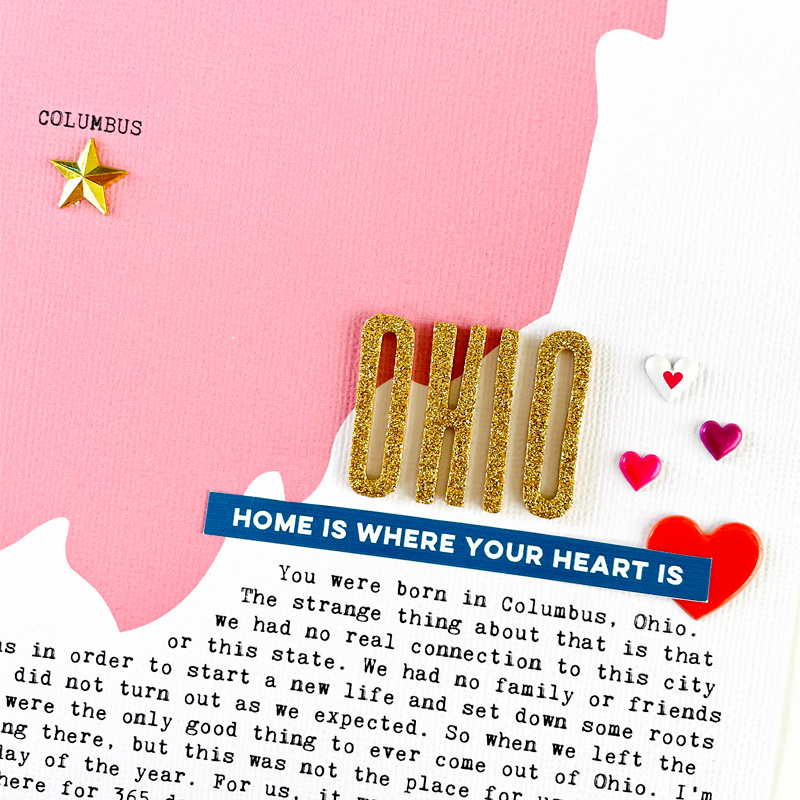
I felt like the page didn’t need much embellishment. The shape of the state is the real star of the show!
This layout was pretty simple, which is good, because now I have to make three more versions for my other kids, LOL!
I hope you enjoyed this little tutorial and you find this to be an easy hybrid project to create for yourself.
 About the Author Nicole Seitler is a hybrid creative team member here at The Digital Press. She’s a homeschooling momma to four fantastic kids (one of whom will graduate this year!). Once upon a time, Nicole was a designer here at TDP… but now she uses her Photoshop skills to scrapbook for herself. Nicole and her husband, Travis, sometimes dabble in web design or comic book lettering together. Most recently, Nicole has been working in the world of the Social Media Management (before 2020 hit and caused her to get laid off… meaning she has even more time for scrapping!).