
Hello, and welcome to another edition of our Tutorial Tuesday series here on The Digital Press blog! Today I’ll be sharing ways to use many under-utilized artificial light sources around your home in order to snap memorable photos and document your life.
Why does the light source matter?
Back in March, I shared a post here on the blog containing tips for using window lighting for capturing photos, and today I’m back to talk about the similar use of artificial light. What’s the difference, and why does it matter? Well, several reasons:
- Always know your light source, and avoid mixing them
- Size of light source matters (in general, artificial light sources are smaller than what you’re likely used to working with, and this requires a bit more planning and arrangement to get the photo you want because of how dramatic the shadows are likely to be; more on that later!)
- Overhead lights don’t count. I only use overhead lights if it’s absolutely unavoidable, as the shadows are often not flattering (or non-existent) and lend themselves better to snapshots and not photographs.
If you have a DSLR camera, I recommend pulling it out to try these ideas. Be prepared to use your highest ISO settings on you DSLR. This tutorial by Chloe is a great intro (or refresher!) on setting exposure. You may be able to get similar results with a cell phone camera… if you can put it into manual exposure mode.
The subtle art behind indoor photography is revealing little bits of light to tell your story, so be prepared for lots of shadow.
Now, let’s jump in!
Computer Monitor — Rim Lighting Effect
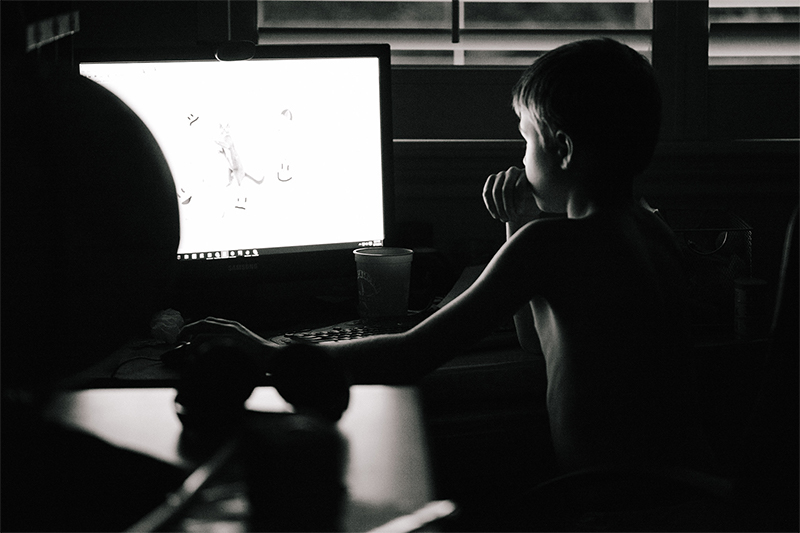
My son would live in front of his computer if I let him, so capturing images of him at his desk is important to documenting who he is right now. My goal here was to capture him as I see him… with his face lit up by the screen of his monitor. The very bright light from the monitor quickly fades away and leaves much of this image in shadow, but the way the light frames his face and arm is called “rim lighting”.
To try this yourself: Use your DSLR in manual exposure mode, then set exposure for the brightest spots on the skin of your subject (here I exposed off the skin on his cheekbone). Be sure to eliminate all other light sources or you won’t get that rim lighting effect! Rim lighting is meant to be bright light and dark shadow with little gray in between.
Computer Monitor — as Direct Light Source
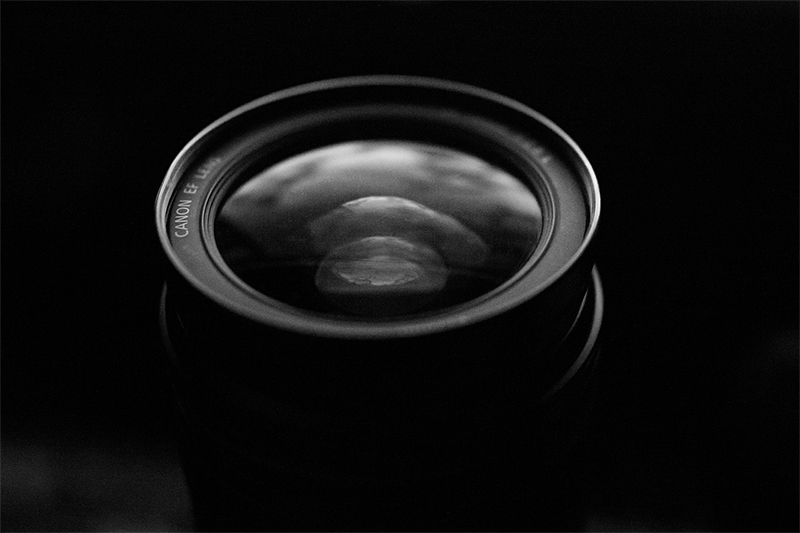
Direct Light is light that goes from the source straight to your subject. In the lens example above, I simply placed the lens on my desk about 6 inches away from the monitor. I love the way the light reaches down into the layers of glass within the lens, and highlights the repeated circles. Notice that the light “falls off” so quickly that it doesn’t even extend down the full length of the lens! This is perfect for helping me hide all the other junk on my desktop that I didn’t need in my image. 🙂
To try this yourself: Use your DSLR in manual exposure mode, then set exposure for the brightest spots on the object you are photographing. Be sure to eliminate all other light sources in the room so you capture all that wonderful shadow! This would work well for a favorite pen, a steamy cup of coffee, or anything else that is slightly reflective!
Laptop — as Portable Light
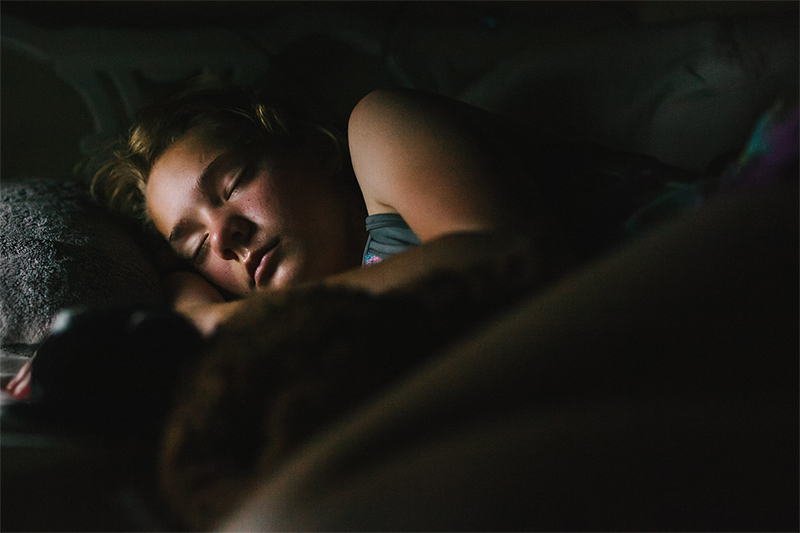
I really wanted a picture of my oldest sleeping. Her room was lacking a suitable light source, however — so enter the laptop as a portable light! I positioned my laptop on it’s side on her night stand, pretty close to her face and just out of sight to the left in this image. I found that putting it on it’s side allowed the light to project straight out, vs. the downward angle of a laptop screen when it’s upright and in use. (also note, my sweet sleeping angel called me a creepy stalker when she saw this! LOL).
To become a creepy stalker yourself: Use your DSLR in manual exposure mode, then focus and set exposure for the brightest spots on the skin of your subject. As always, be sure to eliminate all other light sources in the room so you capture all that wonderful shadow! You could also use a laptop on a subject fully awake too, but where’s the fun in that?!
Book Light — as Indirect Light
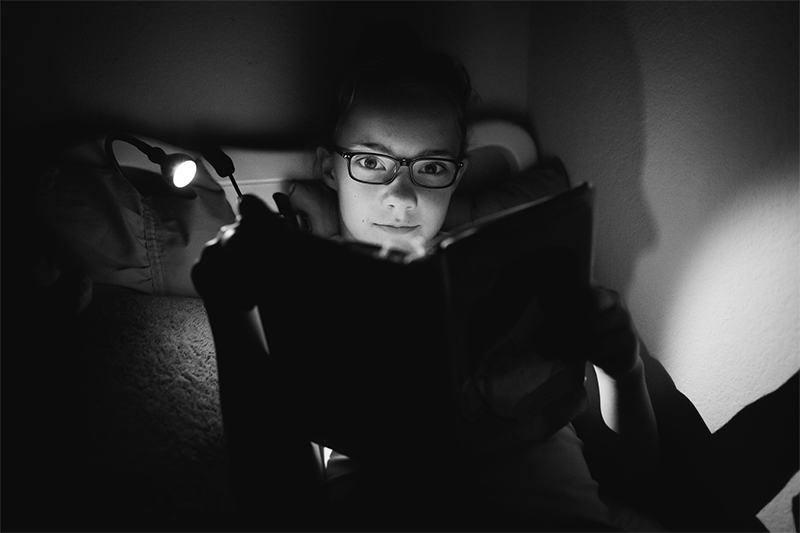
This is one of the easiest techniques! See that tiny book light on the left of the image, above? That’s the only light source in this whole image! Since the white paper of a book is a perfect reflector, the light bounces off the pages right back onto my subject’s face. The light would be way too harsh if I simply pointed it straight at her face, so using the book to distribute the light back into her face was the perfect solution.
To try this yourself: Grab a book light and make your kid read for 5 minutes. Position the light down onto the book, play with the angle of the book to get the most flattering light on your subject. Eliminate all other light sources. Use your DSLR in manual exposure mode, then set exposure for the brightest spots on the skin of your subject.
Cell Phones and Tablets
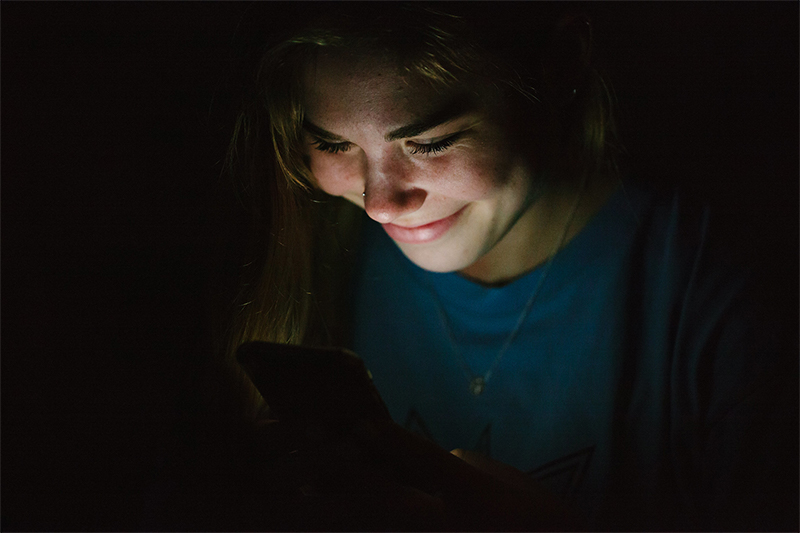
This is another SUPER easy technique! I had my niece hold the phone a little closer to her face than normal, set exposure off the skin on her cheekbones, focused on her eyelashes, and clicked. So easy! She was even sitting on my daughter’s bed, in the middle of her messy bedroom, and you wouldn’t even know it!
Black and White is Your Friend
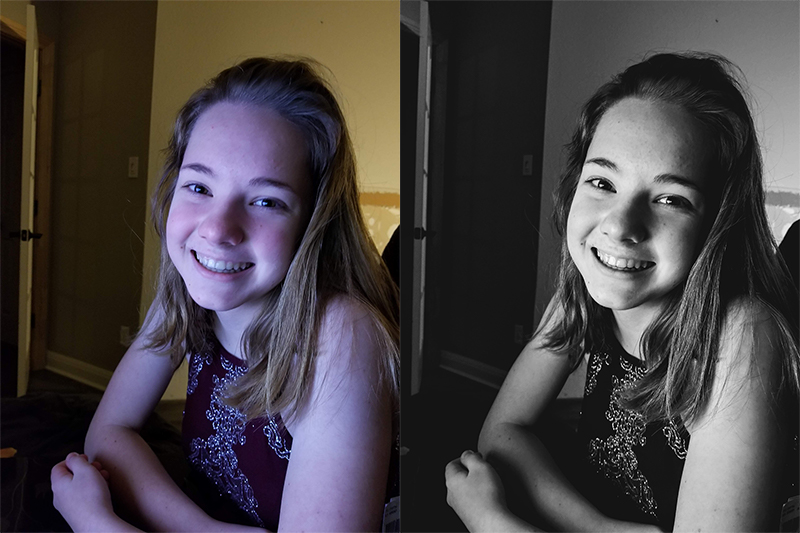
I snapped this purple-skinned image with my cell phone one night after my teen spontaneously joined me while I was scrapbooking. Sure, i could use Photoshop to edit the skin tones… but I’m WAY too lazy for that! One click on a black and white preset — and voila — a beautiful black and white snapshot I’m perfectly happy with, allowing me to remember that moment forever — on a scrapbook page, of course!
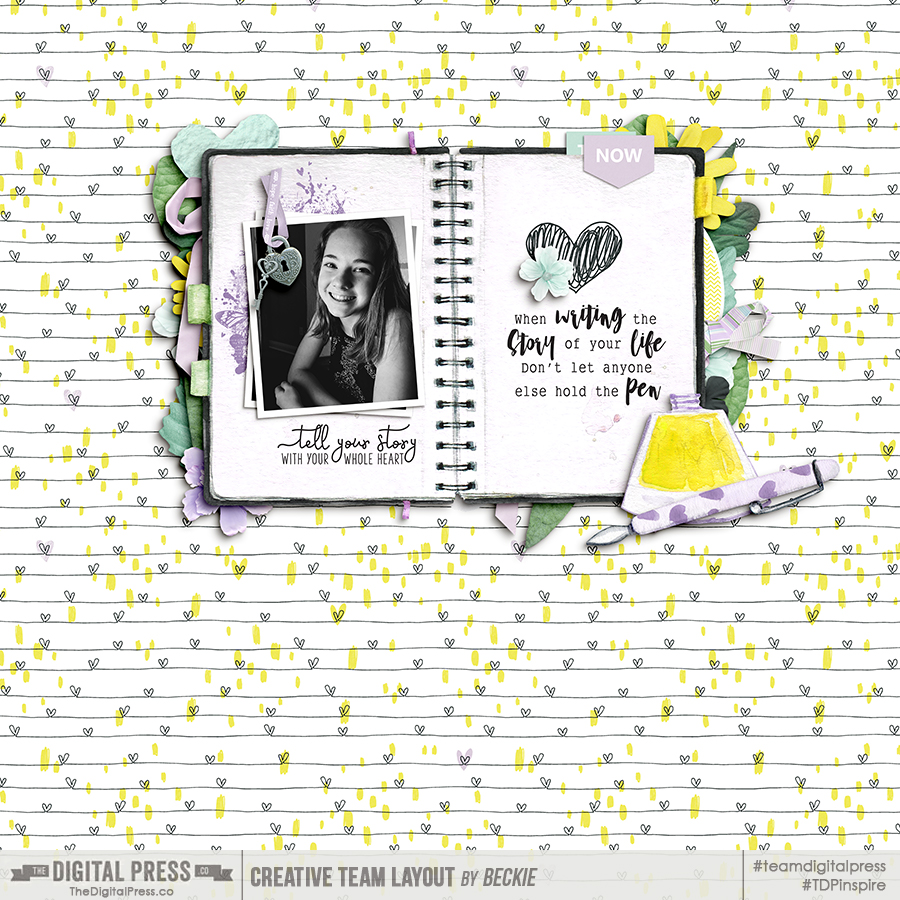
[ Layout created using “Our Story” by KimB Designs ]
Don’t be afraid to convert to black and white. Many photos with low lighting tend to look awesome in black and white, which further accentuates the play of light and shadow. Give it a try, yourself!
Thanks for joining us today on the blog! I hope all of these ideas encourage you to try capturing images around your home using all those underappreciated sources of light! And don’t forget you could try many other light sources, as well — like fridge lighting, candles, televisions, etc.!
 About the Author Beckie is a creative team member at The Digital Press who lives near Austin, Texas. In addition to scrapping and photography, she enjoys spending time with her family, reading, and ignoring household chores.