Hello Everyone, and welcome to another edition of our Tutorial Tuesday series here on The Digital Press blog! Today, I’m here to teach you how you can use Google Photos to organize all of your family’s photos in one place.
Today I hope to share with you a solution for organizing your photos — both the photos you have on your phone, and those you have stored in various places on your computer.
First off, a little disclaimer:
I don’t claim to be an expert on all the ‘ins and outs’ of how Google Photos works. I just know how I use it to organize my photos for my own scrapbooking purposes, and what works for me. There may be faster, better ways of doing things (share yours in the comments, below!)… but this is what I’ve discovered as I’ve been using it for the last few years. This is also in no way an advertisement or an endorsement of using Google Photos over other options; again, it’s just what I use, and one way to do this in the sea of many.
If you are okay with that, then here we go!
Google Photos allows users to upload photos from any mobile device and provides free unlimited storage for photos up to 16 megapixels or videos up to 1080 HD. To store higher quality photos, there is an option to use Google Drive storage, which charges a monthly fee after 15 gigabytes — $1.99 a month for 100 GB and $9.99 a month for 1 terabyte.
I just use the free option, which works great for me, and I’ve got over 10,000 photos stored there so far! All it takes is a Google account. If you’ve got a gmail address for your email, you already have access to Google Photos!
You can also download the Google Photos app on your phone, and set it up to automatically sync the pictures you take on your iPhone into the Google Photos program. I can’t remember how exactly I set that up on my phone, but it must have been pretty automatic when I downloaded the app, because I don’t remember a whole lot of setup after that. If you have questions about setting your phone up to auto-upload your photos… you can Google it. 🙂 LOL
When it comes to organizing my pictures on Google Photos, I use the desktop version rather than my phone using the app. What I’ll be talking about today is for the most part all done using the desktop version of Google Photos.
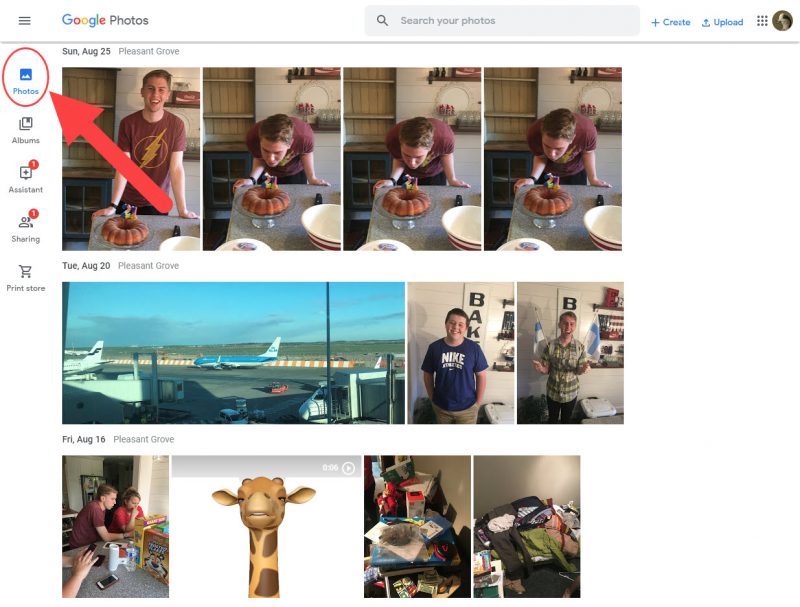
First, go to photos.google.com. Here you can see all the photos that have synced from your phone, or that you’ve uploaded (which is as easy as dragging and dropping from your computer) by clicking into the PHOTOS menu (one of the main buttons on the side, once you’re in Google Photos). By default, Google Photos stores all your photos arranged by date, in a huge long list. This is really handy if you know the date your photos were taken…but if you don’t, then you’ll need to organize them.
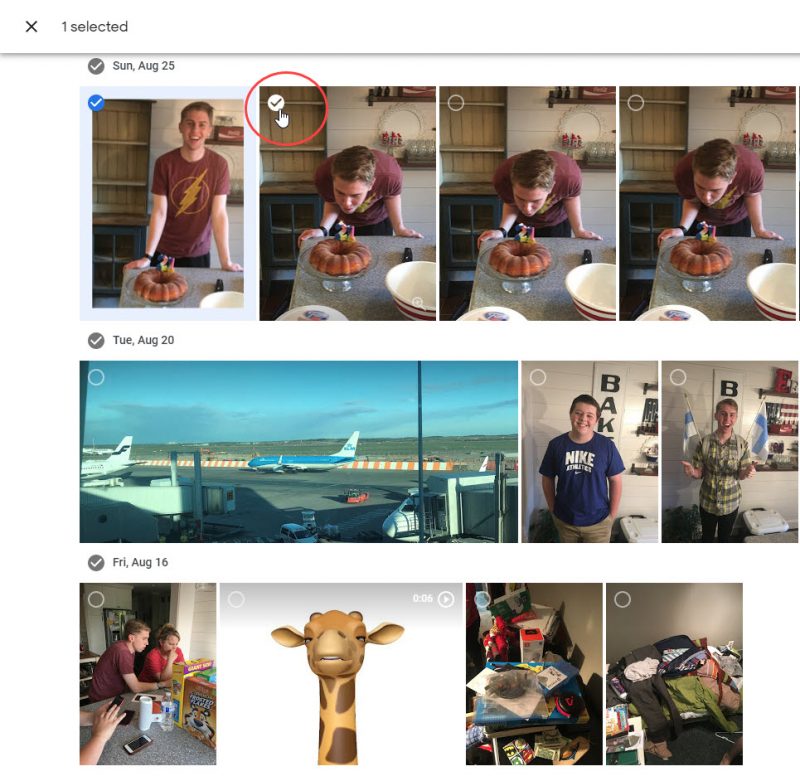
Before you can organize your photos, you need to select which ones to work with. So you need to click on individual photos to select them. When you hover over the picture with your mouse a little checkmark icon appears in the top left corner of the picture. Click that circle to select a single picture or select several at once.
The bar across the top of your screen lets you know that you have “X” number of photos selected. On the right side of this bar is a + icon. Click it.
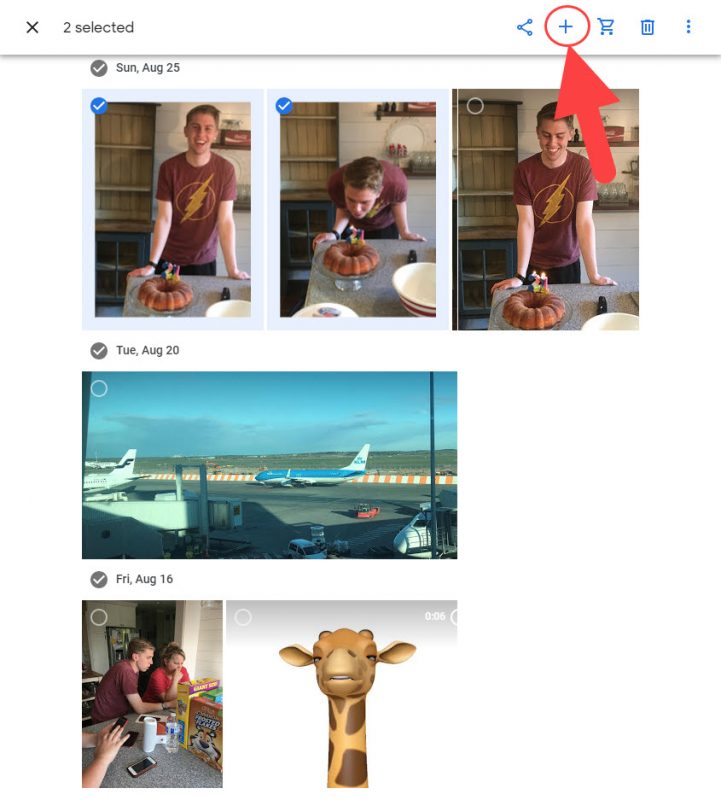
This gives you couple of different options, such as creating a new album. In Google Photos, albums are like folders where you can store pictures in categories. I use the albums just like that, as a way to organize my photos.
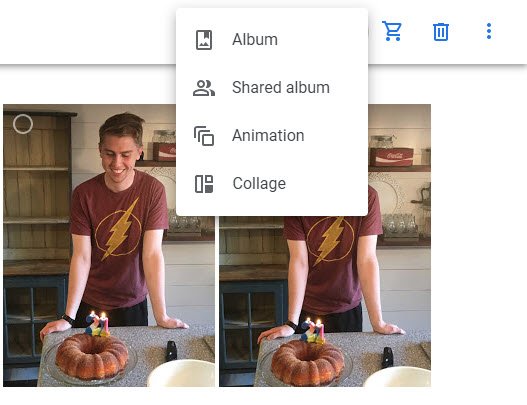
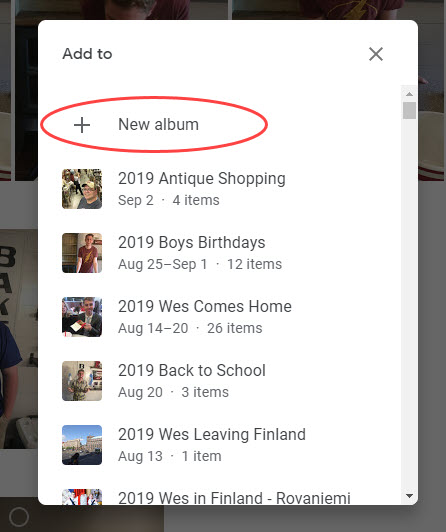
When you click the Album option, a new screen appears asking if you want to create a new album, or if you want to save the pictures into an existing album and then lists previously created albums. For the sake of this tutorial, we’ll create a new album, but if you were to select an existing album, your selected photos would be added into it. But your photos will always still be arranged by date within that main PHOTOS area of Google Photos.
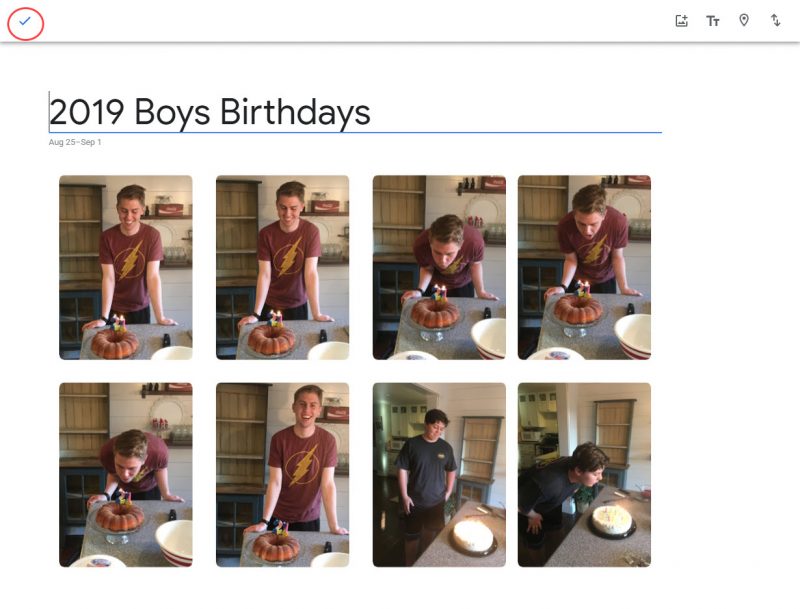
Creating a new album puts your selected pictures together on the screen. Now it’s time to give the album a name. I have a system where I name the album with the YEAR and then a short DESCRIPTION of what the photos are all about. For example, I have albums named 2016 Graduation, 2009 Easter, 2014 Yellowstone, etc. Type a name for album and then click the checkmark in the banner across the top of the page to save it.
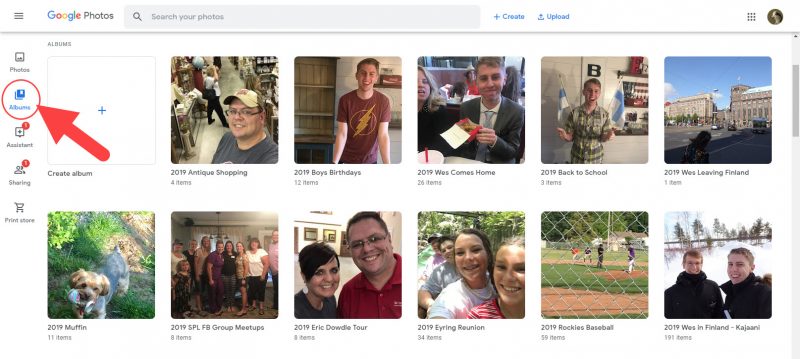
And that’s it. That’s how easy it is to organize your pictures within Google Photos! Once albums are created, you can access them all at once by clicking the ALBUMS option on the left side of Google Photos.
Once I have my pictures arranged into albums, I slowly work to get them scrapbooked. When I’m ready to make a page, I log into Google Photos, and find the pictures (or album full of pictures) that I want to use. I select my photos and then click the three dots button in the top right corner of the page.
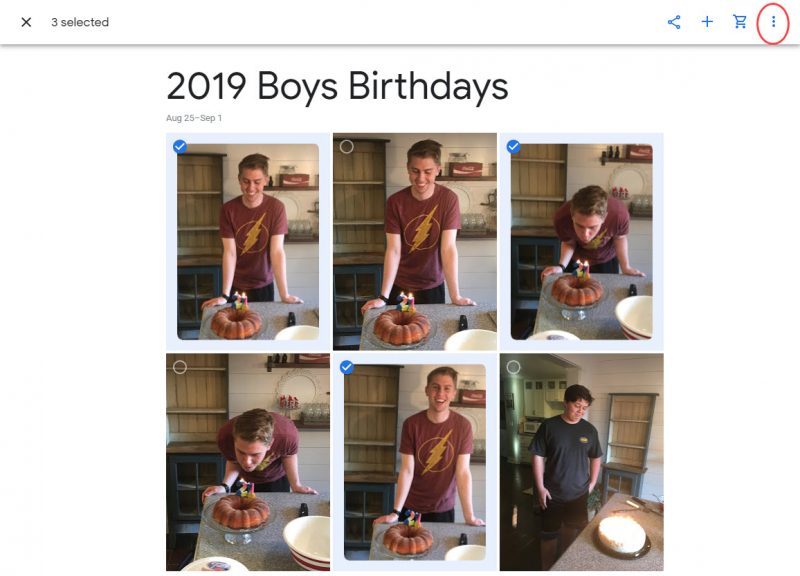
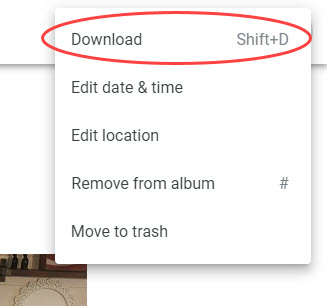
Then I select the DOWNLOAD option, and download those pictures onto my computer desktop, so I can drag them into Photoshop and create my scrapbook page.
Then, after I’ve created my page, I want to make a note to myself that I have scrapbooked those photos, because let’s face it, the old memory isn’t what it used to be!
I go back to Google Photos and click the ALBUMS button to bring up all my albums. I find the album the photos came from, open it up, and I change the name of the album by adding an asterisk (*) to the beginning of the album name (for example: *2016 Graduation). This is just an indicator to me that I have scrapbooked those photos.

Believe me, you will be glad that you have some way to know what’s been scrapbooked and what hasn’t after you’ve made a few hundred scrapbook pages, or if you take a break from making pages for a while!
BONUS INFO
Now for a couple of cool things that Google Photos does.
Once you have several hundred photos stored in Google Photos, try clicking the ALBUMS button. There should be groupings along the top of the page for PEOPLE & PETS, PLACES, THINGS, & VIDEOS.
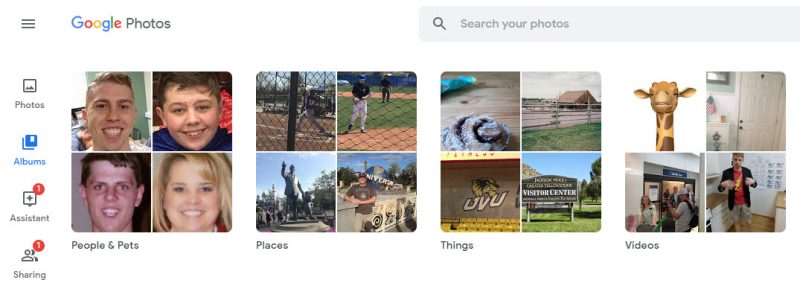
If you don’t see these, it may be that you haven’t stored enough photos for Google to have enough info to create these groupings. I have found that you need to have at least 500-1000 individual photos stored in Google Photos before these options pop up.
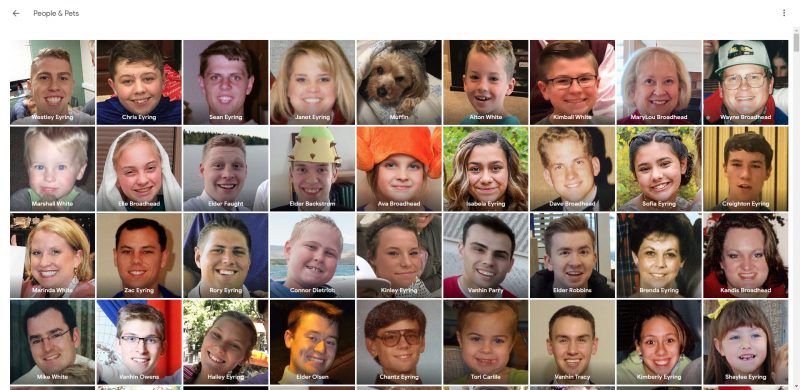
Because Google is first and foremost, a search engine, it tries to make your photos easier to search through by creating these groupings. My favorite grouping is the first one: PEOPLE & PETS.
Click on PEOPLE & PETS and you will see a collection of individual people’s faces from your photos.
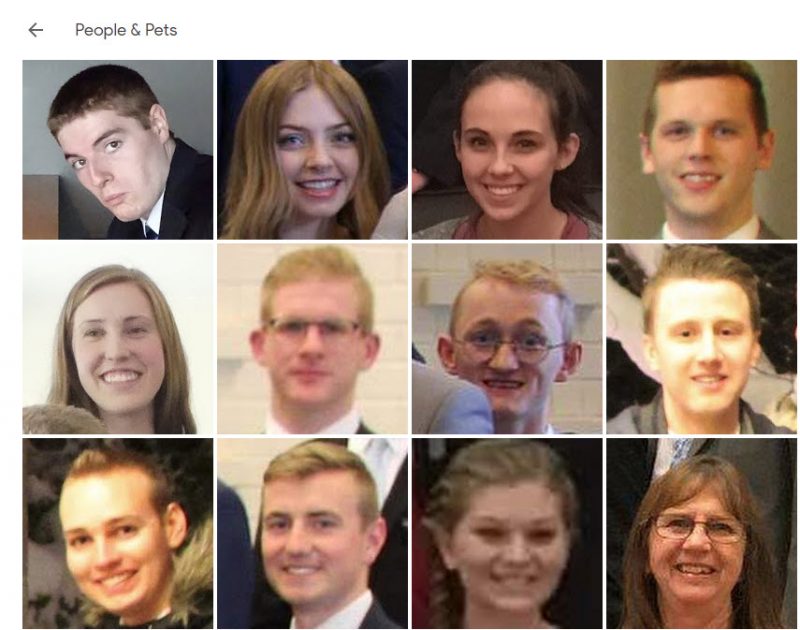
If you click on one of the faces, it will open a new screen where it shows you each album that face appears in (at the top of the page) and each photo the face appears in (at the bottom of the page). You have the ability to Add a Name to the face. Basically, you are telling Google who this person is, and it will use some behind-the-scenes-magical algorithm to locate and “auto-tag” that person in other photos within Google Photos.
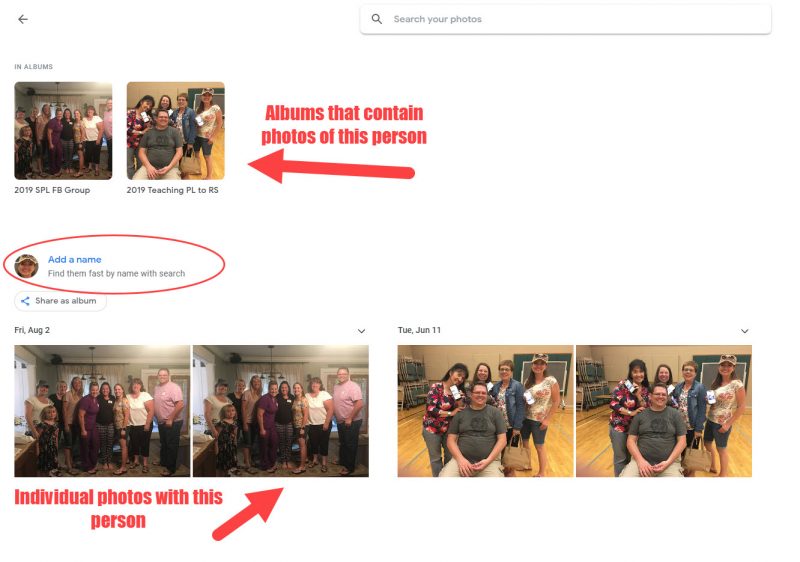
So if the person’s face you clicked on is your son Bob, where it asks you to Add a Name, type “Bob”. Google Photos will now “recognize” Bob, and as you add more photos of him in the future, it will continue to list the additional albums and photos in which he appears here on the page, or whenever you perform a search using his name.
And because Google is a search engine, once you have started adding names to some of the faces using the above method, you will actually be able to perform a search within Google Photos for “Bob” or “Aunt MaryAnn” or any of the names that correspond with the faces you have tagged, and it will locate every picture they’re in that you’ve uploaded! How cool is that?
This is super helpful, especially if you know in your mind what a photo looks like, but can’t remember the year or event album it’s located in. Just enter the person’s name in the search field and all the photos they are in display, making it visually easy to find what you are looking for.
In my experience, (and I have stored thousands and thousands of pictures in Google Photos), I have found that the facial recognition search engine is highly accurate, even across faces that have aged considerably. But, at times, it will “mistake” a face. This happens most often with my wife and her sisters. It pulls up a picture of my wife’s sister Carolyn thinking it’s my wife, or that my mother-in-law is my wife (much to my wife’s horror!) But before we get into how to correct that problem, let’s talk about another similar one.
Let’s say that you have begun tagging faces as described above, and you’ve already labeled your wife’s face with her name, but it pulls up another picture of your wife that it doesn’t recognize as her. Tap on the face and it will prompt you Add a Name again. Type in the first few letters of the name, and it will show a list of matching names you have already tagged. Click the name of the person in the photo and Google Photos will ask you if the photo you clicked on is the same face as one you previously added.
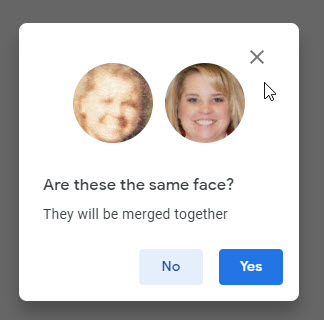
If it is, click YES, and Google Photos will “learn” to recognize those facial features as the same person. This happens a lot if you have tagged photos of babies/children and then their face shows up again as an adult.
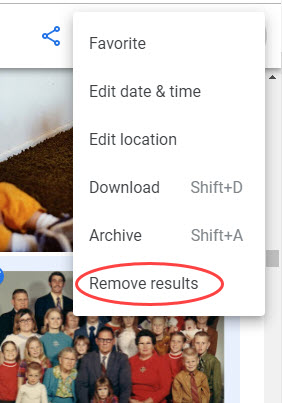
Which leads me to the opposite problem. What if, when you do a search for “Cousin Edgar” it shows in your search results some photos that quite obviously are not your dear cousin. You can also teach Google Photos when it has made a facial recognition mistake. When you are looking at the list of matching results, select the photo that is mis-tagged by clicking the little circle icon on the photo itself (in the top left corner).
This will add a checkmark and select that photo (you can select multiple photos this way, too). At the top right corner of the page, click the three vertical dots button.

Then select REMOVE RESULTS. That photo will now longer show up in “Cousin Edgar” searches. Easy peasy!
So, in a nutshell, that’s how I organize the pictures I keep stored on Google Photos. And every few weeks as I’ve upload more photos, I do a quick face-tagging round and call it good. Pretty soon, when you click on PEOPLE & PETS, you will have a big collection of faces you’ve identified, and you can click on any of these to quickly open a collection of photos that person is in.
Google Photos has recently added PET face recognition as well! So if you have taken photos of your dog or cat (haven’t had it work on pictures I took of my ducks, though LOL) you can tag those with your pet’s name just like you did Cousin Edgar!
But…..you will have a collection of faces that you don’t/can’t identify. Google Photos pulls in EVERY face from your pictures, even those of bystanders in the backgrounds of photos, so I just identify the ones I can and leave the rest alone.
And one last thing. You can also search your Google Photos for other keywords, too. Want to quickly find pictures from the beach? Try searching for the word “beach”, or “palm tree” or “ocean”. Google Photos finds pictures in your albums that it thinks match your search words! You can also try looking in the THINGS or PLACES groupings like you did with PEOPLE & PETS. There’s a lot of meta-data stored in your photos, and Google Photos uses those to try and store your photos geographically in the PLACES grouping.
Well, that’s about all I know about Google Photos, and what little I know I have learned from just playing around with it. Let me know your experience with beginning to use Google Photos (or if you are experienced, some tricks you’ve learned) in the comments!

About the Author Sean is a native New Mexican who fell in love with a Utah girl 25+ years ago and never went home! He is the designated scrapbooker in his family, preserving the memories of his wife, two sons, and dog Muffin. He loves all things Disney, Harry Potter, and anything related to his favorite animal, the duck! When he’s not writing long-winded blog posts, he’s probably scrapbooking on his phone or computer. He joined the Creative Team at TDP in February 2019.
Thank you so much for the tutorial! I have this installed but I was just trying to give photos to my sister from a trip we took together. Now that I know how to use it I will definitely start taking advantage of it! It has done some of this already but I thought it was a change in my iOS.