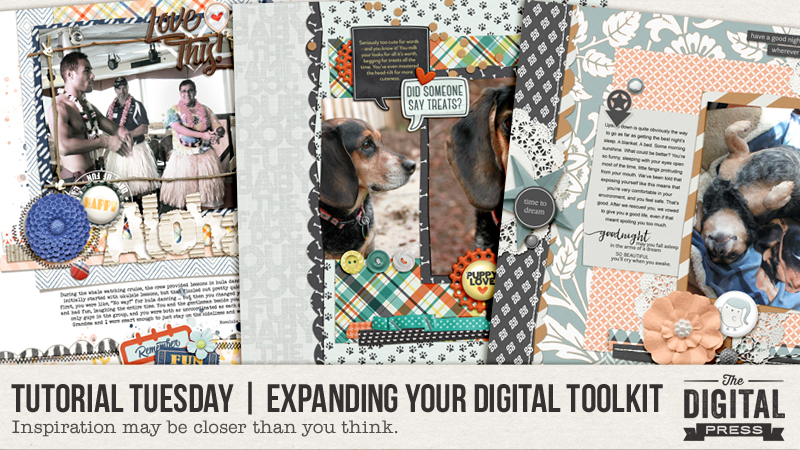
We’ve all had that moment when our creative mojo just escapes us. You’ve been there before, right? You’ve got the time to create… a brand new kit that you really want to work with… and nothing. So what do you do?
Most of us browse galleries for inspiration, of course. Then you find “it” — a layout that has you saying, “wow, I really love that!” Maybe it’s the pictures, the composition/proportions on the page, the kit selection. Oh, hang on a minute… that’s your layout! Wow, that’s a little embarrassing. Actually, it’s not. Most of us are the resident memory-keeper for our family. We should be proud of – and love – the layouts we create. So how about using your own layouts as the inspiration for something new? Yes, I’m talking about expanding your digital toolkit and scraplifting yourself!
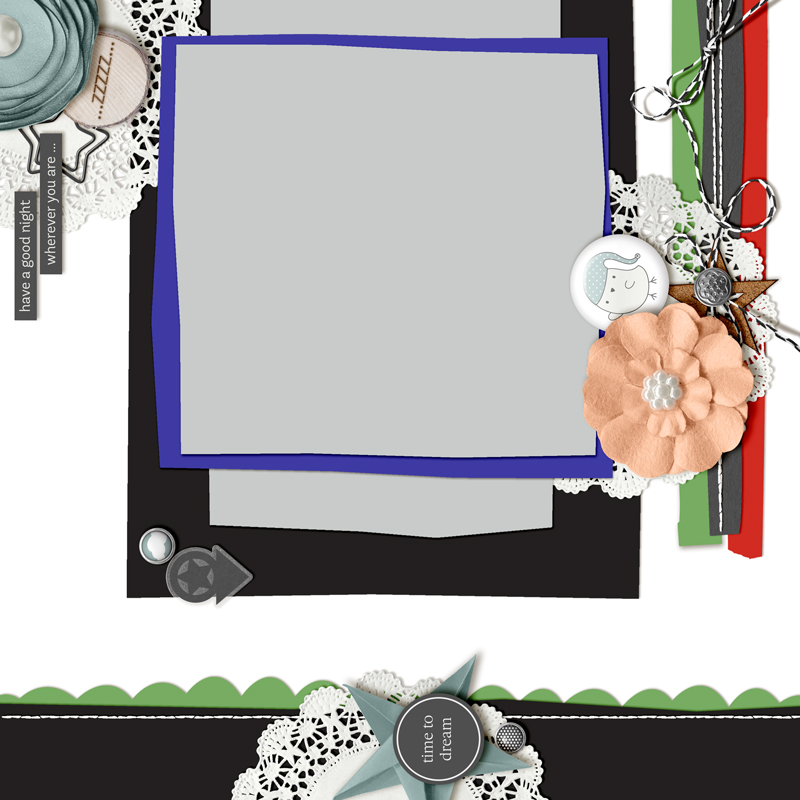
I look at scraplifting as one of the sincerest forms of flattery in the digital world. When you scraplift a page, you’re saying to the creator that their page inspired you to create; it struck a chord with you. It’s okay to give yourself a pat on the back for a layout well done… and if you find a formula that you like, why not repeat it? Scraplifting could be duplicating a layout design, or using it as inspiration to build from. I love doing the latter and wanted to show you my process for “lifting” the page shown here…
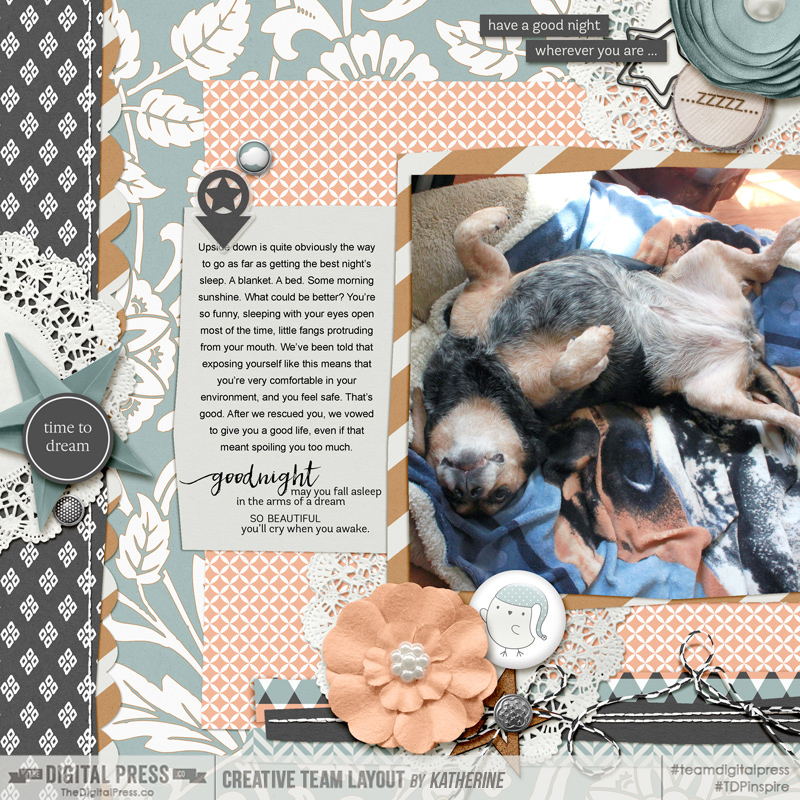
[credits: Sweet Dreams — a collaboration by Sabrina’s Creations and Designed by Soco]
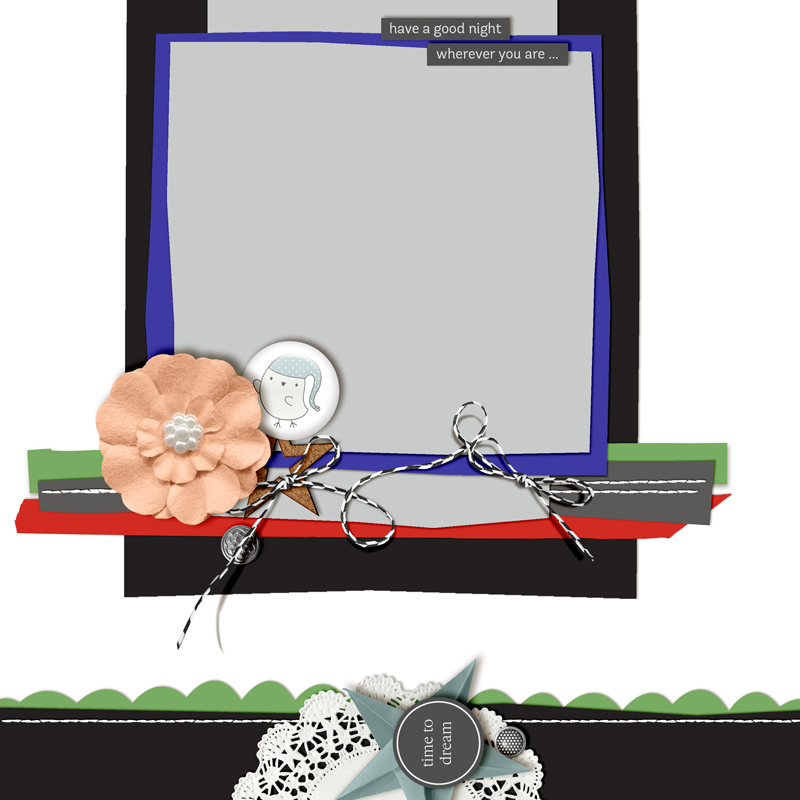
Where to begin? Open your original file in Photoshop or Photoshop Elements and save a copy to work from. This is so important! You don’t want to make changes to your original file and then accidentally save them and over-write your original! Take it from someone who has “been there, done that” — it’s not pretty. On your duplicate file, start removing any paper or photos layers that you might have clipped to shapes. You want to strip the layout down to the basic design elements, like this:
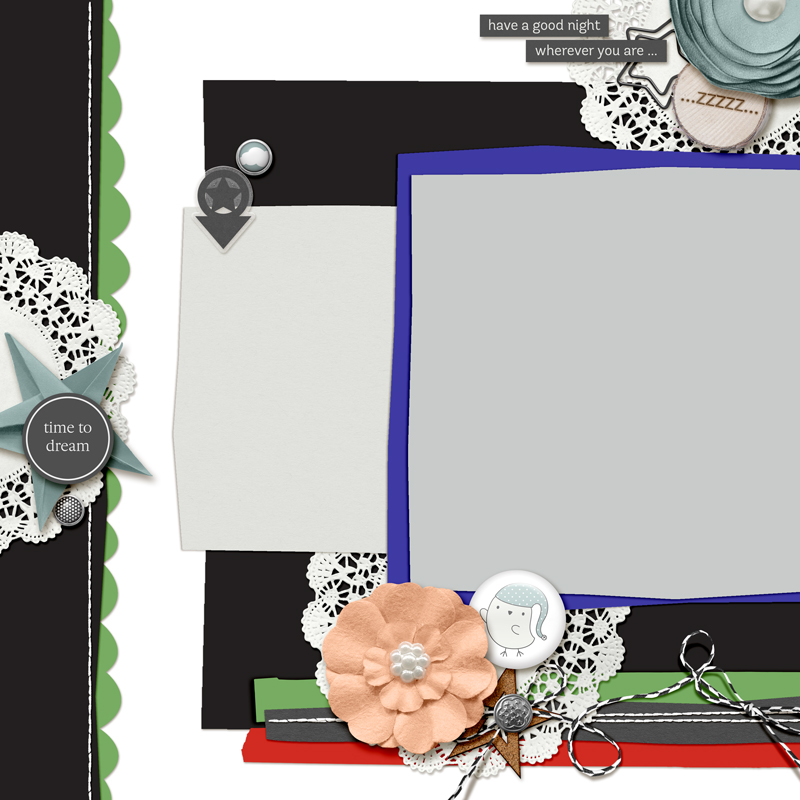
Now, I like to use my existing layouts as inspiration and not necessarily duplicate an existing design (although that’s a great option, too). With that in mind, now that I have the base design laid out in front of me, it’s time to play around by moving elements (or groups of elements) around to create something new.
I like the vertical paper strip on the left with the scalloped edge peeking out and the stitched top edge. This would really lend itself to being on the bottom of a page. Ah, rotate the layout counter-clockwise (all layers), and then lower that portion of the design just a little…
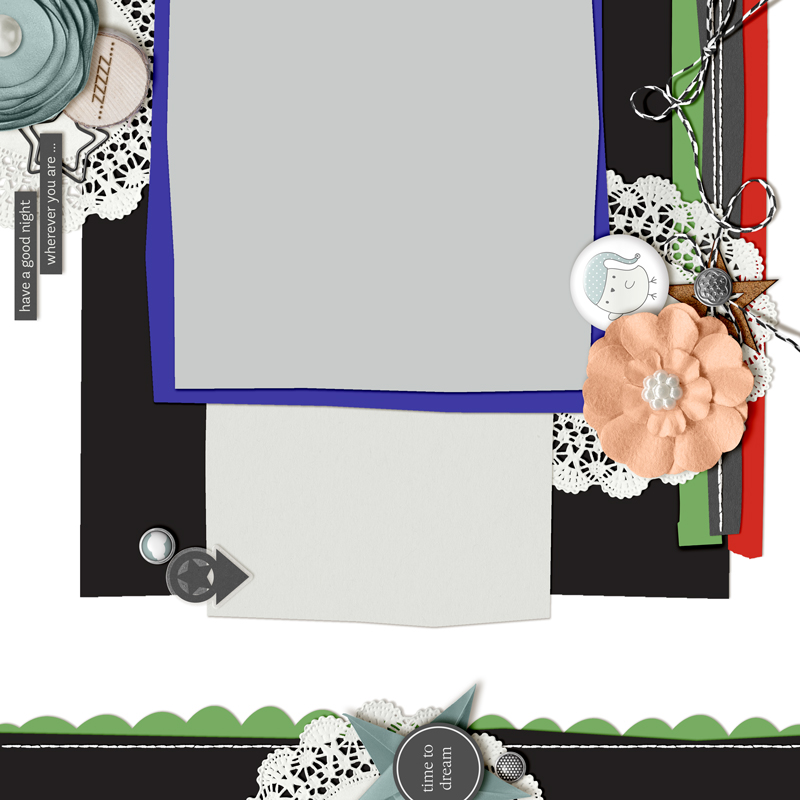
With that central cluster of elements on the bottom edge, I’m now starting to think a vertical design — right down the center of the layout — might be the way to go. Here’s what the design looks like after I’ve moved and re-sized some of the papers. You’ll see that the overall design of the original page is still there; it’s just been modified enough to make it a little different…
Some of the original element clusters on the sides are now looking… well, “off” for want of a better word. This doesn’t mean they should automatically be deleted, however; they can still be re-purposed in the new design layout. Sometimes simply rotating and moving the elements can breathe new light into them. The cluster on the right-hand side of the page, for example, is one I really like. However, the vertical placement just doesn’t work now. Making it horizontal again (as it was in the original layout) will work. Rotated and moved around a bit, here’s how my page’s composition is shaping up…
You’ll see that I’ve also hidden a few layers, like the element cluster that was originally in the upper left-hand corner of the new design. It was just too much. Also, at this point I haven’t even thought about a kit design, new papers, or new elements. I’ve simply been setting up the foundation on which to build from — and that’s not always easy to do, as I want to jump right in!
Using this scraplifted version of my original layout, I can now start adding all of the new pieces to complete my layout. If I move things around again, that’s fine — it’s my page, my memory. I can do whatever I like with it. I’m a firm believer that there’s no right or wrong way to scraplift a page. Bottom line: have fun with it!
Here’s how my now newly-designed page came out:
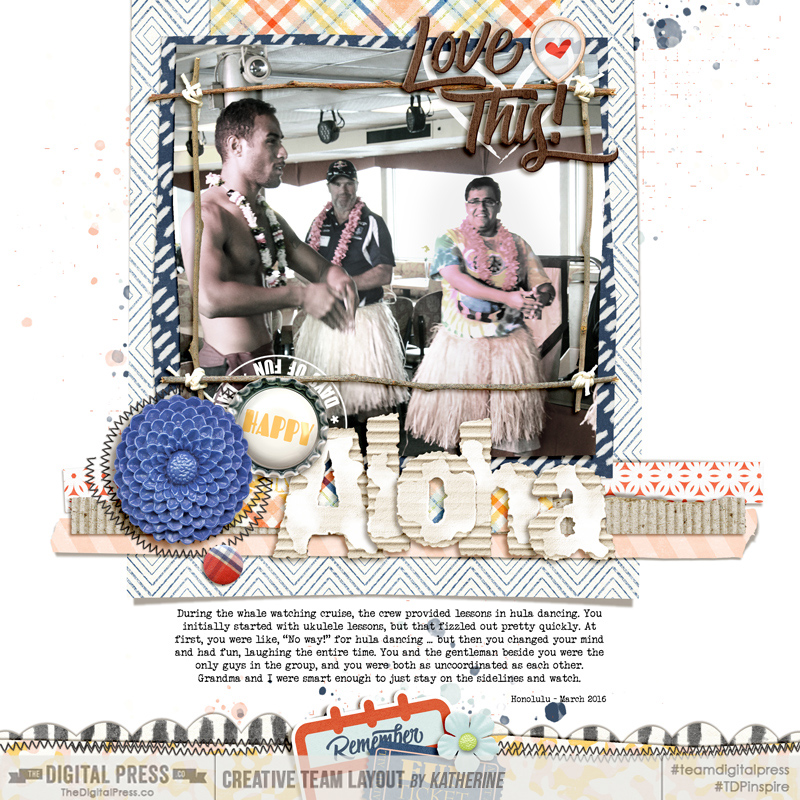
[credits: Away by Creashens]
…and just for fun, I did a second variation of the original page, just to show you that you can expand your toolkit and scraplift one page several times with each layout being unique to the memory you wish to record:
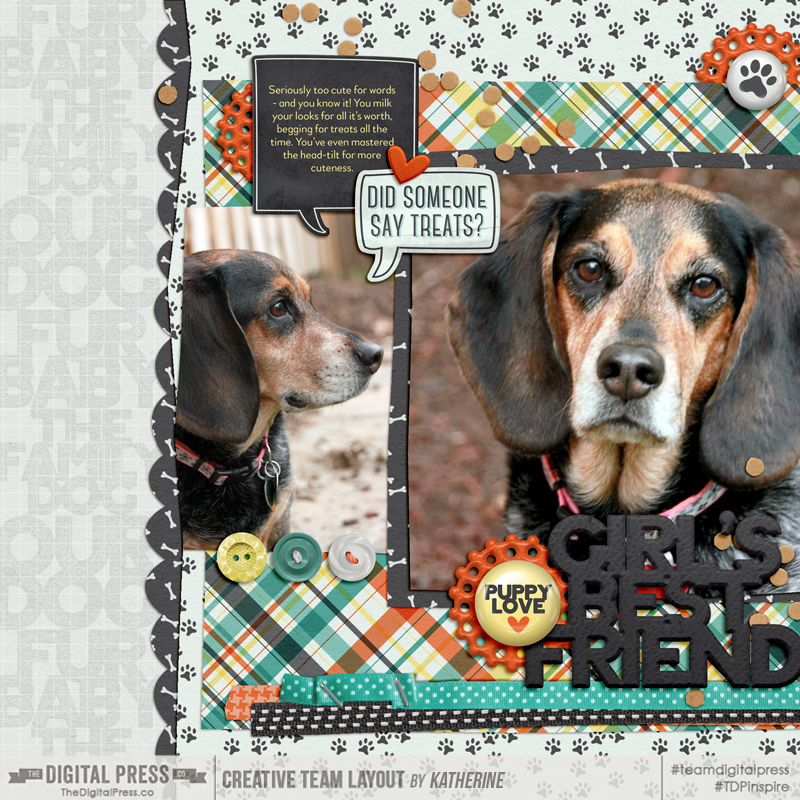
[credits: Leelo and Kiwi by Wildheart Designs]
So, if you like what you create… go ahead and give yourself permission to create it again, with a twist! A few things to remember:
- Create a copy of your original Photoshop file and work from that. Don’t work on your original file.
- If you rotate the design, watch for your shadow angles as they will rotate, too.
- If your original layout was based on a template, which you would normally credit a designer for, think about whether you will still give credit when you share your new layout. My own personal rule of thumb: If the new layout still closely resembles the original template, give credit with something like, “Template (modified) by …”
Scraplifting from your own gallery can be a great way to get your mojo going — or even just a fun exercise to do when you’re in a creative rush. It’s an easy way to expand your digital toolkit since you have all the inspiration right there at your fingertips: it’s you! If you would like to give this a try, I’d love to see what you can do with your own layout, so link me up with a before and after!
![]() About the Author Kat Hansen is a creative team member here at The Digital Press. A Director of Human Resources by day, she loves the opportunity to spend a few hours each day being creative. Vacation memories feature pretty heavily in Kat’s scrapbooking pages, as do her son and “daughter” (of the four-legged furry kind). Kat has quite the sense of humor (she “blames” her father for this), which she incorporates into her journaling and memory-keeping.
About the Author Kat Hansen is a creative team member here at The Digital Press. A Director of Human Resources by day, she loves the opportunity to spend a few hours each day being creative. Vacation memories feature pretty heavily in Kat’s scrapbooking pages, as do her son and “daughter” (of the four-legged furry kind). Kat has quite the sense of humor (she “blames” her father for this), which she incorporates into her journaling and memory-keeping.