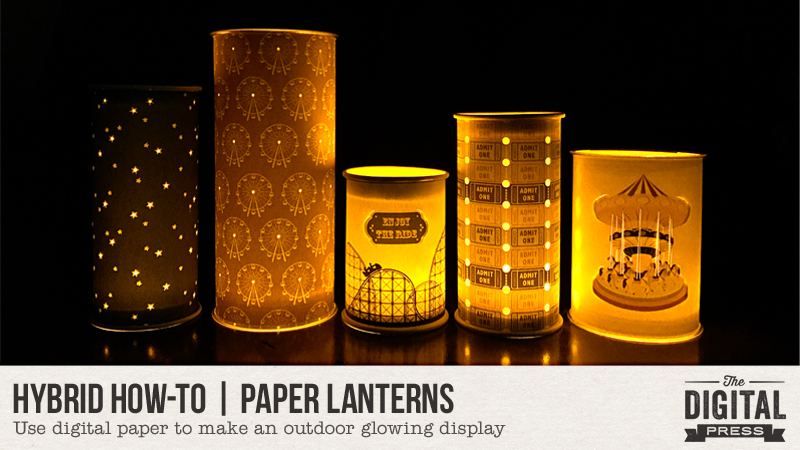
Hello, everyone! Kate here with another edition of our Hybrid How-To series here on The Digital Press blog! Today I’m here to show you how to make these cute paper lanterns that are perfect for your next backyard gathering.
Supplies Needed:
- digital kit of your choice
- lighter-weight cardstock (I found a package of 65 lb that worked great)
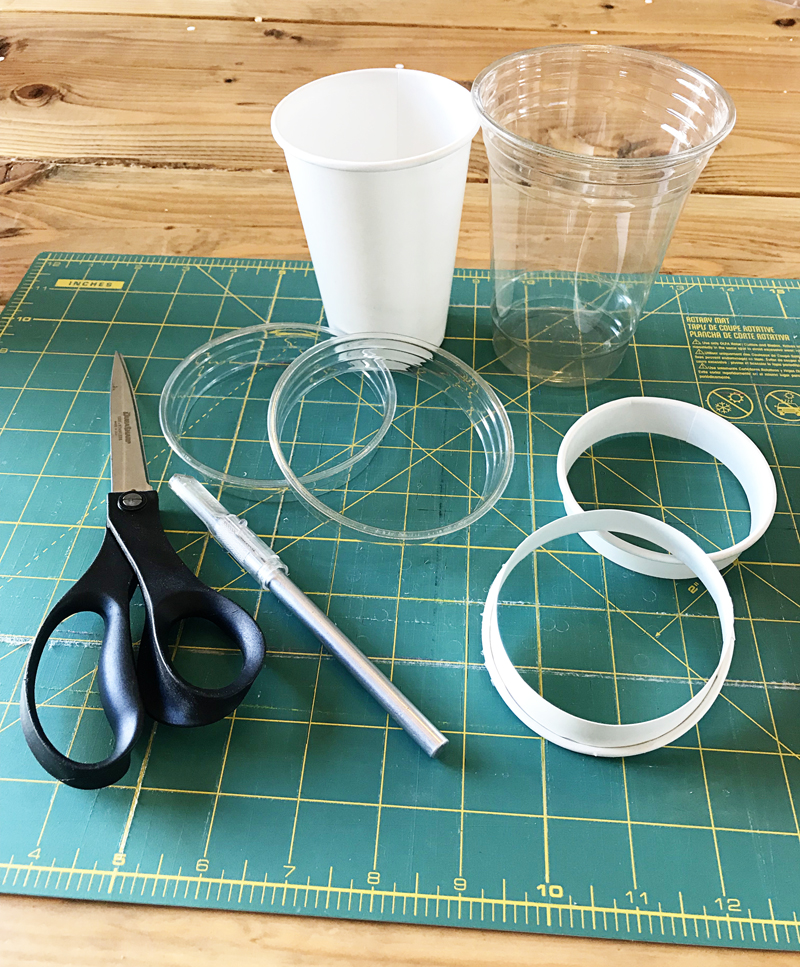
- plastic or paper cups
- x-acto knife
- scissors
- eyelet punch (not a plier kind, since you need to reach into the middle of the papers)
- glue stick
- LED tea lights
First, choose a digital kit with a theme that suits you. I chose Fun at the Fair by Rachel Etrog Designs for my lanterns, as shown here…
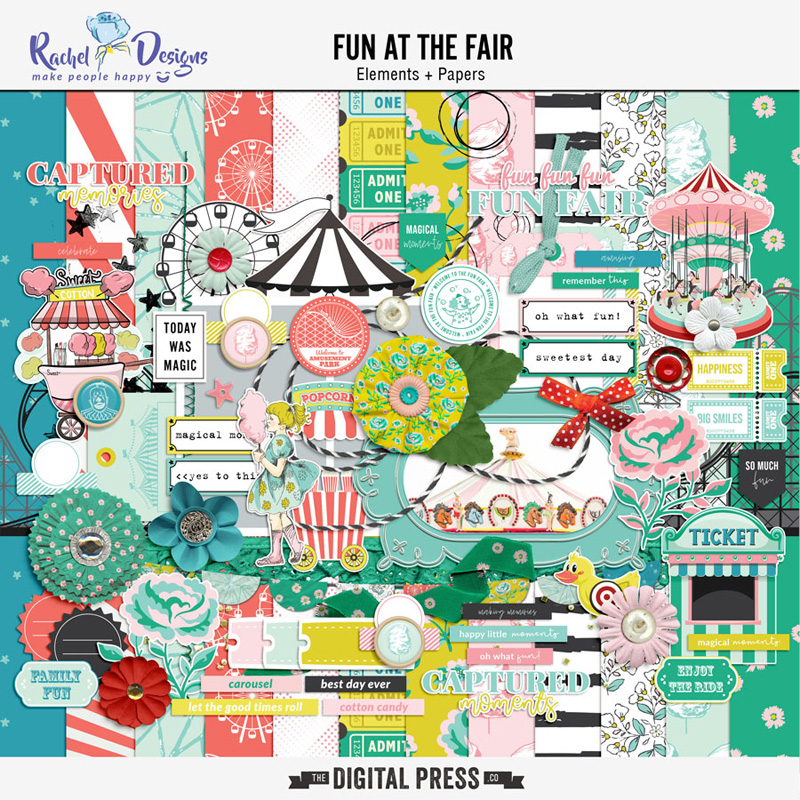
We have a concession stand we built for when we host movies on the back of our house; I thought this kit theme was perfect!
Next, measure around the thickest part of one of your cups. Add 1/2” to that (for overlap so you can glue it together). I chose two different-sized cups for my lanterns; thus, I had one that measured 10” and the other measured 12” after adding the 1/2” overlap.
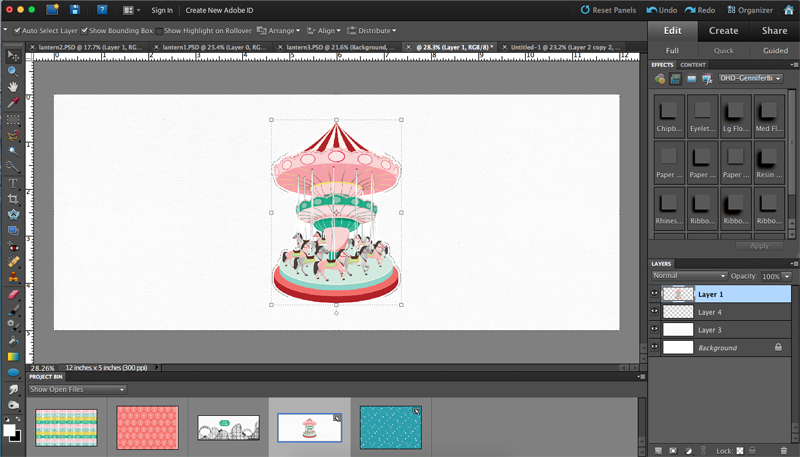
I created a canvas to those specific sizes in Photoshop because I knew I wanted to design the lanterns using both the paper AND elements from the kit, but a photo-editing program isn’t necessary to do this project. You can also just keep it simple by printing off the papers and cutting them down to size.
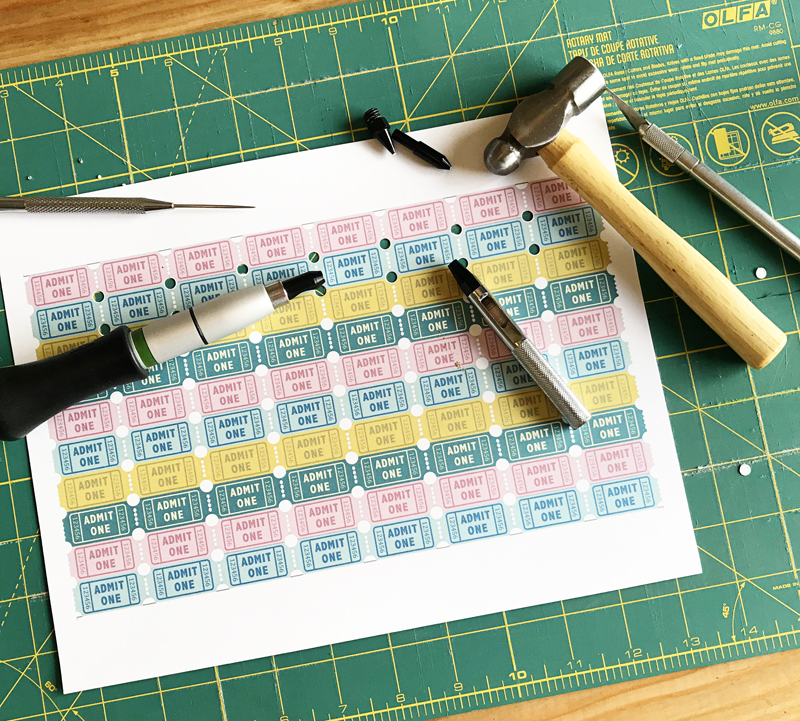
After everything is printed, take your punch or x-acto knife (or both!) and make holes or lines in the paper, depending on the pattern. I have two different sizes available with my punch. I used the bigger one on the ticket paper I printed out, and I used the smaller one for the star paper and ferris wheel paper.
I also followed one of the roller coaster lines with my knife so light would shine through. I cut around either side of the carousel so it would pop out a little when I rolled it and then used the knife to cut the carousal poles.
Next is to cut the rims off the cups. You need two per lantern to stabilize them and to help keep their shape. I punched through the cups with my knife and then used the scissors to finish cutting around the rim, leaving about 3/4” of the cup intact.
Make a tube with the paper and glue the seam together. I had two seams for my larger lanterns.
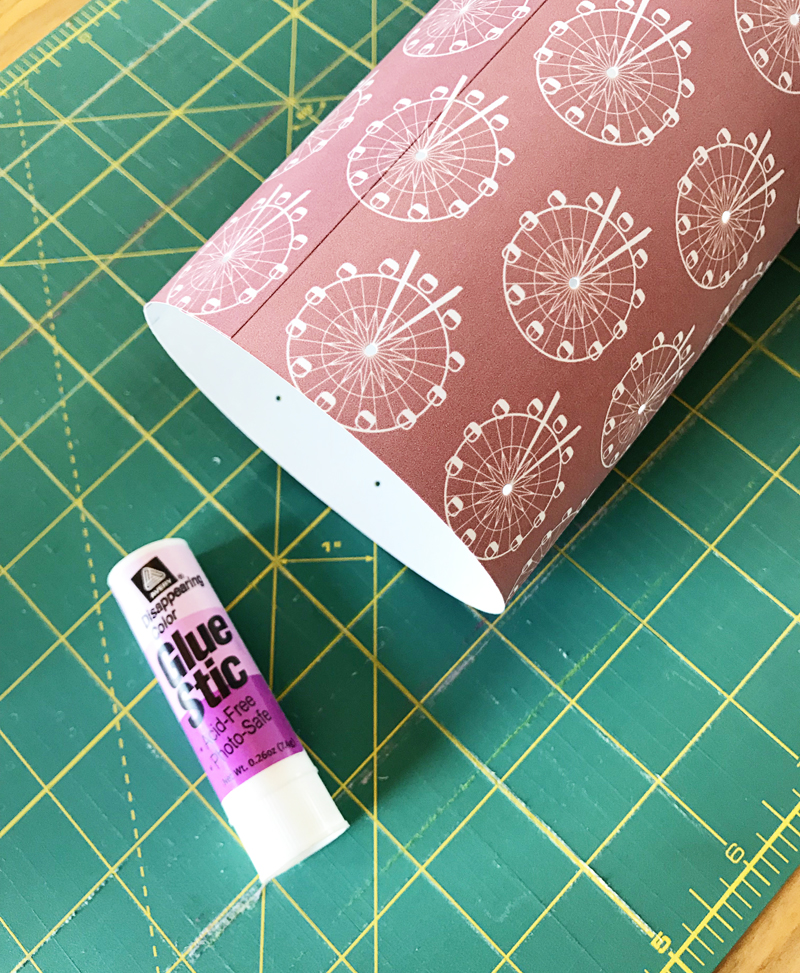
Insert the cup rims on the top and bottom. I was going to to glue them in, but they ended up tight enough that I didn’t have to do that.
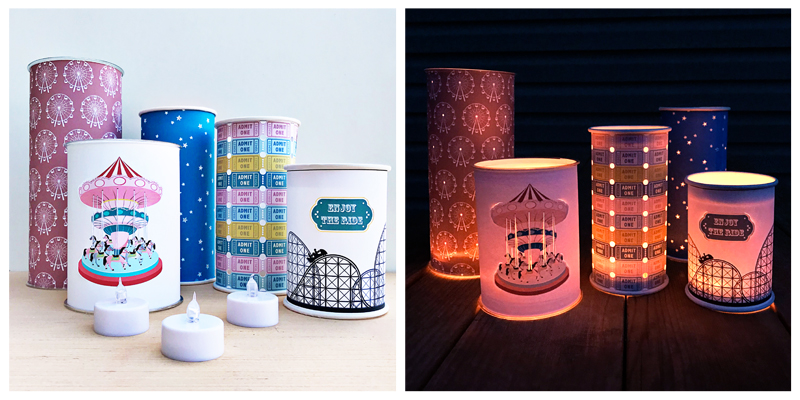
Now all you do is place them over the LED tea lights. I really love how easy these were and how impressive they looked once it got dark! It was such a fun project and I hope you’ll give it a try.
 About the Author Kate is on the hybrid team here at The Digital Press. She lives on the Utah/Colorado border with her husband, 5 kids, 10 chickens, a dog named Gracie, and a cat named Kit. She’s a city-born girl who found she’s really a country girl at heart. She can be found outside, barefoot, and probably in her garden.