Hello Everyone!
In this post I’m going to show you a work in progress I started recently using my traveler’s notebook with the amazing products we have here at The Digital Press. It’s my Bucket List Traveler’s Notebook. It’s super simple to do and so much fun.
Let me start by reiterating, I know this is not a finished project like you usually see on the blog from our amazing hybrid team. That’s one of my favorite aspects of this amazing hobby we share, it can be as “done” or “not done” as you want it to be. It’s all up to you.
One of the biggest reason I turned to traveler’s notebooks is because life has been super unpredictable and stressful lately for me and I need a little more distraction than a 12×12″ page can do for me. And I’ve found an easy pick me up in those moments when I need a break from overthinking everything is to look at places I’d like to be instead of the stress filled place I’m in at that moment. Rather than getting stuck in a parade of pictures (and ads) online that don’t relax me, I’ve made my own happy place to peruse till I feel ready to tackle the world. And best part I gave myself license to get creative in my notebook. Whether it be hand drawn doodles or notes on a journaling card or whatever bits and bobs hit the spot.
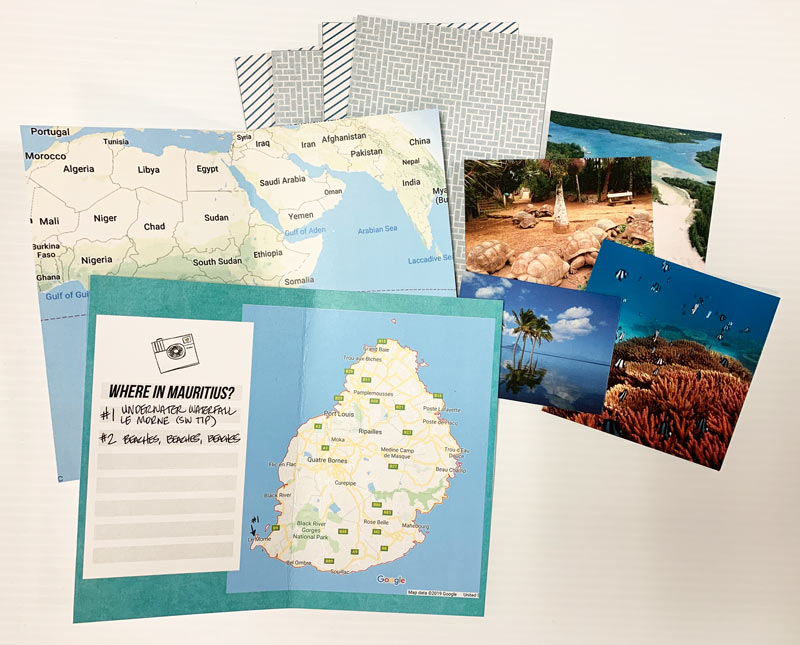
For this Bucket List Traveler’s Notebook I started by collecting screenshots from Google Maps of the my most recent place of interest, the island of Mauritius. (I know the likelihood of ever getting there is 1 in 5 million-billion, but that means there’s still a chance, right?!?) It’s fun to dream and that’s what this notebook is all about.
I have templates for my traveler’s notebook set up in a layered photoshop file so that I can start clipping and printing as quickly as possible… and I waste less ink because I’m not throwing away lots of page that got printed on but didn’t get used once I cut things down to size.
To get started, I printed a couple pages on one side with light bright fun papers that I could write on as I made my plans. Then I found maps on Google first of the island itself and a second zoomed out. Then printed them on to the front of the pages I printed earlier. Here’s what I started the project with, my double sided Google map prints, photos from travel websites and few pages with papers clipped to them.
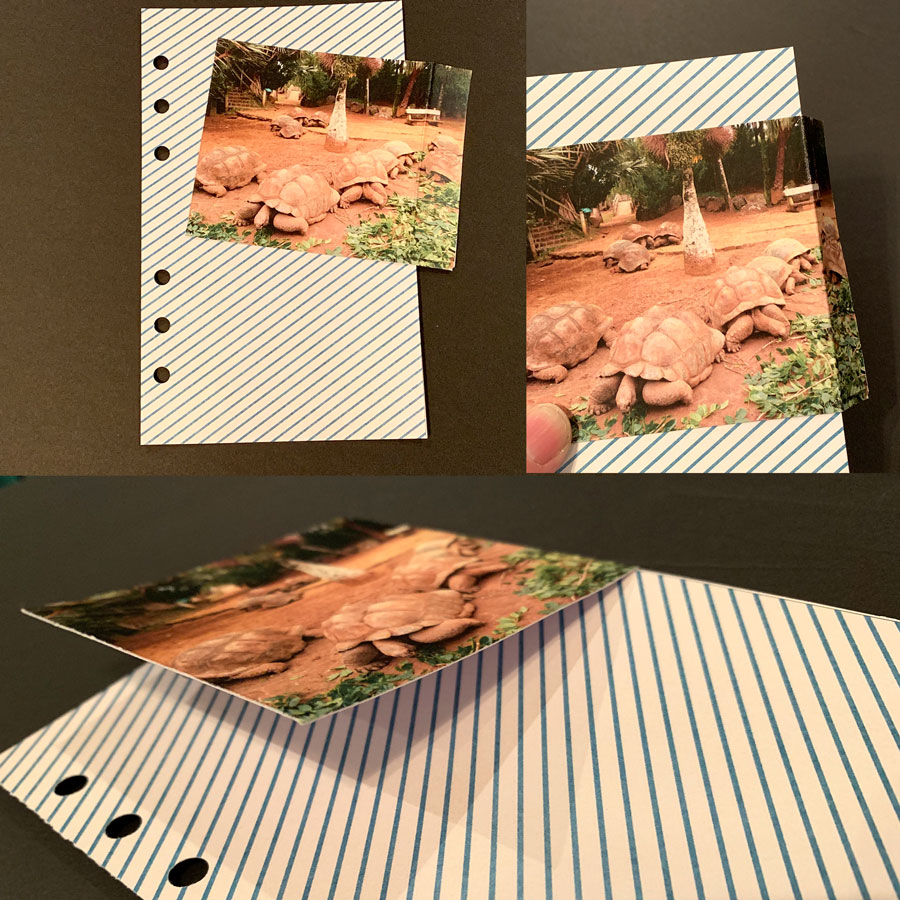
Now the fun begins. I quickly realized in my rush to get started that a couple of my picture were too large for the pages I’d printed. But that’s ok (remember, it’s a work in progress) to remedy this I creased one side and made a flap to hide notes or journaling under.
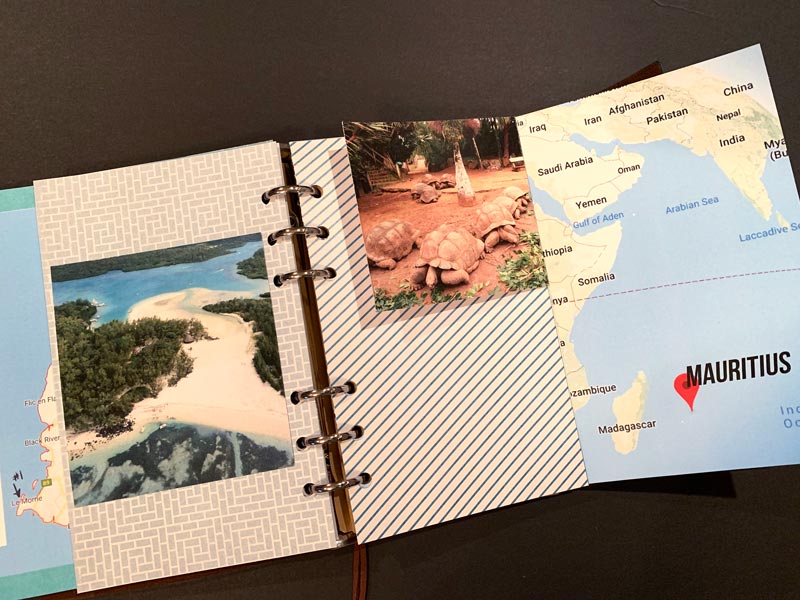
Now it’s just layering in embellishments, photos and etc till I get it where I want.
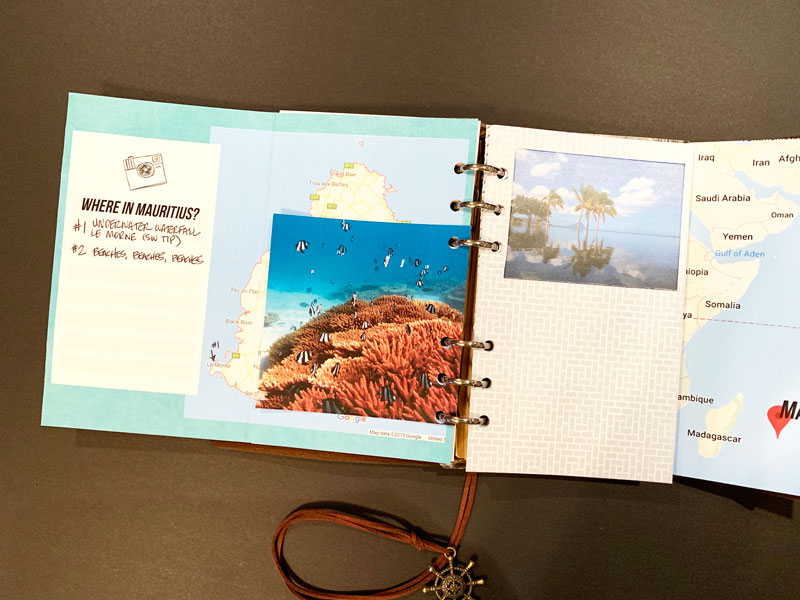
And here’s a second view.
I’m pretty happy with the start I’ve made on my notebook. My next step is to learn a little more about the island and print some journaling cards to fill in the empty spots with destinations and other ideas to fill my time while I’m “on the island”. 😉
I hope this has inspired you to create your own traveler’s notebook, in whatever theme you want or a bucket list of your own, and most importantly to give yourself permission have a work in progress to inspire your own dreams and while away some creative time.
Make sure you check out the shop at The Digital Press for the dreamy traveler’s notebook products our amazing designers have created for you to start your own notebooks with. Thank you for reading!
 About the author Sandy (or SandyPie as she is known in digiland) is a hybrid scrapbook enabler and nerdy introvert. When she not scrapbooking, working, or playing Pokemon Go… she is trying to survive the day with her husband, two teenage boys and four cats. Wish her luck!