Category: Holiday Tips & Tricks

10 Holiday Tips & Tricks | Day Four

Hello there! Amie here (of Little Lamm Paper Co.)… wishing you a very Happy December and welcoming you to Day Four of the 2018 edition of our always-popular 10 Holiday Tips & Tricks series here on The Digital Press blog!

I hope everyone is having a wonderful December so far! I’ve been having a great time making paper decorations with the kids this year. Stars are a huge favorite… and so today I’m going to show you one easy star you can make with just a few tools, in order to create really fun and easy holiday decorations.

SUPPLIES NEEDED:

  • paper (plain paper, patterned paper, printed digital paper, cardstock… it’s up to you!)
  • scissors
  • ruler
  • pencil
  • plate/bowl/other circular object

INSTRUCTIONS:

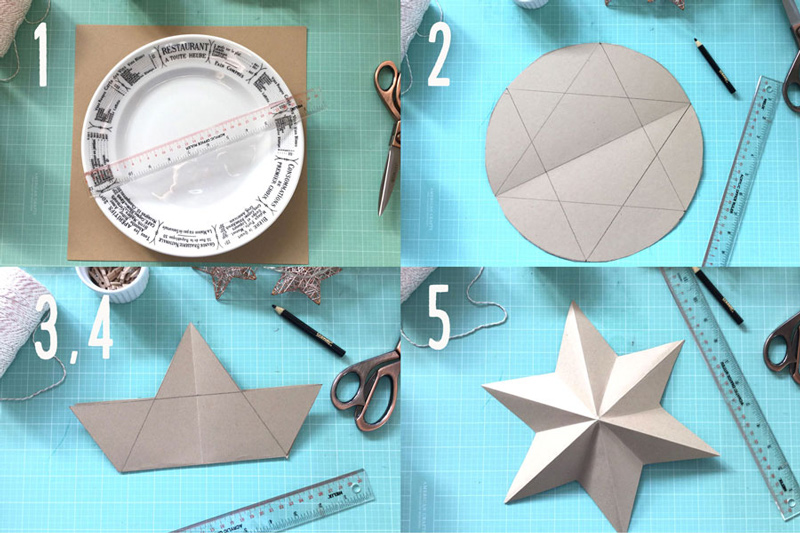
  1. Grab a plate or bowl and measure the diameter. Halve this, and make a note. For example — my plate was 11 inches, so I need to remember 5.5″ (you can totally use a compass for this. I’m not sure why I can’t find mine; probably because small kids and items with sharp points need to be hidden, LOL).
  2. Draw around the plate, and then mark distances of 5.5″ around the rim, giving me 6 equidistant points.
  3. Join up these marks with straight lines, skipping alternate points, ending up with a star.
  4. Cut the star, and fold right sides together along each of the inner angles of the star. Do this 3 times total.
  5. Turn over and fold the wrong sides together along each of the outer points of the star, again 3 times. This will give you your 3D shape.
  6. Refold and score again to reinforce sharpness of the folds, then pop out to make your star.

**NOTE** don’t worry too much about getting your fold lines up super perfect. It’s not noticeable if they are a bit off. 

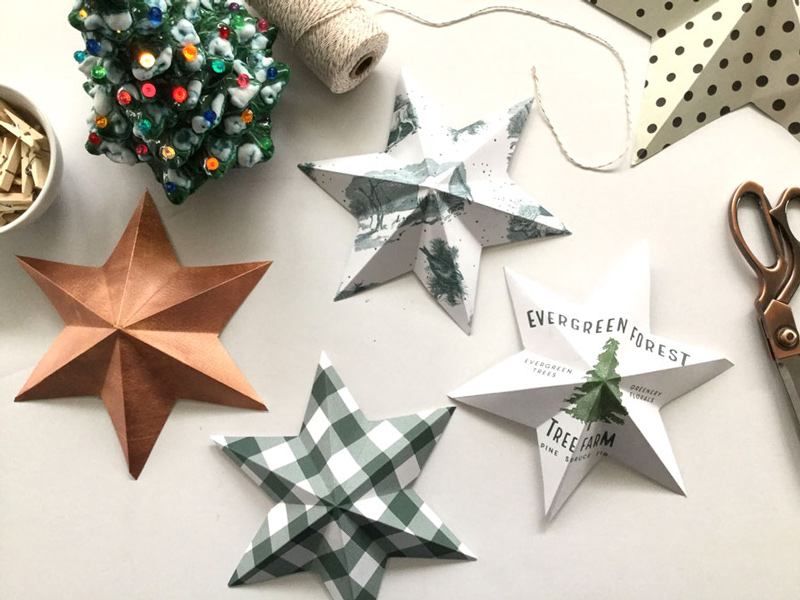
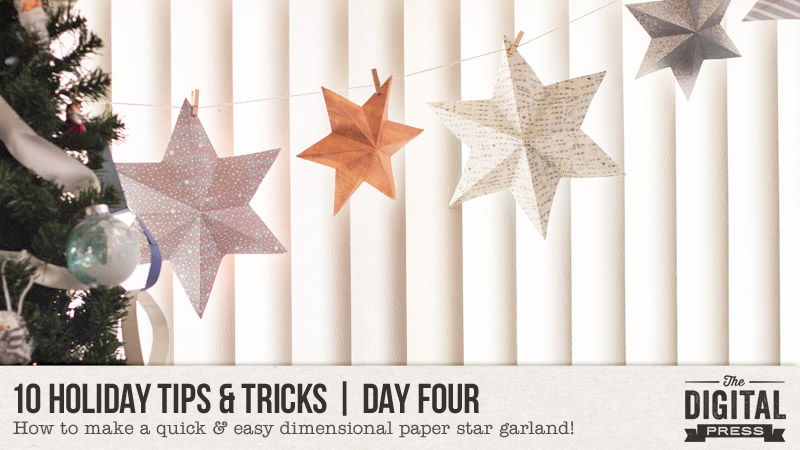
Here’s a look at a few different stars I created, using different patterned papers…

To hang the garland, I used some metallic baker’s twine and mini clothes pins… but you can string the stars, or staple them, or even attach them directly to your wall. Mix and match with other fun paper decor or letter banners, or even some fairy lights!

Take a peek at how cute this is hanging along a wall, or a window, etc…

If you would like even more paper garland and decor ideas, you can check out my Pinterest page HERE.

And if you’re thinking of trying this… head over to The Digital Press’s challenge forum and get the details about how you can earn challenge points for December 2018 at TDP if you try any of our “Holiday Tips & Tricks” throughout the month as they appear here in this blog series! Additionally, we’d love to see any photos of your December/holiday projects using TDP goodies in the gallery this month, so link us up after you’re finished creating and uploading! 🙂


Amie Lamm

About the Author  Amie Lamm is the designer behind Little Lamm Paper Co. at The Digital Press. She is a work at home mom/graphic artist living in Fargo, North Dakota with her hubby, her almost 6 year old son, 2 lazy cats, and a hyper bulldog. She survives her days with copious amounts of coffee and recorded episodes of Fixer Upper.

10 Holiday Tips & Tricks | Day Three

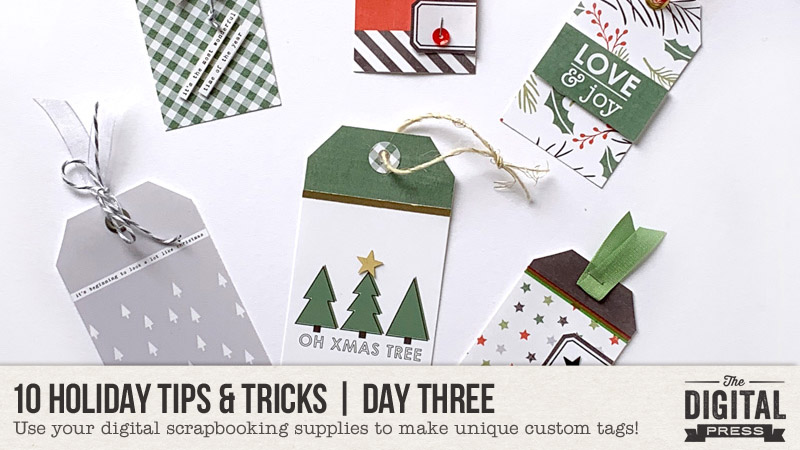
Happy holidays, everyone, and welcome to Day Three of our annual 10 Holiday Tips & Tricks series here on The Digital Press blog! Today I’m here to share a few ideas for using your digital papers and elements to make some festive holiday tags.

I love making tags; I use them on packages & gift bags, bottles of wine, and sometimes I even hide gift cards in them. I also like to use them in my pocket pages in my scrapbooking albums (often, the smaller sizes fit nicely in a 3×4 pocket, or attached to a larger journal cards).

For today’s project, I am going to to show you how to create some photo-based tags (for memory-keeping purposes), and also some gift tags (for wrapping purposes).

To create the photo-based tags, I used a bunch of different items from the all-new holiday collection Every Day of December by Sugarplum Paperie and Laura Passage. Mainly, the photo template set…
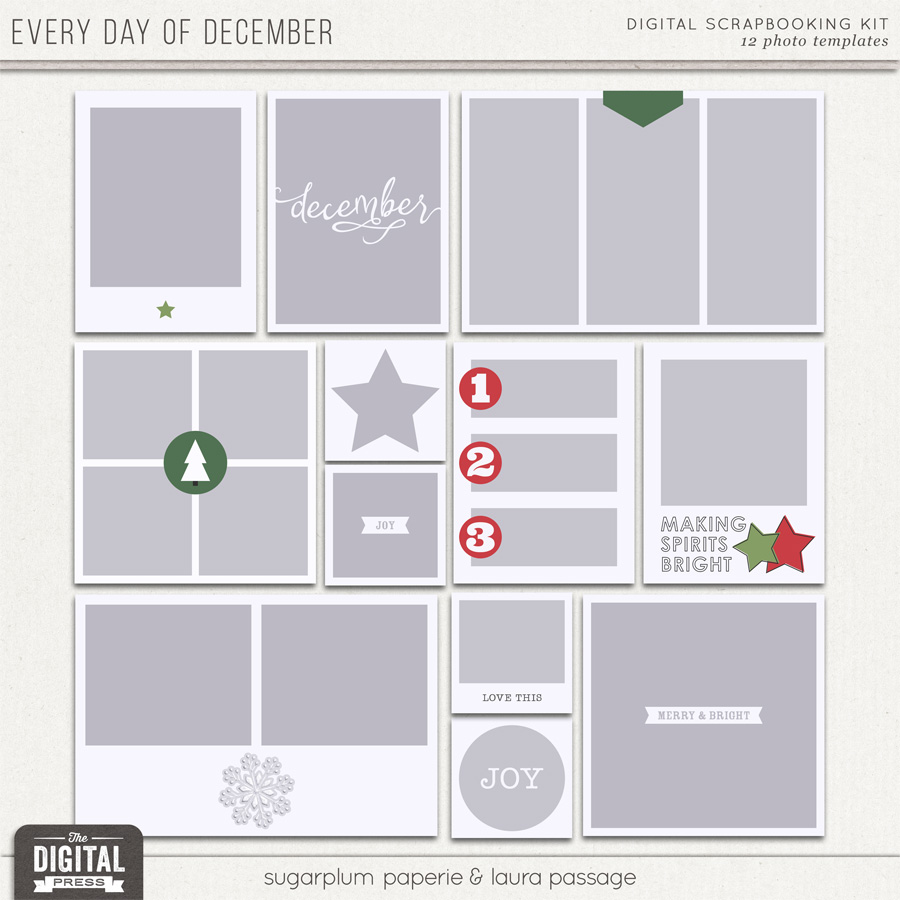
First, I took out a few of my old Christmas cards from when my kids were little, and snapped a few photos. Then, using Photoshop Elements (PSE), I attached the photos to some of the blocks on the templates (Ctrl-G in PSE; Ctrl-Alt-G in PS)… and I also picked some cute patterned paper and elements to attach to others.

Once I had the templates filled, I printed it all on 8.5″ x 11″ white matte presentation paper. I usually add a stroke around each item make it easier to see the edges for cutting. I wasn’t exactly sure how I was going to use everything; the process was just to print things that I could easily cut or punch and then play around (and it was super fun)!

Here’s a look at what my first print sheet looked like as it came out of the printer…
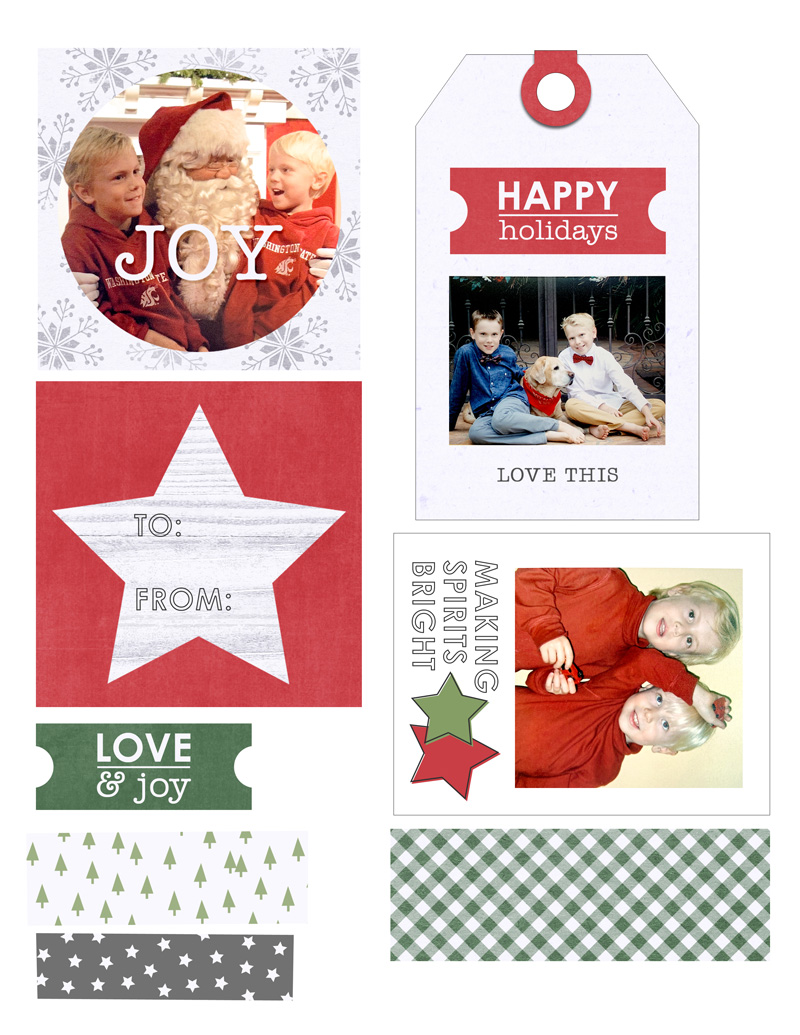
I just use my Fiskers cutter, some scissors, and some punches to cut everything out. I don’t have an electronic cutting machine — yet! (hello, Santa…!)

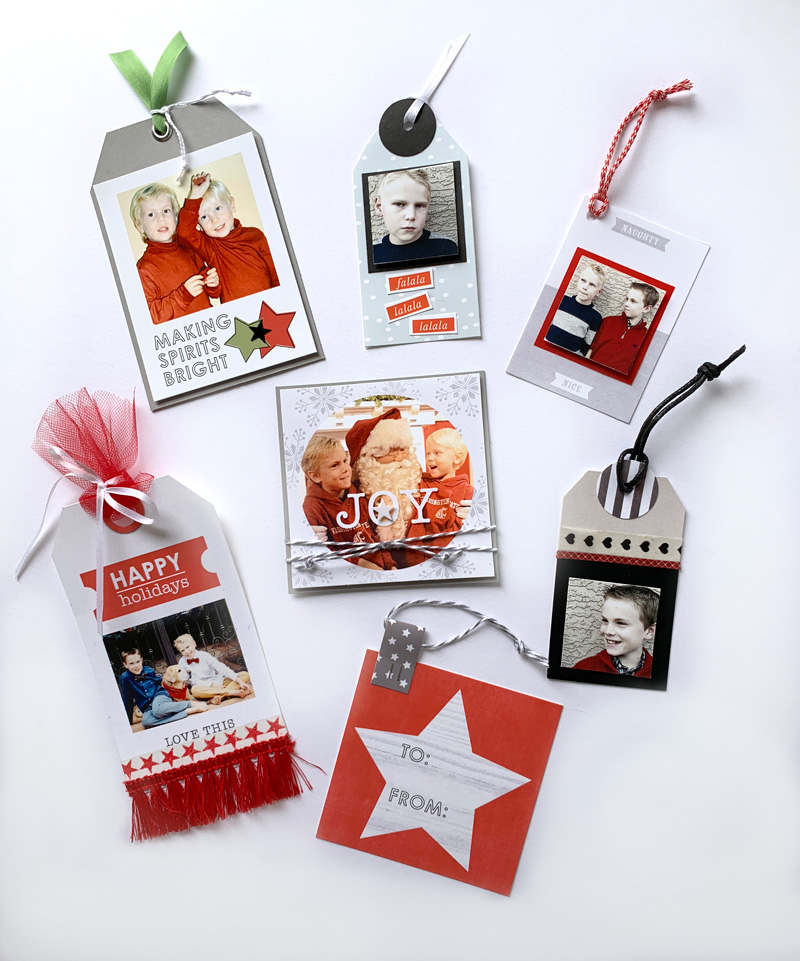
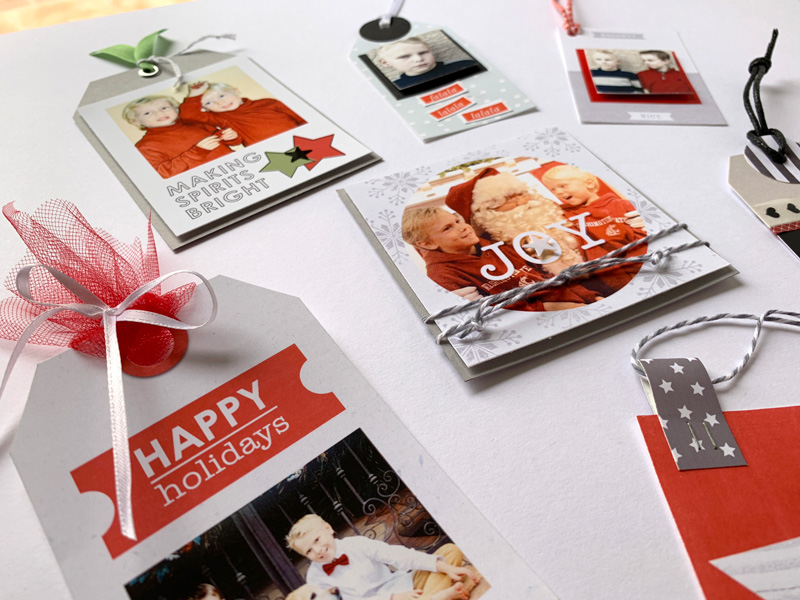
Once I had everything cut out, I started assembling the tags… which came together quickly! First I added ribbon, bows, and twine. For dimension, I used glue dots to add some stars I had in my scrap stash.

I love the way these turned out, and it is so fun to have these old photos front and center this year! Take a look…
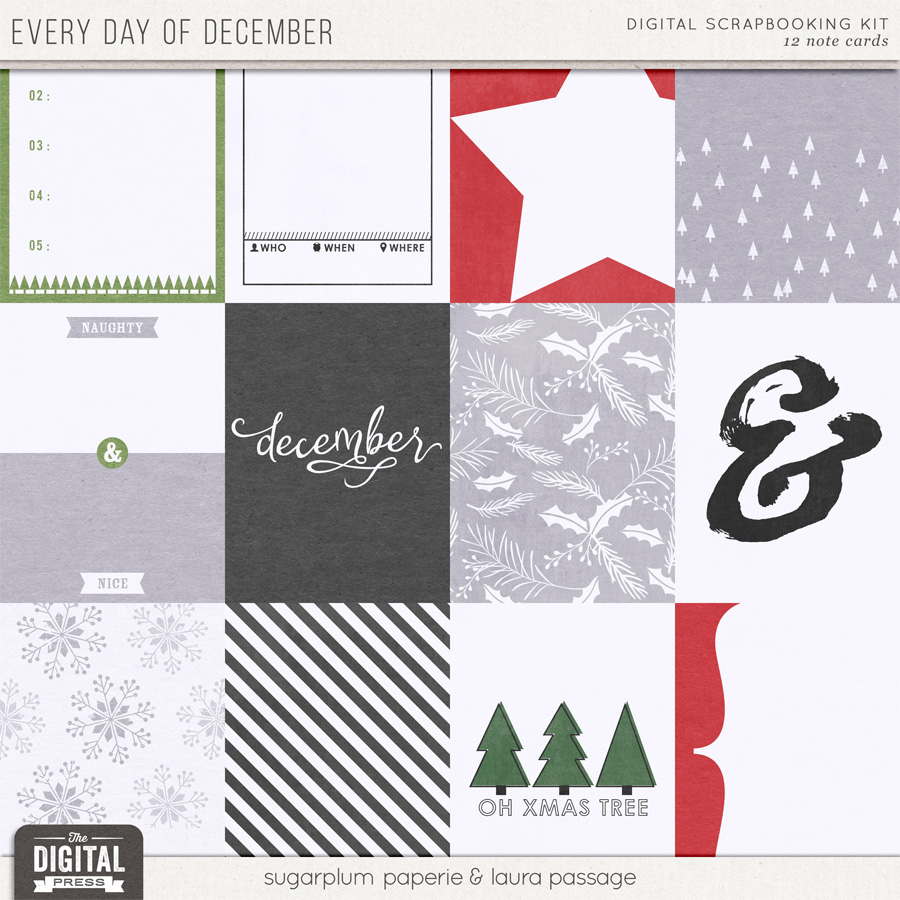
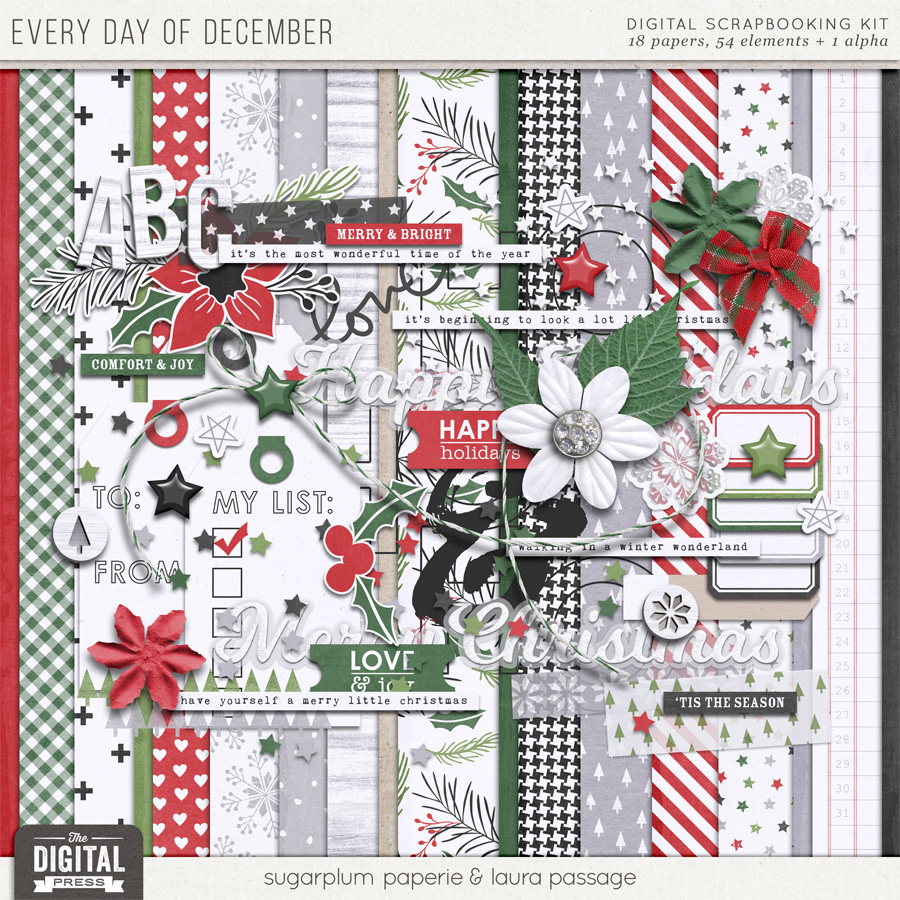
For the non-photo-based simple gift tags, I wanted to utilize all of the beautiful patterned papers and journal cards that I found in the Every Day of December collection. Here’s a look at the kit and cards, so you can see what I used…
First, I found a generic tag shape from my digital scrapbooking stash, and I used it as a clipping mask to attach the patterned paper (see the next image, below; the shape I used is shown in the top two rows — and also — as you can see, I try to use every square inch and align items evenly to make for quick cutting)…
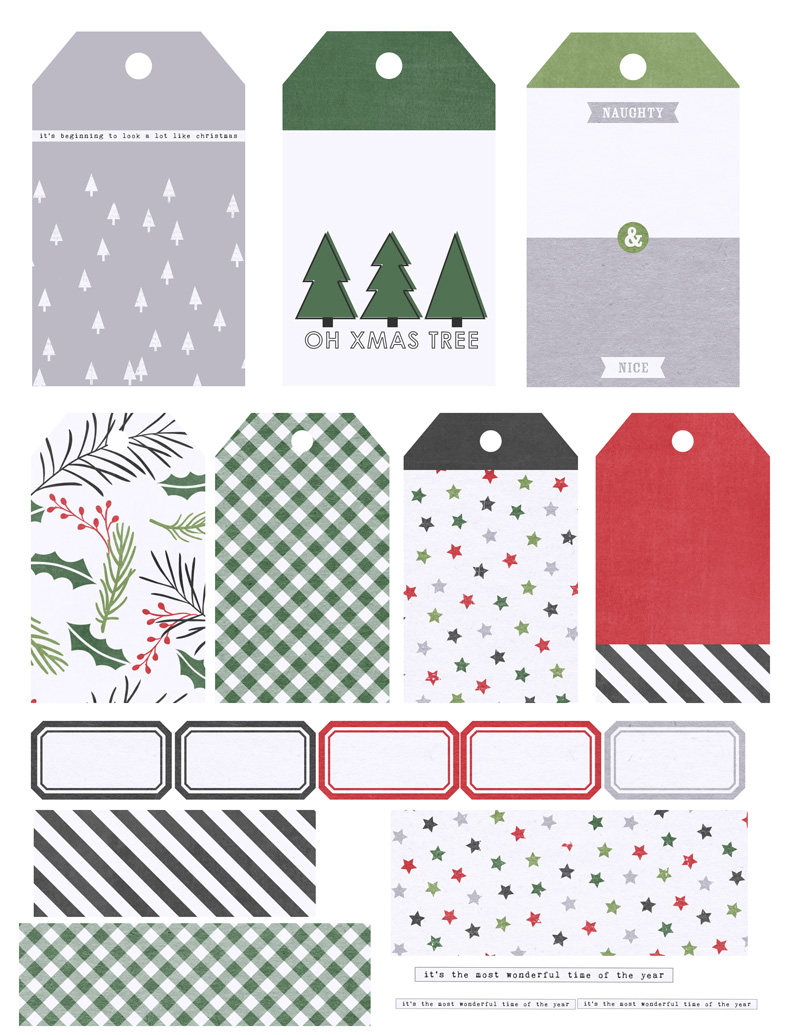
As you can see, above, if you compare my print sheet to the original journal cards/etc… on some tags I wanted the top of the tag to be in one color, and the body of the tag in another… so I just clipped the two papers and moved them up or down in Photoshop until I got them each where I wanted to create the two-tone effect.

Then, after adding a stroke around each tag (again, to give myself a handy cutting line, once printed)… I printed them on an 8.5″ x 11″ paper and cut them out.

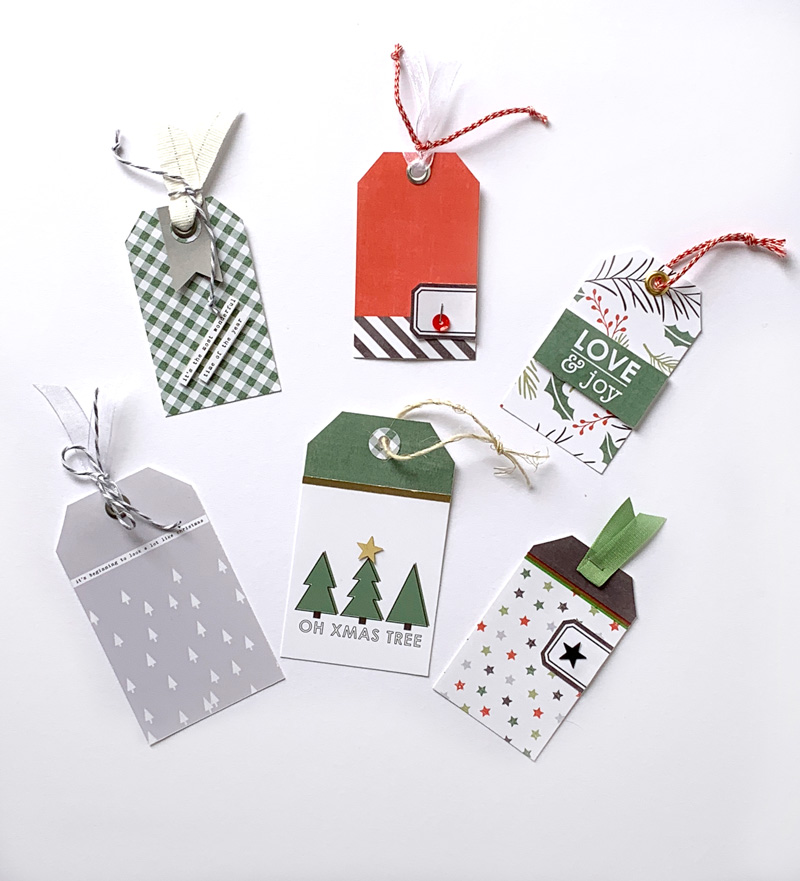
Once the tags were cut apart, I then punched a hole in the top of each one — and even brought out my crop-a-dile to place a few grommets in the holes, which is a little touch that just gives them a little extra sparkle. 🙂

I also selected some twine, ribbon, and a few other embellishments from my stash (and/or word art from the kit) to complete these tags. Here’s a look…

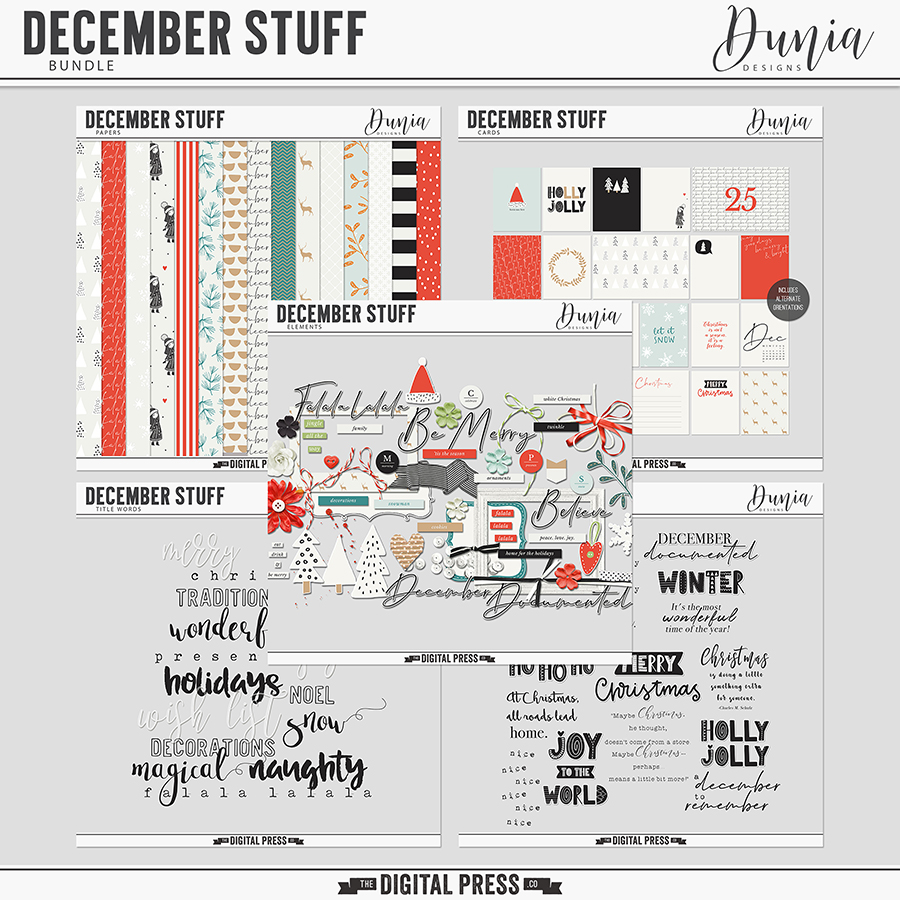
I was having so much fun, I decided to make another group of tags — this time, using the December Stuff collection by Dunia Designs, as shown here…
I fell in love with the little doodled trees… so I decided to use them as embellishments on a bunch of tags.

Here is a look at my print sheet, after I arranged them on a 8.5″ x 11″ canvas in PSE…
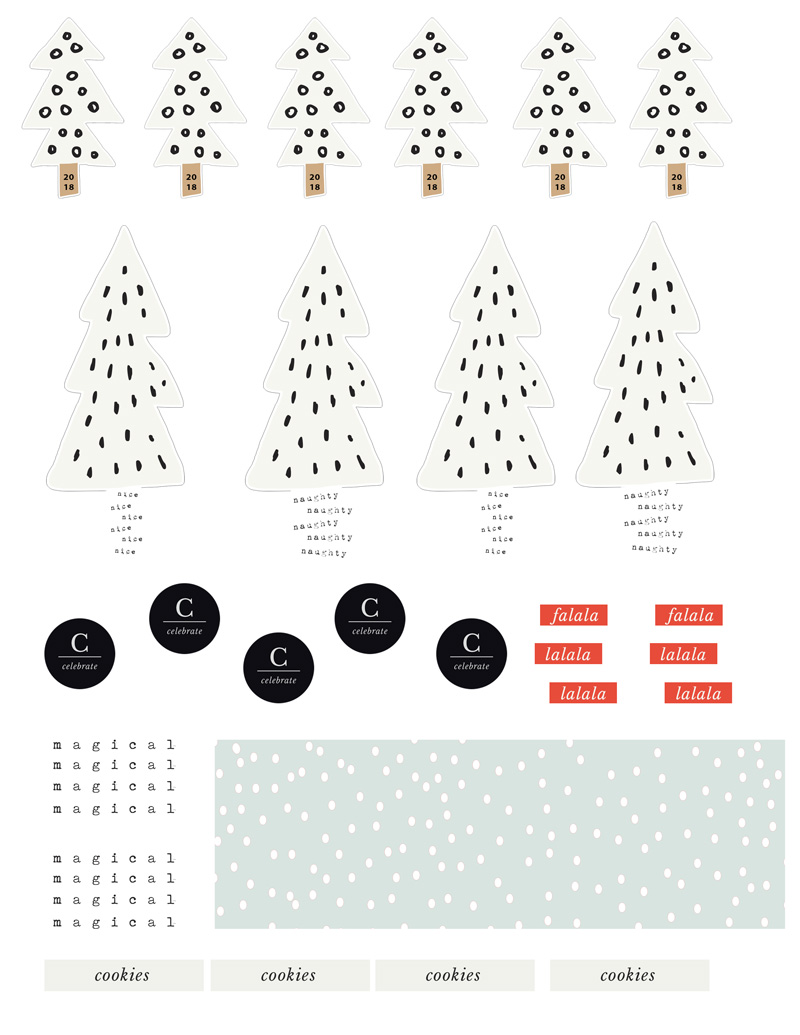
I did have to cut each of these items out by hand — and I am not perfect at “fussy cutting” — but it was quick and easy!

After cutting the trees, I thought they looked great and really stood out on black and kraft-colored solid papers. This time, I just cut the tags out free form — maybe not perfectly-cut, but fine for my purposes! The key to these tags is to give some of the elements dimension. I did that with pop-up dots in a couple of different sizes, and also with the twine, ribbons, washi tape, and stars that I added (oh, and a few circles I added from punches)…
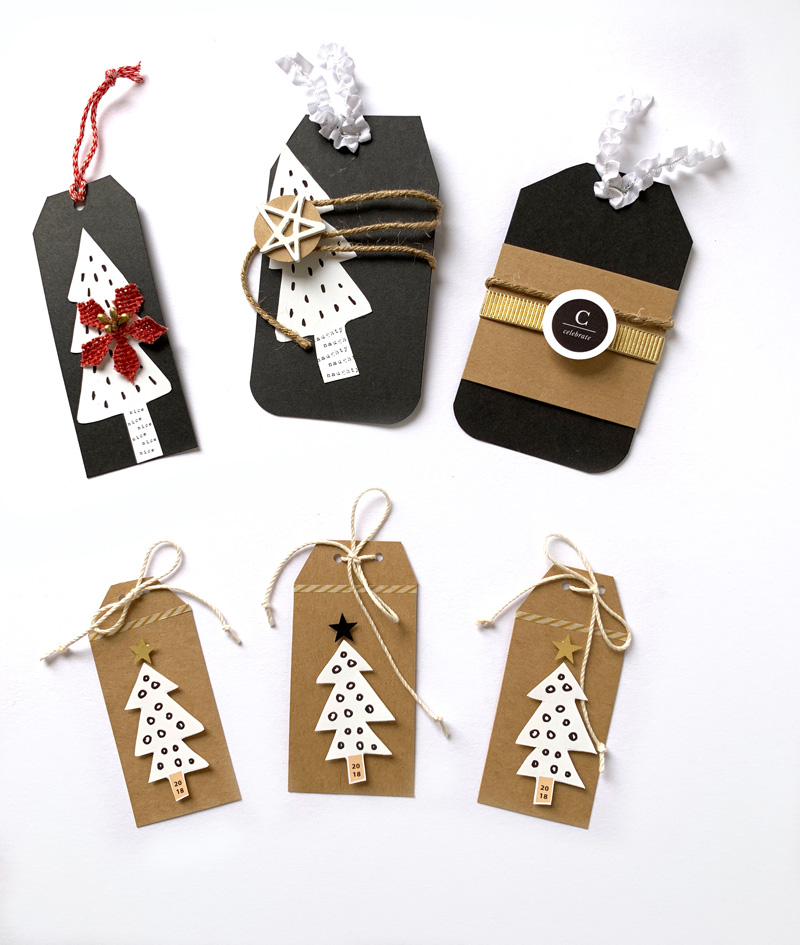
*TIP* — on the trunks of the trees in the top row of tags, you can see the little bit of “naughty and nice” word art that came in the kit. I added it to the trees, creating my own custom trunks, by layering it and clipping it to the tree shapes in PSE — super easy, and a great way to add just a bit more interest (plus, “naughty and nice” is perfect for life around here)! In this same way, I also put the year “2018” onto the tree trunks of the smaller tags in the bottom row, as well. I felt like I had a lot of kraft paper on the smaller tags… so rather than adding another patterned paper, I broke things up by using a thin strip of some washi tape.


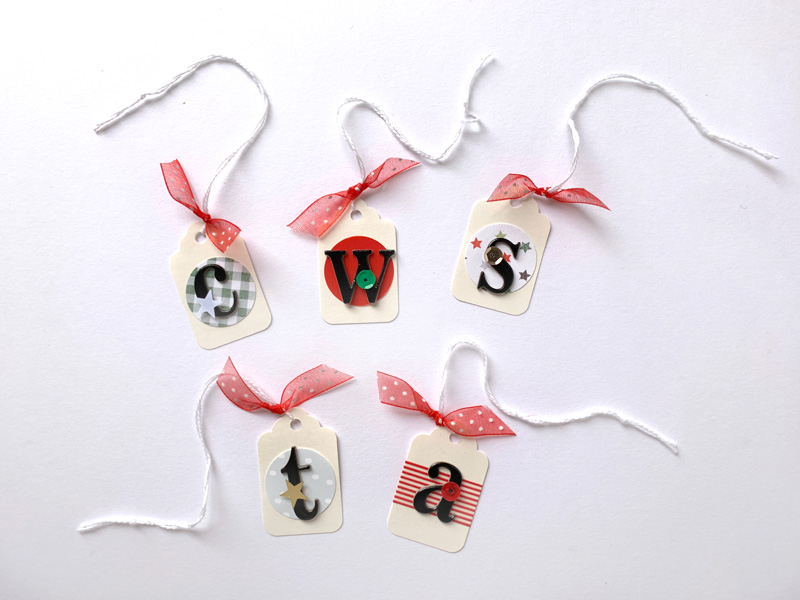
Finally, for one last project… I had some very small cream-colored tags laying around in my physical stash for years, and I thought this would be the perfect opportunity to use them! I knew they would be perfectly-sized to put around a wine bottle or box of chocolate to give to girlfriends and neighbors.

For these, I just punched out some more 1 inch circles from various patterned digital papers that I printed out, and then I attached those circles to each tag. On top of the circles, I added each friend’s first initial with some chipboard letters, and a topped it off with a small star or sequin and some ribbon. I think they are going to like this bit of customization on their gifts!
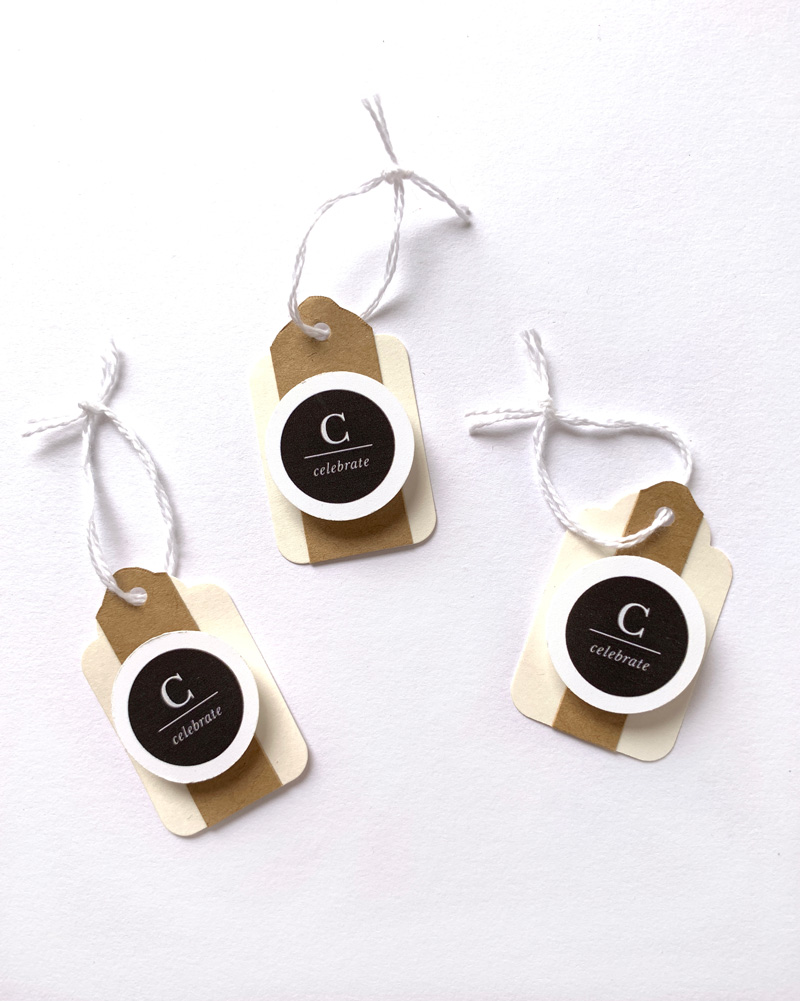
I also used a punch for some of the word art (“celebrate”) that I found in the kit… and added that to these small tags. I thought these might be nice for New Years Eve.
I hope I have inspired you to print out a few papers and elements and put together some tags this holiday season. This was seriously a fun and therapeutic project for me — and I know I’ll be so glad I’m getting it done early in a couple of weeks when things get really hectic!

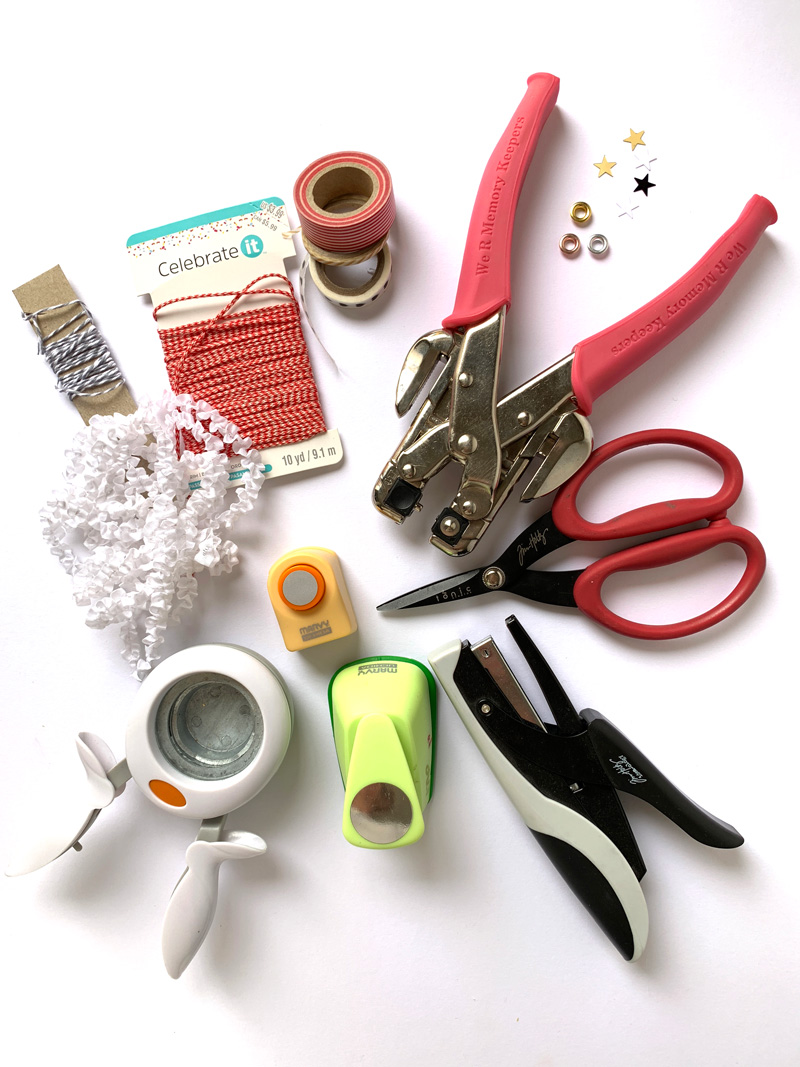
This project is nice because you really don’t need any fancy tools or machines (other than a photo-editing program such as Photoshop or Photoshop Elements, etc.). Here is a look at the other tools I used…
I hope this has given you some ideas! If you’re thinking of giving this project a try… head over to The Digital Press’s challenge forum and get the details about how you can earn challenge points for December 2018 at TDP if you try any of our “Holiday Tips & Tricks” throughout the month as they appear here in this blog series! Also, we’d love to see any photos of your holiday projects using TDP goodies in the gallery this month, so link us up after you’re finished creating and uploading! 🙂

Happy crafting and happy holidays!


IMG_2617lightedt100w

About the Author  KerriAnne is a homebody who resides in the desert SW. She started scrapbooking when her kids were little and hasn’t stopped despite the teenagers rolling their eyes and sticking out their tongues!  When not scrapping or being a chauffeur, she can be found consuming large amounts of iced coffee.
10 Holiday Tips & Tricks | Day Two

Welcome to Day Two of our annual 10 Holiday Tips & Tricks series here on The Digital Press blog! The holiday season is normally my favorite time of year, but especially for crafting & baking! But just like everyone else this time of year — extra time is short! These tips & tricks are great ways to utilize limited time to your advantage.

Today I’m here to share a fun chalkboard art tip for your holiday decor. I have a large chalkboard which is actually an old framed picture that I picked up at a garage sale (I jazzed up the frame with spare paint & the glass with chalkboard paint a few years back!) It’s a staple in all of my holiday decor, as it can easily be updated. I love all the fun chalkboard ideas on Pinterest… but man, I just do not like my handwriting, let alone in chalk! Therefore, I like to use the fun cut files or digital supplies that all our talented digital designers create to help me update my chalkboard!

Here’s how to do it…

Supplies:

  • Paper or scrap vinyl
  • Chalk
  • Digital cut file or word art (I chose this cute ‘Merry & Bright’ card from Tis The Season by Rachel Etrog Designs)

I brought the card into my Silhouette program & traced the card to get cut lines. I typically use a piece of scrap vinyl, as the color doesn’t matter for my final project- it’s just a template! Alternatively, you could print the card on cardstock or some thicker material & then cut out the words.

After my vinyl was cut, I weeded out the words — careful to leave the inside portions of the letters. I added some transfer material so that those inside portions would peel off with my vinyl.

I centered my vinyl on my chalkboard (eyeball it — I really don’t think it matters to be perfectly centered!). 😉

Then I simply filled in the words with red & white chalk…

After carefully peeling up the vinyl, there will be some chalk dust — just blow it away. Then I finally weeded out the inside of the letters… & voila!

The usual spot for my chalkboard is on our entry bench! It goes perfectly with my $1 Poinsettia I picked up on Black Friday! This project took me less than 30 mins (and that time included pulling my Silhouette & supplies all out from the cupboard!).

Cute, and easy!

If you’re thinking of giving this project a try… head over to The Digital Press’s challenge forum and get the details about how you can earn challenge points for December 2018 at TDP if you try any of our “Holiday Tips & Tricks” throughout the month as they appear here in this blog series! Also, we’d love to see any photos of your holiday projects using TDP goodies in the gallery this month, so link us up after you’re finished creating and uploading! 🙂


AmieAbout the Author  Amie is a craft-loving dental hygienist who lives in Washington state. She loves her husband, her two crazy kids, and her English Bulldog… as well as coffee, baking cupcakes, daffodils, glitter & sprinkles, reading a good book, and lip gloss — not necessarily in that order.
10 Holiday Tips & Tricks | Day One

Hello there! Carrie here, wishing you a very Happy December and welcoming you to Day One of the 2018 edition of our always-popular 10 Holiday Tips & Tricks series here on The Digital Press blog!

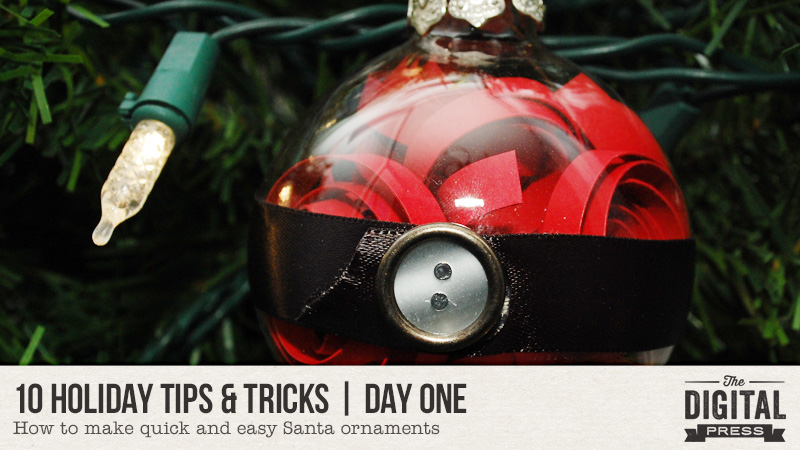
I have a fun, quick ornament project for you today.

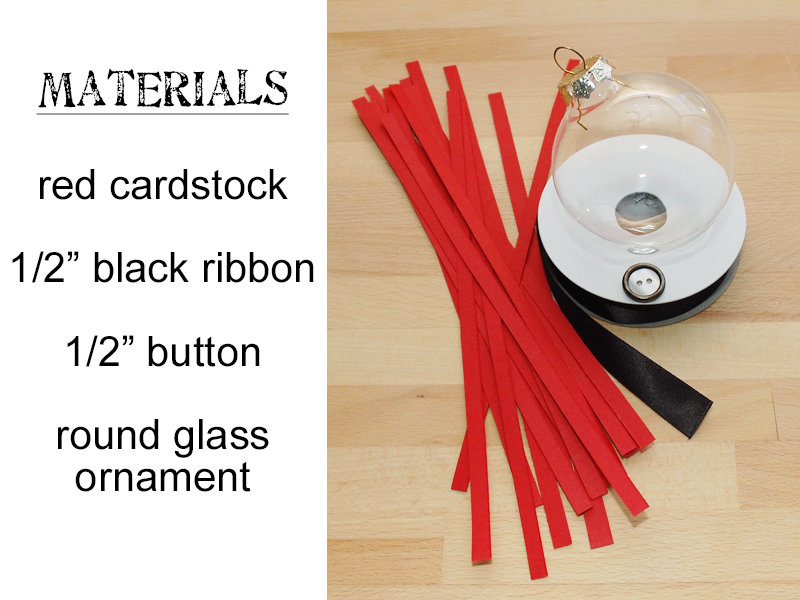
You will need a couple of things, some of which you may already have on hand: half a piece of red cardstock, a 10″ strip of 1/2″ black ribbon, a 1/2″ (diameter) button, and a glass ornament with a removable top. You will also need scissors (or optionally, a paper cutter), a glue stick, and a hot glue gun.

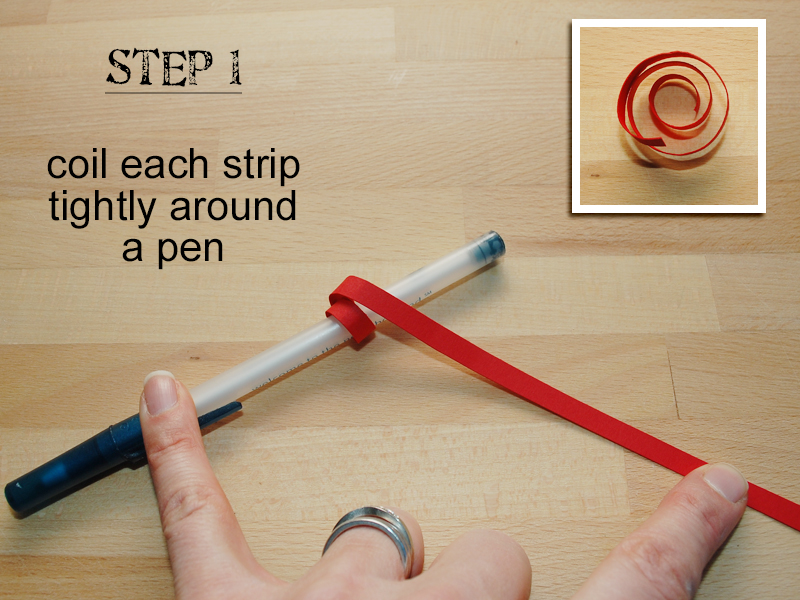
The first step is to trim that red paper into 1/4″ strips. I cut mine from the 11″ edge of the paper, so they are 1/4″ wide by 8 1/2″ long. You will need about 20-22 of these (half the sheet of cardstock). I’d recommend using a paper cutter, but you could also cut the strips by hand with scissors. Once you have a pile of 1/4″ strips, roll each one into a spiral. I found it easiest and quickest to roll them tightly around the barrel of a smooth pen as shown in the photo below (using a pencil or just my fingers left creases in the paper). The coils will spring loose when you pull them off the pen, which is fine.

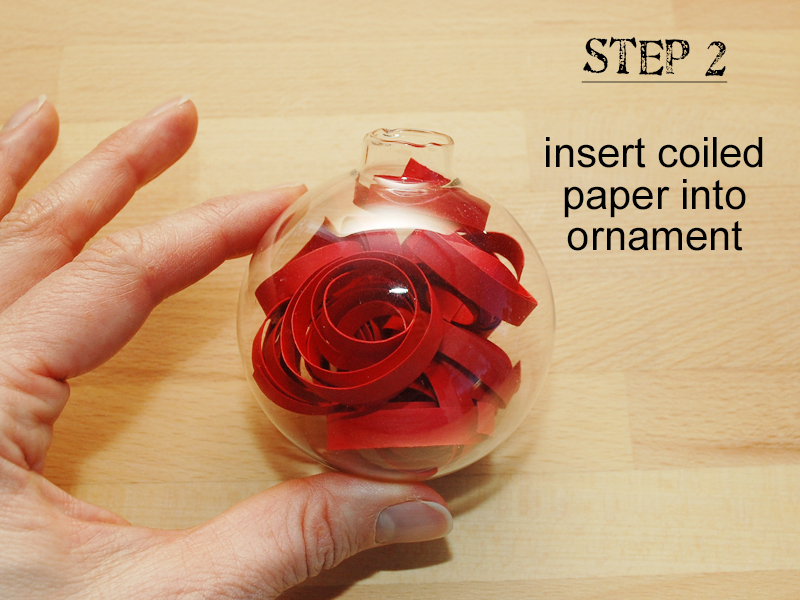
Next you’ll need to get all those little coils into the ornament. Remove the prong cap (just pull gently), and insert the coils. I found it easiest to wind each coil a little tighter when I pulled it off the pen and then drop it straight into the ornament. You can fill the ornament as full as you want, but you’ll probably want to use at least 20 of those 1/4″ strips.

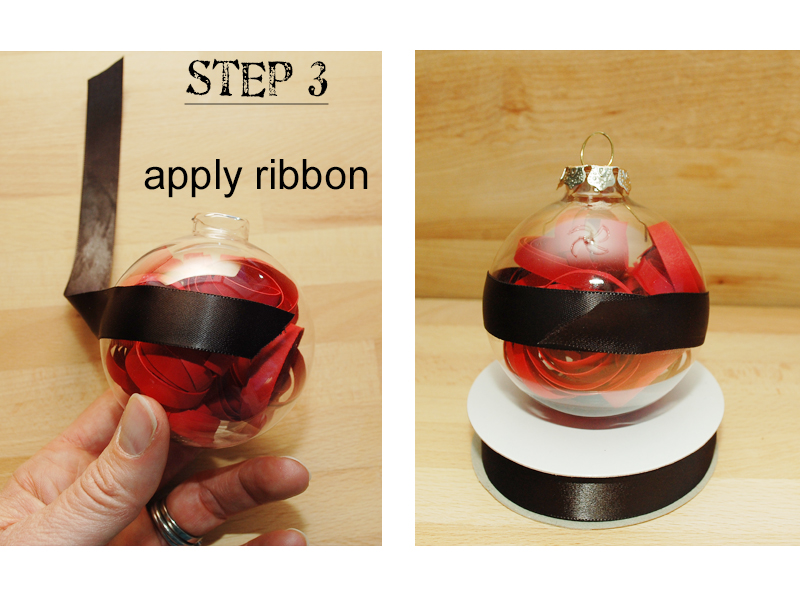
Once your ornament is filled with coiled paper strips, put the prong cap back on. Measure the circumference of your ornament by wrapping the ribbon around it. Add another 1/2 – 1″ for overlap. Trim your ribbon, and lay it right side down on your work table. The classic DIY way to adhere a ribbon belt is to hot glue it, but that’ll leave a lumpy line underneath the ribbon that is especially noticeable with satin, shiny or clear ribbons. I recommend using a glue stick instead. Just drag that glue stick down the wrong side of the ribbon, making sure to get even coverage all the way out to the edges. If you want the last 1/2″ or so of your ribbon belt to hang loose, be sure to stop applying glue about 3/4 – 1″ from what will be the exposed end.

This may be the trickiest part of this whole thing: applying the ribbon belt. Starting with the end of the ribbon that will be completely covered, stick it, glue side down, to the center of the ornament. Working your way around, smooth the ribbon against the ornament, working out any puckers or bubbles. You may find as you finish that the ribbon will need to dip into a slight “v” where it overlaps which is fine as long as the rest of the ribbon belt is smooth. You may also want to trim the exposed end of the ribbon if it seems a little too long. In my example below, the ribbon is cut on an angle to look like the loose end of a belt.

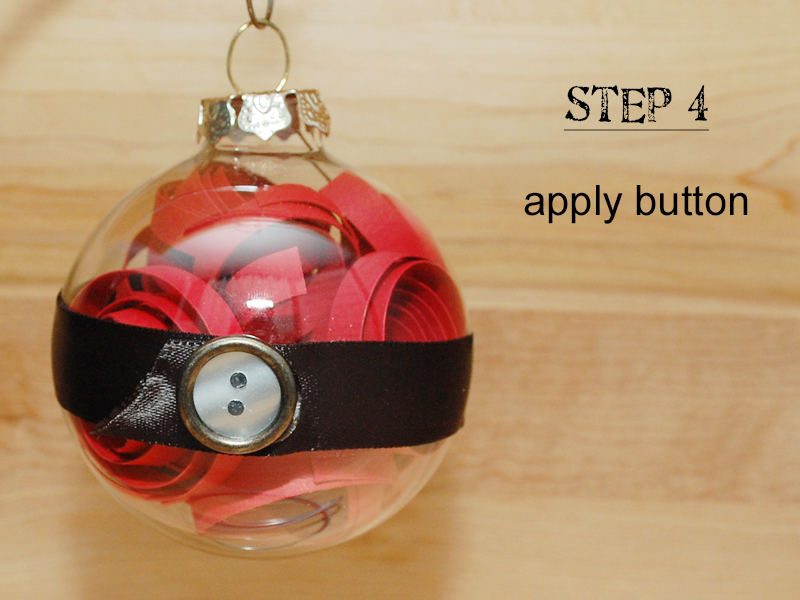
The last thing to do is apply the button. Place a healthy dollop of hot glue on the back of the button, and stick it on top of the ribbon belt. You can use the button to cover up the overlap, or offset it slightly to look like it’s a belt buckle (mine has the latter option). There you go, one simple Santa ornament.

You can apply this same trick to other themes as well: white paper and black ribbon for a snowman, green paper and striped ribbon for an elf, turquoise paper and silver ribbon (and a jewel button), etc. I’d love to see any other variations that you come up with!

Speaking of which… if you’re thinking of trying this, head over to The Digital Press’s challenge forum and get the details about how you can earn challenge points for December 2018 at TDP if you try any of our “Holiday Tips & Tricks” throughout the month as they appear here in this blog series! Additionally, we’d love to see any photos of your December/holiday projects using TDP goodies in the gallery this month, so link us up after you’re finished creating and uploading! 🙂


caliten About the Author  Carrie is a creative team member here at The Digital Press. She and her family enjoy spending time outdoors, year-round, near their home in Colorado. In addition to scrapbooking and the occasional hybrid home decor project, Carrie also reads voraciously, accumulates fabric, makes soap, brews beer, grows hops, and tries to keep indoor plants alive.
10 Holiday Tips & Tricks | Day Ten

Hello, and welcome to the very last day of our 2017 10 Holiday Tips & Tricks series here on The Digital Press blog!

Today I am here to share with you a really fun last-minute project for those of you who want to add a little extra magic to your Christmas morning…

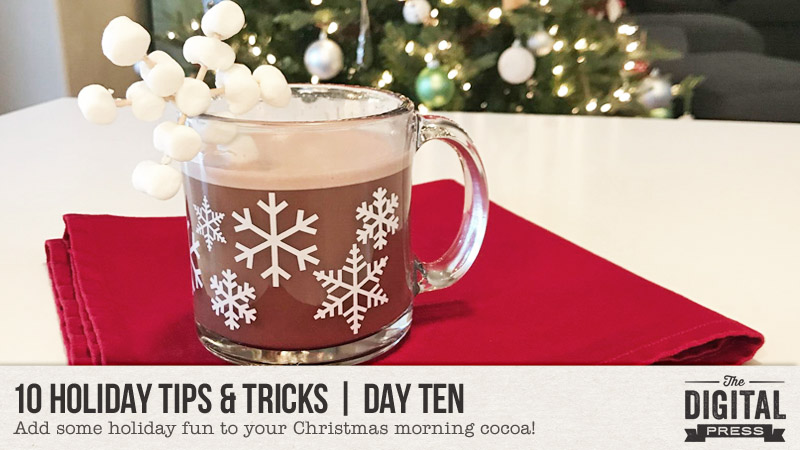
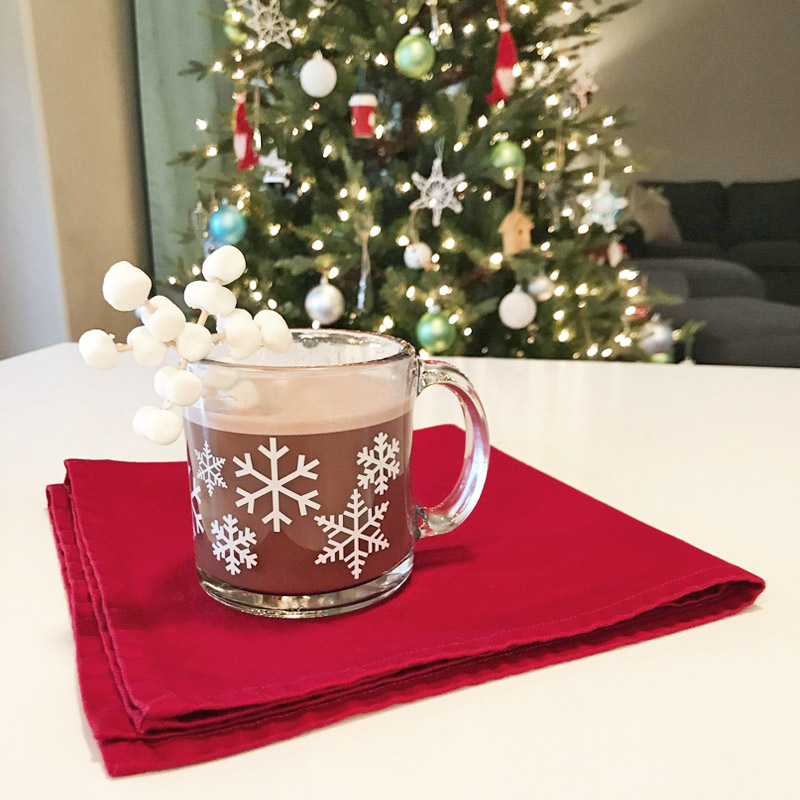
…festive marshmallow-snowflake hot cocoa toppers! 🙂

Supplies Needed

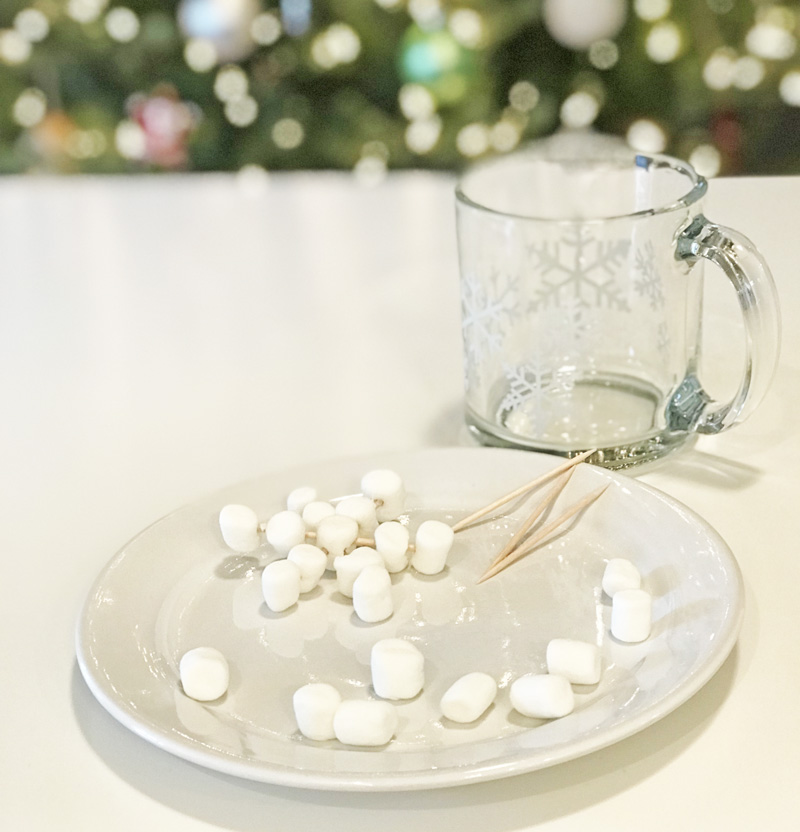
  • marshmallows (mini size shown above; but you can use a variety of big/small/different colors/etc.)
  • toothpicks
  • mug(s)
  • hot cocoa of choice

Instructions

This project’s about as simple as it gets, when it comes to the “how-to” of it all! Seriously… you just thread the marshmallows onto toothpicks in any configuration / combination that you like! 🙂

A few pointers and ideas, though (based on my vast experience in the field of marshmallow-snowflake production, LOL)…

  • If using mini-marshmallows, as shown above, you should limit it to 3 toothpicks (a.k.a. a 6-point snowflake), or else the center piece won’t hold together when acting as the center for more than 3 spokes (toothpicks)
  • When threading toothpicks through the center “spoke” (or marshmallow)… stick the first toothpick through the very middle, the next one just above that (almost touching the first), and the third one just below the first (middle) toothpick. This keeps everything centralized, and leaves enough marshmallow on the top and bottom to keep your toothpicks from breaking through.
  • To create a much larger snowflake… you can also use a large marshmallow for the center, and then use 6 individual toothpicks that all radiate outward from that center point (i.e. your snowflake will be 2x as big as mine… so only do this if you have a giant mug! haha)
  • If you want to get really creative, you can use marshmallows of different colors and/or shapes. You could use the little pink and green mini-marshmallows to make “red” and “green” snowflakes, for instance, on Christmas… etc. You can also use the cute little star-shaped marshmallows for the center and the ends of each toothpick… super cute!

No matter how you make your marshmallow-snowflakes… they’ll be delicious, and they’ll put a smile on the face of anyone whose mug gets delivered with one on the edge. Guaranteed!

If you’re thinking of giving this recipe a try… head over to The Digital Press’s challenge forum and get the details about how you can earn challenge points for December 2017 at TDP if you try any of our ’10 Holiday Tips & Tricks’ throughout the month as they appear here in this blog series.

Here’s wishing you you have a very happy holidays and a fantastic upcoming weekend with your family and friends! 😉


Laura Passage

About the Author  Laura Passage is the owner of The Digital Press, and also the designer behind Wishing Well Creations by Laura Passage (WWC). She works now as a graphic designer in both the digital and paper scrapbooking industries, but previously spent over a decade working as a college soccer coach. She lives in the Pacific Northwest with her husband and two young sons (affectionately referred to as The Tiny Terrorists), and will rationalize eating coffee ice cream for breakfast to anyone who questions it.

10 Holiday Tips & Tricks | Day Nine


Welcome to Day Nine of the 2017 edition of our always-popular 10 Holiday Tips & Tricks series here on The Digital Press blog!

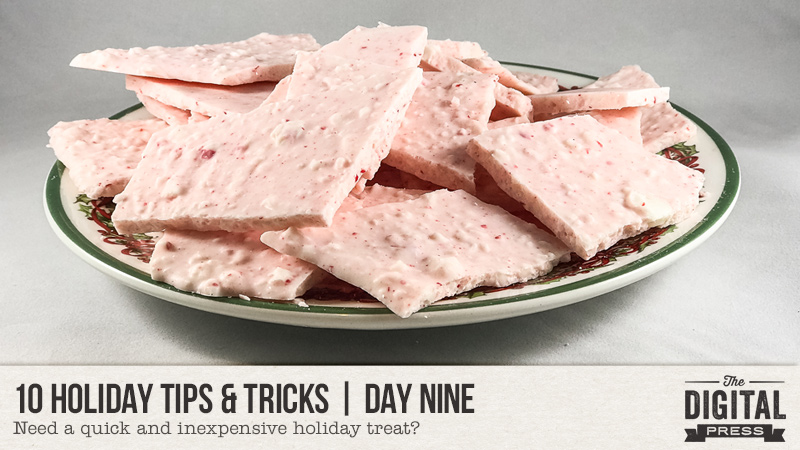
Today I’m here to share a really quick and inexpensive holiday treat recipe… homemade peppermint bark!

Each year during the holiday season, we love taking Christmas goodies to neighbors, friends, piano teachers, debate coaches, UPS drivers, mailmen… and pretty much everyone else in our lives! My college kids also like baking for their friends, roommates, girlfriends, professors (or anyone else they want to impress!). Unfortunately, the problem with making so many goodies all season long… is that eventually, we just need a recipe or two that is fast, easy, cheap, and delicious! This one serves those needs!

After many years of trying recipes, our family finally found one for Peppermint Bark that fits the requirements — and the best part is it’s so simple that kids of all ages can make it themselves!

Peppermint Bark

INGREDIENTS

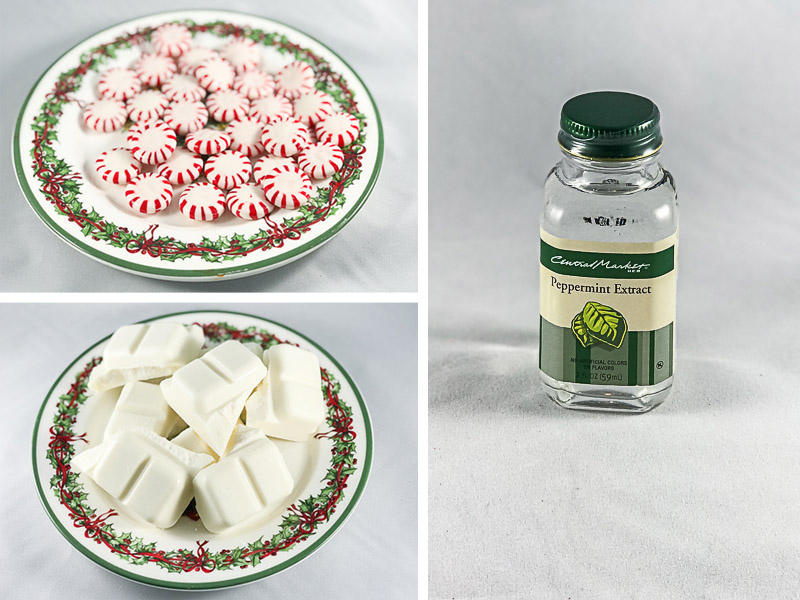
— 1 pound vanilla-flavored candy coating (cut up into smaller pieces)
— about 24 hard peppermint candies (more or less to taste!)
— 1 tsp peppermint extract

Yup, that’s it! Just three ingredients!

And the best part is… it’s not only easy, but flexible, as well. What do I mean? Well, if you want me to be honest, I’ll tell you that my mommy brain has kicked in more than once in the past, and I’ve forgotten to buy the peppermint extract (additionally, my college kids have elected to save money and not buy it, either, at times… so we’ve left the extract out multiple times and no one has truly known the difference). On the flip side of that… we tend to be a really “pepperminty” family, and so at other times I’ve actually used more candies than listed above — a tweak that not only makes it taste great, but also affects the crunch factor. 🙂

INSTRUCTIONS

  • Line a cookie sheet with aluminum foil or wax paper (we never have wax paper on hand, so I use aluminum foil).
  • Crush the candies. I have a food processor, and we use this… but my college kids just place them in a gallon bag, cover it with whatever they have nearby (towels, or dirty clothes, haha), and smash it with hammers, books, or anything else that’s heavy. As long as it’s not their laptops or cell phones, I’m happy.
  • Melt the candy coating in a microwave-safe dish for 1 minute on high. Take it out, stir, and put it back in the microwave for another 30 seconds on high. Keep repeating this until the candy coating is smooth and melted. *TIP* make sure you truly do take the time to stop and stir, as simply heating it on high for 2 minutes + may or may not result in a smelly and inedible glob. Don’t ask me how I know this.
  • Next, mix in the crushed candies and peppermint extract… and then spread the melted candy onto the prepared cookie sheet. *TIP* the thinner you spread it, the further the recipe goes.
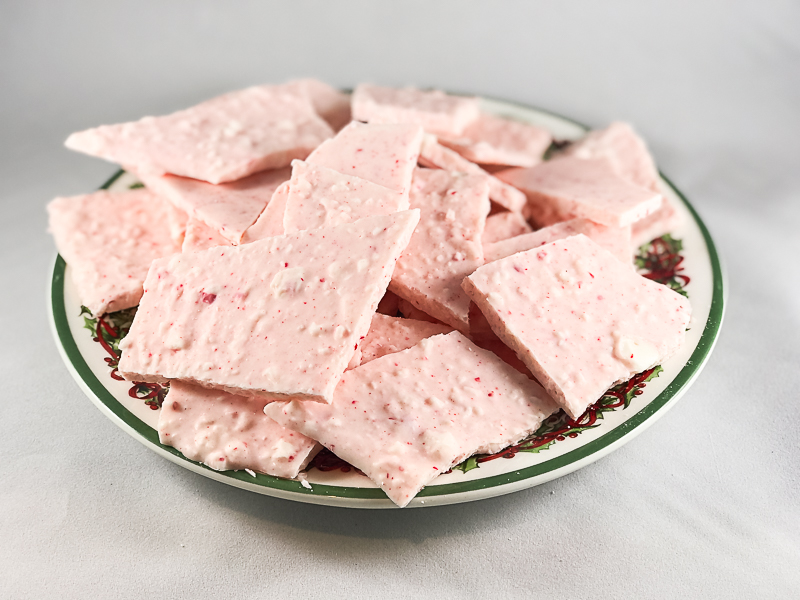
  • Freeze for 30 minutes or so and then break it into pieces. The candy can be stored at either room temperature or hidden in the freezer where children can’t find it — and either way it tastes great!

See how easy this is? No oven required, not many dishes to wash, and the total recipe costs less than $5. You can’t ask for more than that!

Now, you can certainly make this candy fancier by using both chocolate AND vanilla candy coating. Just make sure the first layer (usually chocolate) is hard before adding the second layer (usually vanilla). Adding this second layer often makes the bark look prettier (and who doesn’t love chocolate?!)… but it’s important to note that adding the chocolate candy coating, also, makes the process take longer and makes the recipe slightly more expensive. Thus, our family often just sticks with plain vanilla (unless we really, really like you 🙂 ).

Have fun with the recipe, and feel free to change it to your liking!


If you’re thinking of giving this recipe a try… head over to The Digital Press’s challenge forum and get the details about how you can earn challenge points for December 2017 at TDP if you try any of our “10 Holiday Tips & Tricks” throughout the month as they appear here in this blog series!


Robin

About the author  Robin is a member of the creative team here at The Digital Press. A wife of 25 years and a mom of 4 crazy children (3 in college and 1 still at home), she says that her life occurs mostly in the car as she transports said crazy kids to their many, many homeschool activities. When not driving, Robin loves to make her family cringe by pulling out her camera again (and again, and again…).