Category: Tutorials

Tutorial Tuesday: Using the Layer Mask

20160119

Sometimes when I am working on a layout I want to tuck a bit of ribbon behind a frame or weave a bit of a string through a button but I don’t like using the eraser tool at all. Mostly because if I am not completely satisfied with how the ribbon or string looks, I have to delete it, find the element on my harddrive and re-add it to the layout and it takes time I’d rather spend on actual scrapping. So I went to look for an alternative way to erase parts of an element and I found it. Now when I need to do that I use a layer mask. It is so easy. Here’s how it works.

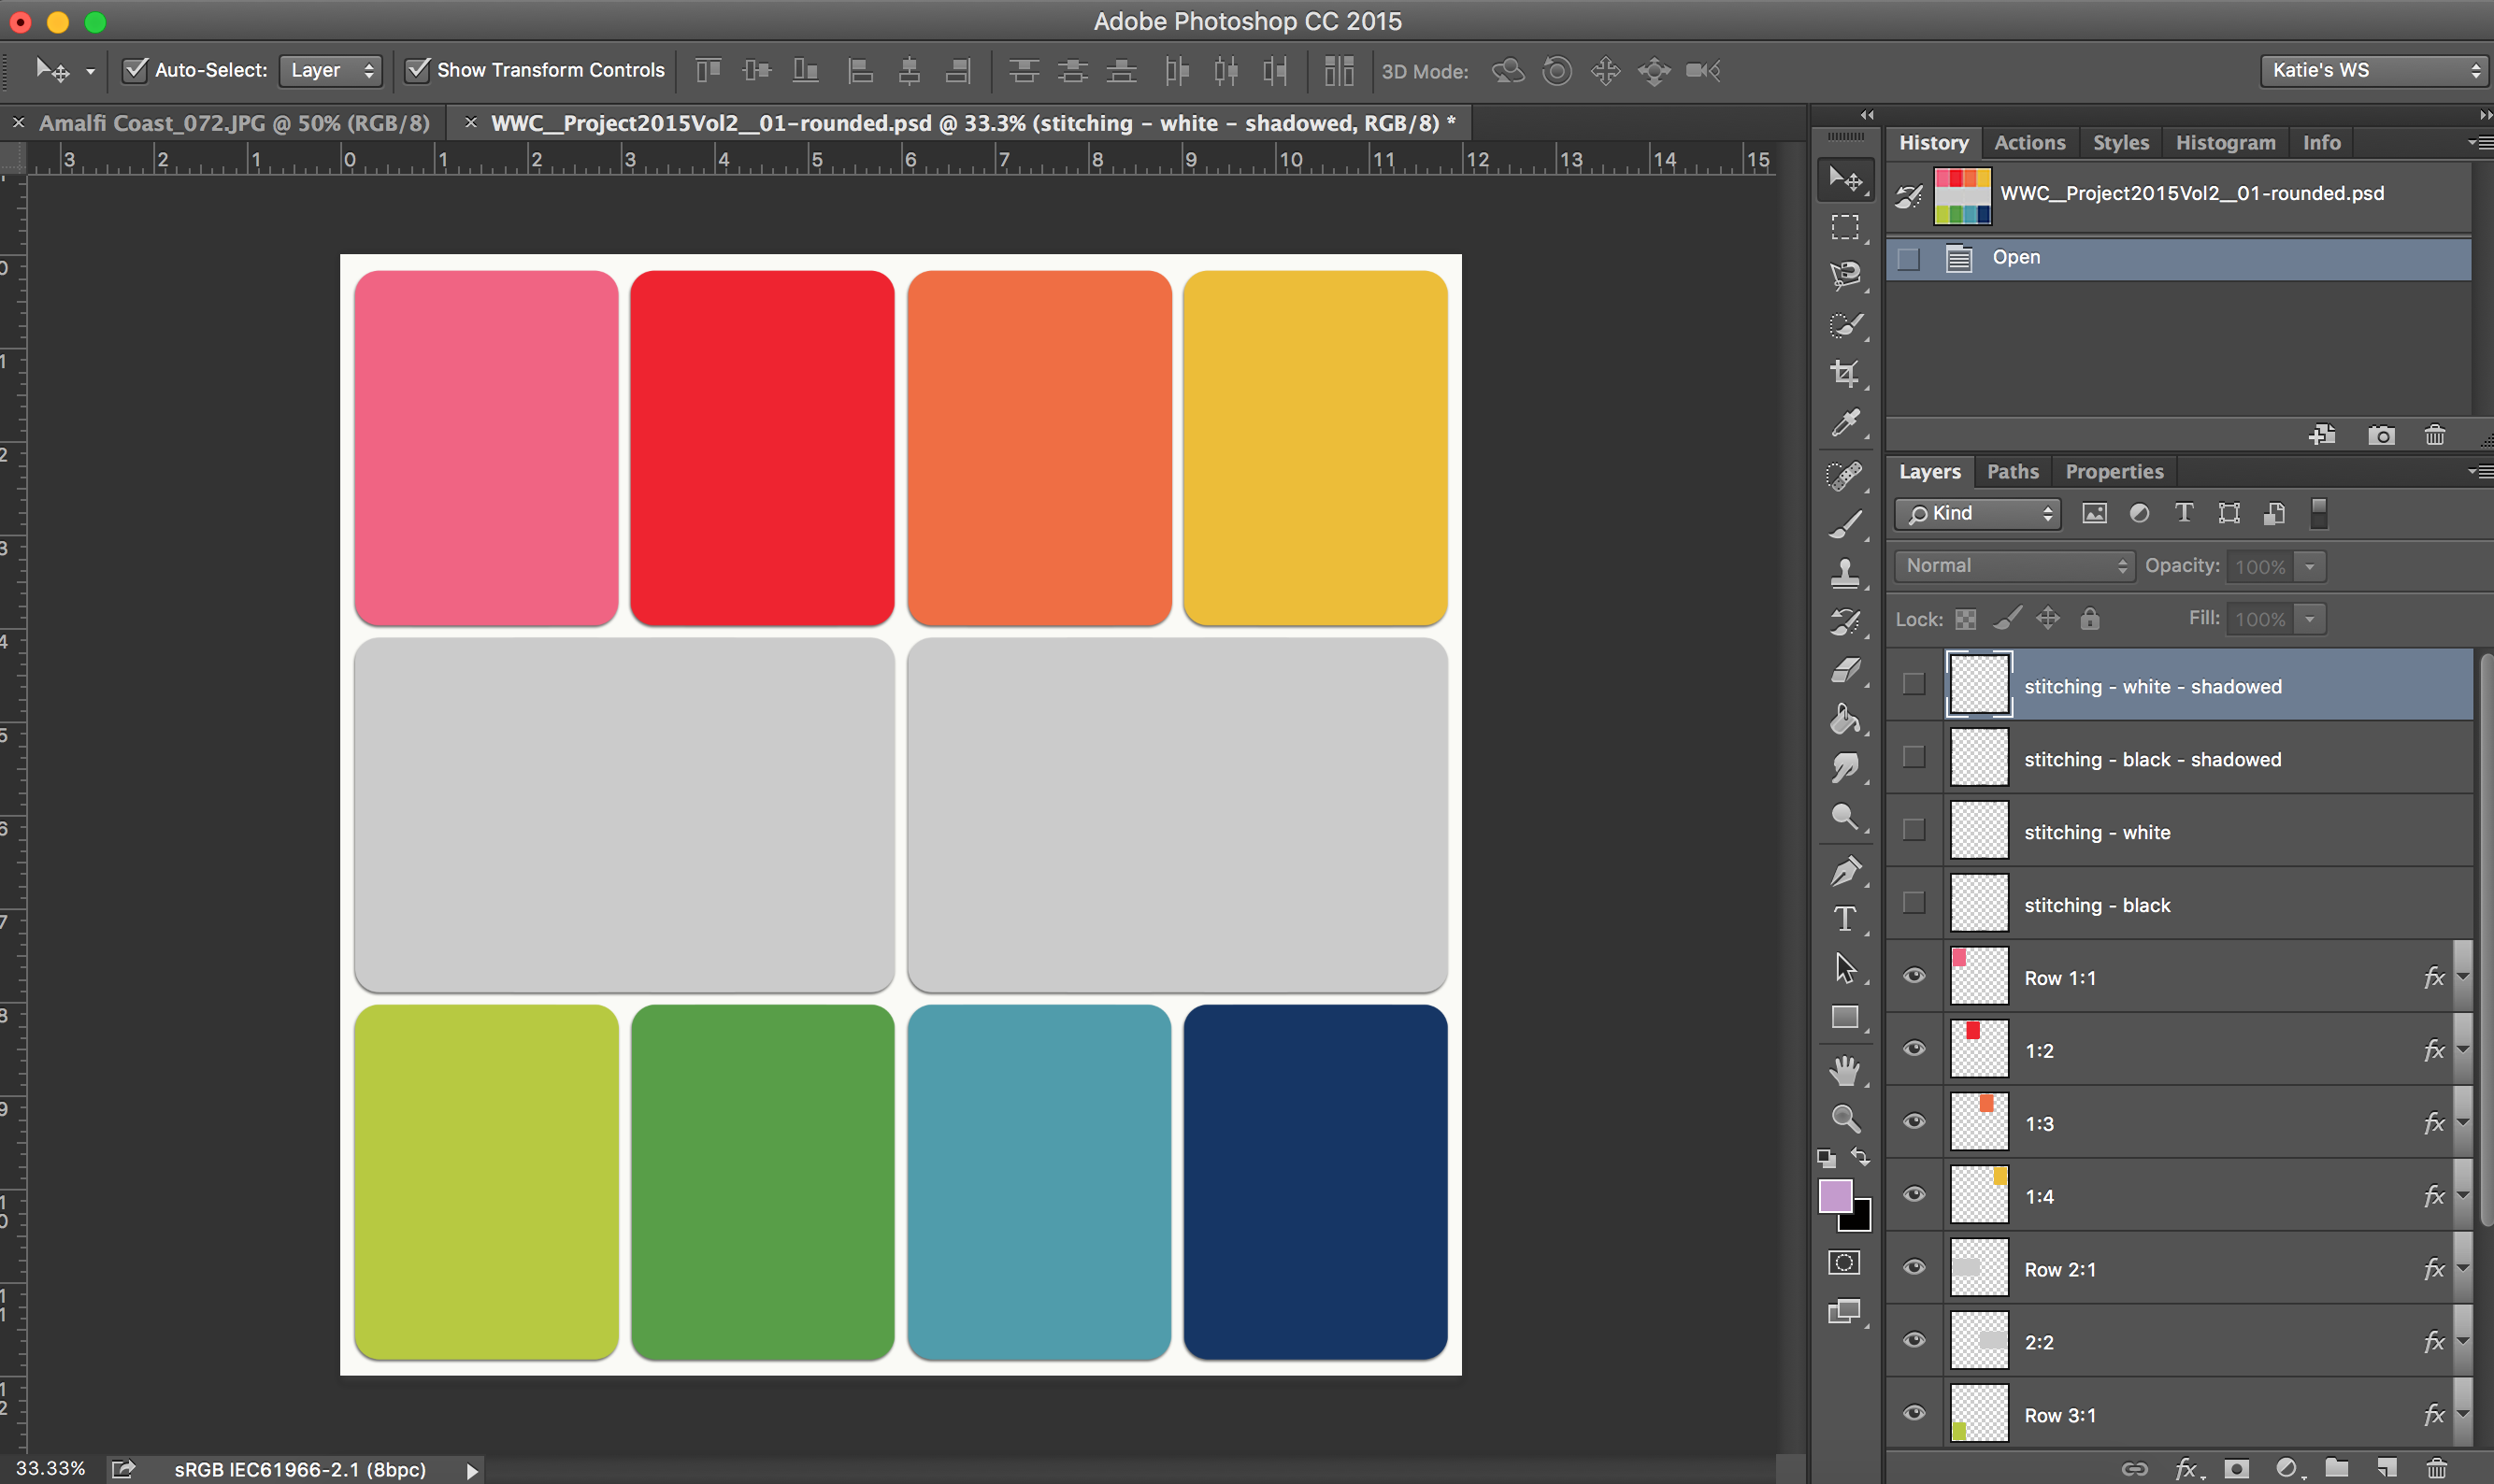
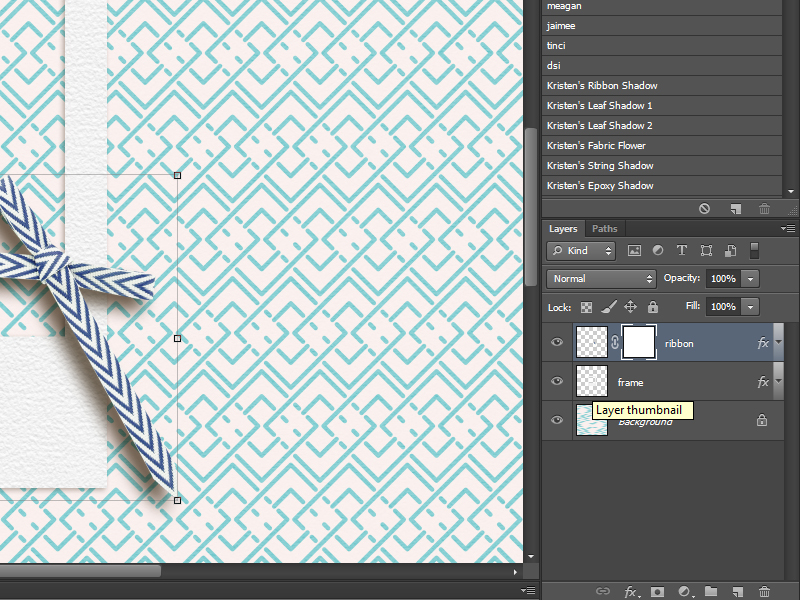
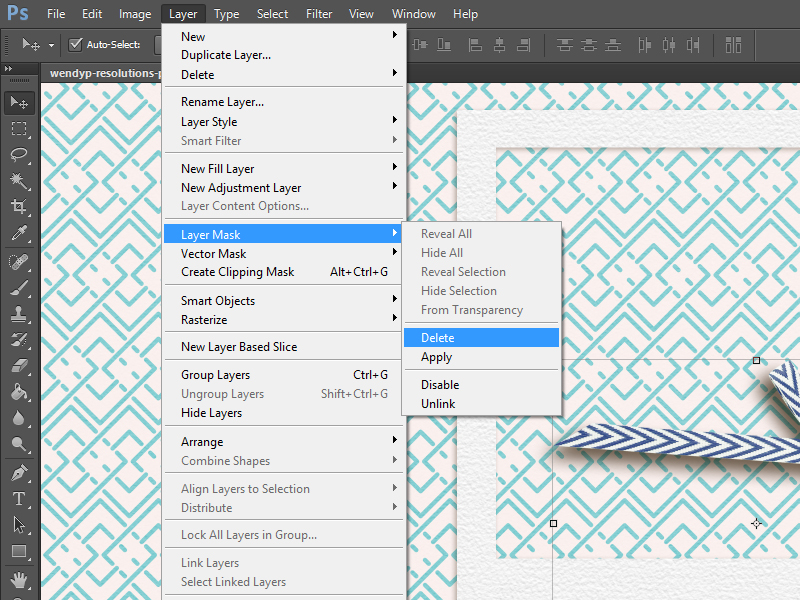
In this case I want to make the ribbon go behind the frame. Make sure the element that you want to ‘remove’ a part from is on the layer above the element you want to weave it to. The ribbon is above the frame layer. Select the ribbon layer by clicking on it.

01

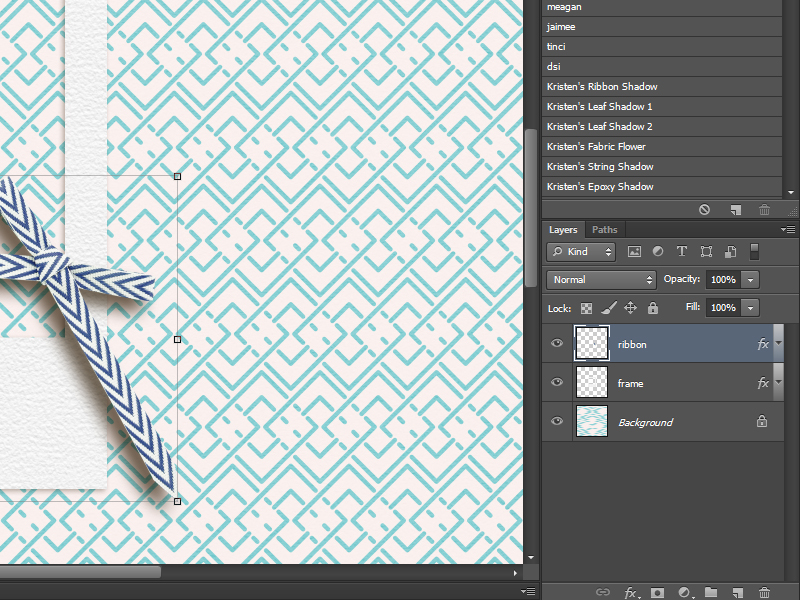
Now we are going to add a layer mask. Go to layer, layer mask and click on reveal all.

02

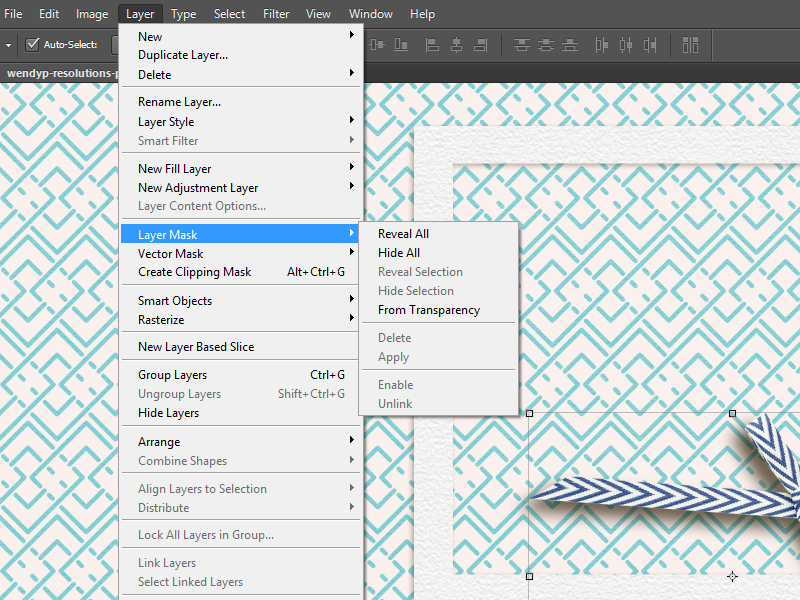
A white square appeared on your ribbon layer (Make sure you have your layer window visible otherwise you probably won’t see this. Go to window and then click on layers. This will make the layer window visible.)

03

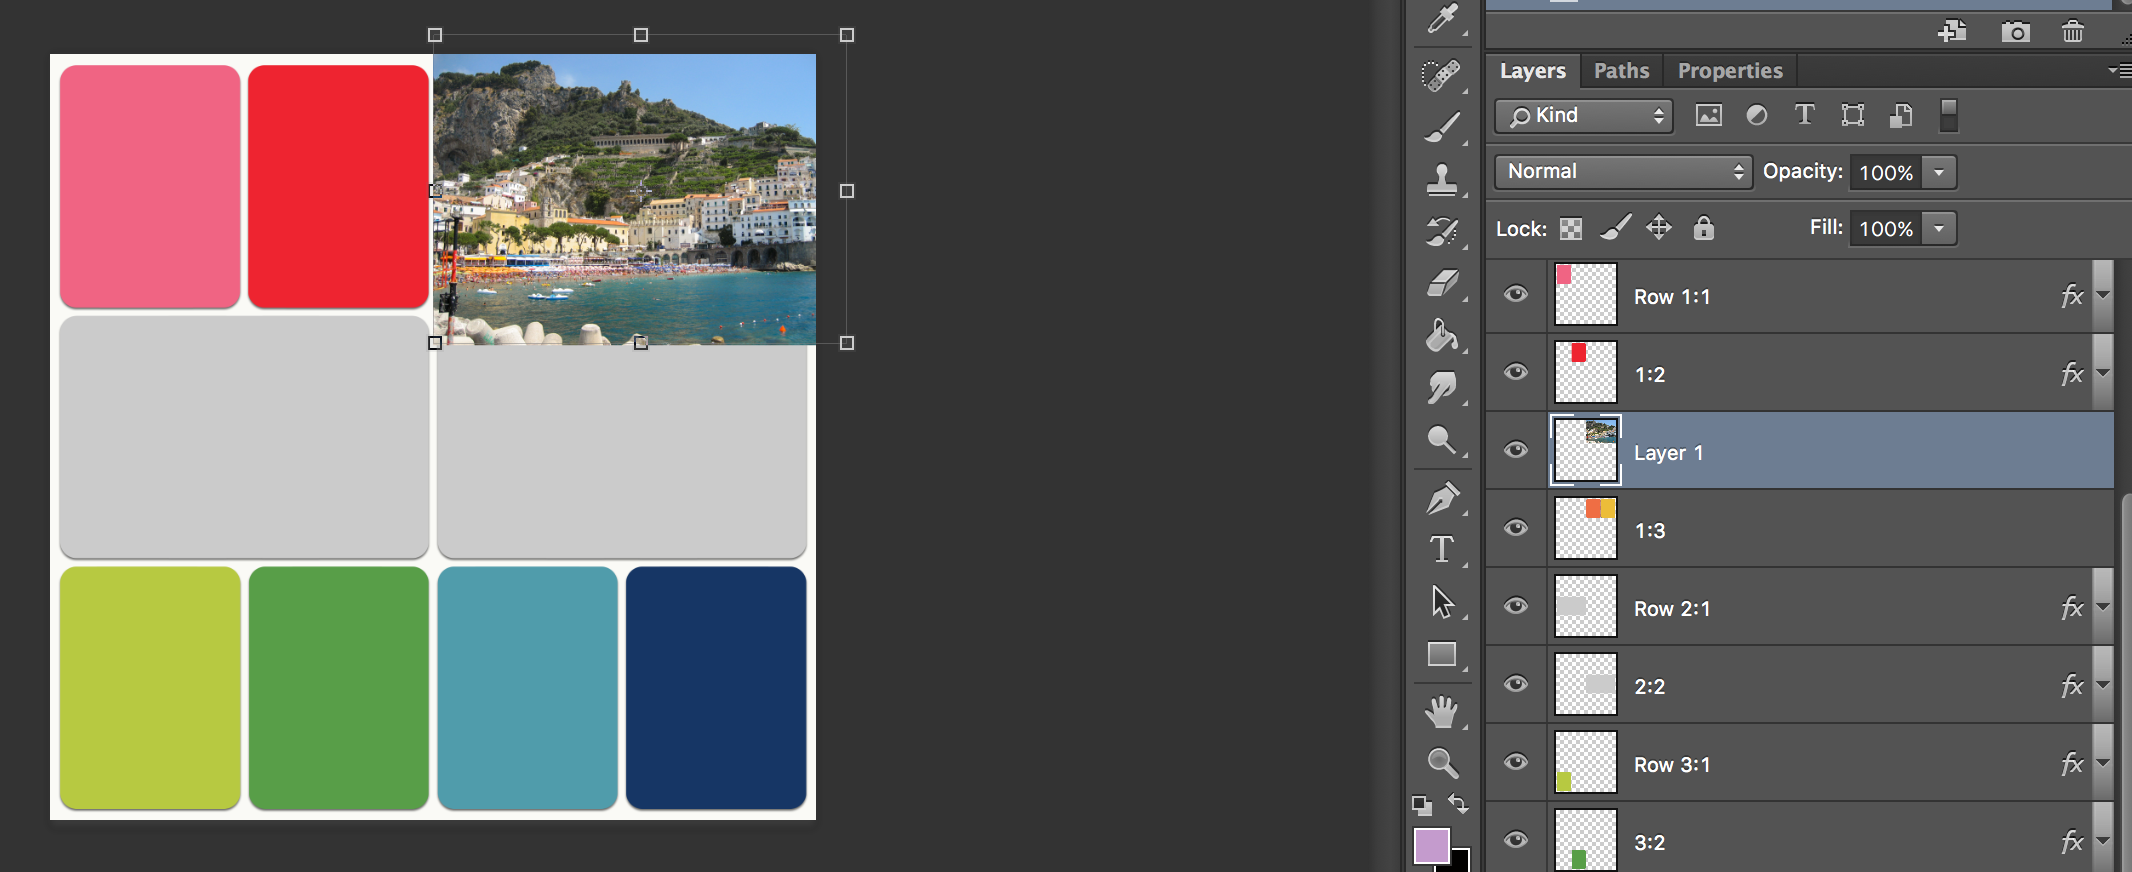
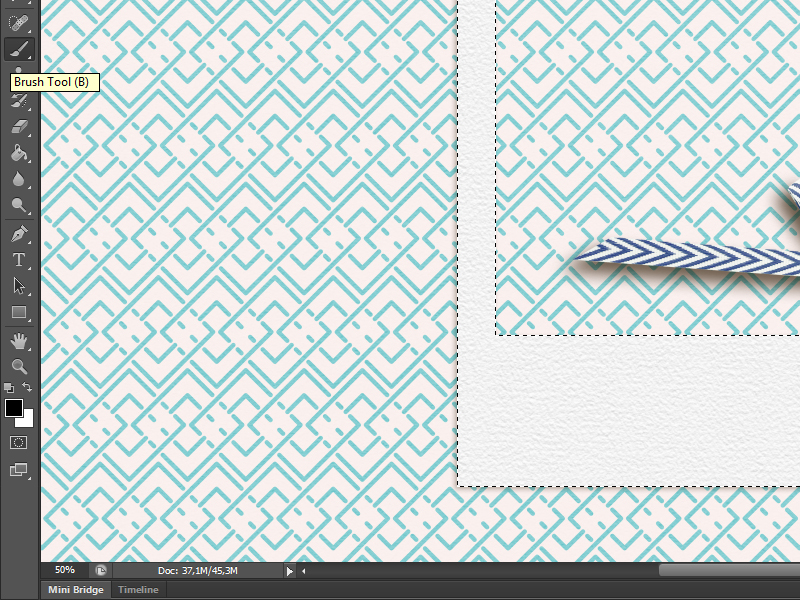
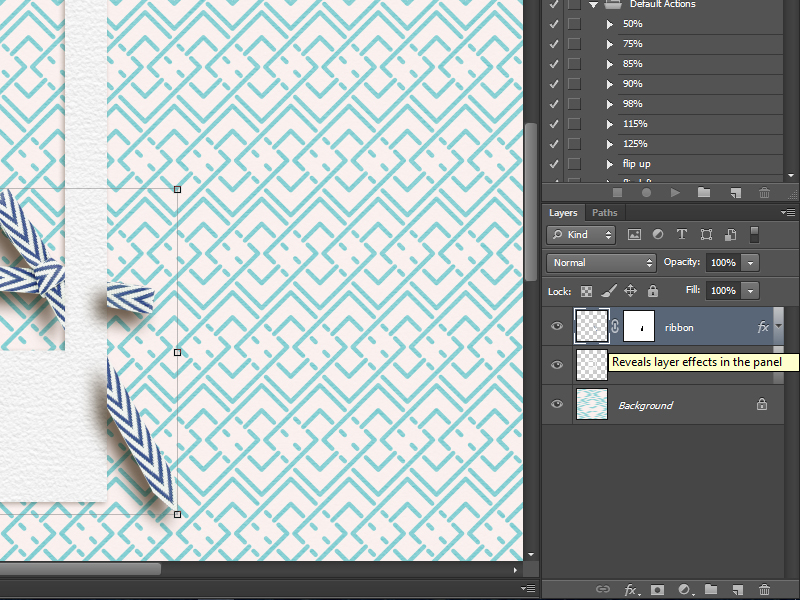
Click on the white square to select it. Nothing will happen yet. Now we are going to select the frame thumbnail layer while holding the ctrl-key. Now your frame is selected.

04

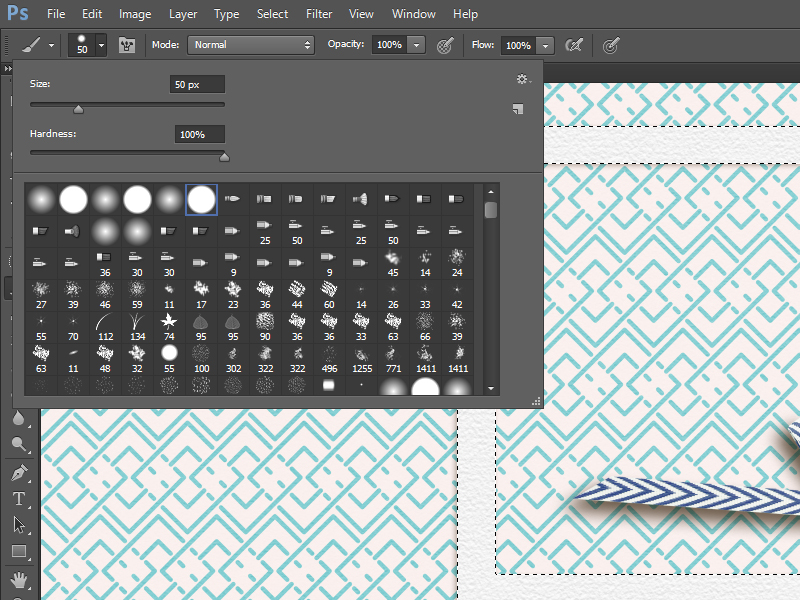
Before we go further make sure the foreground colour is set to black. Now select the brush-tool. Mine is 50px and hardness 100. Now we can remove parts of the ribbon. Just use the brush on the selected part of the ribbon and see what happens. I’ve removed a little bit as you can see….

05

06

07

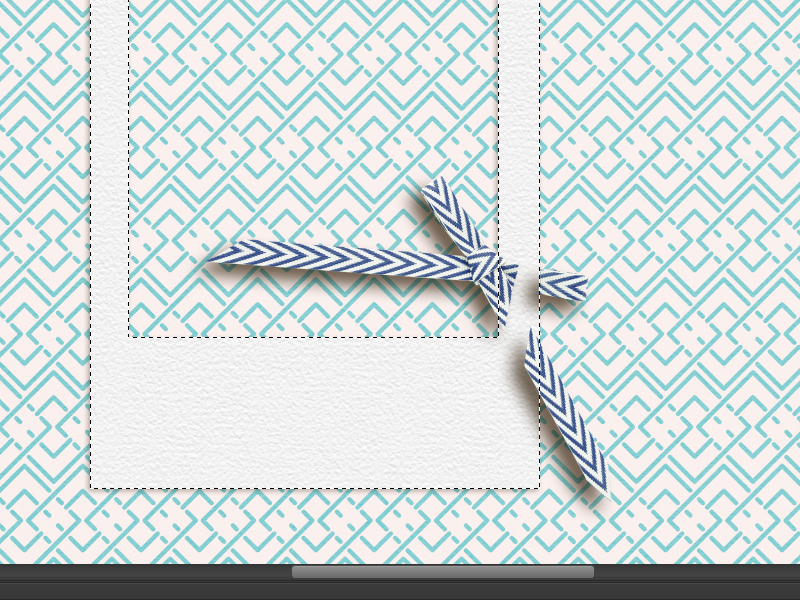
If you are not satisfied with the result and you want the erased part of the ribbon back, this is what you do. Change the foreground colour to white. (Make sure the layer mask is still selected and make sure you still see the ‘marching ants’ (the animated outline when you select something in PS). If you don’t see then click on the layer mask and after that click on the frame thumbnail layer while holding the ctrl-key.) Now use the brush again and you will see the ribbon part you erased re-appear. That’s how easy it is. De-select the frame and you can continue with your layout. If you want a quicker way to get your ribbon back make sure the layer with the layer mask is selected. Go to layer, layer mask and click on delete.

08

I decided to make a little video so you can see in one go how using the layer mask works.

After writing this tutorial I noticed one thing that I wasn’t too happy with. The cast shadow from the ribbon on the frame. It is not very nice to look at so I tried a couple of things in Photoshop and here is how you can get rid of the shadow that’s cast on the frame.

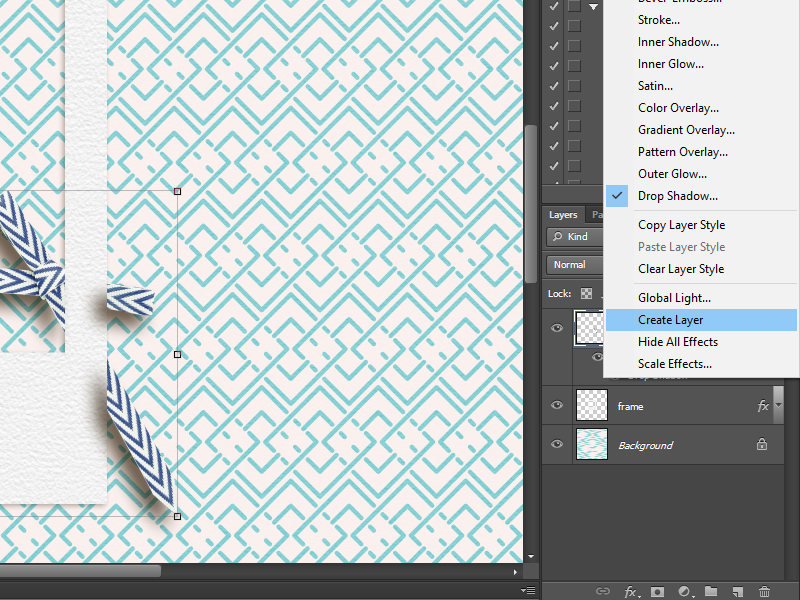
The first thing that you want to do is reveal the layer effects of the ribbon layer. Just click on the little arrow next to ‘fx’ on the layer.

09

Look for the shadow effect, right click and click on ‘create layer’.

10

You might get this warning but just click OK.

11

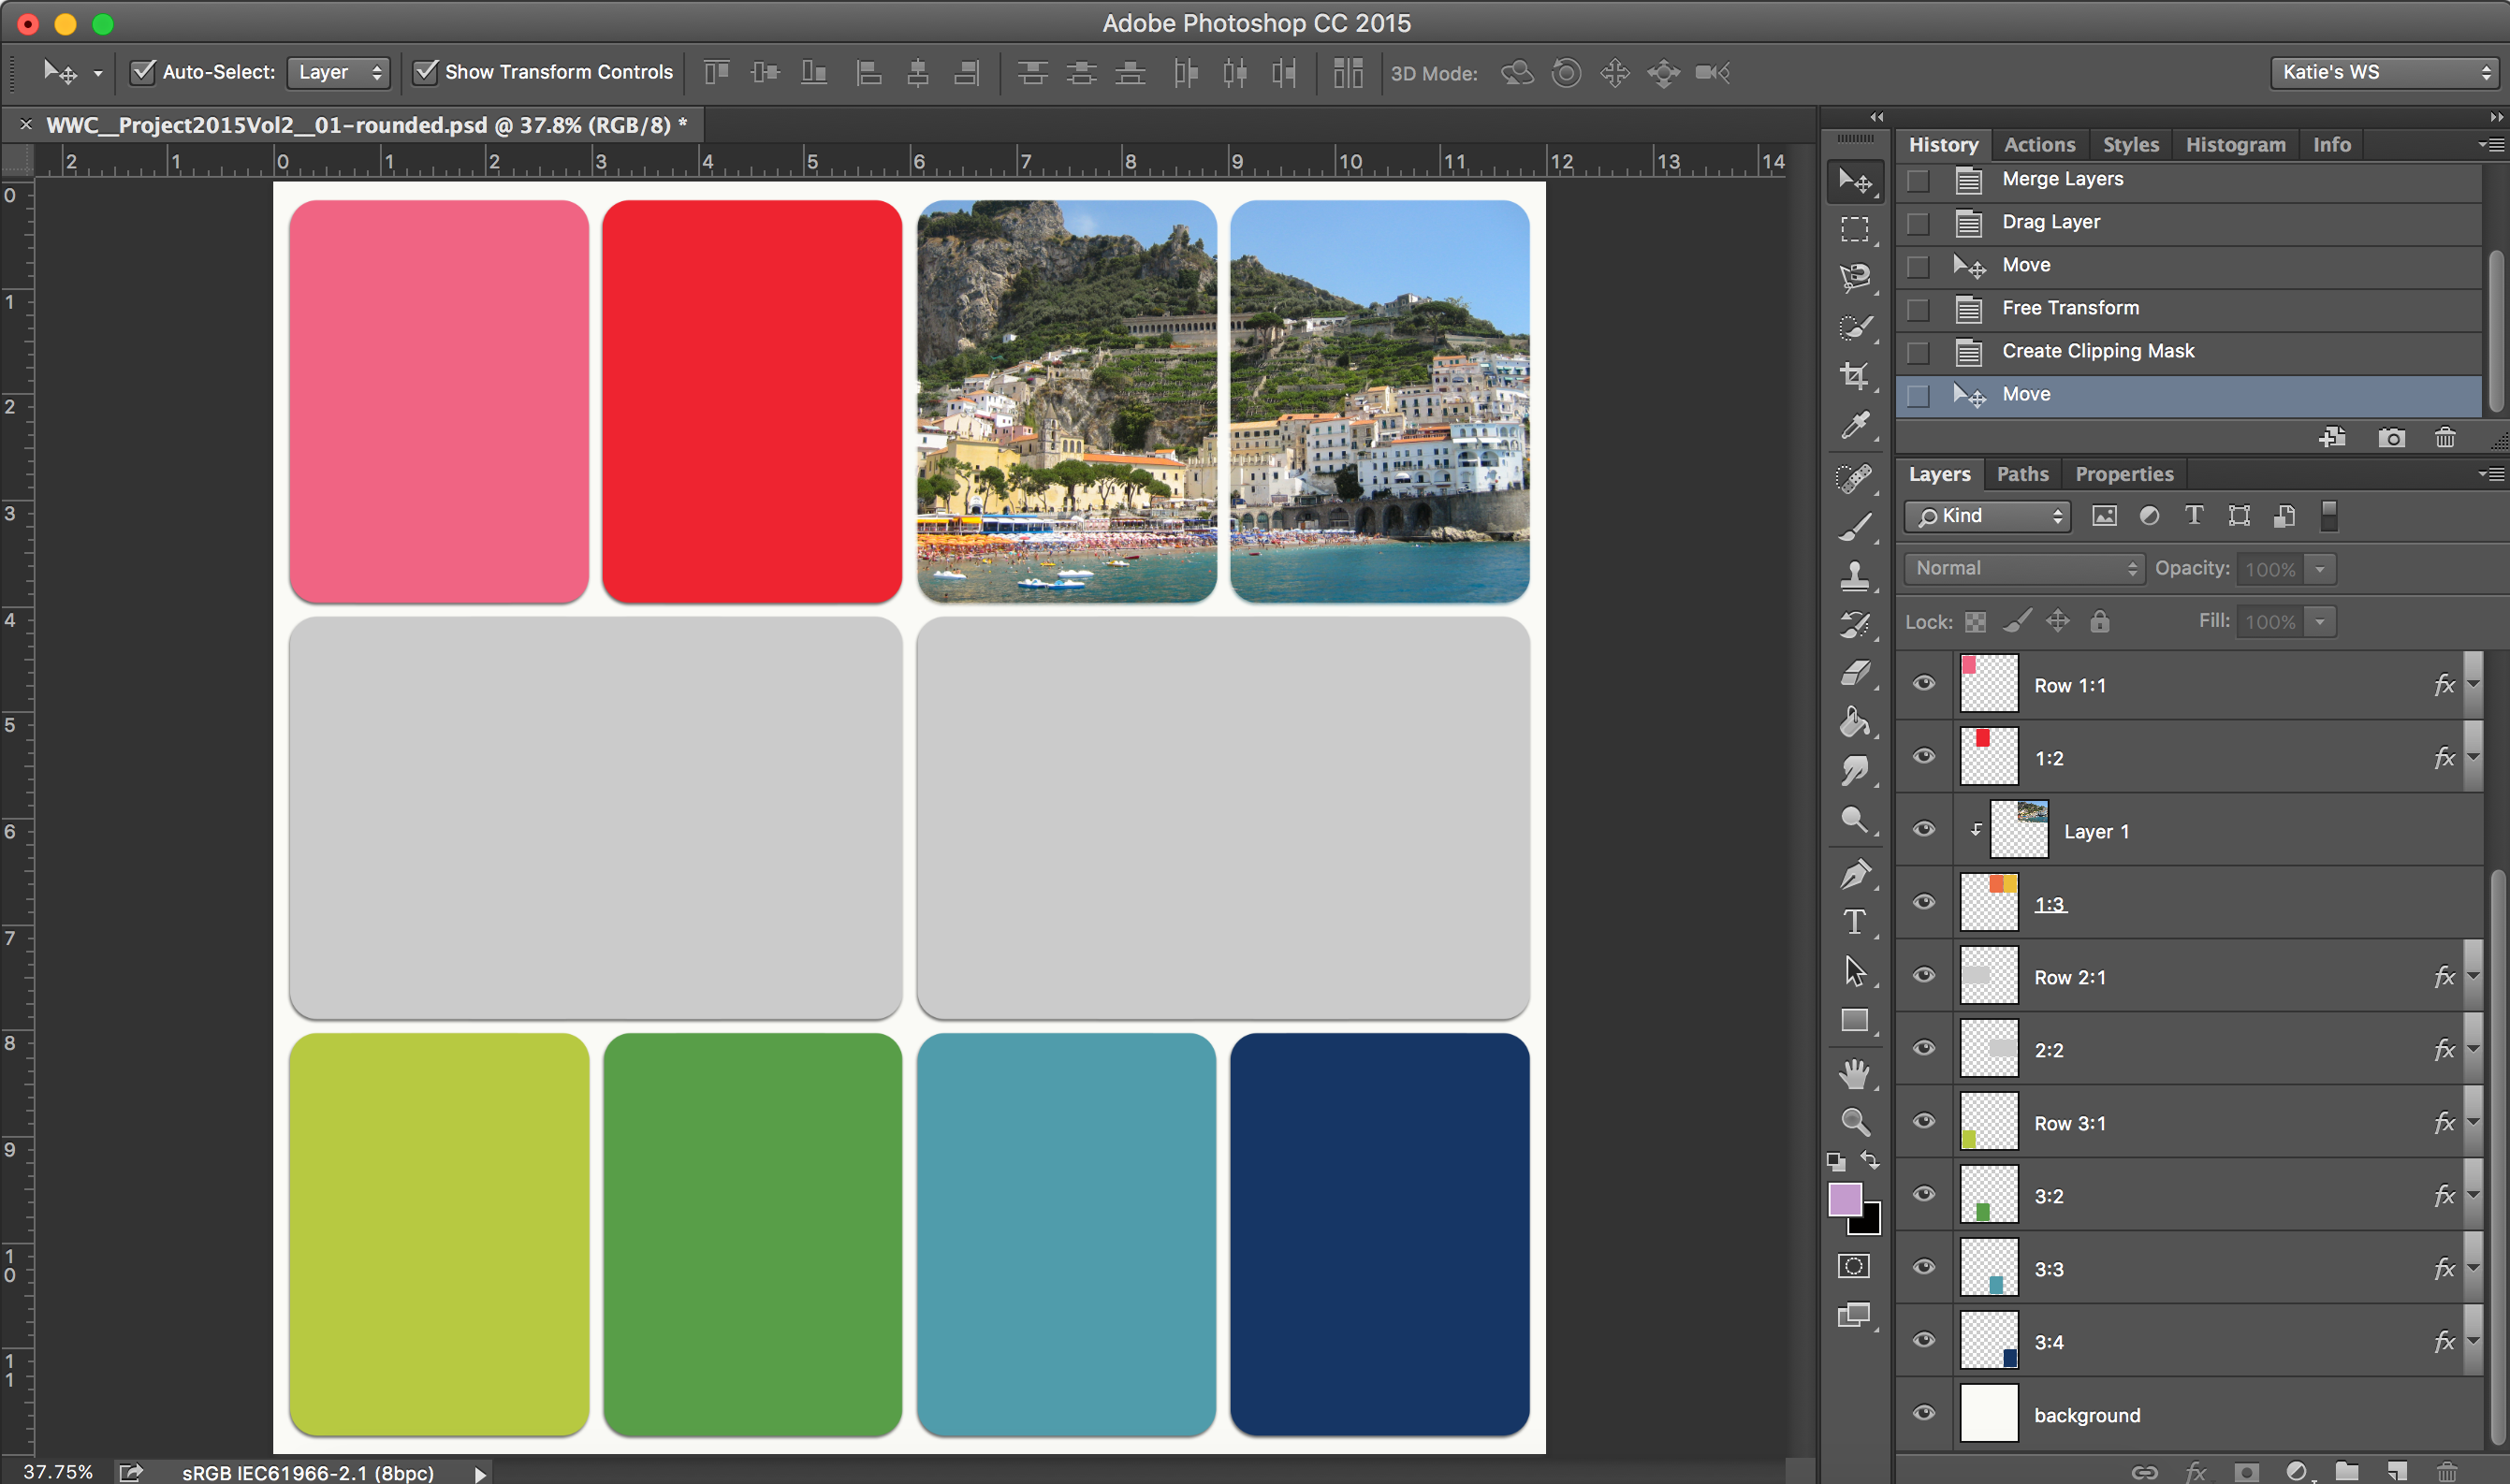
Now select the ribbon’s Drop Shadow layer and create a layer mask. Go to layer, layer mask and click on reveal all. Now we are going to pretty much the same thing as we did with the ribbon. Make sure your foreground colour is black. Select the layer mask on the ribbon drop shadow layer. Ctrl-click on the frame layer (you will see the marching ants appear around the frame again). Select the brush and remove the shadow that is left on the frame.

12

De-select (ctrl-d) and you can continue the scrap your layout. Remember that you can always get the shadow back by using the brush & white foreground colour or by deleting the layer mask.

I hope you’ve learned something you didn’t know yet. I’ve used this a lot and I just love this technique.


bianckaAbout the Author Biancka is a creative team member here at The Digital Press. She is a stay-at-home mom (SAHM), wife to Edwin, and mom to Jasper. She lives in the east of The Netherlands (about 30 minutes from the German border). She is addicted to scrapping, but also enjoys baking, reading books (mostly thrillers), watching her favorite TV shows, and photography.

Tutorial Tuesday | Better in Black and White

I love the look of black and white photos on a scrapbook page. They have the aura of looking “artistic” and work particularly well when mixed with colored photos.

If you are wondering how can you improve your black and white photography to make your photos pop… today’s Tutorial Tuesday is for you! 😉

Here are a few simple tips:

1. Take your photos in color.

Don’t use your camera’s black and white conversion option. Your favorite photo editing program (whether it be Lightroom, Photoshop, or some other similar program) provides a lot of flexibility to convert a color image into a black and white image. These options are much more limited, however, if the original photo is taken in black and white.

2. Look for contrast.

The best black and white images are taken by those who know how to look in black and white. Look for contrast in light and shadows. Look for a large range of lightness or darkness. Look for lines.

Black and white images are often more effective if they contain a true black, true white or both. What does this mean? It means that you need a part of the image to be “white” or “black” to ground the image. If this is not possible, you will definitely still need a wide range of grey; otherwise, the image will appear flat.

If you look at the following two image examples… the first contains black to ground the image, while the second contains white…


3. Look for patterns and texture.

Textures and patterns often look far better in black and white, because color does not compete for attention.

In the following photo, you can see the wonderful texture in the foreground sand and the shape of the old tree threatened by the rising ocean…

Likewise, the texture of the sand and geometric pattern of the wheel actually look more clear without color in this next image…


4. Try not to over or underexpose.

You can use your photo editing software to recover areas that are underexposed or overexposed, but it often creates noise in the photo which has the appearance of splotches or grains of discoloration. Noise will also appear in photos taken at high ISO settings. These defects are more visible in black and white than in color. It really does help to get the correct exposure in camera before taking the photo (and if necessary, using a tripod to steady your camera in low light).

For the following image, I used a tripod and long exposure (6 seconds) to soften waves at the beach…

It helped that my partner had no idea I was taking the photo. 😉

I hope that these tips can help you to take some better black and white photos. Please have fun experimenting with black and white! I’d love to see what you can do, so definitely feel free to link me up to any of your photos in the comments below. Next month, I’ll follow-up today’s post with another that will give some tips on using your photo editing program to convert color photos to black and white (and how to make these images really pop!).

I have one last photo of mine to share today… and this is one of my favorites. It shows our darling 12-year-old rescue greyhound, Zsazsa. She is good in any color.


About the author  Carolyn lives with her partner, eldest daughter and 3 rescue dogs on 5 acres of paradise in the hinterland of the Sunshine Coast, Australia. Her camera, along with an assortment of lenses, is never out of sight. When not taking photos, she loves cooking and gardening. Her new organic vegetable garden has been well photographed.

Tutorial Tuesday | Splitting a Photo into Multiple Pockets

Hey there, scrappers!

Today, I want to share a little tip with you related to pocket scrapbooking (which can actually be used on non-pocket layouts, as well!). A lot of times when I am working with a pocket scrapbooking-style template, I end up with a photo that just doesn’t fit into one pocket. So, why not get creative and split the photo into two or more pockets, right? It might seem challenging, but it really is quite easy once you learn this trick.

      1. Decide which pockets you would like to use for your photo. I am going to use two 3×4 journal card-sized pockets for one landscape-oriented photo. For this example, I’m going to put my photo into the two pockets at the top right…
      2. Select both of the pockets by clicking on the first one and then holding down the COMMAND key to select the other pocket or pockets. (CONTROL on a PC; and *note* that in PSE it might require holding down the SHIFT key, instead, to multi-click and select)
      3. Merge the selected layers into one layer by hitting COMMAND+E. (CONTROL+E on a PC)
      4. Drag your photo onto the layer directly above the merged layer you just created.

      5. With the photo layer selected in the layers palette, choose “Create Clipping Mask” with COMMAND+OPTION+G.(CONTROL+ALT+G on a PC) Then, just resize your photo so that it fits properly “into” your pockets.

I hope you will find this quick tip helpful when you are trying to arrange your photos on your pocket scrapbooking layouts!

Another note — if you are looking for some awesome pocket-style templates like the one I used for this tutorial, check out Laura Passage’s Project Twenty Fifteen Templates!


Katie

About the Author  Katie is a member of the creative team here at The Digital Press. She lives in central Florida with her husband and their four sweet-but-crazy boys. When she’s not dodging Nerf bullets or trying to dig out from under a never-ending pile of laundry, she enjoys photography, cooking, going to Disney World with her family… and, of course, digital scrapbooking.


Tutorial Tuesday | Simple way to add video to your memory keeping

I love photography as much as the next person (or even more, as much as the next scrapbooker! LOL) but even I have to admit that sometimes, still pictures don’t do life justice. Life is in constant motion (and sound) and there are situations where a video is the best way to record those memories.

And here comes the scrapper’s nightmare: how to use those videos in our memory keeping? Even as digital scrappers, videos can’t (yet) be integrated into scrapbook pages.

Well, QR codes to the rescue! You’ve most definitely seen those graphics around. QR codes work like barcodes and you can create your own to link to any internet page that you want… a video for example. Tadaaaaa, problem solved! To use a QR code you have to scan it with your smartphone and there are tons of free apps to do so.

Now what video to add? I’ve been using an app called “1 second everyday” along with my photographic P365(-ish). This app, which is free and exists for various platforms, helps you record (as its name implies) 1 second of video every day. Sometimes it’s a bit too short so you can extend it to 1.5 seconds, but usually it’s enough to capture the essence of a moment. Then the app mashes all those seconds either by year or month. You can also choose a custom timeframe and create your own mini-movie (of 30 seconds max for the free version).

I create my movies to match my PL/P365 pages, which are two-pages spreads for 2 weeks, and I use QR codes to link to my videos. I’ve uploaded those on youtube (through the 1SE app) and set the viewing rights to private, so only me or someone logged in my youtube account can see them. Since I really really like you, though, this time I’ve left it public so that you can scan the QR code and see the video. 😉

Here’s my most recent page, covering the first half of December, using the fabulous collab Dear Santa by Anita Designs and Sahin Designs:

And here are the two pages separately:

You’ve probably noticed my very own QR code on my left page and here it is again (in bigger size) so that you can scan it and see my 1SE video for December 1st to 15th:

How to create a QR code? Well, that’s pretty easy. There are lots of sites that do that, just look for “QR code generator”. I personally use unitag.io which allows me to personalize the colors (background and code itself), but there are tons of other options. Just make sure you can download the QR code once it’s created, and that it’s a high enough quality/resolution if you intend to print your LOs.

Finally, even if 1SE is a fun app to record everyday moments in video, you can use QR codes in many other ways. Here are a few ideas of links to add to your LOs:

  • the video of a moment or event, for example the birthday kid blowing his/her candles or the midnight kissing during your NYE party. Just edit in your program of choice (or in Youtube) and upload it to your favorite platform.
  • the trailer of the movie or TV show you talk about in your LO
  • the video of your favorite Christmas song or the latest track of this artist you love
  • the playlist that you keep listening to over and over again (for a “currently” LO, for example), etc.

I hope those tips will help you add video to your memory keeping. Don’t hesitate to comment or post in the forum if you have any question and feel free to add your ideas if you think of other ways to use QR codes!


Chloé

About the author: Chloé is in charge of PR and communication for her small town by day, “by night” is a digiscrapper and a photographer whenever the light is beautiful. She lives with her man and fur-babies in a small town of Alsace (in the northeast of France), where she loves to read, watch good TV shows (TWD being her absolute favorite), and just hang out with her friends — no matter if they are close by, online, or away in her Swiss hometown.

Hybrid: Reindeer Food Keepsake Ornament

Reindeer Food Keepsake Ornament


I can’t believe Christmas is just around the corner. It’s all happening way too fast this year; even my boys mentioned that it doesn’t quite feel like Christmastime yet. I mean, I just put up my tree and haven’t even gone shopping yet… and before you know it, we will be cheering “HAPPY NEW YEAR!” I’m going to do my best in the next two weeks to slow down and enjoy the holidays. I’ll let you know how that works. 😉

Meanwhile, today I am here to show you how to make an adorable “Reindeer Food” keepsake ornament!

I have seen the idea behind today’s tutorial before (the concept of making “Reindeer Food,” that is)… and I thought it would be cute to put my own little twist on it. Instead of simply putting the reindeer food in baggies to put out on Christmas Eve, I decided to also make an ornament so that when the kiddos are done putting out their reindeer food the can have a cute ornament to keep.

SUPPLY LIST

  • 4 in plastic fillable ornament (I purchased mine at the Dollar tree)
  • projector sheets (acetate sheets; found at any office supply store)
  • vinyl (I got mine from Hobby Lobby)
  • white cardstock
  • ribbon
  • printer and cutting machine (I use a Silhouette Cameo)
  • the special reindoor food (see below for recipe)
  • digital scrapbooking kit of your choice (I used 25 Days by Dunia Designs; I am absolutely in love with this kit!)

kit

Here is my secret Reindeer Food recipe: oats and glitter (I use both red and green). That’s it! …top secret, right!? I have also seen cheerios and little Christmas candy beads use before, too. I’m sure you can just add whatever you think Santa’s reindeer will eat. If they were my reindeer, they would be filling up on sweets… lots of sweets… 😉

food1


Next, we’ll create the ornament. First on that task list is creating the clear acetate insert for the ornament.

If you don’t have cutting machine available to cut the vinyl shapes that make up the reindeer, you can also print the reindeer directly onto the acetate sheets (just make sure that you get the right sheets for your printer). I like the look of the vinyl on the acetate, so the next few steps will detail that method.

First, you need to draw out the ornament template… and then use that shape to cut out the insert from the acetate so that it will fit inside the ornament. I cut my inserts at about 3.75 inches.

templates


I chose a reindeer image from the digital kit, and then before I “pulled it apart” (see below for explanation), I first laid it on top of my ornament template to test it and make sure it would fit.

sizehead


Next, I traced the pieces of the reindeer and separated them in my software (I use Silhouette Studio Designer Edition v3). I laid it out as shown below (separated by color) so that I could put my different pieces of vinyl on my mat in the same places cut one time instead of five.

vinylcut

Here’s a look at how I arranged my vinyl pieces on the mat; notice how the arrangement corresponds with the layout of the reindeer pieces in the image above. This is a good way to use up those vinyl scraps (I don’t do a lot of vinyl projects with my Cameo, so most of my pieces are scraps). My favorite thing to do with my machine is print and cut.

vinylpieces


After I had my vinyl reindeer pieces, it was time to fill the clear glass ornament. First, I removed the top of the ornament and filled it with the reindeer food…
fill


…and then it was time to assemble the rest. I inserted the clear acetate sheet with the reindeer vinyl adhered to it as shown here:

roll


To get the projector sheet in the ornament, simply roll it up and stick it in the ornament.  It will unroll when it is all the way in, and will look like this:

ornie

*NOTE* If you don’t have all of the necessary supplies to make the ornament, you can also simply design a header and fill little treat bags with the food — no cutting machine required! With that in mind, a tag comes in handy (you can also use a tag like this on the ornament itself). Here’s how to make the tag…

tagreindeerfood


I created the tag in the Silhouette software… but you can also do this with any photo editing program and a pair of scissors.

tags

I created two tag images (one reindeer image, and one with a written sentiment), and then tied them together. Aren’t these so cute?

tag

Here’s a look at the final version of this ornament with the tags. I love this little reindeer! I made a couple of these ornaments for some friends’ little guys… and they loved them!


tagblub


I also put the same sentiment onto a wider piece of cardstock in order to make a “treat bag topper”…tagreindeerfood_21


Here’s a look at the treat bag (just the reindeer food, without the ornament). This is a fun little gift, as well!


lightned


And there you have it!

I hope this tutorial has inspired you! If you’d like to give it a try, please join me in the forum and have fun creating something awesome for Christmas. You can earn points toward this month’s hybrid challenges! I can’t wait to see your creations.

Have a very Merry Christmas and a Happy New Year. Take time to slow down and spend time with the ones you love the most!


About the Author  TanyaTanya is a part of the hybrid team here at The Digital Press. She has been hybrid crafting for at least 10 years now, and loves creating and sharing those creations with others. Her all-time favorite tool is her Silhouette Cameo. She has been married for 26 years and has two sons: Chris, 23 and Chance, 19. She also enjoys crocheting, photography and woodworking.

Tutorial Tuesday | All About Bokeh

Tutorial Tuesday | All About Bokeh


It’s beginning to look a lot like Christmas! Most people have their trees up, sparkling with lights… and now they’re wondering about the best way to get some great photos. Getting great photos of holiday lights is easier than you might think! Here is a simple tutorial to get those great shots.

First, I need to tell you a little about bokeh.

Bokeh is defined as “the way the lens renders out-of-focus points of light.” So what does this mean, exactly? In general, it means that while the in-focus parts of a photo are beautiful, the parts that are out-of-focus are just as beautiful. How do we apply this to our holiday lights? Easy peasy… we do what we never plan to do: we take a purposely out-of-focus shot.

The secret to shooting bokeh lies in its definition: out-of-focus points of light. You need four things to shoot great holiday bokeh: (1) pin-point highlights (twinkly lights on the tree), (2) low ambient light (your only light source should be the tree lights themselves), (3) a lens able to open to a large aperture (f/2.8 or wider), and (4) a short focal distance (or rather — enough distance between the lights and where your lens is actually focused).

TIPS:

  1. If you have a tripod, use it; if not, rest your camera on a steady surface.
  2. Turn off all other lights and use a higher ISO. I recommend ISO 800.
  3. Use your widest aperture. I recommend f/2.8 or wider.
  4. Keep your shutter speed high enough to avoid camera shake if you aren’t using a tripod. This will vary based on the amount ambient light available. I used SS 1/400.
  5. MANUAL focus! The key here is to manually take your lens out of focus to force your lens to a shorter focal distance.


Here is my example:

bokeh8


Don’t have a DSLR? No worries! You can still get great bokeh photos with a point and shoot camera (or even a cell phone camera). The key here is to trick your P&S (or phone) into taking a photo at a shorter focal distance. The answer? Put your camera on macro mode. Macro mode has a little tulip icon. I have an iPhone 6S and use the Camera+ app, which also has a macro mode.

Here is an example using my iPhone:


bokeh4


BONUS TIP:

Want to get even more creative? Try making shaped bokeh!

To do so, I dug out my paper punches and punched a few shapes into black paper. I also used my DSLR and lens, as I haven’t figured out a way to do this with my phone’s camera.


bokeh1


First, cut out a circle of paper the same size as your lens…


bokeh2


Punch a shape in the middle of the circle (fold the paper circle in half if your punch is short and you can’t reach the middle).

Next, tape the circle to your lens as shown below… and then follow the same instructions listed up above for “normal” bokeh photos.


bokeh3

Here’s a look at the result… isn’t it fun?


bokeh6


You can try some other fun shapes too…


bokeh7


Hopefully, this will help you capture some great bokeh photos this holiday season. Give it a try!


FarrahAbout the Author  Farrah Jobling is a member of the creative team here at The Digital Press. She lives in Denver with her amazing family — Mike, Nicholas (8), Claire (6) and Hope (1.5 yr old puppy). She works from home as a photographer and enjoys scrapping her personal photos.