Category: Tutorials

Tutorial Tuesday | Better in Black and White (Part 2)

Better in Black and White Part 2 Tutorial

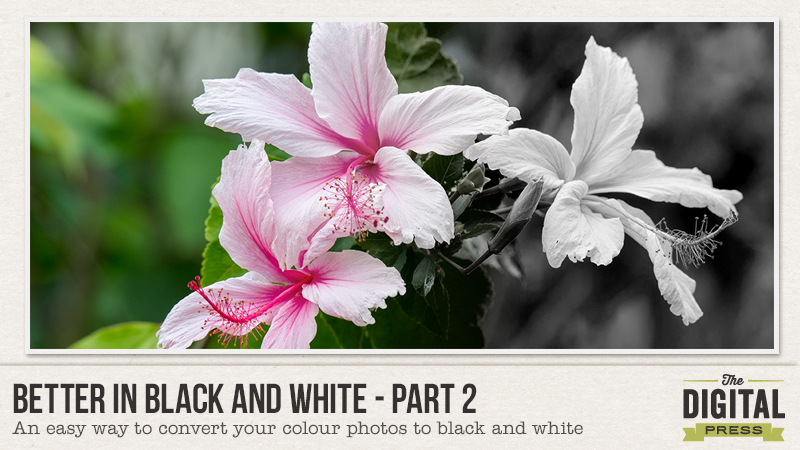
In last month’s “Better in Black and White” tutorial, I gave some tips on how to take better black and white photos. For those who missed it, the tutorial can be found here.

This month, I will focus on converting your coloured photos to black and white. You are probably thinking –“Well isn’t black and white just desaturated colour?” Yes it is, but if you use desaturate, or any of the other one click conversions in your photo editing software, you will get a black and white photo that is usually flat. For the photo to pop, you need to work just a little harder.  😉   A photo edited for colour rarely looks good just desaturated to black and white.

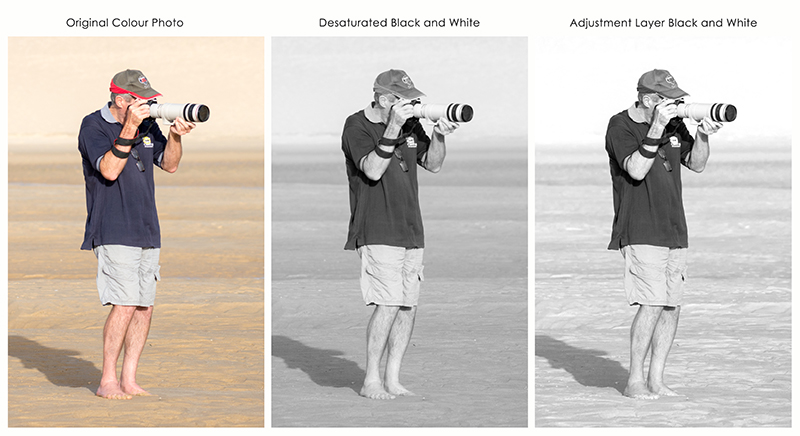
For example, the following photo of my partner was taken at the beach last week. As you can see just desaturating the photo or changing to grayscale has created a flat image. The last image uses one of my favourite conversion methods and the one I will be demonstrating today.

Better in Black and White Part 2 Tutorial

Converting to Black and White using Adjustment Layer and Colour Luminosity

(My screenshots are from Photoshop but most photo editing programs will allow you to convert using this method.)

  1. Open your colour photo in Photoshop and modify as required so that it is appealing to the eye. (This may require brightness or contrast modifications, etc.)
  1. Create a new black and white adjustment layer. (Layer/New Adjustment Layer/Black and White)
  1. Now comes the fun part – changing the luminosity of the original colours. Move the individual colour sliders to the left or right until you get an image that you are happy with. There is no right or wrong, just individual preferences.


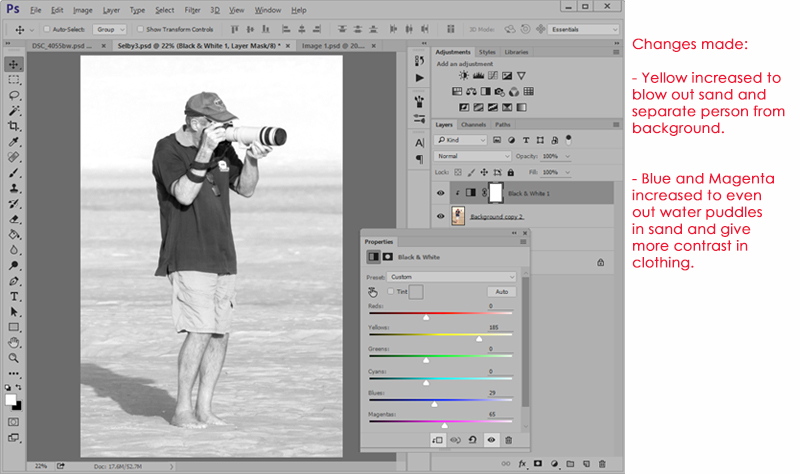
In the previous photo, my aim was to blow out the background so that I would have a photo that could be easily blended into a background paper. These are the adjustments that I made:


Better in Black and White Part 2 Tutorial


Let’s look at some more image conversions and the changes made to the colour luminosity.

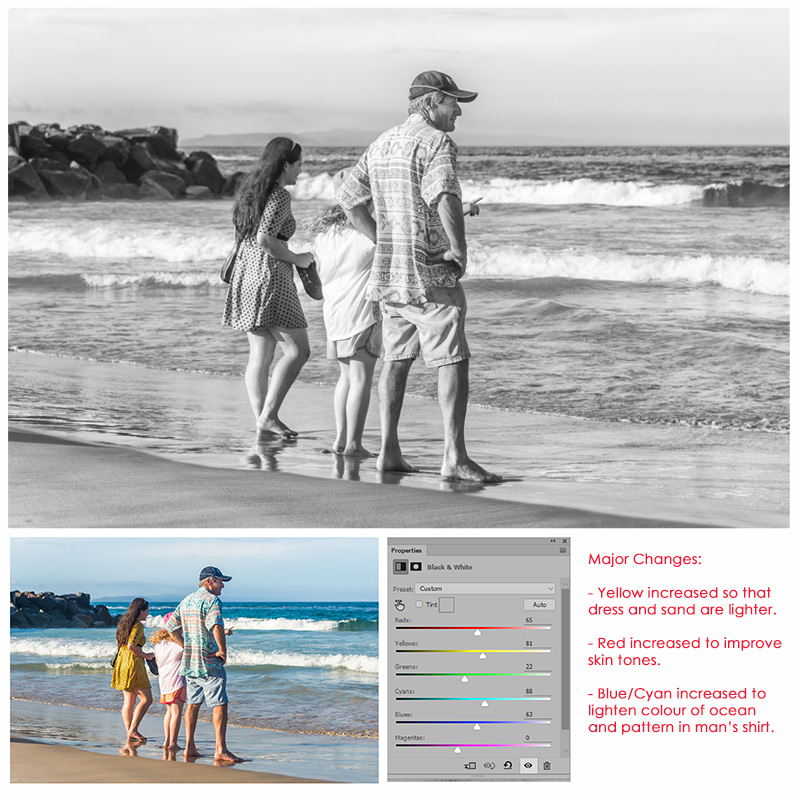
  1. This family photo was taken at the beach. I like the photo but wanted less contrasting colour.

Better in Black and White Part 2 Tutorial

2. I took this photo of Pied Cormorants last week. I love the conversion which shows great detail in the feathers.

Better in Black and White Part 2 Tutorial

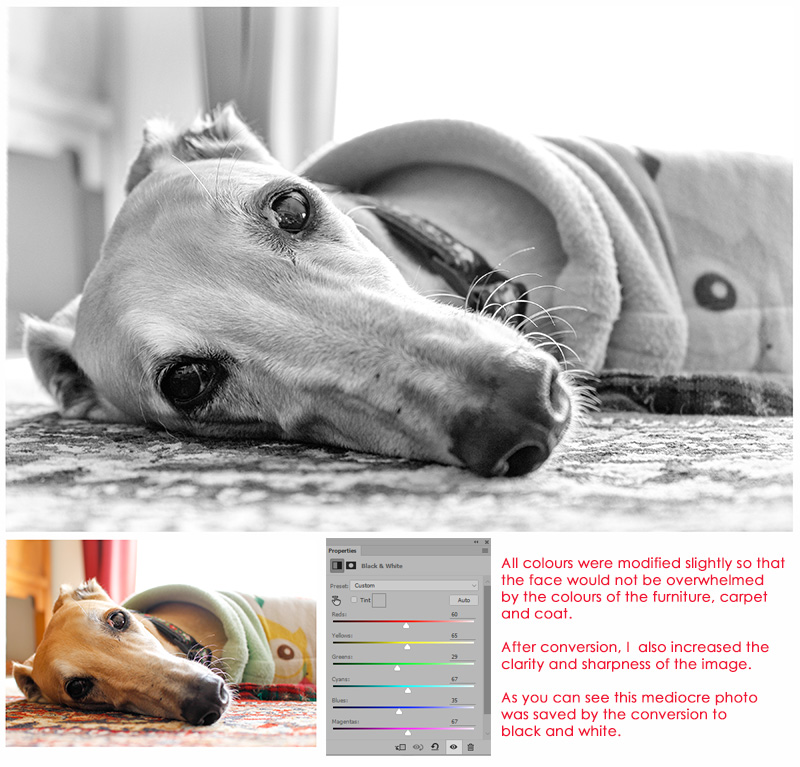
3. This photo of my darling Zsazsa did not look good in colour and was saved by the conversion to black and white. Yes sometimes you can save a photo by converting. 🙂

Better in Black and White Part 2 Tutorial

As a final step, I will often alter the brightness and contrast slightly before flattening the image and saving it as a separate file to the original. (You may need that original in the future).


As you can see this is an easy way to have better control when converting images to black and white. Please have fun trying out this technique. I’d love to see what you can do, so definitely feel free to link me up to any of your photos in the comments below.
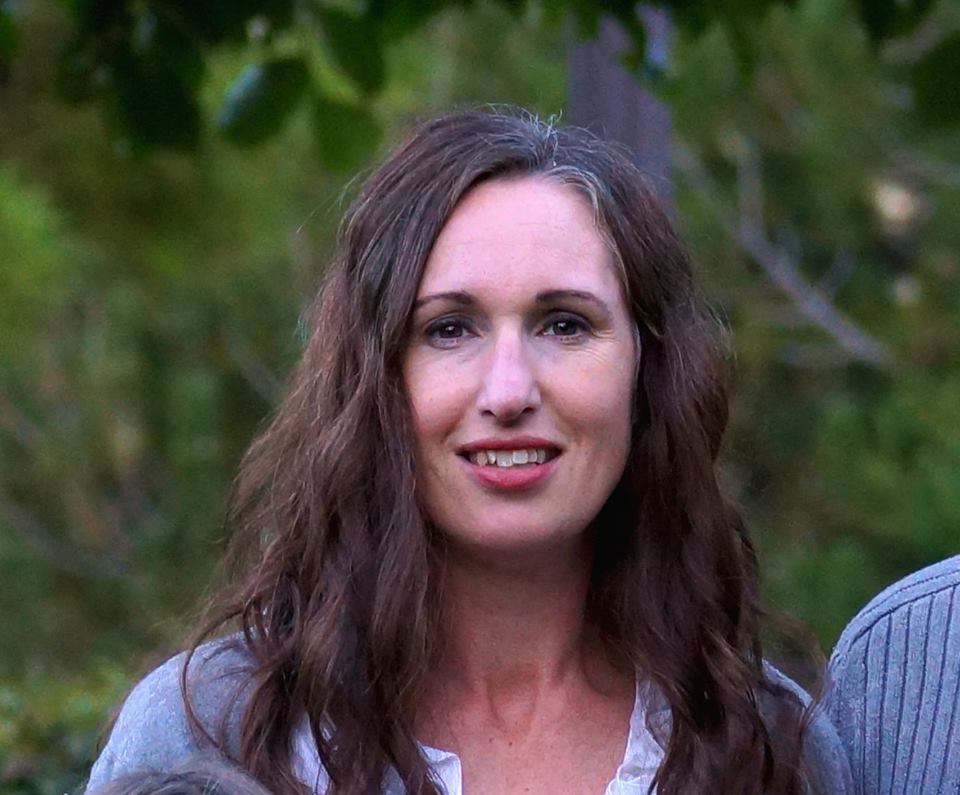
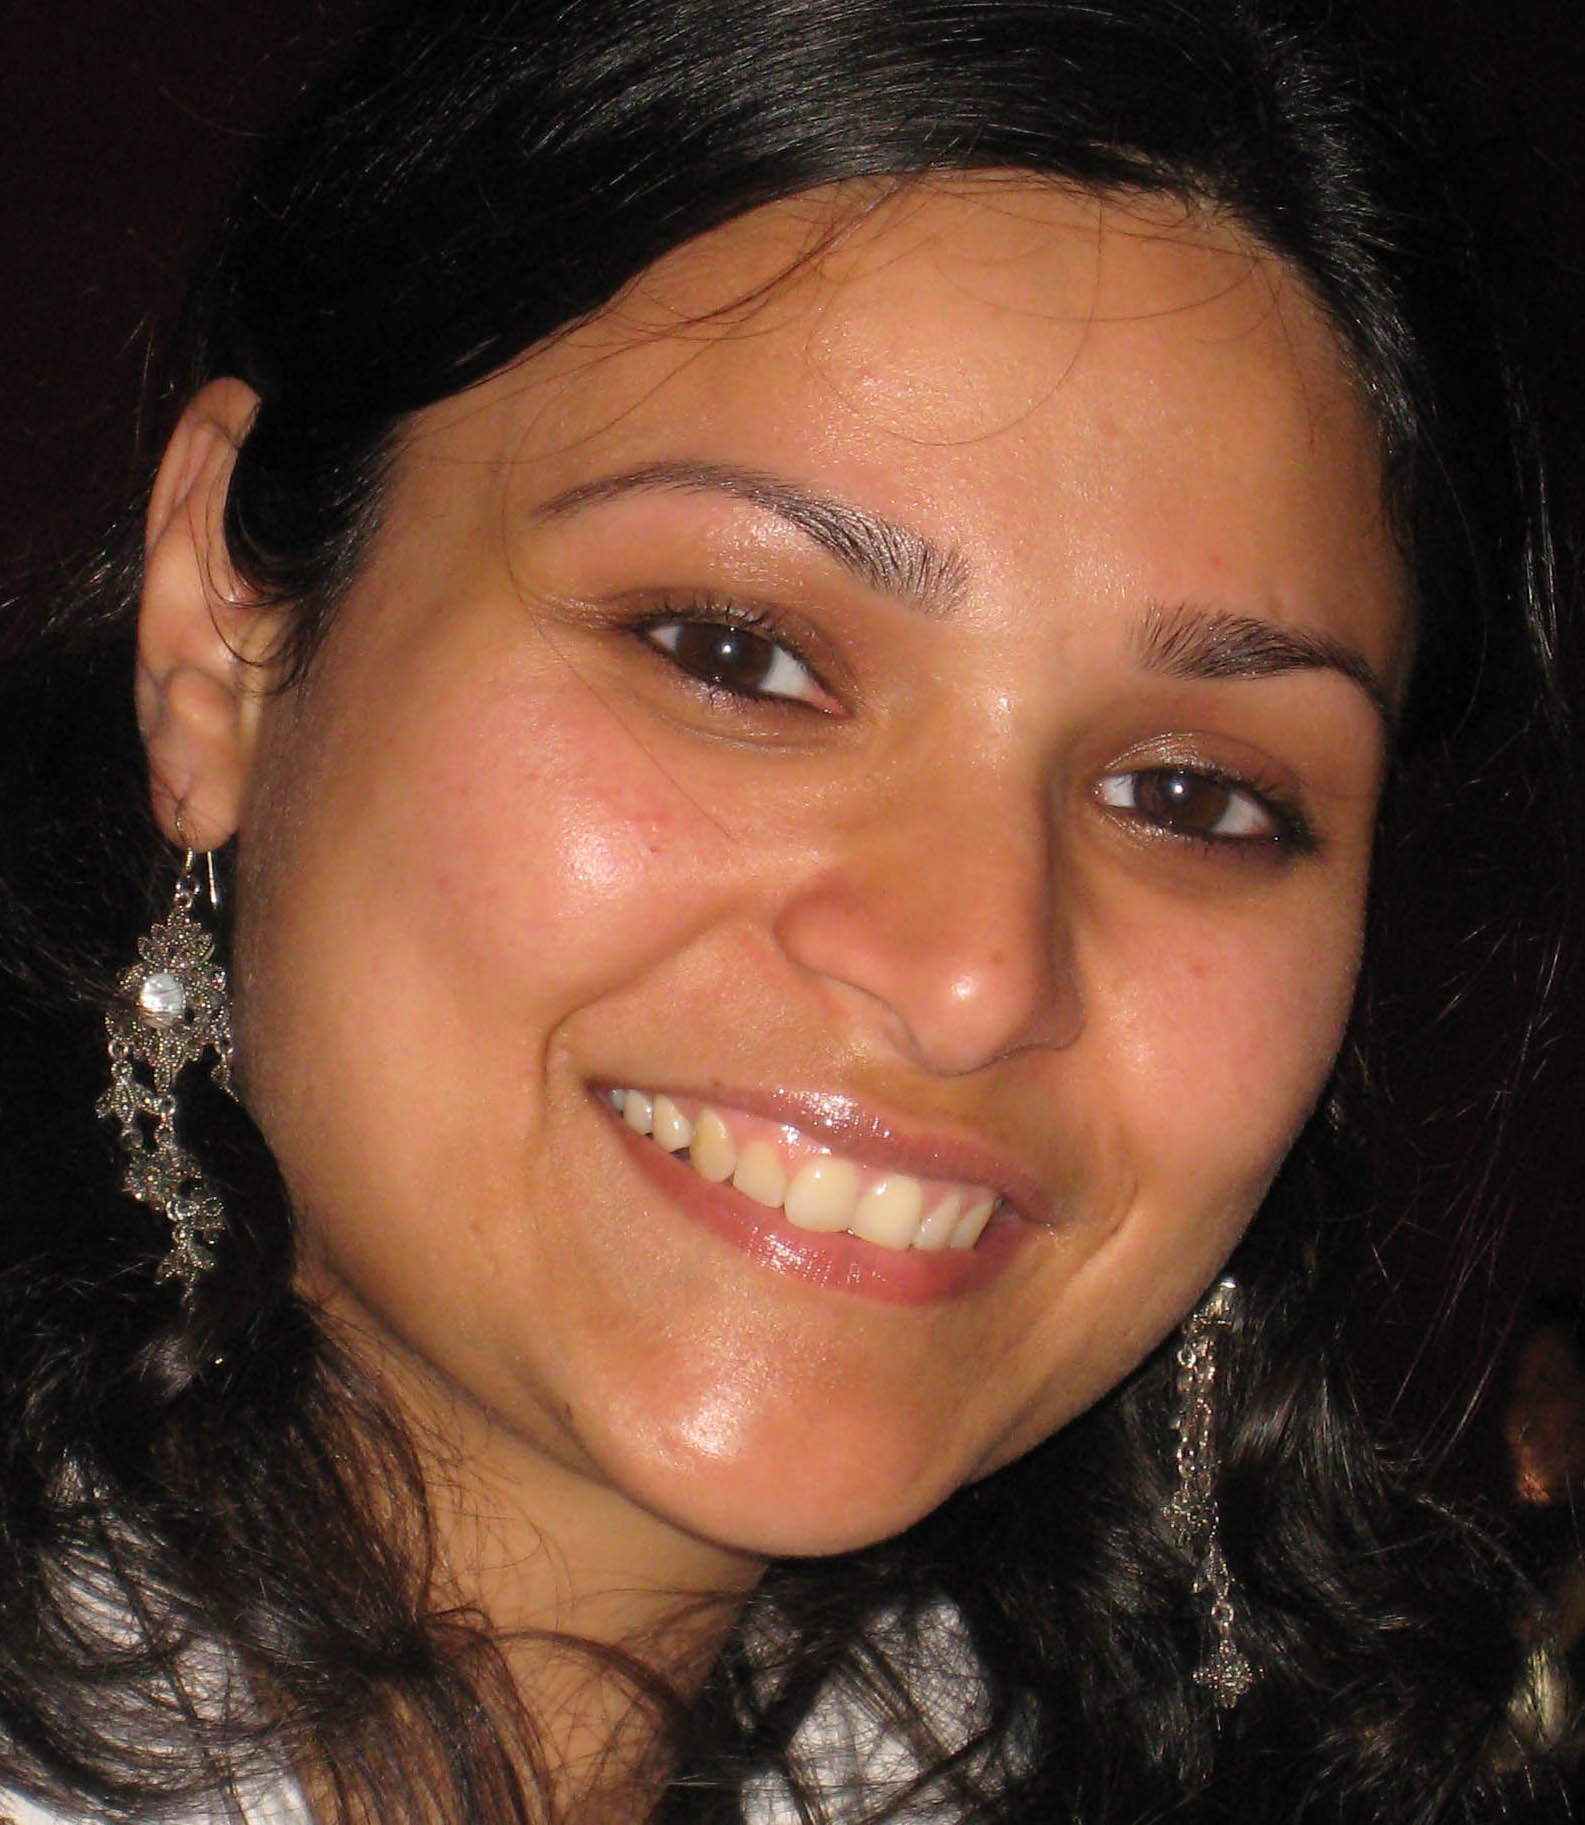


AvatarAbout the author  Carolyn lives with her partner, eldest daughter and 3 rescue dogs on 5 acres of paradise in the hinterland of the Sunshine Coast, Australia. Her camera, along with an assortment of lenses, is never out of sight. When not taking photos, she loves cooking and gardening and of course scrapbooking.

Prettify Your Pantry – Hybrid DIY Storage Containers Upcycle


My name is Alina and I like to hoard stuff. There’s always something I can think of doing with things later. Maybe I even like to hoard ideas. When I recently got all the clutter out of my kitchen drawer it dawned on me, that I need a way to store my ingredients. Since I couldn’t figure out what the optimal permanent solution for my problem would be, I thought of an interim.

And that’s when my hoarding finally made some sense. I had lots of containers saved for an unspecified diy project. Yay! Containers! They were all not matching my kitchen colors and I knew that a hybrid make-over would let them shine. I will guide you through my thought and action process for this project.


All the kitchen containers I hoarded for later use. For this project the large containers on the bottom came to new life.


First I looked through my ingredients. How big should the containers be and how many of them would I need? How many of them would fit into the space I found for them? I figured that I had 11 bulky ingredients needing a big container. The other ingredients would need a smaller container and they would fit into the drawer, so they wouldn’t need a make-over. If I had additional time and energy, I could still upcycle them later.

I cleaned the containers cautiously and let them dry before I did anything else with them.

Then I thought of the colors I wanted to use. Our house is full on romantic in dusty/grayed colors and the kitchen is blue/purple/taupe/gray with a wooden countertop. I knew Anita Designs would be my go to for the style of the kitchen. I found lots of kits in these colors and the style that I needed. I was specifically looking for the patterned papers and left out the colors that wouldn’t match what I had in mind (green and red in this case).


The kits I used (linked) Belvedere, This Week, A Day At The Park, Frame It In Vol. 10

I measured the containers. They are all cylindric and have the same measurements. The size of the cover would have been larger than A4 but only a small strip would remain uncovered. Since it’s just an interim solution, I am okay with a small portion on the back of the container peeking through. I have A4 sticker paper and used it for this project.

I created a template in photoshop with the measurements of the cover. It’s simply a background paper, a big frame and a large font in capital letters. I created all the covers and printed them on the sticker paper.


My template for the covers. I only changed up the papers and the captions.


Now I got serious. After cutting the excess paper off, I tried the cover on with the backside of the sticker paper still attached. I could see some of the high contrast original cover through the new cover. On those containers I used a plain paper before I covered it up with the printed paper.

The sticking onto the container was tricky. I had to be very carefully finding the parallel lines to be able to stick the paper without creases and bubbles. Since I’m lazy, I didn’t want to draw a line on every container as a guide. So I only got the small backside off and tapped it lightly onto the container, making sure it would be fitting on the edges. Then I peeled off the rest of the backside and brushed the paper from the middle of the already sticking part to the edges and around the whole container.


Sticking only the small strip to the container to see if the sticker will fit on the edges.


Et voilá, after several repeats, I had them done. All in all this took me about 2 hours, printing not included.


The containers on my crafting table.


They fit perfectly into my kitchen and I’m happy when I look at them. If I wanted them to last longer, I had them coated, because the ink might come off when in touch with water.


The containers in the kitchen, where they belong.


That’s how my hoarding became something beautiful. Now I can even ease “the hubster” into the thought of keeping things a little bit more. Who knows which idea I will diy next?


alina

About the Author: Alina enjoys sitting in front of her large computer screens too much. Apart from that she loves walking her dog and watching sunsets while being amazed of life in general. She is married to her best friend. Tries to manage the needs of her two cats and her dog and badly fails when they all want their cuddle time at once. Everything else is scrapping, taking photos and currently crafting. Having said that, she needs a bigger craft room.


Create a Valentine’s Day Printable

Valentine’s Day Printable


I am a hopeless romantic, and just love Valentine’s Day. Today, I am here to show you how to create a simple Valentine’s Day printable using word art and digital elements from The Digital Press. You can print and frame for a piece of artwork… or make a card to send to a loved one.


Valentine's Day Printable

Step 1. Gather a collection of Digital Supplies that includes any word art and elements you would like to use. For my printable, I used l’Amore by Little Lamm & Co., Be Mine by Mari Koegelenberg & Danielle Engebretson, and the TDP mini kit Cherished.

Step 2. Create a new 8×10 canvas in your photo-editing program (it should be 300dpi for print-resolution). Place your words on your layout until you have them arranged in the desired position.

Step 3. You can add color to some of the words, or clip digital papers to items you’ve chosen. You can even add drop shadows to a few of your words to add dimension.

Step 4. If desired, add a few digital elements to embellish your word art (you can see that mine uses hearts, arrows, etc.).

Step 5. Print it out onto paper and frame at 8×10 to show off your new lovely artwork.

Valentine’s Day Printable

Step 6. If you would also like to create a greeting card using your printable, simply re-size it to 5×7 and then print, seal with a kiss, and send to your loved one.

Valentine’s Day Printable


Cute, isn’t it? And so easy!

Hopefully this tutorial helps you think of ideas for repurposing your digital products and creating your own home printables and cards.


LindyKrickbaum

About the Author  Lindy Krickbaum is a member of the creative team at the Digital Press. She is a happily-married wife, and best friend to her twin sister. She currently lives in Johnson City, Tennessee in the United States. Lindy is a self-admitted scrap-a-holic, rarely missing a day to scrap. She also enjoys designing jewelry, reading, and traveling every chance she gets.


Hybrid Saturday | Jar of Hearts

header blog2


I love the month of February. Valentine’s Day is always a great time to show appreciation and love to family and friends.  Today, I am here to show you a few simple ways to dress up a jar as a Valentine’s Day gift. They make fun teacher gifts, also! I love to collect jars of all sizes and use them for gift-giving. For this project, any small to medium-sized jars will work perfectly.

Supplies Needed:

  • jars
  • twine/string/etc.
  • felt
  • needle and thread
  • cotton balls
  • toilet paper roll (optional, to be used as filler)
  • candy
  • digital elements (Valentine-themed, etc.)
  • card stock

To begin, choose your favorite digital scrapbook kit. For my jar labels and tags, I chose Be My Valentine Kit and Love is in the Air Journal Cards from the shop at The Digital Press.


Next, let’s work on the jar of felt hearts. I used various colors of felt: red, pink, blue, and green. I hand-drew a heart pattern that was about 2.5 inches wide, and after cutting out the hear shapes I hand-stitched half of two hearts together with white floss. Then, before completing the stitching all the way around the heart shape, I slipped a cotton ball inside and stitched up the other side. I sewed about 15 of these hearts to fill the largest jar (TIP: when you are filling a larger jar, it’s helpful to add in a filler; I slipped a toilet paper roll inside the jar and placed the hearts around it).

layout

To create a topper for the jar, I chose some elements and papers from the Be My Valentine Kit. In my photo-editing program, I sized the elements and paper to the size of the lid of the jar (my lid was roughly 3 inches in diameter). Then, I printed my image on card stock and used the jar as a template to cut it out by hand.

Here is a look at the finished jar with the topper, tag, and stitched felt hearts inside it. Isn’t the word art sweet? I love that bit of gold print on the tag. It matches perfectly with the XOXO topper.

Enhance-jarPS

Next, check this out… I love how easy it was to create a tag using a journal card from the Love is in the Air Journal Cards set. I chose this darling “You Have My Heart Always” card (shown below), and then sized it to fit my jar, printed it, and cut it out. I punched a small hole at the top and slipped some ribbon through so I could tie it around the jar.

enhanced-photo3PS

Here’s another example of a fun jar topper and tag combo… I just loved the heart shape made out of flowers (found as a digital element in the Be My Valentine Kit, and used as the topper on the candy hearts jar shown below). Before printing it out, I simply noted the specifications of the lid size — making it easy to know what size to print that heart element onto the background paper for the topper.

enhanced-photoPS

Once created and filled with goodies, each jar is unique and ready to give to that special teacher, friend, or family member on Valentine’s Day!

enhanced


Want to give this a try? Please come join us in The Digital Press’s forum for a fun challenge related to this tutorial! Not only will you end up with some adorable hand-made gifts… but you can earn challenge points while doing so, which can later be cashed-in for discount coupons to the shop at the end of the month if you participate in the challenge system at The Digital Press!


TerresaAbout the Author  Terresa is a mother to 5 beautiful children. She loves capturing memories with her digital camera and then creating a visual family memory book to be enjoyed and treasured. She also loves to design and create personalized items for her home and children. Other interests are crafting and gardening, and you will often find her enjoying the outdoors and soaking in the beauty of nature.


Tutorial Tuesday: How To Create Digital Embossing

How To Create Digital Embossing

What’s the one thing I miss when it comes to paper crafting?  Embossing.  It doesn’t matter if it’s dry embossed or heat embossed, both techniques are just pure joy.  Guess what?  I’ve mastered digital dry embossing and I’m here to share just how easy it is to create this look.

I created this page using the Fireside Kit by Sahin Designs.  This kit is a nod to sitting by an open fire, draped in a fleece blanket with a warm cup of cocoa, milk, coffee or tea, enjoying a good book.  The colors in this kit are rich, warm earth tones.

So, without further adieu, let’s move on to the tutorial.

How To Create Digital Embossing:

Step 1: Open a patterned paper in Photoshop.  It’s best to choose a paper with high contrasting designs and colors but this technique can work with almost anything.

Step 2: Go to File, Save As to change the paper from a .jpg extension to a .psd file extension.  Note: You should rename the paper so that you do not override the original. 

Step 3: In your new working document (not the .psd you just created), select the paper layer you want to emboss into a smart object.  You can find this under FilterConvert for Smart Filters (this is an important step – don’t skip this).

2016-02-02-HowToCreateDigitalEmbossing-img01

Step 4: With your paper layer still selected in the Layers panel, go to the Filter menu then scroll down to select Filter Gallery.  Under the list options choose the Texture folder then select Texturizer.

2016-02-02-HowToCreateDigitalEmbossing-img03


Step 5: Time to play with the Texturizer settings.

  1. First you will need to load the pattern paper that you saved as a .psd file by using the drop down menu.

2016-02-02-HowToCreateDigitalEmbossing-img04

  1. The two main settings are the Scale and Relief option.  The scale reduces or enlarges the pattern.  For my page I chose a scale of 200%.  The relief determines how deep the embossed impression looks on the page.  For my page I chose a scale of 20.  These settings will be different for you depending on the pattern you’ve chosen. When you’re done, click OK.

2016-02-02-HowToCreateDigitalEmbossing-img06

After returning back to your layout you will notice in the Layers panel a new layer named Smart Filters.  If you don’t like the look of the embossing, double-click the Smart Filters again and you are right back in an editable state allowing you to change the scale and relief sliders until you get your pattern to look perfect.

How To Create Digital Embossing

Finishing Touches: After the raised embossing pattern is as I like it on the page, I then moved onto re-coloring the paper.  With the eyedropper tool, I selected a warm rusted red from the striped pattern paper.  Then, I double-clicked the Smart Object icon in the Layers panel that belongs to the embossed paper layer.  This opens an editable copy of the layer where I then filled it with the warm rust color.  This results in a warm, rust colored paper with a seamless embossed pattern all throughout.  Perfection!

2016-02-02-HowToCreateDigitalEmbossing-img09

We’re almost done…stay with me!

Next I wanted to be able to see the beautiful striped pattern beneath the embossed paper so I reduced the Fill/Opacity and added a drop shadow to create the look of a vellum paper. Brilliant, beautiful, bold and striking!  Yup – she’s a beauty!

I couldn’t be any happier with the end result.

20160115_rherron_sahindesigns-weboverlay


Rachel

About the author: Rachel works at a law firm by day and loves to create digitally using Photoshop in her spare time at night. She is a busy mom of two girls and a wife who lives in the greater Philadelphia region. She has a passion for storytelling and likes to use techniques to recreate the look of paper.

Tutorial Tuesday – Wave Shadowing Tutorial

tutorial5

Today I want to share a technique that I use to give my shadows a realistic look. Yes, I do warp my shadows. But if you do that for every paper on the page, then the time taken for each shadow quickly adds up. Thats why I use the wave shadowing technique for most of my pages. The effect is super cool and its a time saver too!

So, I will first start with my finished page.

Tutorial1


I like the shadows on the page. However, if you look at the cream background paper, the way the shadow falls on the polka dot blue/green background paper, looks a little flat. Thats where the wave tutorial comes in.

Here are the steps.

  1. Apply your usual shadowing layer style to the paper you want to use. (As I am a very slow scrapper, I believe in saving time, therefore I use a style for shadowing all my papers as a starting point and then tweak. In case you apply shadows from scratch, please go ahead and apply your usual shadows to the chosen paper)
  2. Create a separate layer for the shadow so that it is on a layer of its own. In PS, if you look at the layer of your selected paper, there will be a ‘fx’ sign on that layer. Right Click on that ‘fx’ sign to open up a drop down menu. Choose ‘Create layer’ option from the drop down menu. Now your shadow will be in its own separate layer.
  3. Make sure you have selected the shadow layer from the layers panel.
  4. Now use these following setting in the Filter menu.


tutorial2

5. The Wave menu will open up. I use the following values in the wave menu –

Tutorial3

6. And voila! Your perfect paper like shadow is ready!

Tutorial4


If you look at the cream paper now, there is an uneven-ness in the shadow that gives it a realistic look.

Sometimes, when this shadow doesn’t come out right – like if it shows that the paper is raised while it is just under a heavy element, – I just cancel out the effect and apply it once again. That gives a different look and after playing around a few times, I generally am happy with the effect.

I used PS5 for my page. However, you can follow the same steps in PSE as well. Just creating a separate shadow layer in PSE requires some extra steps.

Do play around with this fun technique and see your pages take a realistic look instantly.


PallaviPallavi resides in Mexico City with her husband and her ever growing little son, Rajveer. She has previously lived in Calcutta, Pune, San Francisco, Chicago and London. She reflects all these places in her pages as she captures her everyday stories. She is an alumni of Northwestern University. Currently she is learning photography and working towards getting to a healthy weight. Her days are full and she loves it that way!