Category: Inspiration

Hybrid How-To | Happiness Jar

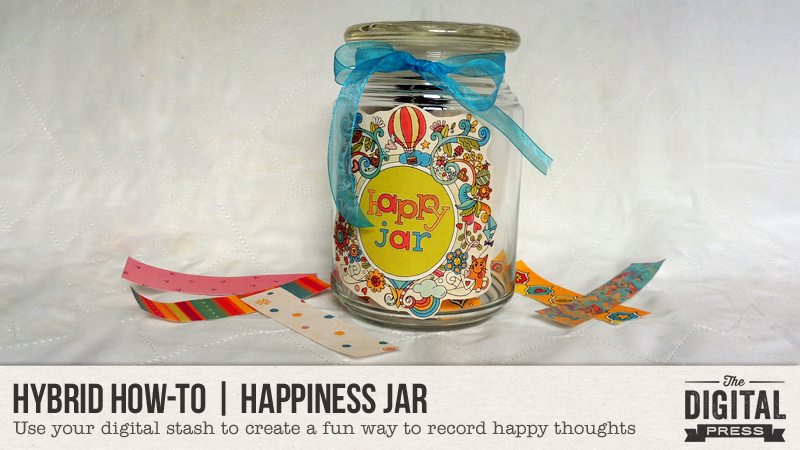
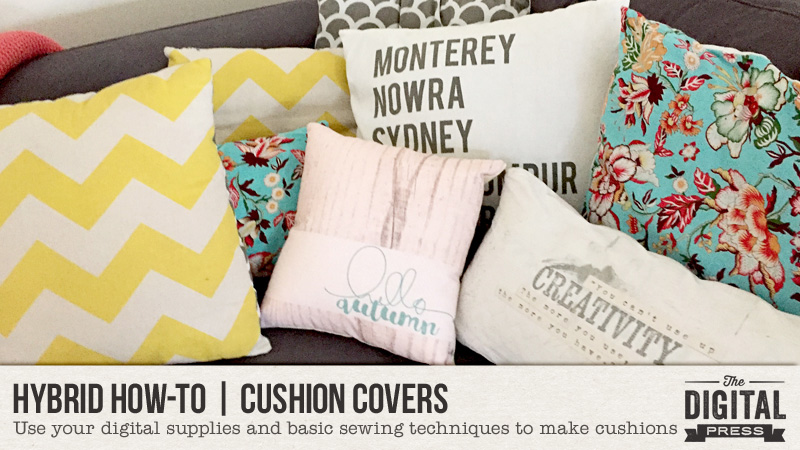
Hello everyone! It’s Donna here, and I’m excited to share another edition of our Hybrid How-To series with you here on The Digital Press blog! Today, I have a fun project for you that will allow you to capture and document your happy moments throughout the year… a Happiness Jar!

The idea behind the Happiness Jar is quite simple: on a daily, weekly, or monthly basis (your choice!), every family member writes down what they are happy about or thankful for… and places their written thoughts into the Happiness Jar. At the end of the year, it’s really fun and meaningful to empty out the jar together as a family and have fun reading/reminiscing about all those moments that brought you joy.

It’s a really easy project, too… so let’s get started!

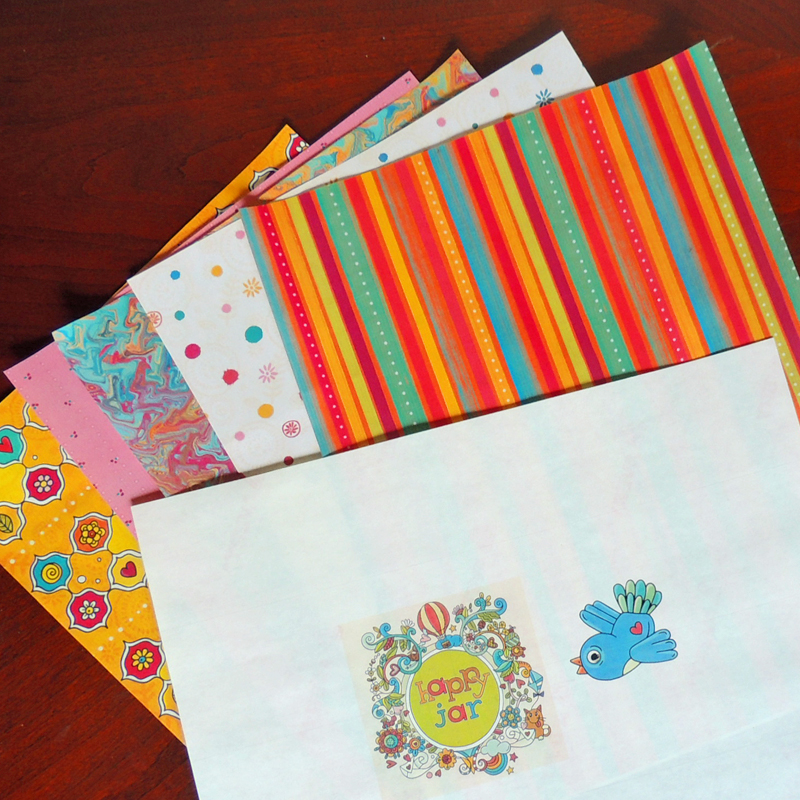
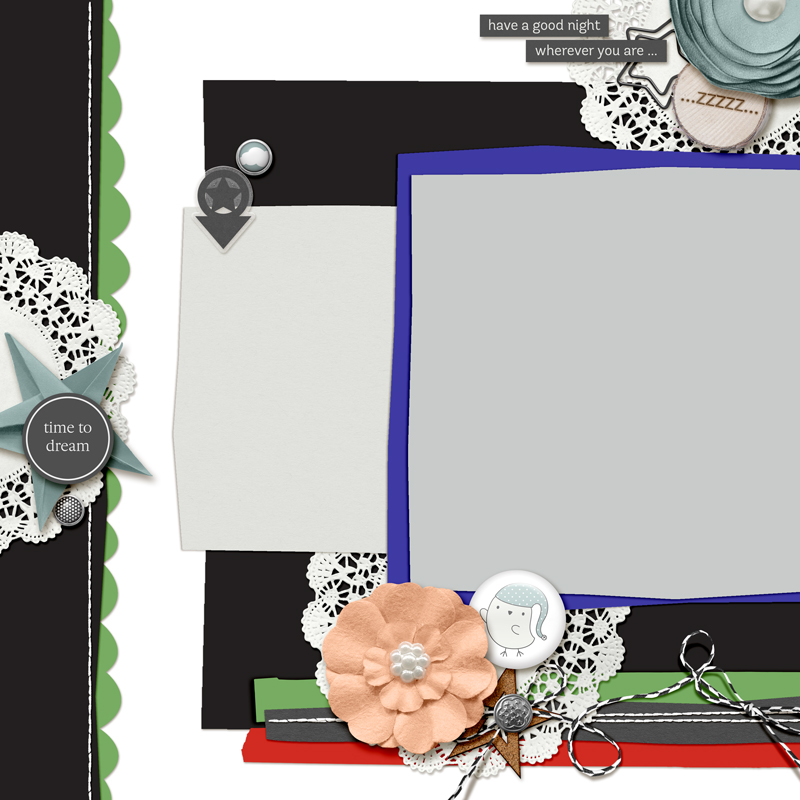
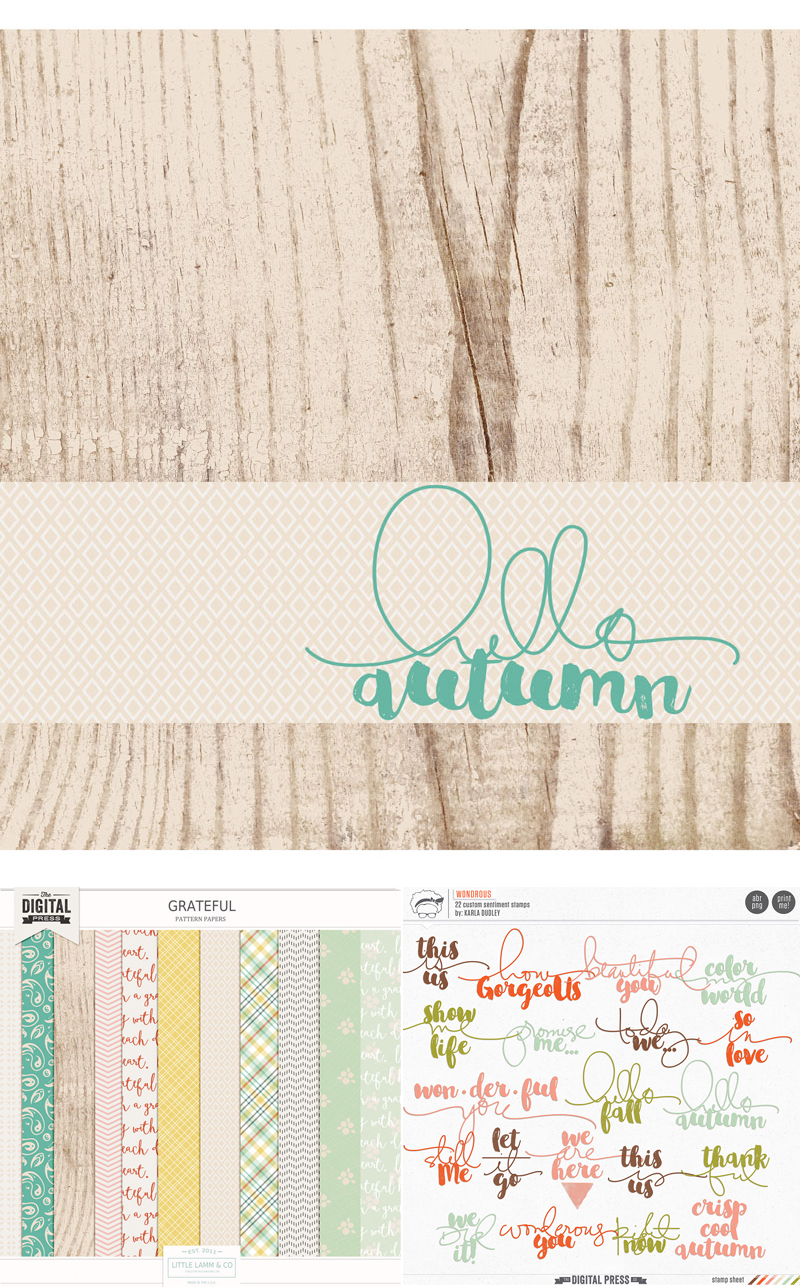
For my example, I will be using the digital kit Mademoiselle by Julia Makotinsky, shown here…

.

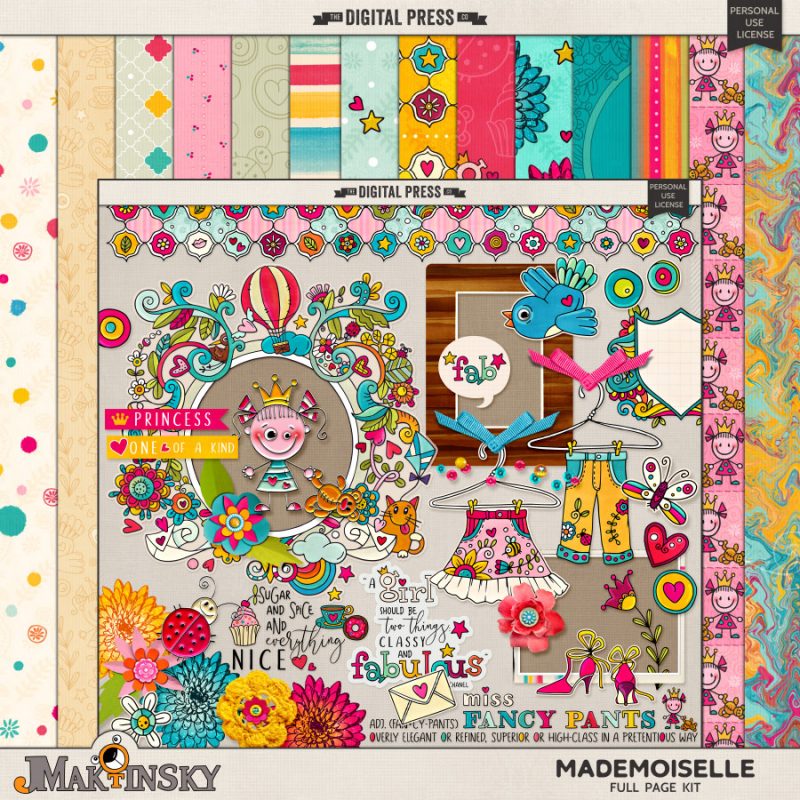
I love the fun, whimsical feel and the bright colors of this kit (and doesn’t that little bluebird element just scream “Bluebird of Happiness” to you?!).

SUPPLIES NEEDED:

  • digital scrapbooking kit(s) of your choice
  • photo editing software (I am using Photoshop Elements)
  • empty jar
  • printer/copy paper
  • label paper (could use Printer/copy paper & double-sided tape instead)
  • scissors or paper cutter
  • binder clip
  • ribbon (optional)

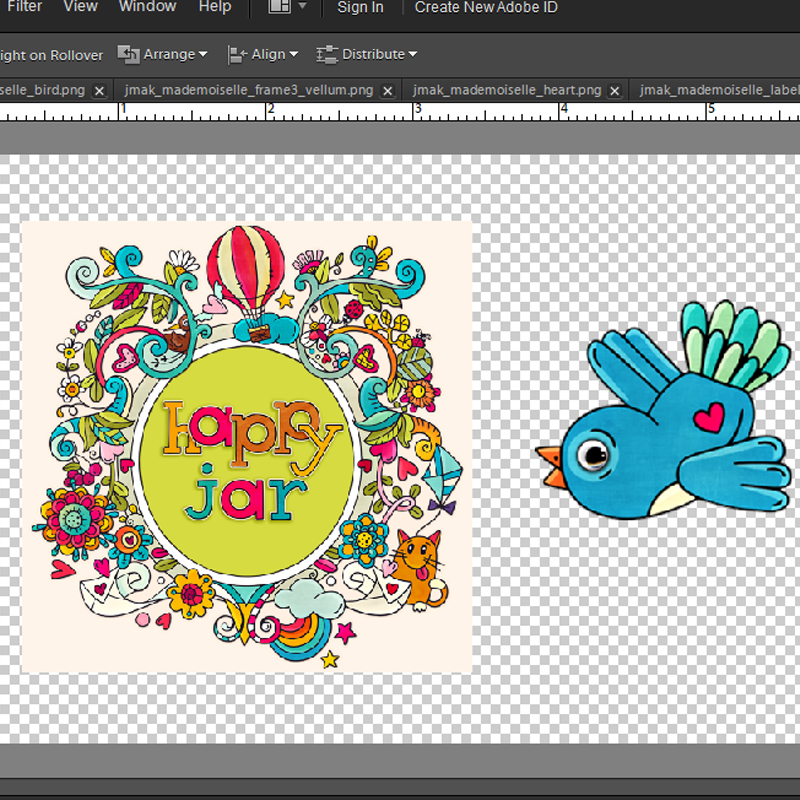
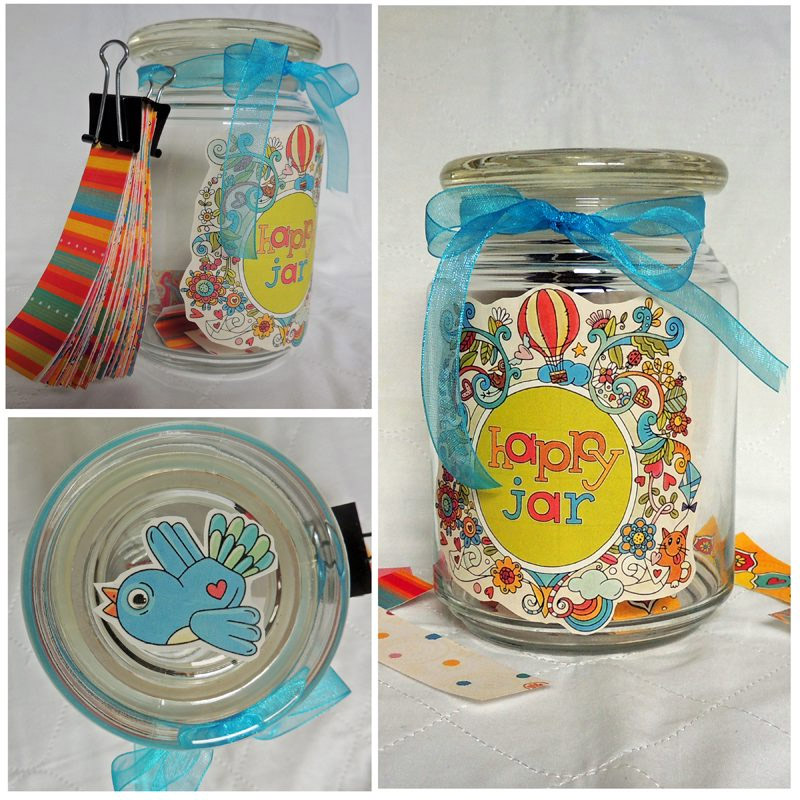
The first step is design the jar labels. I used an empty candle jar, but any style of jar will do. In my photo editing software, I designed labels for the front of the jar, as well as for the lid…

The next step is to create the strips of paper that you’ll use to write down your happy thoughts. You’ll need to do a little calculating here to determine how many strips of paper you’ll need. Since it’s just hubby and I, and we will do this weekly… I’ll need 104 strips of paper (52 weeks X 2 people = 104). The size of my paper strips are 1″ x 4.25″, meaning I can get 22 strips from one piece of 8.5″ x 11″ printer paper. This means I will need 5 sheets of printer paper (22 strips x 5 = 110)… so I chose 5 papers from the kit I am using and printed those papers out to add a decorative touch to the back side of each strip.

The image below shows where the strips should be cut on an 8.5″ x 11″ piece of paper…

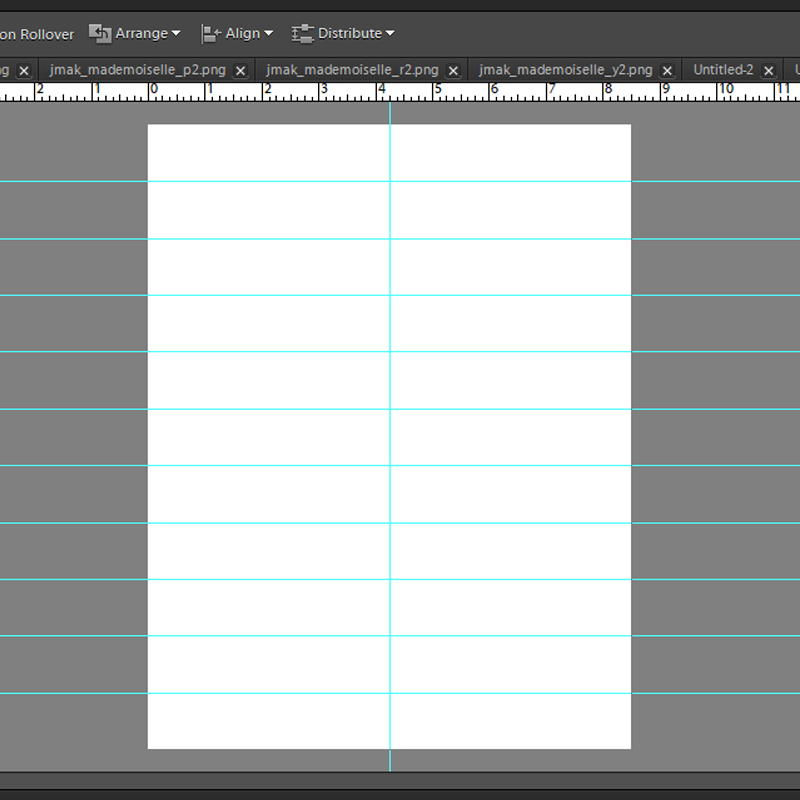
If you are cutting with a scissors, you may want to include the lines on your papers before you print them out so you will have a cutting guide (optional). If you are using a paper cutter or cutting machine, having the printed cut lines isn’t necessary.

Here’s a look at my labels and papers printed out…

The final step is to assemble everything, as follows…

  • Cut out the jar labels and adhere them to the jar (if you used printer/copy paper, you can use double sided tape to adhere them)
  • Cut out the small paper strips (I used a paper cutter)
  • This last step is optional… but for myself, I didn’t want the little paper strips to get lost (which they certainly would, laying loose on my countertop all year!), so I used a binder clip and tied them to the neck of the jar with a ribbon. You could also keep your strips in a drawer or a little box, etc. and skip this last step… it’s up to you!

And that’s it! Your Happiness Jar is now ready to collect all your joyful moments. The entire project, from start to finish, took less than 2 hours.

I wanted to also share with you a few variations of this idea that could easily be adapted from this tutorial…

  • A “Mom, I’m Bored” Jar — start out with the jar full of fun ideas, and when the kiddos are bored let them pick from the jar to find inspiring ways to combat their boredom
  • A “Date Night” Jar — start out with the jar full of fun date ideas, and let date night be determined by the luck of the draw (this would also work for the “What do you want for dinner?” dilemma that occurs frequently at our house)
  • A “Journal Prompt” Jar — start out with the jar full of journaling prompts, so when the urge to write surfaces you’ll have something to write about
  • A “Scripture or Positive Thoughts” Jar — start out with the jar full of scriptures or positive thoughts, and pull one out when you need a little uplifting

I hope these ideas will inspire you to create your own jar! If you decide to make a happiness jar (or any variation, like those listed above), please let us see it! You can load your project into the gallery at TDP and leave a comment below with a link to your project… etc. I would love to see what you come up with!


DonnaAbout the Author Donna is a member of the hybrid team here at The Digital Press. She has been a digital scrapper and hybrid crafter for over 10 years, and loves the flexibility digital products provide. When she’s not scrapping you’ll find her in front of the TV, at the computer, or in the kitchen  cooking up something scrumptious. She has been married for 40 years to her husband, Sonny, and they live in South Florida with their sweet little dog, Roxy, and kitty siblings Cashmere and Velcro. She also enjoys swimming, gardening, traveling, and chocolate (of course!).

Tutorial Tuesday | Expanding Your Digital Toolkit

We’ve all had that moment when our creative mojo just escapes us. You’ve been there before, right? You’ve got the time to create… a brand new kit that you really want to work with… and nothing. So what do you do?

Most of us browse galleries for inspiration, of course. Then you find “it” — a layout that has you saying, “wow, I really love that!” Maybe it’s the pictures, the composition/proportions on the page, the kit selection. Oh, hang on a minute… that’s your layout! Wow, that’s a little embarrassing. Actually, it’s not. Most of us are the resident memory-keeper for our family. We should be proud of – and love – the layouts we create. So how about using your own layouts as the inspiration for something new? Yes, I’m talking about expanding your digital toolkit and scraplifting yourself!

I look at scraplifting as one of the sincerest forms of flattery in the digital world. When you scraplift a page, you’re saying to the creator that their page inspired you to create; it struck a chord with you. It’s okay to give yourself a pat on the back for a layout well done… and if you find a formula that you like, why not repeat it? Scraplifting could be duplicating a layout design, or using it as inspiration to build from. I love doing the latter and wanted to show you my process for “lifting” the page shown here…


[credits: Sweet Dreams — a collaboration by Sabrina’s Creations and Designed by Soco]


Where to begin? Open your original file in Photoshop or Photoshop Elements and save a copy to work from. This is so important! You don’t want to make changes to your original file and then accidentally save them and over-write your original! Take it from someone who has “been there, done that” — it’s not pretty. On your duplicate file, start removing any paper or photos layers that you might have clipped to shapes. You want to strip the layout down to the basic design elements, like this:


Now, I like to use my existing layouts as inspiration and not necessarily duplicate an existing design (although that’s a great option, too). With that in mind, now that I have the base design laid out in front of me, it’s time to play around by moving elements (or groups of elements) around to create something new.

I like the vertical paper strip on the left with the scalloped edge peeking out and the stitched top edge. This would really lend itself to being on the bottom of a page. Ah, rotate the layout counter-clockwise (all layers), and then lower that portion of the design just a little…


With that central cluster of elements on the bottom edge, I’m now starting to think a vertical design — right down the center of the layout — might be the way to go. Here’s what the design looks like after I’ve moved and re-sized some of the papers. You’ll see that the overall design of the original page is still there; it’s just been modified enough to make it a little different…


Some of the original element clusters on the sides are now looking… well, “off” for want of a better word. This doesn’t mean they should automatically be deleted, however; they can still be re-purposed in the new design layout. Sometimes simply rotating and moving the elements can breathe new light into them. The cluster on the right-hand side of the page, for example, is one I really like. However, the vertical placement just doesn’t work now. Making it horizontal again (as it was in the original layout) will work.  Rotated and moved around a bit, here’s how my page’s composition is shaping up…


You’ll see that I’ve also hidden a few layers, like the element cluster that was originally in the upper left-hand corner of the new design. It was just too much. Also, at this point I haven’t even thought about a kit design, new papers, or new elements. I’ve simply been setting up the foundation on which to build from — and that’s not always easy to do, as I want to jump right in!

Using this scraplifted version of my original layout, I can now start adding all of the new pieces to complete my layout. If I move things around again, that’s fine — it’s my page, my memory. I can do whatever I like with it. I’m a firm believer that there’s no right or wrong way to scraplift a page. Bottom line: have fun with it!

Here’s how my now newly-designed page came out:


[credits: Away by Creashens]


…and just for fun, I did a second variation of the original page, just to show you that you can expand your toolkit and scraplift one page several times with each layout being unique to the memory you wish to record:


[credits: Leelo and Kiwi by Wildheart Designs]


So, if you like what you create… go ahead and give yourself permission to create it again, with a twist! A few things to remember:

  • Create a copy of your original Photoshop file and work from that.  Don’t work on your original file.
  • If you rotate the design, watch for your shadow angles as they will rotate, too.
  • If your original layout was based on a template, which you would normally credit a designer for, think about whether you will still give credit when you share your new layout. My own personal rule of thumb: If the new layout still closely resembles the original template, give credit with something like, “Template (modified) by …”

Scraplifting from your own gallery can be a great way to get your mojo going — or even just a fun exercise to do when you’re in a creative rush. It’s an easy way to expand your digital toolkit since you have all the inspiration right there at your fingertips: it’s you! If you would like to give this a try, I’d love to see what you can do with your own layout, so link me up with a before and after!


KatAbout the Author  Kat Hansen is a creative team member here at The Digital Press. A Director of Human Resources by day, she loves the opportunity to spend a few hours each day being creative. Vacation memories feature pretty heavily in Kat’s scrapbooking pages, as do her son and “daughter” (of the four-legged furry kind). Kat has quite the sense of humor (she “blames” her father for this), which she incorporates into her journaling and memory-keeping.


Hybrid How-To | Cushion Covers


I know most of the world is coming into summer now, but where I live we have the most beautiful autumns and I wanted to make some decor to celebrate that.

I make a lot of my cushion covers; they are so easy to do. Today, I will show you how!

First, I design the cushion cover in Photoshop. My printer prints up to A3, so that’s the size of the page I start with. For this project, I used Grateful Papers by Little Lamm & Co. and Wondrous Stamp Sheet by Karla Noél.

After creating the design, I cut fabric to A3 size. Make sure your fabric is ironed completely flat and stuck to the paper with double sided tape. The top edge should be stuck right to the edge of the paper. Print your design onto the fabric.

*NOTE* The ink will not be colorfast, so if it gets wet… it WILL run. You can use transfer paper if you want your design more colorfast, but I change mine around often, so its not a big deal for me. If mine gets wet, I just make a new one!

You will also need to cut a back for your cushion cover. I purchased a small cushion from IKEA that already had a pattern on it and wanted to make sure the pattern didn’t show through on the front, so I cut an extra piece of calico. Cut them slightly larger than your design to allow room for seams.

hybrid cushion covers

To make my cover look a bit more quilted I decided to sew where the different papers meet. Do this on the front so you can see where you need to sew.
IMG_4933

When you are happy with your design, put the ‘right’ sides of your fabric together and sew around the edges, making sure you leave a large enough gap to put the cushion in.

IMG_4937

Turn your cover inside out, paying attention to the corners, stuff your cushion inside and hand stitch up the gap.

Untitled-5

Voila!

IMG_4941


Amanda

About the Author  Amanda found digital scrapbooking in 2006 as a paper scrapper who was frustrated with the limitations of paper scrapping products. She now loves to combine paper and digital products and techniques for her pages and projects. She is the wife of a Naval Officer and has two teenage children. She lives in Australia, and has also lived in the U.S and Malaysia and loves that she has had the opportunity to travel the world with her family.

Tutorial Tuesday | Shadowing Transparent Items


Have you ever noticed that the preset shadows don’t work so well with vellum and other transparent elements? I struggled with it for a long time, and although I can’t profess I have mastered it all… I do have a trick or two to share with you today.

For this tutorial, I am working on a layout using River~Rose’s fabulous new collection Pursuit of Happiness

In the following image, my layout is almost complete… and as you can see there are a couple of transparent acrylic elements on the page — the heart and the ampersand. With preset shadows in Photoshop, my layout looks like this…

Now the biggest quibble I have is that dark shadow showing through the transparent acrylic element. See how “grey” it looks? Logically, any transparent/translucent object that lets light through shouldn’t throw such a defining shadow. And that’s what we need to modify.

Step 1

First, you will separate out the shadow from the element (i.e. put it in its own layer). I do this using Photoshop CS2 (old free version of Photoshop!), and then open up my layout again in Photoshop Elements (PSE), which is what I’m showing my steps in for the screenshots in this tutorial. Once you have your shadow on a separate layer, you will press CTRL and select the element thumbnail in the layers panel. This will make the “marching ants” appear around the element, like this…

Step 2

Now, with that selection still on, you will click on the shadow to “cut away” the selection. Now you have two layers of shadow: one that shows immediately beneath the element, and the peripheral shadow that sticks out around it. We want this peripheral shadow to be pronounced — while at the same time downplaying the central part (see layer 2 in the screen shot).

Step 3

We can do this next part more than way…
a) Hide the shadow that appears under the ampersand entirely (as shown in the screen shot below)
a) Decrease its opacity (see top right of the layers panel and play with the slider till you like the effect)
c) If your transparent element is on a solid paper or background, it helps to recolor this part of the shadow in darker hue of the same color.

Play around till you are happy with the result you achieve.
Screen shot 3


And voila! …here’s my final layout. Compare this layout with the copy at the beginning of this tutorial, and see if you can see the subtle yet noticeable difference this makes…
Happiness-is-final layout


I hope you found today’s tips to be useful! If you have your own tricks about shadowing transparent items, please do share them. I would love to try out something new.

Until next time, then… happy scrapping!


Profile pic avatar small

About the author  Shivani Sohal is a donner of many alter-egos. A finance professional by day in busy London, she morphs into a seemingly normal mum of two in the evenings and weekends. She is constantly found with her fingers in too many pies and juggling the metaphorical balls. That is living on the edge for her; aided by the two ankle biters and a darling hubby who define the warm and mushy for her. She is ferociously dedicated to memory keeping – almost immune to any nay-sayers (or equally disruptive crying children or annoying house fires!!!); keeping her head down and forging ahead at all times.

The Anticipation of Summer!


I say it every year — but man, time sure flies by! There is no way June is just a few days away! Is it even possible? My kids have an official “countdown until school is out” going… so I had to get myself in gear and get our Summer Bucket List ready!

I love the easy schedules of summer break — the “we can do nothing if we want to” attitude! I love the slower pace of life, and enjoying our lovely weather & beautiful surroundings here in Eastern Washington.

Even though my children are out of school during summer break each year, I still have to work part-time. Therefore, when creating our Summer Bucket List, we try to add a bunch of easy tasks that can be done on my work days or on my days off, as well as some fun weekend activities! I’m pretty excited about our list this year — I think everything is totally attainable (my kids can get a little crazy sometimes!). 😉


For my layout, I used a few fun summer kits:

Summer Bucket List by Laura Passage & Amanda Yi: HERE

Hello Summer by Scotty Girl: HERE

Summer Set by Rachel Hodge: HERE


Are you excited for summertime?

Join me in our forum to join the challenge that is related to this idea, above… and create/share your own summer bucket list with us!


 AmieAbout the Author  Amie is a craft-loving dental hygienist who lives in Washington state. She loves her husband, her two kids (ages 8 & 5), and her English Bulldog… as well as coffee, baking cupcakes, daffodils, glitter & sprinkles, reading a good book, and lip gloss — not necessarily in that order.

Tutorial Tuesday | Painting Paper

Tutorial Tuesday | Painting Paper


Have you ever created a layout and decided it just needed a little more “oomph”? Or have you designed a layout and the kit you’re using has so many amazing papers that you simply have to find a way to use more of them? If so, I’ve got a quick tutorial for you.


Following is my sample page:


Tutorial Tuesday | Painting Paper


I created my page using River-Rose Designs’ Pursuit of Happiness Full Kit and the Pursuit of Happiness Extras Pack 1.


Tutorial Tuesday | Painting Paper


Tutorial Tuesday | Painting Paper


I created my page with the solid colored yellow paper as the background. It was a nice solid color that allowed all of the artsy elements, cluster frame and page border from the kit to really shine. The look was a bit too stark for me and I wanted to tone it down a bit so I chose another paper from the kit and “painted” it onto the background paper. Let me tell you how you can quickly and easily accomplish this look.


1. Add the background paper to your layout.


To show you where I started from, here’s my layout without the painted paper layer.


Tutorial Tuesday | Painting Paper


2. Add the paper you want to “paint” onto your background paper to your layout.


I chose the paper with the circular design from the Pursuit of Happiness kit.


3. Add a black layer mask to the paper you just added.


Make sure your newly added paper is active in the layers panel. To add a black layer mask press the OPTION key (Alt on a PC) and click on the Add Layer Mask icon in the layers panel. Since you added a black layer mask, the paper will now disappear.


Tutorial Tuesday | Painting Paper


NOTE: If you added a white layer mask instead of a black layer mask, you can easily change it to black. Simply make sure the layer mask is active in the layers panel and press CMD+I (CTRL+I on a PC) to invert it.


4. Choose a brush to paint with.


You are now going to choose the brush you want to use to paint your paper. I suggest using a paint/watercolor style brush or a soft round brush. You can access the brush tool by using hotkey “B”.


5. Make sure that the black layer mask is active in the layers panel.


The layer mask will have a white bounding box around it when it is active in the layers panel. If the white bounding box is around the paper and not the mask, simply click on the layer mask.


6. Now it’s time to play! You can begin “painting” in parts of the paper.


Make sure that white is your foreground color in the color picker then simply “paint” on the layers mask. As you paint, if you want, you can play around with the opacity of the brush or change the shape dynamics in the brush properties. Once you’re happy with the painted layer, if you want to change it up a bit more, you can adjust the layer opacity or the blend modes for the newly painted paper layer. The sky’s the limit here!


Here’s my layout before and after painting the paper.


Tutorial Tuesday | Painting Paper


Fun right?! Feel free to ask any questions in the comments or, if you have any other related tips you want to share, I would love to hear them as well!


Until next time … happy scrapping!


Barbara
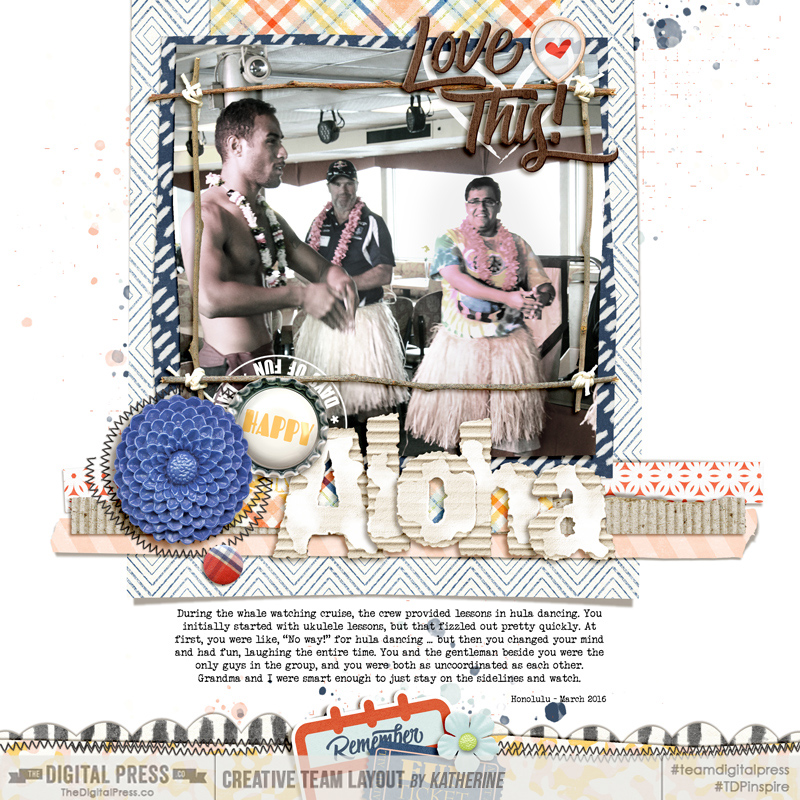
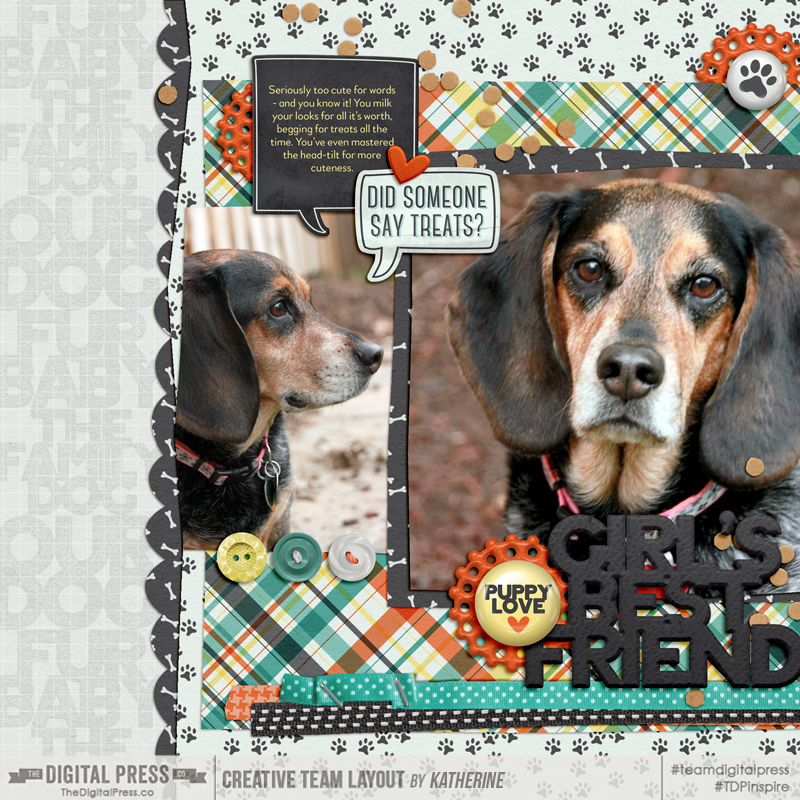
About the Author:  Barbara is a member of the creative team here at The Digital Press. She is a wife, mom to two teenage kids (a 19 year old boy and a 16 year old girl) and a dog (an adorable 9 year old Soft Coated Wheaton Terrier). In her free time she loves to digi scrap, take photos and hang out with her family.